Sweetened & Smooth Iced Coffee, Finally Without the Bitterness

“What’s this black sludge?” Not the words you want to hear from your husband while his head is in the fridge. When I told him it was an experiment, he looked even less convinced.

coldbrewed

Last week I went to Starbucks with some co-workers for a little afternoon caffeine. One of my co-workers was sipping a Diet Coke instead of ordering coffee, so the barista decided to give her a little sass, “I think you should know,” he said, “since you’re not ordering a coffee… They did a study that showed soda was more effective at cleaning out car engines than other products.”

Now, the comment was unnecessary and snarky, and I’m not saying I believe him, but it did get me thinking.

I’ve always been a soda drinker more than a coffee drinker. My own breakfast of champions, I used to start out the day in high school with a Coca-Cola, followed by one at lunch and another when I got home from school. One can of Coke is, what, 140 calories? Multiply that by three and you get 420 extra calories per day that were giving me absolutely nothing in return. When I made the switch from regular Coke to Diet Pepsi back in college, I was thrilled to find that I also dropped a few pounds (byebye, extra 420 calories!). After and since college I finally dropped my soda consumption down to just one can a day (of course, not including weekends, free refills at restaurants, giant size fountain soda cups, etc…).
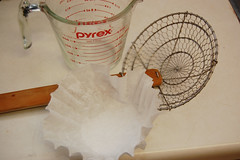
coldbrewhelpfultools

But even though I dropped those extra calories in regular soda and I decreased the volume I’m drinking, what am I really giving my body in return? Besides the sweet jolt of cold caffeine and the refreshing taste, ignoring the slightly troubling burn of soda as it goes down the throat, what is the nutritional value?

The Pepsi Products website lists the ingredients as CARBONATED WATER, HIGH FRUCTOSE CORN SYRUP, CARAMEL COLOR, SUGAR, PHOSPHORIC ACID, CAFFEINE, CITRIC ACID, NATURAL FLAVORS. What’s really natural about soda?

I don’t mean to get preachy here. As far as vices go, one Diet Pepsi per day is pretty darn good! But what if I could replace one vice with a slightly less harmful and more natural vice?
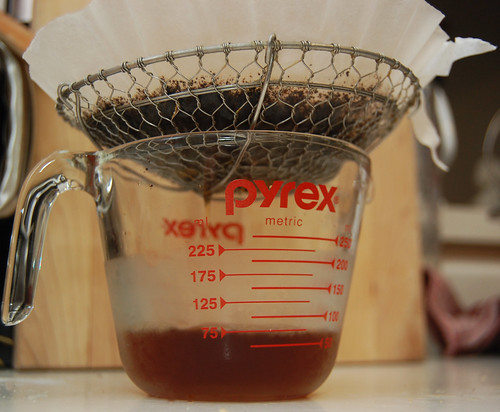
strainingcoffee

And that’s how my husband arrived at “black sludge” in the fridge. The sludge was actually coffee grounds and water, being cold brewed overnight. I’ve read it’s the only way to make good iced coffee.

Before you recoil at the phrase iced coffee, know that I am a reformed skeptic/hater of the stuff. Every time I’d had it in the past it was sharp and bitter, too reminiscent of hot coffee gone cold and left to sit for hours in the pot. Then I tried Starbucks Iced Coffee, Sweetened, with Non-Fat Milk – only $1.95, beckoned the billboard outside the store (and only 80 calories, says the website). It was so much better than any iced coffee I’d had before, and I decided it was time to harness the power of iced coffee in my own home and pocket the $1.95.
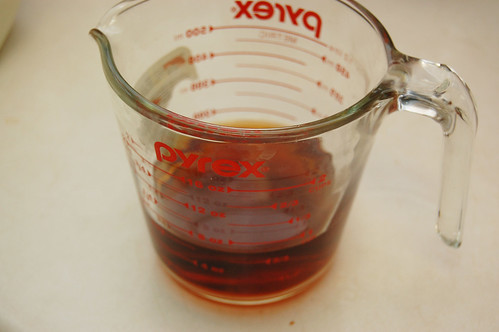
strained coffee

I’ve seen a lot of recipes for iced coffee on the internet, and I’m sure you have too. Even the recipes that use the cold brew method, though, don’t seem to go that extra mile and tell you how to make it Starbucks style. If you’ve ever watched the TV show “True Blood,” there’s a scene where the grandmother wonders why on earth anybody would pay three bucks for “a cup of coffee with too much milk.” Well, I do it because I enjoy the extra milk and sweeteners! I also appreciate the ease of just walking in and grabbing a cup. The cold brew method does require a little planning ahead, but the prep is minimal.

addingmilk

For once I’m so glad I gave in to the billboard advertisement and tried a Starbucks iced coffee. Though I will say, I went back for a second one yesterday and it was very bitter and nowhere near as good as the first one. I’m thinking they may have forgotten to sweeten it, or maybe I’m just used to my home-brewed version by now! This recipe isn’t an exact replica of Starbucks of course, but it gives me exactly what I wanted – an ice cold, mostly natural, smooth, sweet and refreshing caffeinated beverage. It’s very much like the frappuccinos that you can buy in grocery stores.

This summer I’m going to try swapping out the additives and unnaturalness of soda without giving up the caffeine (this is officially my third day “off the sauce,” lots more to go!). Why don’t you try it with me?

icedcoffee

Sweetened & Smooth Iced Coffee
Makes two cups

Total ingredients (water, sugar, milk and vanilla will be divided):
1/4 cup coffee grounds (not instant)
2 cups cold water
3 to 4 tablespoons sugar (*see note below)
1/2 cup non-fat milk
1/4 teaspoons vanilla extract

Handy tools – 2-cup measuring cup, wok skimmer or large strainer, coffee filter

Step 1: Combine 1/4 cup coffee grounds and 1 cup cold, filtered water in a 2-cup measuring cup. Stir to combine, and refrigerate overnight.

Step 2: The next morning, add the remaining 1 cup of cold, filtered water to the cold brewed coffee. Stir to combine. Pour into a separate large glass and rinse 2-cup measuring cup to use for next step.

Step 3: Set wok skimmer or strainer over the clean 2-cup measuring cup. Place paper filter inside strainer, and pour coffee mixture over paper filter to strain into the 2-cup measuring cup. This should take approximately 5 minutes (prop the long skimmer handle onto something so that you can do other things while this is straining. If you’d like to use your coffee machine instead, just filter grounds throu
gh machine without plugging in)

Step 4: Fill two large glasses with ice and divide cold coffee between glasses. Add 1/4 cup non-fat milk, 1 1/2 to 2 tablespoons sugar, and 1/8 teaspoon vanilla extract to each glass. Stir and enjoy!

*Note – For the best and most even distribution of sugar, consider making a simple syrup. You can actually make a good amount at once and then just store it in an empty bottle in the fridge to use as needed. Here is a great how-to for simple syrup.

Food Photography – Popovers

Heather and I love to try all kinds of different recipes and styles. The world of food is so huge that there’s just so much out there to try. Of course, with trying new things come failure. Bread that doesn’t rise (grrr), chicken that’s too spicy, dishes that just plain burn… And for the most part we keep that to ourselves. Sure, there’s plenty to learn from failure, but a recipe on how NOT to make something isn’t all that helpful.

Sometimes you come across a cool idea that didn’t come out spectacular but didn’t absolutely fail either; like today’s photo of popovers. I made these using a recipe over at Bakers’ Banter that called them “guaranteed.” Sadly my result wasn’t as stellar as theirs but I really liked them nonetheless. They get their name from how they rise and “pop over” the edges. They are very light and fluffy, and very simple in flavoring. Consider trying it next time you need biscuits.

Popover

Reader Request – Vodka Cream Sauce Using Fresh Tomatoes

A few weeks ago a friend contacted me about homemade vodka sauce. She happens to love it, and she and her significant other have a huge garden where they are about to come into a large surplus of tomatoes – something like two bushels of tomatoes a week!

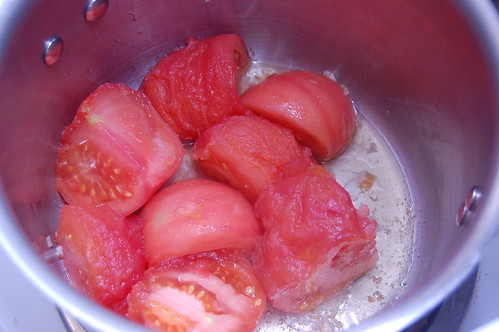
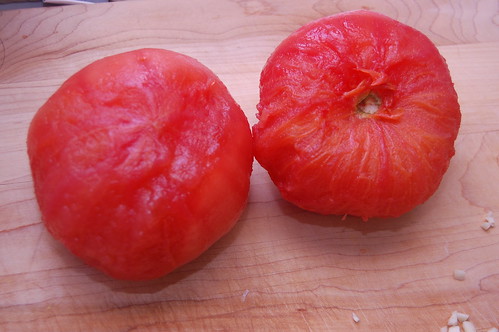
blanched tomatoes

I had never made vodka sauce from scratch, but Edwin and I are always ready for adventure here on DinnerCakes.

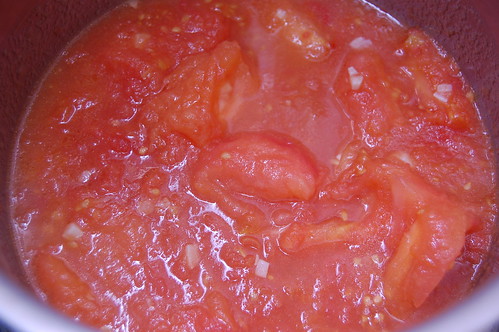
tomatoes simmering

I unearthed a discussion thread about making vodka sauce from scratch on Chowhound. A few of the commenters had some interesting ideas about making it from scratch, and a number of others just suggested a combination of canned and fresh tomatoes to really get the best taste. For this first attempt I used only fresh tomatoes, but I agree that adding some canned tomatoes would probably make a bit of a fuller sauce.

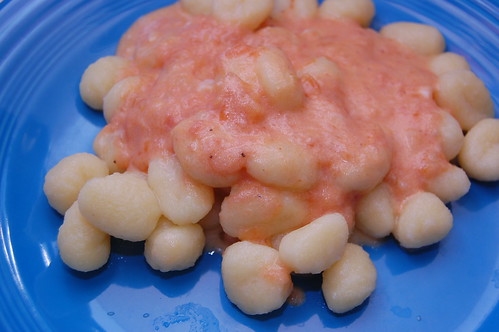
vodka sauce

My sauce came out light and fruity, and I served it over gnocchi pasta. My husband and I both came to the realization that while we love gnocchi for the first few bites, we get a little bored with it towards the end. I think we might have enjoyed this more served over a different kind of pasta.

However, this is a good, lighter style vodka cream sauce that’s just right for summer! Please let us know if you have your own variation of vodka sauce using fresh tomatoes.

gnocchi with vodka sauce

Summertime Vodka Cream Sauce
inspired by Chowhound forum

2 fresh tomatoes
2 cloves garlic
1 tablespoon vodka
1/4 cup light cream
salt and red pepper, to taste

Wash tomatoes and make a few shallow cuts in the skin. Boil water, add whole tomatoes to boiling water for a moment, then remove and run cold water over them (ie, blanche tomatoes). The skin will now peel off easily. Peel tomatoes and set aside.

Heat a large pot and add a liberal amount of oil. Mince garlic and add to oil. Stir so that garlic does not burn. Quarter tomatoes and add to pot; simmer on medium heat.

Continue to heat until tomatoes come apart. Stir occasionally and break apart tomatoes with a wooden spoon as they simmer. This process will take a little while until the tomatoes turn to a pulpy sauce. Continue to stir frequently while simmering so that some of the liquid boils off and the sauce thickens, about 20 minutes.

As the sauce begins to caramelize, add the vodka and stir well. Add the cream last, then sprinkle with salt and red pepper. Pour over pasta while warm.

Sometimes I consider quitting my my job in IT and working at Whole Foods. Why? Because of their tasty hot bar. Ok, I really wouldn’t quit my job, I like my job (usually), but I would like to acquire their recipes. I’ve had some good new experiences there. I had my first exposure to tempeh at Whole Foods and was quite a fan (you can look forward to something with that in the near future). So yes, this is another try-to-copy-whole-foods recipe.

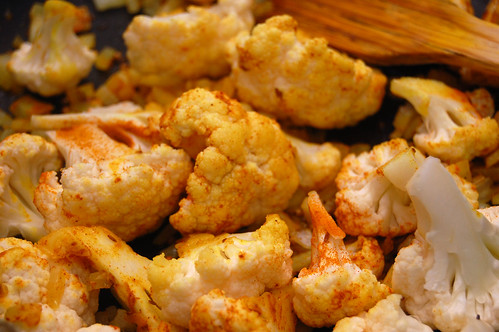
Cauliflower and Spices

Whole Foods has this dish called Cracklin’ Cauliflower which I enjoy. Alliteration aside, I’m not sure why they call it that. It doesn’t strike me as cracklin’ at all, really. But then, what is cracklin’? How do you make something crack? Wait, what were we talking about?

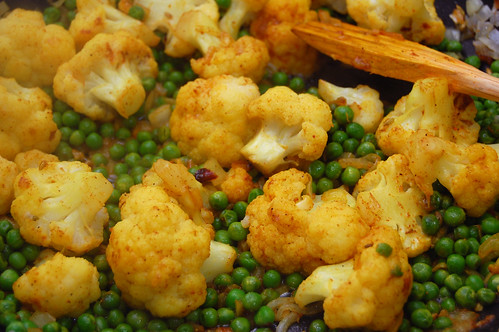
Cauliflower and Peas with Spices

So yes, cracklin’ cauliflower is a subtly spicy dish that I like to get when perusing the hot bar selection. The spices say ‘Indian’ to me. with turmeric, fennel, and perhaps some curry. Another reason I like it is because, unlike many “true” Indian dishes, its ingredient list seems relatively smaller. Like last time, this dish isn’t what you find at your local Whole Foods, but delicious nonetheless.

Cracklin' Cauliflower - Sort Of

Cracklin’ Cauliflower

3 tablespoons oil
1 head of cauliflower; cut into equal size floret (larger pieces, cut in half)
1 yellow onion; diced
1 clove garlic; minced
1/4 teaspoon turmeric
1/2 teaspoon fennel seeds
1/2 teaspoon garam masala
1 teaspoon curry (I used half hot, half sweet)
5 tablespoons stock or water
1/2 teaspoon salt

Steam your cauliflower for approximately 7 minutes so that it still retains firmness. After a few minutes, saute your onion on medium high heat in a large frying pan or wok for 5 minutes.

Add all your ingredients; your cauliflower, peas, garlic, spices, stock and salt. Reduce to medium heat. The stock will help drop the temperature as well as make it easy to mix the spices evenly (otherwise it clumps up). Stir-fry until evenly mixed and the stock has boiled away; approximate 5 minutes. The cauliflower should still be firm. Serve and enjoy.

DC Chatter – Accidental Eating

Overheard:

Heather: D’oh i ate reese’s pb pieces!
Edwin: hahaha, you make it sound like it was an accident
Heather: it was!
Edwin: like you yawned and one flew in your mouth… and by one I mean 12
Heather: that’s pretty much how it happened. thanks for the recap!

Kitchen Tips – How to Save your Burned Pots!

My husband Morgan and I were given a wonderful set of stainless steel Calphalon cookware as a wedding present. The pots and pans are amazing and we use them exclusively.

So my heart may have momentarily stopped when Morgan, while trying to steam vegetables but with too little water in the pot, burned the bottom of our 6 quart spaghetti pot completely black!

I assumed that the pot was ruined. He tried a few small things but nothing seemed to help.

Then he found an amazing how-to guide on How to Treat Burned Pots and Pans. It was Step 4 that really made the difference:

“If burned areas still remain, cover them completely with a generous amount of baking soda. Drizzle in just enough water to create a thick paste, smearing the paste up the sides of the pot if needed. Set aside for at least 4 hours, preferably overnight.”

And now? The pot now looks brand new! All the black that was at the bottom is completely gone. So if you or your significant other burns a pot – relax! The ehow.com steps work.

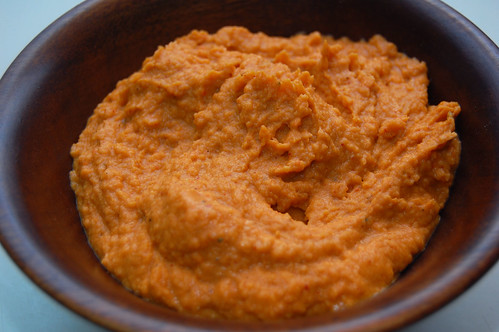
All righty! So now you know how to roast and peel a bell pepper. Time to put those fancy new skills to work. Hummus, as I’ve mentioned before, is easy to make and the order of steps is so flexible that it’s very easy to experiment with. AND it’s a great option for bringing something to a party (even when one of the hostesses of said party is a crazy foodie).

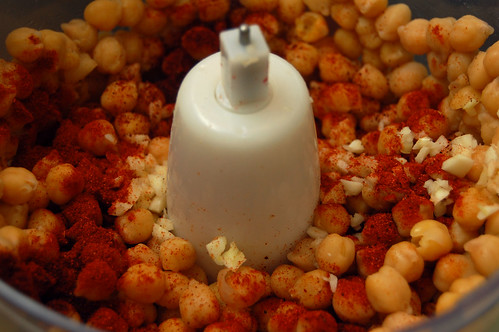
Ingredients for Fire Roasted Red Bell Pepper Hummus

Another great thing about hummus is that, if made with a strong flavor of its own, it can really work with a lot of different “scoops.” Sure pita and tortilla chips are the classics and they do offer some accent to the flavor; but they’re largely just edible spoons. As I type this, I’m eating some of this delicious hummus with celery (what can I say? I’m a calorie counter). Do not fall in societal constraints! Eat hummus freely, with whatever you have at your disposal!

Fire Roasted Red Bell Pepper Hummus

Fire Roasted Red Bell Pepper Hummus

1/4 cup olive oil
4 cups cooked chickpeas; drained
2 red bell peppers; roasted and peeled
2 medium garlic cloves; minced
1 1/2 teaspoon ancho chili powder
1/2 teaspoon paprika
2 teaspoons lemon juice
ground black pepper to taste (1/4 teaspoon or more)
1 teaspoon kosher salt

Add all ingredients but the oil into a food processor and start processing. Add the oil slowly until you reach the consistency you’d like. Add additional salt and pepper to taste. Enjoy.

Food Photography – Scenes from the Joint Birthday Cook-out

I consider myself very lucky; I received many gifts this year.

roses

Gifts of lovely flowers, phone calls, messages and cards

orchid

Gifts of very good news

jhhats

Gifts of funny hats (courtesy of Chef Edwin), laughter, and friends

macandcheese

We enjoyed more food than we had room for – like Alton Brown’s Baked Macaroni and Cheese (doubled, and with shell pasta instead of elbow macaroni)

beans

My Uncle Chuck’s famous beans (my favorite – stayed tuned!)

cheesecakes

Key Lime Black Raspberry Cheesecake cupcakes, deliciously made by a friend

treslechecake

A Tres Leche Cake from CakeLove: How to Bake Cakes from Scratch

And much, much more

Thank you for all the wonderful gifts this year – cheers to another year of friendships and culinary adventure!

Heather and Jane’s birthday party this past Saturday was a blast. There were friends, music, drinks, games and oh-so-much food. The latter has to be expected when one of us is involved. There was mac & cheese, chips, beans, veggies, cakes… enough food to last a lifetime. I offered to help Heather with the food prep because it’s very easy to get in over your head with that sort of thing. Plus, hey, it’s an excuse to cook something.

Chopped Red Peppers

I made hummus before and I really enjoyed the results, so I decided to try a variation with fire roasted red bell peppers. Now I was going to post that recipe today, but then it occurred to me that there might be some readers out there that don’t know how to fire roast red bell peppers. So instead, we’ll go, step by step, this process.

Charred Red Peppers

Option 1 – Open Flame
The easiest way to fire roast red bell peppers is with an open flame, whether it be a grill or a gas stove. Simply place it above so the flames lick the bell pepper and rotate as the skin chars. You really want a lot of charring. It doesn’t need to be completely black, but too little char = peeling difficulty (and sadness). Then place in plastic bag. By putting it an air tight container while it cools, the steaming action will make it easy to remove the skin. Let sit for 30 minutes and peel off the skin with your hands. Then core and seed as usual.

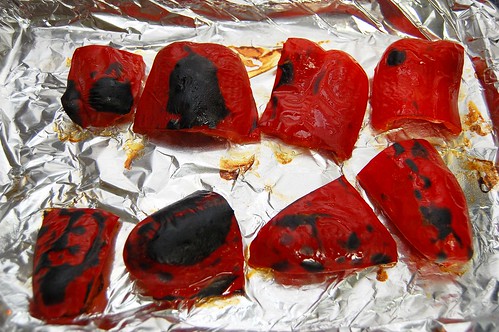
Uneven Charring

Option 2 – Oven
Some people don’t have a gas stove or grill, but they can always fall back to their oven. Chances are, if you’re fire roasting a bell pepper you’re going to puree, dice, or do some kind of significant cutting to the pepper. Because of this I recommend cutting the bell pepper into eighth; coring and seeding it as you go. This will make it easier to seed as well as ensure that all the pepper is being charred. In addition, ovens often don’t char as evenly (see above) and an under-charred pepper is incredibly frustrating to peel. Set the peppers on a baking sheet on the top rack of your oven and broil, removing pieces as they become charred. No time guidelines here. Just keep a watchful eye!. Then, just like in option 1, remove from the heat and seal in plastic. After 30 minutes, remove and peel off the skin. Enjoy!

Steaming To Peel

Jeff's Chicken Adobo

Happy Monday, DinnerCakes readers. I hope you had a good weekend! If you read Saturday’s post, then you know that I kept pretty busy! The joint cook-out went very well and, as expected, we had entirely too much food. Just as a party should be!

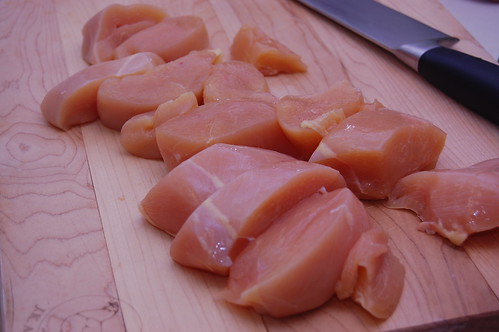
raw chicken

After all that cooking, I can safely say that the last thing I felt like doing the next day was making dinner. My husband, Morgan, and I worked together to make this dish; one of our friend Jeff‘s favorites – Chicken “Adobo.”

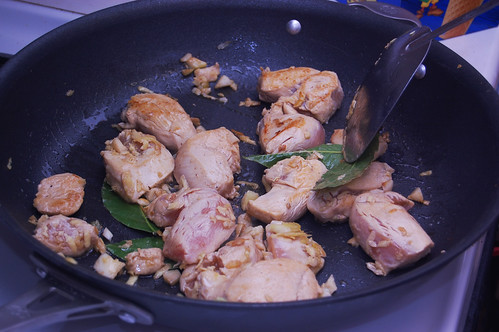
cookingchicken

Adobo style is Latin American and typically involves preparation with red chili peppers and/or tomato sauce. That’s why this recipe from Jeff perplexes me a little (and why I put it in quotation marks above), because it has no chili peppers or even red pepper. I apologize for the name confusion, but it’s a very flavorful and delicious dinner just the same!

I’m not a huge fan of ginger, but I actually enjoyed it in this dish. The bay leaves also add some great flavor. Next time we make it I’ll probably add cayenne and chili powder because I love a little heat (and it would be more aptly named). That’s just a personal preference, though. This dish doesn’t necessarily need heat – so enjoy!

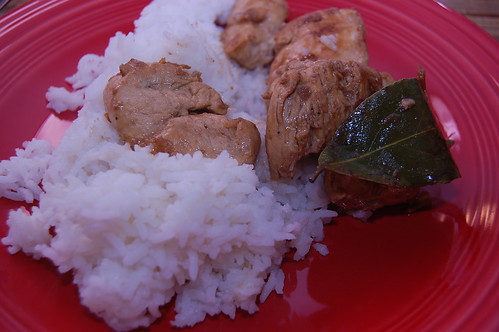
chicken adobo

Jeff’s Chicken Adobo

olive oil (just enough to coat the bottom of the pan)
1 lb. boneless chicken breast, cut in 3/4″ chunks
soy sauce
vinegar
water
1-2 inches of ginger root, grated
6-8 garlic cloves, grated or finely chopped
4-6 whole dried bay leaves
fresh ground black pepper, to taste
1 1/2 cups dry rice (basmati works great)
pinch of salt

Chicken:
Place chicken into a container to marinate. Cover with a mixture of equal parts soy sauce, vinegar and water. If you prefer a stronger flavor, you can cut back on the water. Marinate for at least five minutes (chicken may be marinated longer or even overnight for stronger flavor).

Add ginger, garlic, bay leaves and black pepper. In a large pan, heat the olive oil. Once the oil has heated, add chicken (saving the marinade).

Saute the chicken on medium-high heat until it is done or mostly done. Add the marinade and reduce the heat to medium. Continue cooking until sauce reduces to desired thickness. Serve over rice.

Rice:
Rinse rice in a pot 4-5 times and drain. Cook in a rice cooker, or according to package instructions.