Happy Weekend, DinnerCakes readers – today is my birthday!

It’s actually barely my birthday… just fifteen minutes until 1:00 AM as I’m writing this. Why so late? Well, already a lot of exciting things have happened – who could sleep?

pbcupcakes

Throughout history, June 6 has always been an important day:
1944 D-Day, World War II: Battle of Normandy begins.
198?Ghost Baker was born!
1984Tetris was released.
2009 – TBA!

I brought chocolate cupcakes with peanut butter frosting and chocolate ganache to work today, modeled off the Sky High Cakes recipe that Edwin and I made back in November. Halving the cake recipe gave me about a dozen cupcakes, and I was so immensely pleased that they were so well received! I was also given lovely flowers and taken to lunch. Thank you, everyone!

Then when my husband, Morgan, came in from work today, he brought a dozen peach and orange roses with him! I spent the rest of the evening cooking and baking in preparation for a joint birthday cook-out at a good friend’s house later today.

cupcakes

I had just taken Alton Brown’s Baked Macaroni and Cheese out of the oven and Morgan had just gotten into bed when the the phone rang. His sister had applied to transfer colleges and she just found out that moment that she got in! This is something that she worked very, very hard for and wanted with all her heart. We are thrilled, ecstatic, positively delighted and overjoyed!

The clock just struck 1:00 AM; barely my birthday and already so many wonderful things have happened. If the last 24 hours are any indication of things to come, then it should be an amazing year indeed!

HeatherBirthdayMe

Kitchen Tips: How Grills Heat

Ah, the wonders of summer and the great weather it brings. This weekend is looking pretty good and with good weather comes grilling. But did you ever stop to wonder how grilling works? How it cooks your food? (No? Well, see you Monday then!) How your delicious burger is born in fire?!?!?! Well, wonder no more!

Whether it be charcoal or gas, a grill cooks your food with three kinds of heat transference: conduction, convection and radiant heat. Conduction is your most straight forward. Science 101 states that heat makes molecules move faster. The faster they move, the more often they bump into other molecules, transferring heat to them. This is called conduction. Your metal grating in your grill that you rest the food on is a great conductor; heat transfers through it all very quickly. Your food, however, is not such a great conductor. This is why you always preheat you grill. That initial contact of meat with metal is a burst of energy, forcing heat in deeply and quickly. The outside of the meat continues to receive most of the heat, passing it slowly inside. This is why you can have a steak with a thick crust and a rare interior (mmmm).

Convection is the transfer of heat through the air, but in a special way. The heating of he air molecules in a closed girl causes air circulation. As the molecules heat, they rise, cooking the meat and forcing the colder molecules down to be heated by the fire. This rotation of air is not a primary method of cooking, but it does account for part of it; especially in indirect grilling.

Radiant heat is your tricky one. This heat actually never touches the food. (crazy, right?) It’s infrared energy. Think about the sun and how it can still warm you on a cold day. It’s not heating you through conduction because the air around you is still cold, and yet warmth it’s providing.

So in short, the flow of heat from the the fire to the meat is radiant heat, the heating of the grating (and then the direct heating of the meat) is conduction and the heating of the surface of the meat is a combination of conduction, radiant heat and convection. Got it? Happy grilling!

Spicy & Hot Tofu Puffs

Can you tell that I’m on an Indian food kick?

Just yesterday I decided to treat myself to the Indian buffet near my office for lunch. So delicious, and so much food! My birthday is on Saturday and, I’m not sure if any of you are aware, but calories actually don’t count on your birthday (or the days leading up to and after your birthday).

tofu

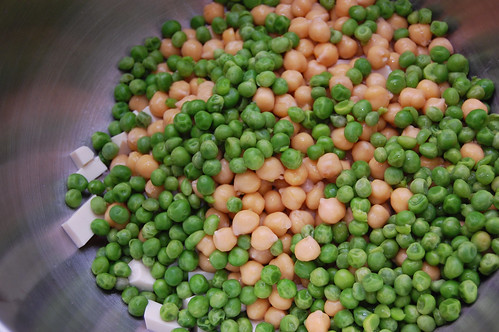
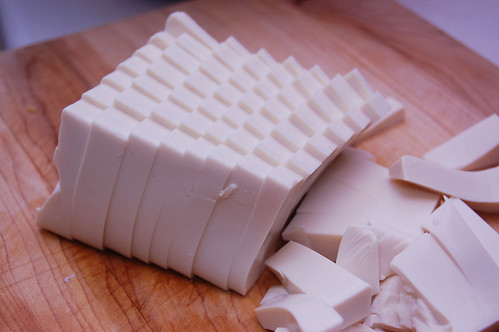
So a few weeks ago when I saw a recipe for Chile Pea Puffs on 101 Cookbooks, I was ecstatic and decided to make something similar. I took out the paneer and added silken tofu, garbanzo beans, Indian chillies, cumin and curry powder.

peaschickpeastofu

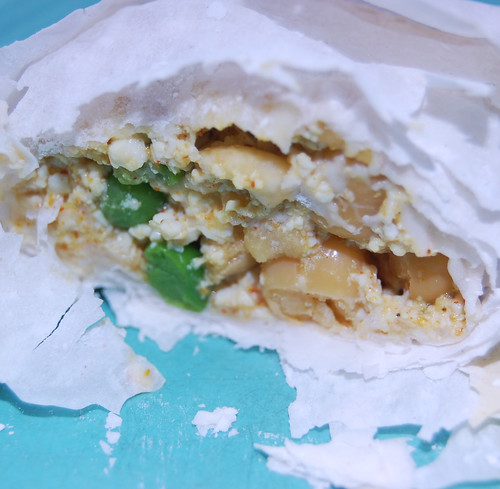
I couldn’t find wonton wrappers at the grocery store, but I picked up phyllo dough. Unfortunately it was my first time working with phyllo; I got impatient and I did a pretty sorry job with them. I’m not jumping at the chance to work with phyllo again, but the filling was great!

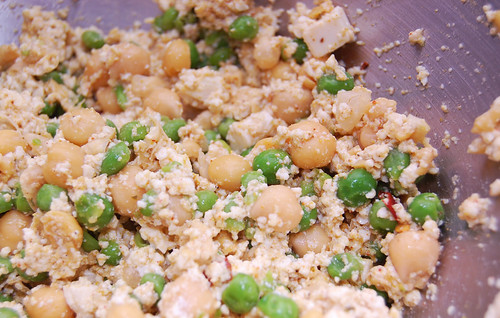
peaschickpeastofumashed

The Indian chillies give this quite a lot of heat. If you don’t like heat, then you’ll want to leave the seeds of the chillies out, or leave them out entirely along with the red curry powder (seriously, it’s hot!). My husband who, like me, doesn’t eat a lot of tofu and isn’t totally comfortable with it yet, didn’t even know that there was tofu in this until I told him. We were both pleasantly surprised! I recommend that tofu-phobes give this a chance – this recipe had both of us scratching our heads as to why we don’t work with tofu more often!

puffs

Spicy & Hot Tofu Puffs
Adapted from 101 Cookbooks

1 1/2 cups green peas, cooked
1 can garbanzo beans (15 ounces), drained
1 package silken tofu (12 ounces), cubed
2 Indian chillies (seeds removed for less heat!), crushed
1 teaspoon yellow curry powder
1/2 teaspoon red curry powder
1/4 teaspoon cumin
1/4 teaspoon salt
1 clove garlic, minced
wonton wrappers or package of phyllo dough (if using wonton wrappers, use instructions here)

Preheat oven to 400F. Spray baking sheet with cooking spray or line with parchment paper.

Combine all prepared ingredients in a large bowl. Mix well and crush lightly with the back of a fork.

Allow phyllo to thaw. Unroll and place mixture onto center of one piece. Fold edges together to make a pocket, brushing edges with egg whites to hold in place and secure seam. Place on baking sheet, forming a single layer of puffs.

Cook for 4 minutes, then turn puffs once and cook until crisp and golden brown.

Pop's Old Fashioned Ice Cream

One of the best ways to repay a favor, as far as I’m concered, is with food. I helped a friend out a bind and she wanted to repay me with ice cream. It had been a while since we had hung out so we decided to hit up Pop’s Old Fashioned Ice Cream in Old Towne Alexandria.

Walking in, you can’t help but be struck with a bit of the 50’s style red & white motif and server’s uniform. Their menu is simple with only four kinds of sundaes. In the world of Cold Stone and Baskin Robbins, this places doesn’t fit it. And you know what? I like it that way.

Crisp and Juicy Curry Chicken

We hope you all enjoyed Rainbow Week! It was a lot of fun for us to do. If you have suggestions about other themes you’d like to see, please let us know!

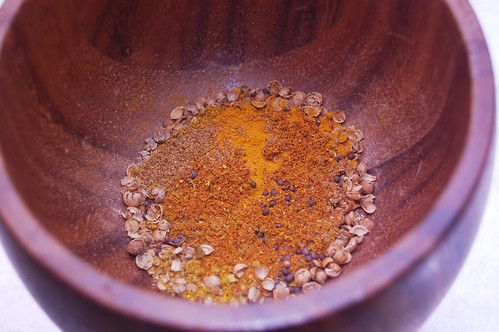
spices

And now a confession – this is my new favorite dinner recipe. I can’t believe that there was actually was a time when I didn’t really like cumin or curry; now they’re some of my staple spices.

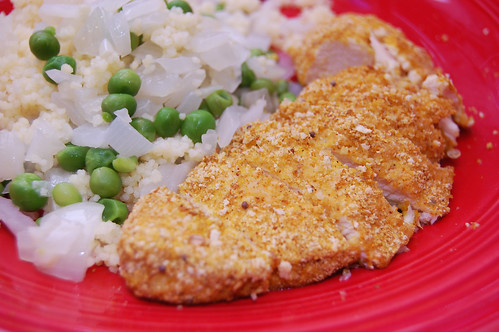
This dinner is so easy and delicious. I like having a bit of crispiness to my chicken, but of course without all the fat that comes with frying and using oil. I coat the chicken with a variety of Indian-style spices and a little bit of plain bread crumbs – it locks in the juiciness of the chicken and provides for some excellent flavors.

I like to serve it with couscous, but it would also go well with steamed rice. Hope you enjoy it as much as I do!

chickencurry

Crisp and Juicy Curry Chicken

For couscous:
1/2 onion, diced
1/2 cup peas
1-2 cloves garlic
dash salt
whole wheat couscous

For chicken:
1 lb chicken breast, sliced in half lengthwise
1/2 teaspoon cumin
1 teaspoon yellow curry powder
1 teaspoon coriander, ground
1/4 teaspoon brown mustard seeds
1/4 teaspoon ground turmeric
1/4 teaspoon red curry powder
1/4 cup plain bread crumbs
3 fresh basil leaves, torn into small pieces

Preheat oven to 400F. Combine spices for chicken in a small bowl and stir with a fork. Add chicken halves to a gallon Ziploc bag with a tablespoon of water. Add spices to bag and toss gently to coat the chicken (you could dredge the chicken to coat it, but I’ve found I get a much better coating when I use the Ziploc).

Bake chicken for 20 minutes until cooked through. While chicken is baking, saute onions in a small pan for 5 minutes until transcluscent. Cook couscous according to package instructions, toss lightly and add onions, peas, garlic and salt. Cover and keep warm until chicken is ready.

The weather was beautiful this past weekend; gorgeous break in the rain we’ve been having lately. I had a special hope for this weekend because of some climbing plans and couldn’t have asked for a better Saturday. A group of us drove up to Seneca Rocks for a day of climbing the peaks. I had never been to Seneca before and it was an excellent experience. The view from 900 feet is… indescribable.

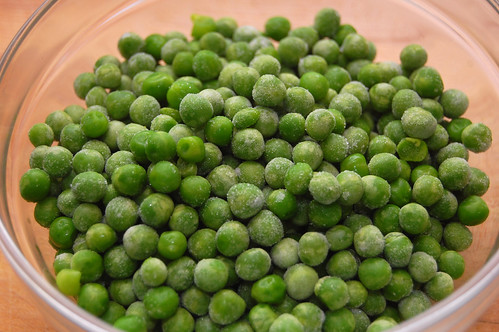
Peas!

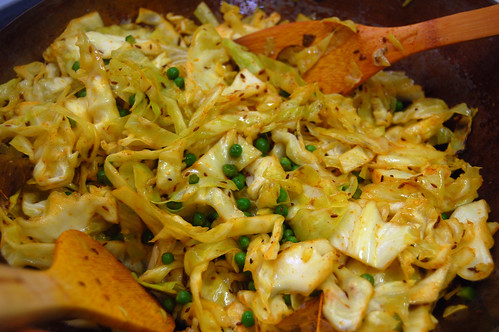
As usual, when Sunday rolls around I’m drained and really don’t want to make anything involved; I want quick. I also want something that’ll give me plenty leftovers for the week and, hey while we’re at it, something not too pricey. Cabbage is cheap. Very cheap. McDonalds cheap; and, with a few spices and a little stir fry action, tastes much better. This is really more of a side dish than a main dish, but honestly, when I’m feeling lazy I’ll just eat a ridiculous amount of a side dish to avoid the effort (don’t judge me).

Shredded Cabbage Stir-Fry with Green Peas

Shredded Cabbage Stir-Fry with Green Peas

1 head green cabbage; cored and shredded
2 cups frozen green peas; thawed
1 serrano chili (or any small, hot chili); minced
6 tablespoons oil
1 3/4 teaspoons cumin seeds
2 bay leaves
1/2 teaspoon ground turmeric
1/4 teaspoon cayenne pepper
1/4 teaspoon curry powder (hot or sweet)
1 teaspoon sugar
1 teaspoon salt
1/2 teaspoon garam masala

Heat a large pan or wok to medium heat and add oil (swish around if in a wok). Let the oil heat up for a few seconds then add the turmeric and bay leaves. Cook only for a few seconds until fragrant (too long and it burns) then add cabbage and green peas. Cook, tossing occasionally, for one minute to coat the cabbage and vegetables in oil.

Add the turmeric, cayenne and curry powder; tossing to coat. Stir fry for five minutes until the cabbage begins to soften but still maintain some crisp. Be sure to toss on occasion to prevent burning and ensure even cooking (if you like your cabbage with a bit more crisp, stir a bit less often). Add the chili pepper, sugar, salt and garam masala and cook for a minute.

Day #7 of Rainbow Week – Rainbow Vodka

You’re looking at day seven of our Rainbow Week series. Click here to start on day one.

Today marks final day of Rainbow Week. Heather and I had a blast and we hope you enjoyed the ride as well. Today we’ll wrap things up with something to quench your thirst: rainbow vodka. I really wish I could take credit for this, but the clever people at Mix That Drink deserve the credit.

Rainbow Vodka from Mix That Drink

With their simple step-by-step instructions, it doesn’t get much easier than this. This is definitely on my to do list (perhaps with rum?).

Thanks again for reading. DinnerCakes will return to its regular programming Monday. See you tomorrow!

Day #6 of Rainbow Week – Pastel and Tie Dye Cupcakes

You’re looking at day six of our Rainbow Week series. Click here to start on day one.

Well, we’re nearing the end of Rainbow Week! We hope you’ve learned some new things and that you have plans this weekend to make lots of colorful rainbow treats like today’s post – Pastel Tie Dye Cupcakes.

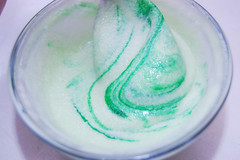
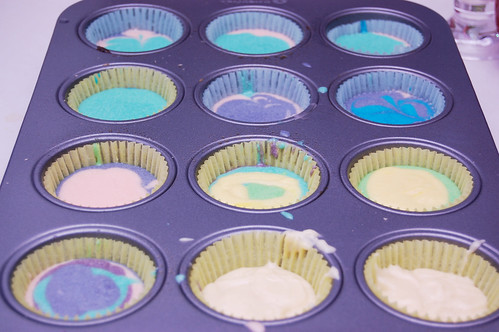
adding pastel

greenswirlpastelpurple

Back in the day I loved tie dye – and let’s be honest, I still do.

pastelcolorscupcakeswirl

Last weekend I was at a wedding for great couple; my husband and I met the groom back in high school. One of the groomsmen made a nice slide show of memories for the couple which was shown at the wedding. He joked with me that he had a bad old photo of me he considered including. Once he described the photo I remembered it exactly – I was wearing an old pair of jeans that I turned into bell bottoms using some tie dye fabric. Hey, who cares what he thought, right? I thought they were cool…

cupcakebatter

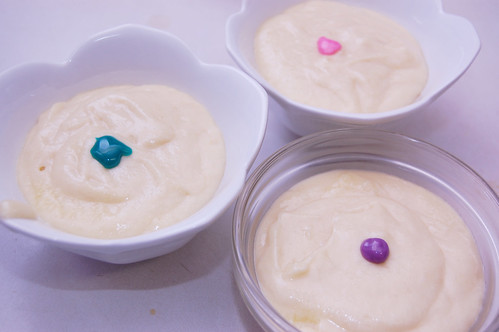
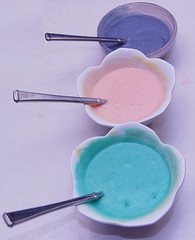
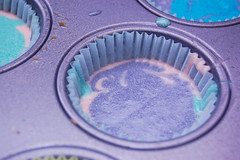
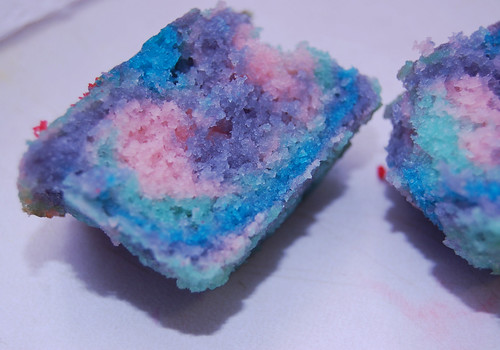
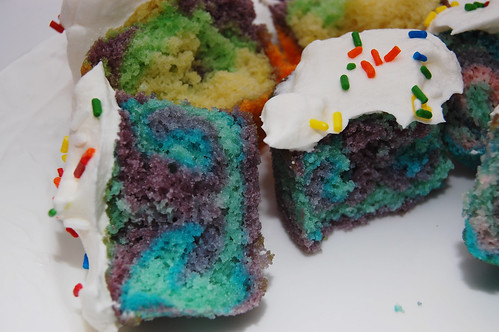
Making rainbow cupcakes like these can even be more fun than rainbow cake because each individual cupcake can have a unique pattern – colored layers, marbled/swirled batter, just color in the middle, etc. I used pastel purple, teal and pink, along with a few other colors, in yellow butter cake batter.

brokencupcake

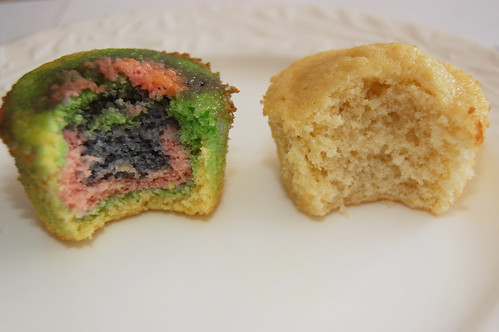
I was also able to do a little test, baking regular cupcakes alongside rainbow cupcakes to see how the color affects the batter. The answer is, as I believe Edwin mentioned and as I found out, that the color does affect the batter, particularly this time.

cupcakecomparison

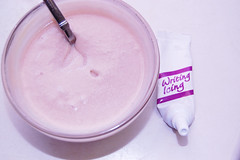
Pastel colors, because they’re lighter, require more gel. Whereas Edwin and I use only a small amount of primary color gel for the rainbow cake and rainbow cake cones, I had to use the whole tube of pastel color gel to color the batter – oy! All the stirring needed for pastels unfortunately makes the cupcakes more dense. So I might recommend sticking with primary color gels for the best tasting cake, although the teal color did turn out pretty cool!

inside cupcakes

Yellow Cake & Frosting

I used the same Williams-Sonoma yellow cake recipe here as I did for the cake cones. If you don’t have the Williams-Sonoma “Desserts” book, I would recommend this recipe available online by Martha Stewart for a basic yellow butter cake, adapted from “Martha Stewart’s Baking Handbook.” It is very similar to the one I used. A box yellow cake mix will also work.

To frost the cupcakes, I used a light and fluffy fat free Cool Whip. A Seven Minute Frosting would also work well. Anna at Cookie Madness has a good recipe for Seven Minute Frosting, and Joy the Baker has a Seven Minute Frosting that you can make pink or green (just in case you want even more color for your cupcakes!).

In case you missed Edwin’s detailed instructions on “How To Make Your Own Rainbow Cake” earlier in the week, please check it out for very useful tips and advice before you begin.

You’re looking at day five of our Rainbow Week series. Click here to start on day one.

Rainbow Week is running strong with day five and what a ride we’ve had. We’ve done baked goods, we’ve done fruits; how about a main course? That’s right folks, we’re giving you the full gamut! Of course, I’d be remiss if we did something easy. I mean, sure, I could just boil some colored pasta, throw in some cream sauce and call it a day; but that’s not why you come here, right? Didn’t think so.

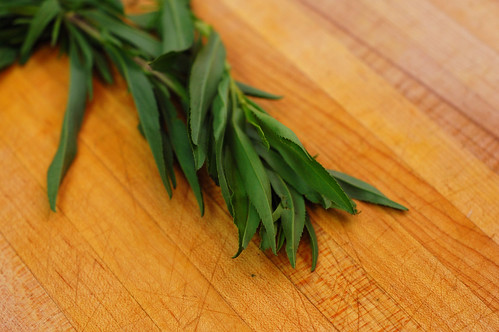
Tarragon

Now, my health-obsessed mind just wouldn’t be happy unless our rainbow dinner was healthy. So, we’re going with salad, but a different kind of salad. I’ve never been one for seafood, but my mother recently returned from a trip to Alaska with a cook book for me and, apparently, if there’s one thing you can get a lot of in Alaska it’s seafood (I guess it has something to do with all the water or the sub-freezing temperatures). No cookbook should just sit collecting dust so I decided to broaden my horizons.

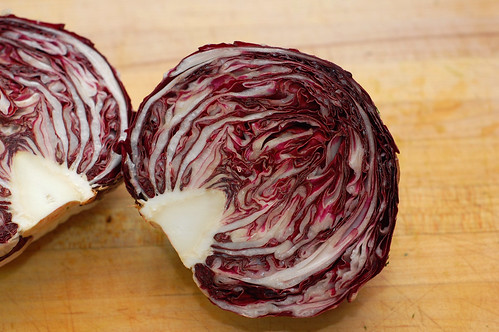
Radicchio

Lettuce provides the green, radicchio the purple, salmon the red and lemon the yellow. I like this dish because it has a low skill requirement, which is great for my seafood newbie-nees. I tried adding corn for the yellow at first but this really didn’t work out. Instead, go with lemon over lemon juice for a more visually appealing effect. Note, that this is a LOT of salmon I used in the picture below. This amount could easily be split between two for a lighter dinner.

Poached Salmon Salad with Honey Vinaigrette

Poached Salmon Salad with Honey Vinaigrette
Adapted from What’s Cooking, Alaska?
1 cup water
1/2 cup dry white wine
2-3 sprigs of tarragon; leaves removed
6 peppercorns
1 lemon cut into quarters
1 salmon fillet
1 quarter radicchio; sliced thin
Several handfuls of salad greens (I used romaine and spinach, but mesculn would work great as well).

Throw the water, white wine, tarragon stems, peppercorns and lemon into a large pan or pot and bring to a boil. Simmer covered for 10 minutes to reduce (if too much boils away, just add more water). Add your salmon fillet and simmer, covered, for an additional 10-12 minutes. Remove from heat, uncover and let the fillet cool. Once cool, wrap in plastic and chill for 1-2 hours or until ready to serve.

While chilling, prepare your salad greens along with our earlier honey vinaigrette recipe using the tarragon leaves from earlier (chopped). Once ready, top your salad with your salmon and spoon as much dressing atop as you’d like. Enjoy.

Day #4 of Rainbow Week – Tropical Fruit Salad

You’re looking at day four of our Rainbow Week series. Click here to start on day one.

Need a little break from baked goods? Rainbow cakes are a lot of fun and make for great eye candy, but there are other options for impressive and vibrant food as well.

pineappletoss

strawberriesoverflowing

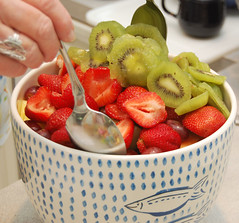
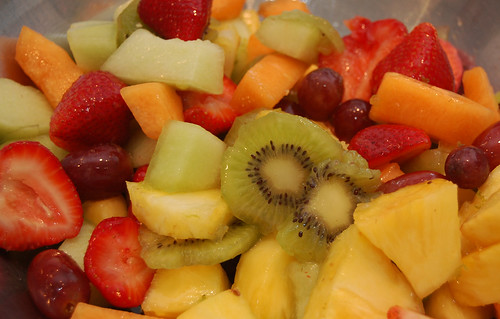
I hijacked this fruit salad recipe from my mom. In fact, I took the photos for this post the last time she made it (which I hope made for some cool action shots). I love the fruit salads that she makes because they always have very sweet and excellent glazes. This one packs a little more punch than some of my other favorites because it comes with tequila!

pouring

The tequila is noticeable, but not overbearing. You could leave it out if you really wanted to, but why? This recipe makes a very large bowl of fruit – perfect for entertaining at cookouts or dinner parties. If you’d like to adapt it to every day use, simply cut the recipe in half.

fruitsalad

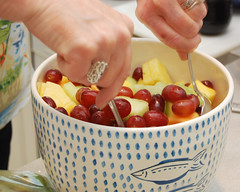
You can probably tell this from the photos, but if you do decide to make a large batch, make sure you use the appropriate size bowl. We ran into some overflowing problems and had to transfer the fruit to a larger, wider bowl so that we could toss it with the glaze.

tropicalsalad

Tropical Fruit Salad
Adapted from Sandra Jackson-Work’s “Cooking with Friends” submission to Betty Crocker’s “CELEBRATE!” (April 2000, #161)

3/4 cup sugar
1/4 cup water
1/4 cup Key lime juice
2 to 3 tablespoons tequila
1 teaspoon fresh grated lime peel
14 cups cut-up fresh fruit – strawberries, cantaloupe, pineapple, kiwi, honey dew melon, red grapes

Heat sugar and water to boiling in small saucepan. Reduce heat, and simmer uncovered for approximately 2 minutes, stirring constantly until sugar is dissolved. Remove from heat and stir in lime juice and tequila.

Let stand to cool. Cover and refrigerate for approximately 2 hours.

Stir in lime peel. Carefully toss fruit and lime mixture. Serve immediately.

Or, click here for a version without tequila (boo!).