Day #3 of Rainbow Week – Rainbow Cookies

You’re looking at day three of our Rainbow Week series. Click here to start on day one.

Back in Richmond, where both Heather and I grew up, there’s a local chain of grocery stores called Ukrops. My family didn’t go there often (there were closer grocery stores and Ukrops was never open on Sundays), but I always looked forward to the times we did for one reason and one reason only: rainbow cookies. As Heather likes to remind me, they weren’t particularly good cookies. In fact, they were quite dry. But when you’re a kid there’s something awesome about multi-colored cookies; just like there’s something awesome about cereal that looks like cookies (Cookie Crisp you were, and are, so amazing).

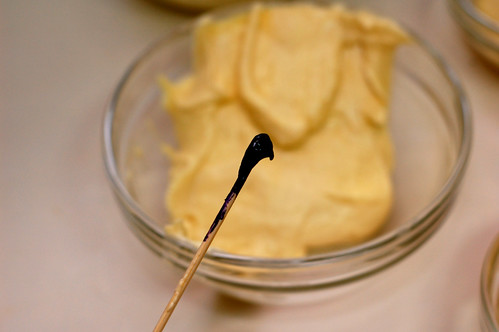
Rainbow Cookie Dough

I haven’t been to Ukrops in a long, long time, but what Rainbow Week would be complete without rainbow cookies? Today’s recipe follows the same principles from our first post, with a few exceptions. First, because cookie dough is much thicker than cake batter, food color drops are really your only option. It’s just too difficult to mix and distribute the gel. Since most cookies are pretty dense (when compared to a cake), you’re options are a lot larger. Just don’t pick something, well, cake-y like a black and white cookie and you should be fine. Try with 5-10 color drops in the divided good and you should be good.

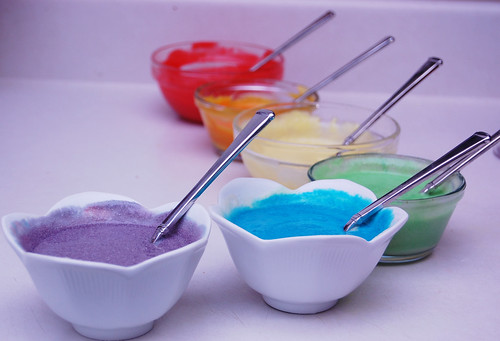
Blue Cookie DoughRed Cookie DoughTri-Color Dough

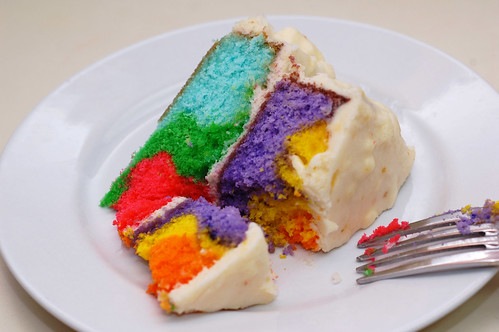
I decided to work with sugar cookies, a pretty simple and resilient cookie. You can work in one, two or three different colors (or more I suppose). With most sugar cookies I’d wager you’d have approximately three teaspoons of dough for each cookie, so divide the portions by the number of colors you want accordingly and put them together as shown. Then roll around in your hands until you get a smooth looking ball. Place them on a baking sheet and flatten them to the width specified with your recipe. That’s it!

Rainbow Sugar Cookies

Finding the Right Sugar Cookie Recipe

Most general cookbooks should have a sugar cookie recipe for you to use; and if it doesn’t you should write the author(s) a scathing letter. I personally used the one from Joy of Cooking (my cooking bible) for these.

If you’re looking for a good sugar cookie recipe, try Lydia’s recipe over at The Perfect Pantry. I’ve used it on many occasion with good results. Simply Recipes also has a recipe you could try. Enjoy!
Day #2 of Rainbow Week – Cake Cones

You’re looking at day two of our Rainbow Week series. Click here to start on day one.

Welcome back to work (for many of you); we hope you had a great holiday! Rainbow Week continues here on DinnerCakes, and today I’ll be sharing rainbow cake cones.

colors

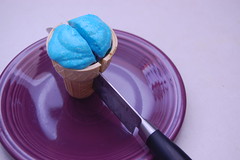
Cake cones are ice cream cones filled with cake. My mom used to make them for me when I was little. It’s a fun twist on a traditional cake, and if you scoop ice cream on top instead of frosting, it’s perfect for dessert lovers who enjoy cake and ice cream. Cake cones also lend themselves particularly well to rainbow cake.

DSC_0047DSC_0049

cakeconesoven

Yesterday Edwin recommended using standard food drops or fondant coloring gels. I divided yellow cake batter into small bowls and used about 1/4 teaspoon of Betty Crocker classic food coloring gels, stirring as little as possible.

cutconecakecones

cakecones2

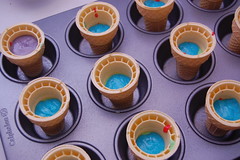
I used a small spoon to pour one spoonful of each color batter into the cones. Because the cones are small, it’s easier to get an even layer of color, by moving the spoon from front to back, than it is with a large cake pan. Fill your cones about 2/3 full.

DSC_0051 (2)DSC_0070 (2)

To cook the cake cones, set the cones inside a muffin pan to keep them from falling over. For half of my cones, I made cream cheese frosting and added a few drops of food gel for color. I left the other half frosting-free so that I could scoop ice cream on top. I would recommend serving your cake cones with ice cream scoops. As you might imagine, I enjoy my cake with ice cream, but I also think it tastes better. The cake cones with frosting instead of ice cream is just a little too dry for me.

icecreamcone

The yellow cake recipe that I used is from my Williams-Sonoma Desserts book. I will admit that I enjoyed the taste of Edwin’s rainbow cake using a gold cake recipe more than my yellow cake (yum!), but either gold or yellow will work well. Enjoy!

icecreamconebitten

Finding the Perfect Yellow Cake & Frosting

If you don’t have the Williams-Sonoma “Desserts” book, I would recommend this recipe available online by Martha Stewart for a basic yellow butter cake, adapted from “Martha Stewart’s Baking Handbook.” It is very similar to the one I used.

You may also use a box yellow cake mix if you’re so inclined. Though I will add that Edwin has said, “Every time a DinnerCakes reader makes cake from a box a piece of me dies inside.” So, do with that what you will, readers!

I recommend using an ice cream of your choice instead of frosting the cake cones, but for half of my cones I used cream cheese frosting. It doesn’t take much food gel to color the frosting; I separated the frosting into small bowls and used about 3 to 5 drops of food coloring gel. I put the frosting in a small ziploc bag and cut off the tip to create a makeshift pastry bag. For a good recipe that won’t make an obscene amount of frosting, check out this one from Anna at Cookie Madness. For a frosting that’s a little flashier, Edwin recommends this Coconut Cream Cheese recipe from 101 Cookbooks.

In case you missed Edwin’s detailed instructions on “How To Make Your Own Rainbow Cake” earlier in the week, please check it out for very useful tips and advice.

Happy Rainbow Week at DinnerCakes! Heather and I have been busy talking about things we’d like to do and the direction we’d like to take with our modest niche in the foodie world and today is one of our new things we’re trying out (you may have also noticed Heather’s Saturday post: Foodie News). Every now and then we’ll introduce a theme week, in which we’ll write about the topic of choice. This week’s theme is rainbow week. We’ll give you tips and tricks on how to do your own rainbow-inspired food along with ideas on where to take it. We hope you enjoy it and, as always, e-mail us if you have any suggestions!

Rainbow Cake

Today’s post is about the basics of rainbow baking. We’ll discuss what you need to do, concerns and considerations, as well as give you a recipe to try your own (in case you just want to just follow some steps).

The Color – Drops and Gel
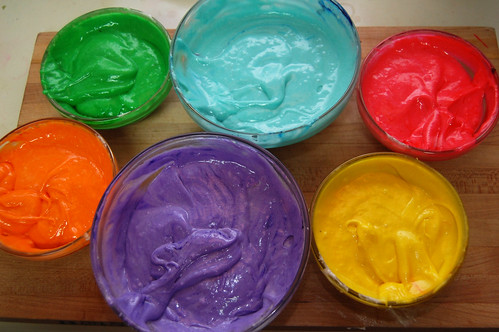
To color your batter, you’ll use food coloring. You’ve got two choices: you can go with the standard food drops or you can go with coloring gels (like the ones used to color fondant). Both work, but there’s a slight trade-off. The gels will give you a more vibrant color, but since they’re not liquid they’ll require more stirring. More stirring means more gluten, which means less rising during baking. This is generally not a good thing for cakes; it’ll be less light and airy. With the drops you have less stirring but the colors are fainter. The ones below are with gels.

Rainbow of Colors

The Cake – Dense
Coloring your cake batter is going to require additional work after you’ve completed all your steps short of the actual baking. Even if you choose the drops, there will be more stirring which creates more gluten bonds. More gluten bonds means the cake will rise less. You really want to choose a denser cake. The effect will be less dramatic. If the cake has folded egg whites in it, forget it. Gold and yellow cakes are good candidates and, while I haven’t tried it yet, I bet a pound cake would work as well. I would not recommend this for angelfood cake.

Now, Heather says I should point out that you technically CAN use cake from a box. The rules are the same (though I’m not sure if cake mix has any real flour to form gluten with). But really, why would you want to? Every time a DinnerCakes reader makes cake from a box a piece of me dies inside, knowing we have failed you somehow.

Mixing the Batter

The Process
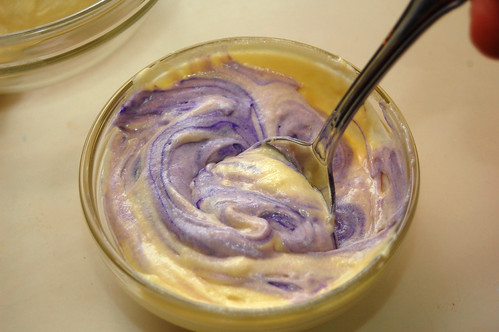
The process is pretty straight forward. Decide on how many colors you want (I suggest six or less and remember, the batter is already one color you could use) and separate your batter into that many portions. Add your drops of your gel. If drops, 7-12 should be enough, though it does vary depending on how dark you would want it and which color you’re working with. With the gel, see the picture below. Either way, add it all at once and start first by folding the batter and eventually transitioning to stirring. The folding distributes the coloring quickly and the stirring smooths out the color. Be sure to scrape the bottoms and the sides so everything is colored (if you have glass bowls, use them). Remember, you want to stir as little as possible
.

Gel

Once you’ve got your prepared batters, divide them among the cake pans. Pour one at a time directly in the center of the pan. You’re not going to get flat layers stacked on each other (I’ve tried). What you’ll get is each portion of batter pushing the other batter to the side as it fills in. It won’t result in perfect vertical bars, but it’ll definitely get the point across.

That’s all there is. Give it a shot and let us know how it turns out!

Pouring the BatterRainbow Batter

Rainbow Cake
Original recipe from Joy of Cooking.

2 1/2 cups cake flour
2 1/2 teaspoon baking powder
1/4 teaspoon salt
1 1/2 sticks unsalted butter
1 1/4 cups sugar
8 egg yoks
1 teaspoon vanilla
1 teaspoon lemon zest
3/4 cup milk

Whisk together the flour, baking powder and salt in a bowl. Cream the butter and sugar on high for 2-4 minutes until light and fluffy. Beat the yolks, vanilla and lemon zest for several minutes until thick and a pale yellow. Beat into the butter mixture. On low, beat the flour mixture and milk in alternates (flour-milk-flour-milk-flour). Continue until well combined.

Separate your batter into the portions and follow the guide above. Enjoy.

If you’re not following us on Twitter yet, then you may have missed out on some cool foodie links that we unearthed this week. Here’s a wrap up of what we think is fun or interesting in the foodie world right now:

Epicurious posted their thirty favorite, top-rated cake recipes – browse through mile-high chocolate cake, cheesecake, fresh coconut cake and some more exotic options like “Persian Love Cake,” a lemon-cardamom chiffon cake with saffron and rose-scented whipped cream. Click here.

Chef Edwin located Mark Menjivar’s “You Are What You Eat,” a photographic exploration of the contents of strangers’ refrigerators. Click here.

Looking to jazz up your usual coffee routine? Try some new tricks for your coffee. Click here.

My personal favorite thing about the warm weather means that farmer’s markets are back in action. But do you know how to pick the right fruits and vegetables. Click here for a short quiz to see if you know how to shop a farmer’s market.

David Murdock at the Huffington Post shares the amazing health effects of “33 Of The Healthiest Foods On Earth.” Click here for the list.

And of course, your festive Lolcat for the day! If I was deprived of pancakes I believe I’d be making that same face.

funny pictures of cats with captions

Hope you’re enjoying your Memorial Day weekend!

Kitchen Tips – Simple Tricks for Fussy Palates

As you all well know, I can sometimes be a veggie-phobe. Yet for some reason as the sun comes out and the temperature rises, even I can be tempted.

Last Friday me and my husband, Chef Edwin and his lady friend and some bake-a-thon alums got together at Edwin’s for a happy hour cook-out.

meatballs

You would never, ever catch me putting raw onion slices or green pepper on my burger, but if you dice it and roll it into the patty, I’m sold. Though I still ate way too much food at the cook-out, with some veggies in the patties at least I did sneak in more vegetables than usual!

I’ve been told that most people aren’t like me in that they actual revel in eating fresh vegetables, but if you know and love a fussy eater (spouse, significant other, child, etc.), consider add vegetables to your patties. Dicing veggies to a small size will work best. This will also work well for meatballs.

If you’re like me, time seems to disappear much faster in the summer time. Not only is there more to do when you’re not holed up in your room, but this whole more-hours-of-sunlight thing just catches me off guard. One moment I’m frittering about at 6 in the sun and then next thing I know it’s 8:30 and the sun is still out. You’ve fooled me once again, mother nature.

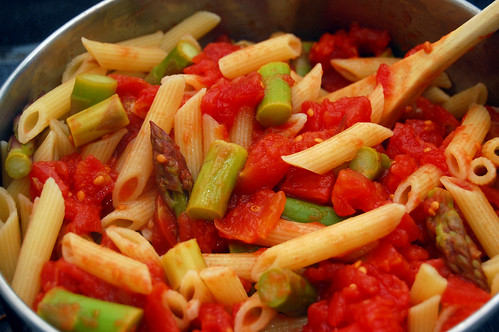
Asparagus and Tomato Pasta

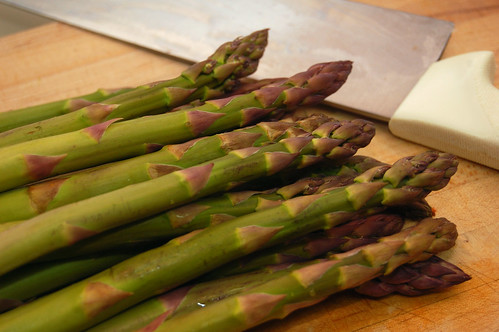
It just feels like you can do more when the weather is warm and the sun is shining and because of this things are busier and time flies faster. When this happens, it’s nice to have a quick meal recipe to fall back on. Asparagus season is in full gear right now which makes this recipe even more appealing (in season vegetables are just better). You can find asparagus in thick or thin stalks and I recommend the former for this recipe. The tomatoes “sauce” in this recipe doesn’t dominate your taste buds so the asparagus needs to step up.

Asparagus

Asparagus and Tomato Pasta
If you’re looking for a slightly more complex flavor, consider adding a teaspoon or two of pesto.

8 oz penne pasta
1 bunch of asparagus, woody stems removed and cut into 1-2 inch pieces
28 oz can of stewed tomatoes
1 garlic clove; minced

Cook the pasta per the instructions; probably 11 minutes in salted water. While the pasta is boiling, cook the garlic and tomatoes in medium-low heat for 5 minutes. Add the asparagus and cover; cooking until the pasta is ready while stirring occasionally.

When the pasta is ready, add to your tomatoes and asparagus. Remove from the heat and toss. Serve and enjoy.

Food Photography – Mom's Strawberry Shortcake

strawberryshortcake

Pictured: Mom’s signature birthday cake – Strawberry Shortcake.

My father and brother demand it for their birthdays each year. I’m sure this will scandalize everyone, but when I was little I used to pick off the strawberries and just eat the cake!

I like to marvel at this photo I took from my dad’s recent birthday… perfectly aligned cake, not a drop of Cool Whip amiss, strawberries and candles evenly spaced – Mom is a much more meticulous baker than I!

I really really (really) love this time of year. Not only do I hate the cold, but there is so much more to do in the warmth. Hiking, climbing, swimming, the list goes on. Edwin was not meant to be contained indoors! The only issue I have with the summer is the shift towards colder meals. Don’t get me wrong, I enjoy a good salad, but otherwise I prefer my dinners hot.

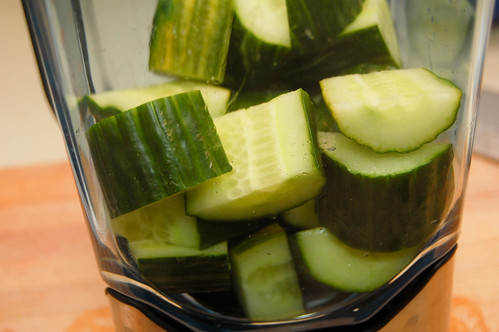
Chopped English Cucumber

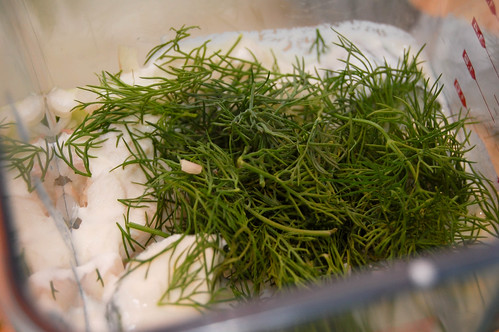
Of course, I try to keep an open mind so I thought I’d give a cold soup a shot. English cucumber is a seedless variety of cucumber that has an edible skin and is often considered less bitter than most. It’s also friggin’ long; several feet. It’s the most common ingredient in a cold cucmber soup, today’s dish. The major ingredients are the cucumber (duh), dill and yogurt. I decided to add corn and tomato because, well, I like a soup with substance and a pureed soup makes me feel like I’m eating water.

Dill Fronds

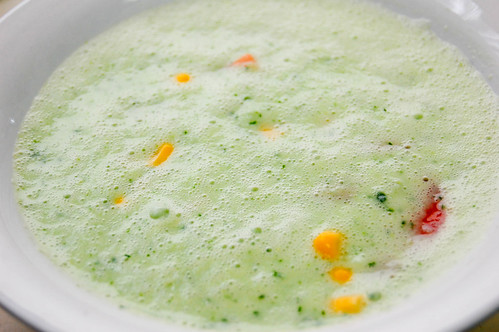
This is definitely not the most appealing-looking soup I’ve made, but appearances can be deceiving. It’s got a light flavor and the cucumber and yogurt combine surprisingly well. On top of that, this is one of the few soups that calls for little to no salt. Oh, and did I mention it’s by far the easiest soup I’ve ever made? Give it a shot and let us know what you think.

Chilled Cucumber Soup

Chilled Cucumber Soup
Feel free to substitute the shallot with garlic, onion or scallions.

1 english cucumber; chopped
1 small or medium scallion; minced
1 handful dill fronds
2 cups yogurt (regular works fine, but consider greek if you’d like a thicker consistency)
1 cup corn kernels
1 plum tomato; diced
Salt and pepper to taste

Add all ingredients except the corn and tomato into a blender. Blend until smooth. Serve with the corn and tomato on the side as a “garnish.” Enjoy.

Baked Ziti

Last week I decided to make something a little different for dinner. My husband really enjoys lasagna, but because it was a weeknight we didn’t have the time to take quite that long. I settled on baked ziti!

It’s funny, whenever my family goes out to dinner it’s usually to an Italian restaurant. My husband also has an Italian grandma. Despite all that, I never typically cook Italian.

DSC_0001

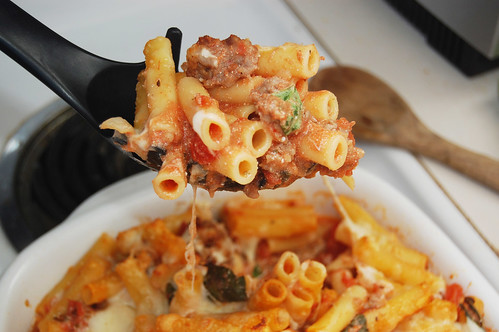
My newbie attempt adapted from Taste of Home turned out pretty well, and I made enough ziti to almost overflow my shallow 13×9 ceramic baking dish. I don’t like a lot of vegetables in my pasta sauce, so I left them out and instead added Italian sausage, oregano, parsley flakes and more red pepper flakes. I also took out the provolone cheese so that it wasn’t quite so cheesy.

I had meant to include some spinach as well, but unfortunately I forgot to include it. I’d love to hear your ziti recipe and see what you recommend as well!

servingziti

Baked Ziti
adapted from Taste of Home

1 cup onion, diced
2 cloves garlic, minced
2 cans (14 oz.) Italian diced tomatoes
1 can (15 oz.) crushed tomatoes
1 tiny can of tomato paste
1 cup vegetable broth
1/4 teaspoon crushed red pepper flakes
1 box ziti
1 cup (8 oz.) part-skim ricotta cheese
1/4 cup loosely packed fresh basil leaves
1 cup (4 oz.) shredded part-skim mozzarella cheese
1/4 cup grated Parmesan cheese

In a large nonstick skillet, saute the onion and garlic until onion is translucent. Stir in tomatoes, broth and red pepper flakes and bring to a boil. Reduce heat and simmer for approximately 15 minutes.

Preheat oven to 425F. Cook ziti according to package instructions. Drain and return to pot. Stir in the tomato mixture, ricotta and basil.

Transfer to a shallow 13×9 baking dish and sprinkle with mozzarella and Parmesan. Bake uncovered for 10-15 minutes until cheese is melted.

Kitchen Tips: What is Brining?

So it occurred to me recently that a lot of my Kitchen Tips have been more relevant to meat than veggies. Oh well, culinary terms are good for you. However, if you’ve got any questions you’d like answered in the vegetarian subject area, let us know.

Brining is the process of immersing a meat in a brine for anywhere from a few hours to two days; resulting in it becoming significantly juicier. A brine is a solution of liquid with a significant amount of salt; usually 3% to 6%. Brining does three things. First it breaks down the muscles a bit; making it more tender (brining is often considered a type or marinating). Second, the salt interacts with the proteins in the meat, giving them a higher water holding capacity. Third, it absorbs any herbs or spices that may be in the brine very well.

So, basically, when done correctly you have the potential for a very tender, very juicy, very flavorful meat. This has great potential for turkey, a type of meat that many consider very dry. Simply Recipes has a great recipe for brined chicken that I’ve tried and loved. Give it a shot some time.