Chicken and Black Beans with Avocado Salsa

My husband and I have been feeling a little lazy lately about cooking. We’ve both been busy, and on days when you’re just drained it’s not only hard to cook, but it’s likely that your kitchen may not be stocked with fresh options.

On this particular day I knew we didn’t have anything in the fridge. We had some chicken in the freezer, but we try not to defrost chicken in the microwave if we can help it (and I haven’t yet tried Edwin’s ice bath method).
avocado

I went to the grocery store after work and picked up some chicken breast (that I didn’t have to defrost). On my way to the cash register I spotted some avocados. I don’t think avocados are in season, and I know that they’re high in fat, but at that moment I just wanted some avocados!

For my calorie conscious friends, listen, avocados are good in moderation!

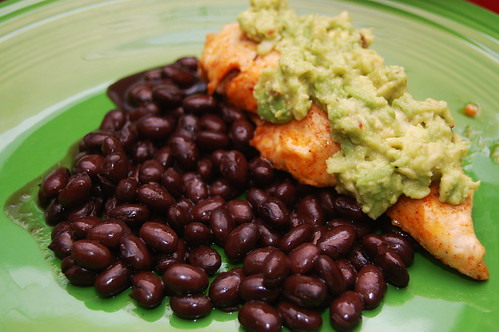
As I was walking home, I still had no idea what I was going to do with my small avocado and chicken. I thought about making chicken sandwiches with slices of avocado on top, but I knew I didn’t have buns. I decided on a citrusy, guacamole-like salsa over baked chicken and black beans. What an awesome change to spice up our typical routine! This dish is light but filling. The lime juice gives it a lot of zip, and it’s not very spicy.
chicken avocado

Chicken and Black Beans with Avocado Salsa

1 lb boneless skinless chicken breasts
1 can black beans

For the Chicken Marinade
1 tablespoon olive oil
1 tablespoon sweetened lime juice
1/2 teaspoon chili powder
dash cayenne

For the Avocado Salsa
1 small Haas avocado, peeled and sliced
1 chili, minced with seeds removed (or 1/4 teaspoon red pepper flakes)
1 tablespoon sweetened lime juice
1/4 teaspoon salt
3 cloves garlic, minced
dash black pepper
dash cayenne

Cut chicken breasts in half longways and marinate in olive oil, sweetened lime juice, chile powder and cayenne for at least 30 minutes. Preheat oven to 375F and bake for approximately 15 minutes. Cut into the middle of the thickest piece to ensure the chicken is thoroughly cooked.

While chicken is baking, warm black beans in a small sauce pan on the stove.

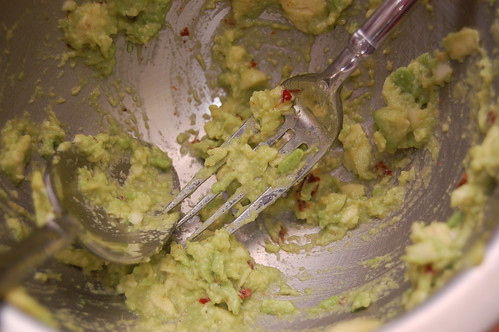
Peel and slice avocado and place in a medium size bowl. Add minced chili or red pepper flakes, sweetened lime juice, salt, minced garlic, black pepper and cayenne. Mash avocado with the back of a fork while combining ingredients. Don’t mash too much, you want the salsa to be chunky.

Spoon black beans onto a plate and follow with cooked chicken breast. Spoon avocado salsa over the chicken and serve!

SusanV of Fatfree Vegan Kitchen posted a dish that looked pretty rockin’ the other day: No-Queso Quesadillas. I really love some of the recipes she writes, they were pivotal when I was making the move away from meat, but I don’t think I’ve ever made something of hers that I’d call comfort food. This, however, had potential.

No-Queso Queso

I think I’ve mentioned before that the lady friend gave me Fresh Food Fast, a book that’s yielded me pleasant results thus far. Inspired by one of its recipes, I decided to take a shot at souping up SusanV’s recipe and make it a true comfort food.

Preparing Our Quesadillas

The non-queso queso is good, but won’t fool anyone into thinking it’s a cheese. The zucchini and black beans add a meaty-ness to the dish and work well with the queso; not overpowering. Next time I intend to try adding onion if I can do so without overfilling. I recommend you give this dish a shot and let us know what you think.

Black Bean and Zucchini Stuffed No-Queso Quesadillas

Black Bean and Zucchini Stuffed No-Queso Quesadillas

2 cups black beans; drained (one can)
1 jalapeno pepper; diced (with or without seeds depending your spice preference)
1 medium zucchini (10oz); shredded
8 6-inch tortillas; any kind

Queso:
1 cup water
1 cup milk
2/3 cup nutritional yeast
7 teaspoons corn starch
4 teaspoons lemon juice
1 teaspoon salt
8 garlic cloves minced
1/4 teaspoon cayenne pepper (optional)
2 tablespoon tahini
1/2 teaspoon tumeric
1/2 teaspoon onion powder

Put your drained black beans and jalapeno pepper in a small mixing bowl. Take one handful of the shredded zucchini at a time and squeeze out much of its liquid, adding it to your beans. Mix until well combined.

Whisk your “queso” ingredients together until smooth. Add to a medium or large-sized non-stock pan and, while stirring occasionally under medium heat, bring to a boil. Reduce heat to low and simmer, stirring constantly until queso is think and smooth; approximately 2-4 minutes.

Brush a small amount of oil on one side of four of your tortillas. On the other four tortillas, spread your queso followed by thin layer of your bean mixture. Bring a large-sized pan to medium heat. Add one of your oiled tortillas, oil side down, and cook for 2-3 minutes; until browning. Remove from the pan and add one of your bean/queso topped tortillas to the pan, adding your precooked tortilla, oil side facing down (touching the bean mixture). Cook for 2-4 minutes, until other side is browned, and remove. Repeat with your remaining tortillas. Enjoy.

Food Photography – The Story of My Mom's Birthday Cake

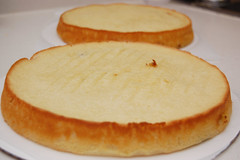
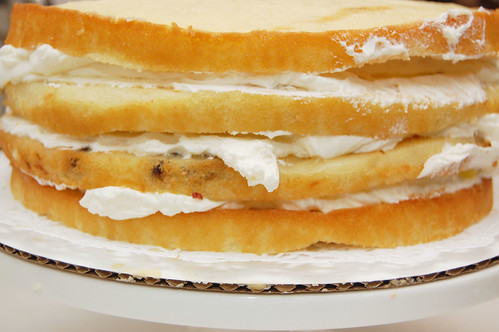
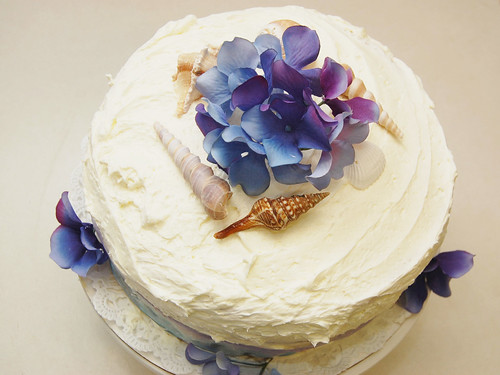
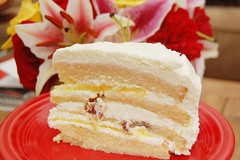
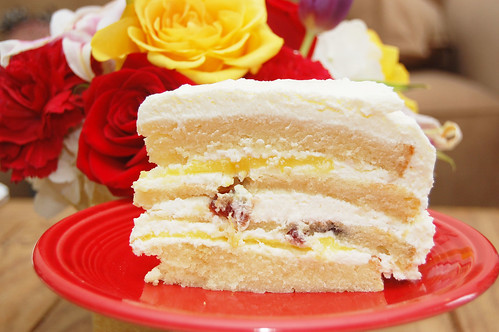
Well, I promised an update on how my mom’s birthday cake turned out, and here it is! I made a cranberry-lemon pound cake with lemon curd filling and Italian meringue lemon buttercream frosting.

pound cakelayers

The cake and buttercream are from, my favorite, CakeLove: How to Bake Cakes from Scratch, and the lemon curd is from Martha Stewart (the CakeLove lemon curd recipe called for more egg yolks and butter than any living thing should ever ingest).

stacked

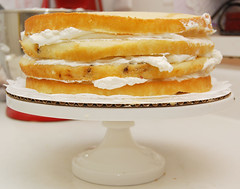
I was very pleased with how everything turned out and how it fit together. With a little help from Wilton’s 10-inch cake circles, my layers sliced and stacked without any difficulty.

layers on cake standfrosting

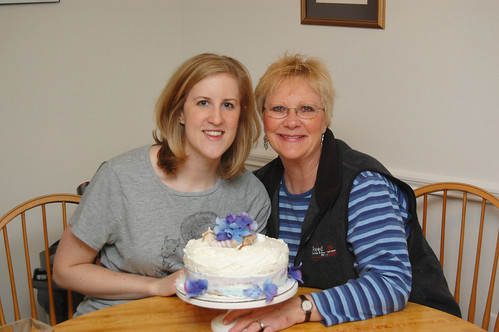
My mom arrived just as I was putting the finishing touches on the cake decor; I didn’t even have time to change out of my fat squirrel t-shirt… I hope it gives you a good laugh!

heathermombday

I was especially happy with the decorations. Remember I told you that I actually drew specs? My mom loves the ocean, so I wanted to use a few sea shells as tastefully as possible.

topcake top

She also likes hydrangea, which I think happen to look very beautiful even when they’re fake.

bdaycake

I did unfortunately learn that I don’t care for lemon curd at all… not even a little bit. I scraped it off easily enough on my slice and enjoyed the rest.

top of cakecake slice with flowers

It was extremely rich – one slice and you’re set for life! Next time I think I’ll try something a little lighter. You really don’t want to know just how many sticks of butter and individual eggs were sacrificed in the making of this cake… really, it’s better this way.
cake slice

Spring is officially here, and I took full advantage of it this weekend. Some friends and I got together to spend most of Sunday climbing at Carderock, Maryland. The weather was beautiful, the climbs were great… you couldn’t ask for more. It made me a bit sad to leave and prepare for the work week, but another gorgeous weekend will come.

Red Wine Vinaigrette

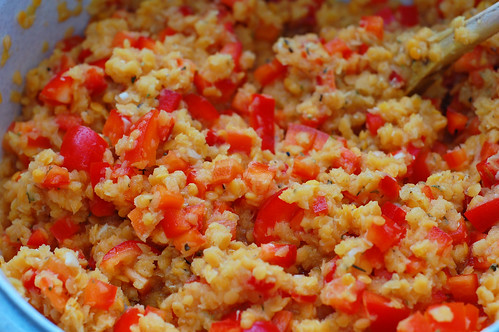
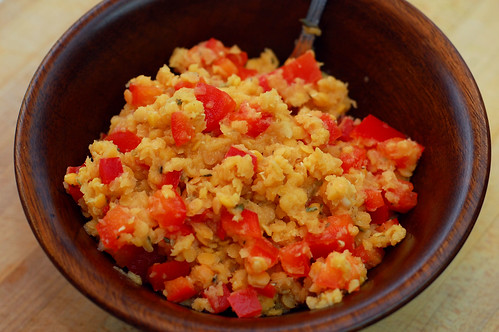
As the climate changes, so does the type of food we cook. Soup is one of the big things for winter (one of the few things I enjoy about the season) but as the weather warms, often what we eat cools. Salads are big and a salad is what I made that evening; albeit not the traditional leafy kind. This baby has red lentils as the star and I was pretty happy with the results.

Red Lentils and Red Bell Peppers

Like the rest of the lentil family, the reds are a great source of protein. They also have a mild earthy flavor and cook in very little time. The red bell peppers add their sweet compliment and the red wine vinaigrette enhances without overpowering. Be sure to drain the lentils well, though! Otherwise you might end up with something that’s a cross between soup and salad.
Red Lentil Salad with Red Wine Vinaigrette

Red Lentil Salad with Red Wine Vinaigrette
Be sure to drain your lentils well or you will get a rather watery salad. Bleh.

3 cups dried red lentils; cooked and drained
2 red bell peppers; diced
4 garlic cloves; minced
1/3 cup red wine vinegar
1 teaspoon dried oregano
1/4 teaspoon dried thyme
1/4 teaspoon dried parsley
2 table spoons olive oil

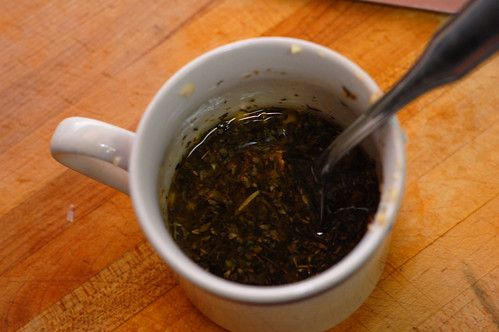
Stir your lentils and red bell peppers in a large bowl. Combine the rest of your ingredients separately to form your vinaigrette, whisking to ensure well mixed. Pour your vinaigrette onto your lentils and bell peppers, mix well and enjoy.

Warm and Satisfying Sweet Potato Biscuits

Most summers, my family tries to sneak in at least a brief vacation to Nags Heads, NC. Though Nags Head is gradually becoming more built up, luckily some things haven’t changed.

cooked biscuits

Our favorite and most consistent restaurant is Kelly’s Restaurant and Tavern in the Outer Banks; if you haven’t been then you’re really missing something special. It’s a nicer establishment than most (ie, expensive), but it’s well worth the expense. Usually when we go I always order the flounder, but it’s incredibly difficult to restrain myself from filling up on their signature Sweet Potato Biscuits.

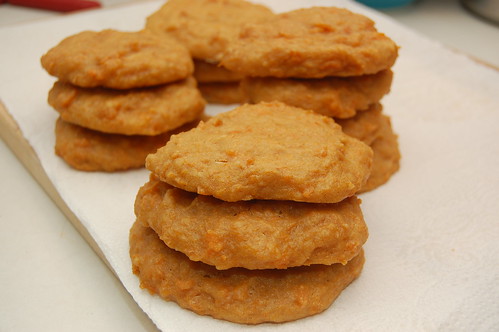
These biscuits aren’t beauty pageant winners – they stay fairly flat and don’t rise in the oven. They aren’t the light, flaky, buttery kind, in fact they’re quite dense and heavy. What makes them so great? They smell heavenly, they’re very unique, they’re filled with sweet potatoes which are actually good for you and they stick to the roof of your mouth. Yum!

sweet potato biscuits

Kelly’s will give you the Sweet Potato Biscuit recipe if you ask for it, but you’ll be surprised to learn that they’re made using Bisquick. While this isn’t necessarily a bad thing, I prefer making it all from scratch – which really isn’t much more difficult and you’ll likely have all of the ingredients already on hand.

I read a few different biscuit recipes to come up with a combination of ingredients that I thought could replace the Bisquick while maintaining the great taste I’m used to. I made these Friday night, just in time for the series finale of Battlestar Galactica (if you happened to watch this, what did you think? my husband joked, “the moral of 4 seasons: robots will probably kill you”). We scarfed a few of these down until our stomaches hurt (hey, I warned you they were dense). These are best enjoyed warm.

sweet potato biscuits

Sweet Potato Biscuits

1 pound sweet potatoes (approximately 2 sweet potatoes)
1 cup light brown sugar
1/4 cup milk (I used skim)
2 cups all-purpose unbleached flour
2 teaspoons baking powder
1/2 teaspoon baking soda
1 teaspoon salt
1 teaspoon sugar
4 tablespoons unsalted butter

Preheat oven to 350 F.

Peel sweet potatoes, then cut into 2 inch pieces and boil until there is very little resistance when pierced with a fork. Mash sweet potatoes using a masher or the back of a fork. Add all remaining ingredients and mix well.

Using two spoons, drop biscuit mixture onto a parchment paper lined cookie sheet; biscuits should be approximately 2 1/2 inches wide and 1/2 inch thick.

Bake for 16-18 minutes. The moistness of the mixture makes it so that these biscuits do not rise much. Keep an eye on them so that they don’t overcook. Biscuits are ready when they have set and they are slightly firm to the touch.

Makes about 1 1/2 dozen biscuits.

Note: Be sure that these are completely cooled before putting them away, if there are any left. Do not store in an airtight container because the tops will get “sticky.”

Kitchen Tips – Beating Egg Whites

My biggest pet peeve with cookbooks is when they throw around undefined terminology, leave too much to the imagination and have no photos accompanying recipes.

If you’re relatively new to baking and a recipe advises you to beat egg whites until they’re “stiff white peaks,” you may find yourself wondering what in the world this means.

First separate the egg whites from the yolks. Let the whites get to about room temperature, or at least not quite as cold. For best results, you will need the assistance of an electric mixer or stand mixer – your arms likely don’t have the stamina!

With your electric or stand mixer, beat the egg whites on high speed with a whisk attachment for several minutes. Do not rush the process. You’ll know you have “stiff white peaks” when the egg whites resemble marshmallow fluff. Your egg whites should also triple in volume. Follow your recipe instructions when adding other ingredients such as sugar.

Patience and beating at high speed is key!

white peaks

More red bell peppers! Yes, the sales have still been going strong, and I’m still taking advantage. A reader recently commented about quinoa and I realized that we haven’t done any recipes with that ingredient yet. That’s a shame really, because like couscous, quinoa is food that’s great for you and easy to prepare. In addition to this, its subtle nutty flavor has potential to enhance many a dish.

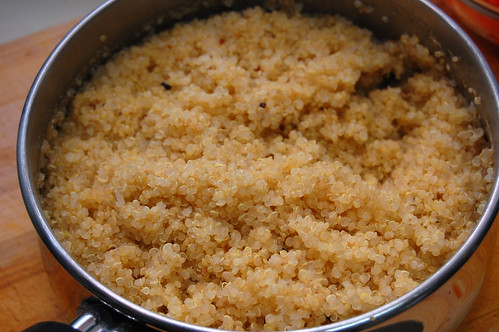
Cooked Quinoa

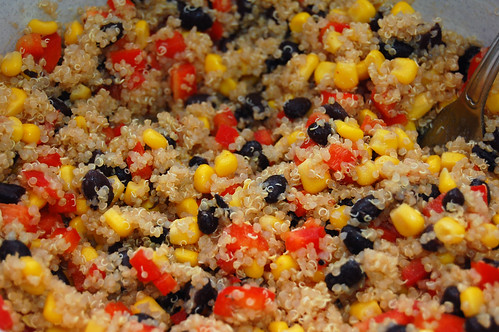
Do a search for quinoa salad with black beans and mangos and you’ll come up with more hits that you can count. I tried to go a different route. Now, I can’t say this dish is amazing or unique, but I enjoyed it. None of the flavors dominate, so it’s flavor is subtle and complex.

And yes, you can definitely use fresh corn and beans. I was feeling lazy!

Black Bean, Corn and Quinoa Salad

Black Bean, Corn and Quinoa Salad
Follow the instructions on the packaging for cooking quinoa, but often this is just simply cook one cup of uncooked quinoa in two cups of boiling water, and let simmer. One cup of uncooked quinoa yields approximately two cups cooked.

1 can black beans; rinsed and drained
1 can corn; rinsed and drained
1 red bell pepper; diced
2 cups cooked quinoa
2 tablespoons red wine vinegar
1/4 teaspoon coriander
1 teaspoon salt
4 teaspoon oil
3/4 teaspoon cumin
1/4 teaspoon cayenne pepper
4 teaspoon lime

Combine all your ingredients. That’s it! Enjoy.

Seven Layer Tortilla Pie

I have to be honest with you, Internet. Right now I am angrily biting the nail polish off my nails. I have extremely breakable nails, so I try to keep clear nail polish on them; you know, the super thick stuff. This stuff is also great fun to peel off when irritable. Come on, you know you’ve done it before… please?

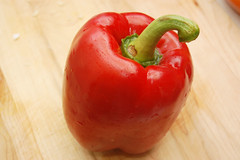
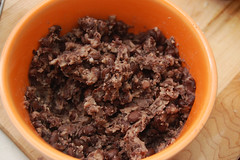
red peppermashed black beans

I had big plans to bake something to bring to work tomorrow for some upcoming and recently passed birthdays, and I needed it to be flourless. But at this point I’m feeling like God made flour for a reason, and we just shouldn’t fight it.

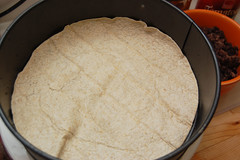
layer onelayer one with black beans

I know, I can’t even believe it myself, but I tried those cursed black bean brownies again. No changes or alterations, just completely by the book. I was low on agave syrup, so I used half agave and half honey. They came out tasting so strongly of honey that it’s practically oozing from them. Don’t worry, my curiosity about these things has been sated. I’m burning the recipe – never again!

shredded chicken

Next I tried a flourless chocolate cake. The recipe stressed to gently fold in the beaten egg whites to the melted chocolate. Maybe I was too careful, because now it just seems completely bland.

Ghost failures twice in one night!!!

layer one completelayer two

I don’t even want to think about baking anymore right now. Let’s talk about dinner, okay? Dinner, unlike tonight’s stupid desserts (grrr!), turned out quite well.

top layer

A few years ago I tore a recipe out of a magazine for some kind of tortilla pie. The tortillas were stacked high and stuffed with cheese and black beans; it looked great. Unfortunately, I lost this recipe before ever getting to try it. So instead I tried to create something similar but with less cheese and more beans.

tortilla pie

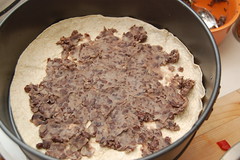
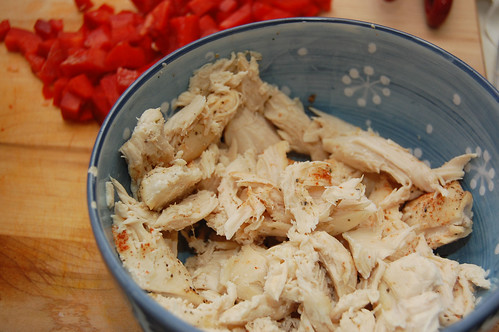
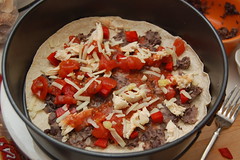
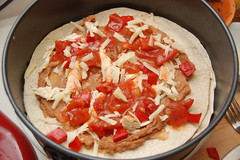
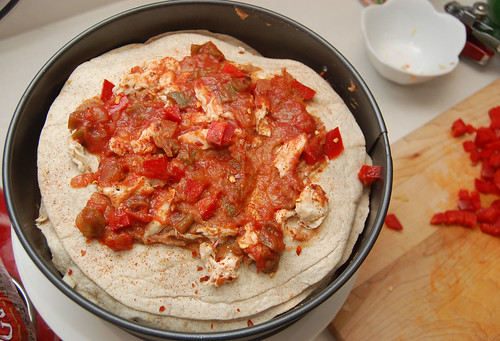
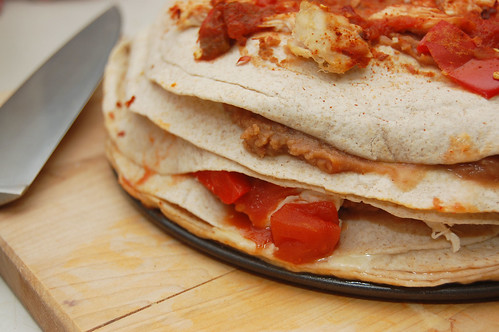
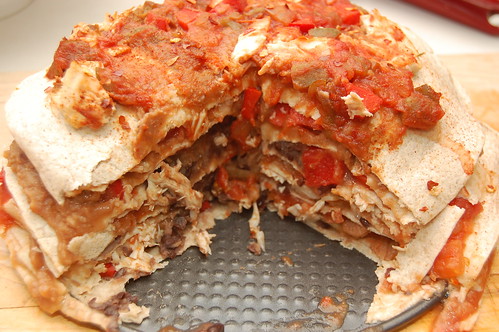
Seven tortilla layers total – I alternated layers of black beans and refried. I also included shredded chicken, diced red pepper, garlic, a combination of diced tomatoes and salsa, and the tiniest bit of cheese on each layer. I just included spice on the top layer, but feel free to mix the spice throughout. I also cooked mine in a springform pan to avoid any potential toppling problems, but I think that you could get away with using a pie plate or cake pan as well. My husband really loved this and kept making trips back to the kitchen for leftovers. Enjoy!

tortilla pie inside

Seven Layer Tortilla Pie

1/2 pound chicken breast, baked and shredded
1 can black beans, drained and mashed
1 can fat free refried beans
1/2 cup reduced fat cheddar cheese, grated fresh
3 cloves garlic
1 can diced tomatoes
1/2 cup salsa
1 red pepper, diced
7 flour tortillas
1/2 teaspoon red pepper flakes and cayenne pepper, optional

Preheat oven to 375F. Measure and prep ingredients and bake chicken (if looking for a way to bake the chicken, you can use my style found here. Because it’s only one half pound you will not need to bake it as long. Be sure to cut into the middle of the thickest piece to make sure it’s fully cooked. Shred with a fork). Combine diced tomatoes and salsa in the same bowl.

Lay one flour tortilla in the bottom of a springform pan (or pie dish or cake pan with high sides). Spread a thin layer of the mashed black beans over the tortilla. Follow with shredded chicken, garlic, red pepper, salsa mixture and sprinkle with cheese. Be a little careful near the edges so that your filling doesn’t spill out. Lay another tortilla over this and push down gently to level it. This time spread refried beans over the tortilla, then include other ingredients as before. This recipe makes just enough, so don’t make your “filling” too thick or you will run out. I was especially stingy with the cheese.

Continue to alternate layers. On very top layer, sprinkle remaining ingredients evenly along with 1/2 teaspoon of red pepper flakes and cayenne for some heat. Be sure to take the salsa mixture to the edges of the top tortilla so that the top does not dry out and become too crispy while baking.

Bake for 25 minutes. Serve in wedges.

Food Photography – Pinto Bean Chili

Happy photography day, loyal readers. Today’s photograph is one of my favorite vegetarian (and vegan) recipes: FatFree Vegan Kitchen’s pinto bean chili. I LOVE this dish. It’s nutritious, filling, low in calories and extremely delicious. I highly recommend it.

Pinto Bean Chili

Oat & Herb Baked Chicken

If you’re planning a wedding, have recently gotten married or just love weddings in general, then you’ve probably heard of a website called The Knot. The Knot is a spectacular place to find local vendors, get ideas for flowers, dresses, cakes and color combinations and to help out with planning and etiquette questions.

processing

I recently went to The Knot for the first time since my wedding in July 2008 to look up a friend’s wedding website. I was surprised to discover that when you log in after your wedding has passed, you’re redirected to a site called The Nest. The Nest features advice for married people – money tips, decorating your home and saving, love, beauty, babies and dinner recipes.

oat mixture

Of course I clicked first on the dinner recipe tab. It was pleasantly surprised by what I found. Many of the recipes on the site are designed to be relatively easy and healthy, and they’re geared towards serving two people.

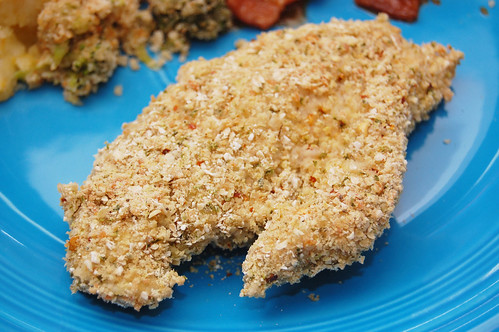
One of the recipes that caught my eye was, well, one of the less healthy ones, something called “Herb Oven-Fried Chicken.” What sparked my interest was that instead of using plain breadcrumbs or “Shake ‘n Bake” to lightly coat the chicken, this recipe called for oats! Let me make sure it’s clear – I love oats!

cutting chicken

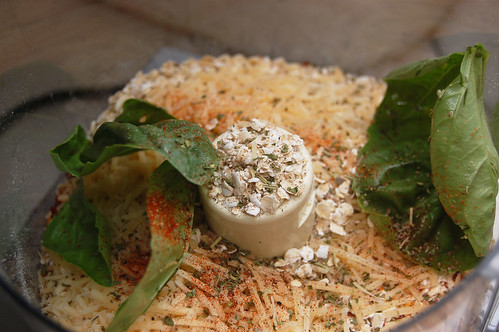
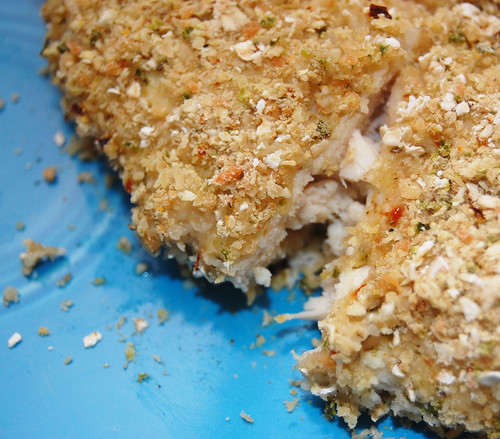
By pulsing the oats in a food processor, you get a fine powder that adds an interesting and wholesome taste to your chicken breasts. I added a lot more flavor to the coating by including more spices in the oat mixture. I also baked it in the oven (and removed a lot of the oil) instead of cooking it in a toaster oven. I don’t have a toaster oven, but even if I did trying to cook raw chicken in it sounds like an odd idea to me (even though apparently The Nest pulled this recipe from a book solely dedicated to cooking with a toaster oven, my question is “Why?” I understand not having a stand mixer or food processor, but why would you need a substitute for a conventional oven?).

My husband and I enjoyed this chicken with a side of mashed potatoes and mashed rutabaga and baked beans. It doesn’t taste like a typical breaded chicken; if you don’t like oats then you probably won’t like this. But I highly recommend this spicy and unique take on chicken breasts!

chicken breast

Oat & Herb Chicken

adapted from The Nest (who excerpted it from Lynn Alley’s The Gourmet Toaster Oven: Simple And Sophisticated Meals for the Busy Cook)

1/2 cup milk*
3 cloves garlic, minced
1 1/2 teaspoon salt
1/2 tablespoon oil
1 pound boneless, skinless chicken breasts
1 cup rolled oats (you can use Quaker Quick or Old-Fashioned, but not Instant)
1/2 teaspoon red pepper flakes, rosemary, Italian seasoning, black pepper, celery seed and paprika
1/2 cup grated Parmesan cheese
1/4 cup fresh basil leaves
1/2 teaspoon paprika

My 1 lb of chicken breast contained 3 medium chicken breasts. Cut chicken breasts in half longways. In a small bowl, combine chicken, buttermilk, garlic, 1/2 teaspoon of salt and oil. I refrigerated this marinade for about 5 hours, but do it for however long you can.

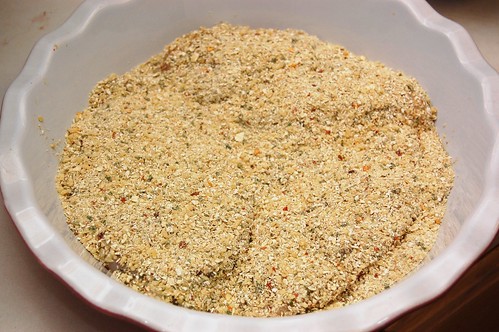
When ready to cook, preheat oven to 425F. Combine oats, red pepper flakes, the remaining teaspoon of salt, parmesan, basil, rosemary, Italian seasoning, black pepper, celery seed and paprika in your food processor. Pulse until the oats are mostly powdered. Spread oat mixture out on a plate. Shake the excess buttermilk off the chicken gently and lay both sides of the chicken in the mixture to thoroughly coat.

Place chicken in a shallow baking dish (I actually used a ceramic pie dish). Bake for about 15 minutes, depending on thickness of your meat. The crust should be a little crispy. Be sure to test for doneness by cutting into the thickest piece and ensuring that it’s bone white in the center. Remove chicken and serve with vegetable of your choice.

*Note about Milk – The original recipe called for buttermilk, but I used skim milk because that’s what I had on hand and it worked out fine. Buttermilk will give you more of an authentic fried chicken type taste, and next time I make this I’ll probably try out buttermilk. For my calorie-counting friends, give buttermilk a chance! Wikipedia says, “Buttermilk is lower in fat and calories than regular milk because the fat from buttermilk has already been removed to make butter. It is high in potassium, vitamin B12 and calcium.” Yum.