

Hope you enjoy my recreation of a favorite Snorg Tee in celebration of Easter this coming weekend. This one has always cracked me up, and I don’t mind a little cruelty to chocolate bunnies (mwhahah)!
They were very good models.. Mmmmm!
Hope you enjoy my recreation of a favorite Snorg Tee in celebration of Easter this coming weekend. This one has always cracked me up, and I don’t mind a little cruelty to chocolate bunnies (mwhahah)!
They were very good models.. Mmmmm!
Ever since I’ve learned the glory that is couscous, I’ve been trying to find ways to incorporate it into my meals. One of the ways I’ve been looking into is as a replacement (or complement) to rice; giving an old favorite a twist. That’s how I came up with today’s recipe.
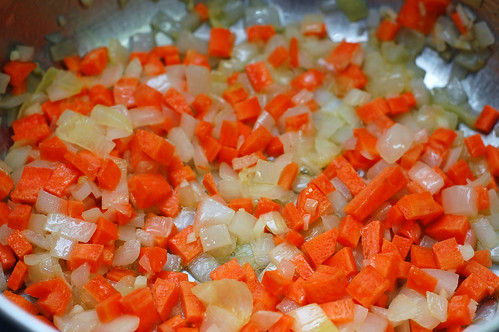
When I was in high school I worked at the local Arbys restaurant. It was close enough to walk (no car) and far less disgusting than the nearby McDonalds (which was quite disgusting). Oh, and we had a frozen custard station which was friggin’ awesome. One of the side dishes we sold with our rotisserie chicken was rice pilaf which was, for an uncultured high-schooler, quite tasty. It had small bits of vegetables and almond slivers. I decided to use this as my inspiration.
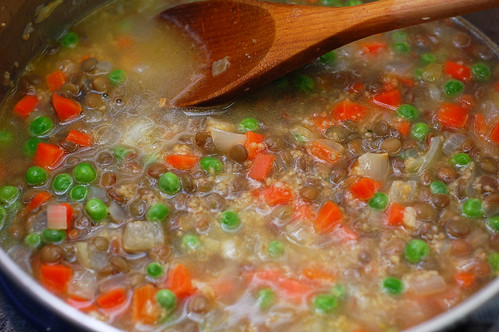
Pilaf is a dish in which rice is lighty sauted in butter or oil and often well-seasoned. I decided to go mild on the seasoning; relying instead on a high quality stock. This recipe can be easily modified per your seasoning or vegetable preferences, but I suggest giving it a shot as a complement to your main course.
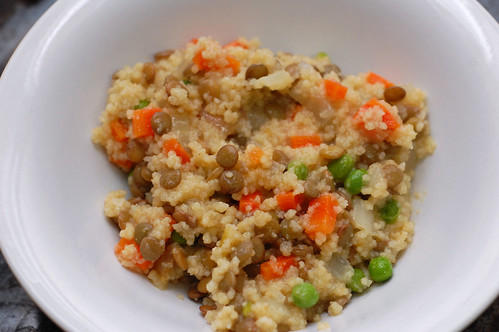
Couscous and Lentil Pilaf
Without a high quality stock to enhance the flavor, this dish will be very mild in taste. Consider spice alternatives.
2 tablespoons butter
1 small oinion; diced
1 clove garlic; minced
1 carrot; diced
1/2 cup green lentils
1/2 cup couscous
1 cup peas (if frozen, thawed)
1/4 teaspoon salt
1/4 teaspoon cumin
4 cups high quality stock
1/4 cup almond slivers
Bring the lentils to a boil in 1 1/2 cup of water and simmer for 12 minutes. Strain and set aside. While the lentils are cooking, lightly toast your almond slivers.
Melt the butter under medium-low heat and sweat the onion, garlic and carrots for 10 minutes; stirring occasionally. Add the lentils, couscous, peas, salt, cumin and stock and bring to a boil under medium-high heat. Reduce to low and cover, letting it simmer for 10 minutes. Turn off heat and leave on the burner uncovered until light and fluffy; approximately five minutes. Add your almonds and any additional salt to taste. Enjoy.
Groan – It’s hard to write this post when I’m still so full from dinner… four hours later! But if I had it to do over again, I’m sure I’d still wind up eating way too much.
My husband, Morgan, and I got back into town yesterday evening from a few long and difficult days. Thanks to everyone who sent good thoughts our way.


Getting back into the swing of things, my cooking/baking wish for the next week is that I’ll avoid baking at least until Easter because I indulged in way too many delicious and fattening things at northern bakeries (ever had Checkerboard Cake? We bought some after my dad exclaimed that he used to enjoy it from time to time while growing up. I had never had it before, and now you can bet I’ll be trying to make it soon).

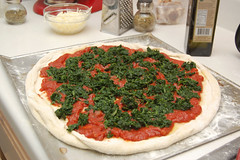
So today was mostly comprised of cleaning up the apartment, organizing for the week, grocery shopping and decompressing. The weather was gorgeous, and Morgan and I decided to pick up some pizza dough from the nearby Italian Store (I’ve mentioned here before that they have outstanding dough).

We bought ingredients for a spinach and mushroom pizza, but this time we made the sauce from scratch using my mom’s excellent marinara sauce recipe. It’s recently become an obsession of ours to make this sauce for spaghetti, chicken, pizza and anything that could possibly use marinara sauce.


I have to say this is our finest pizza yet. Making this sauce from scratch is so easy and probably less expensive than buying ready made sauce. We have leftover sauce, so we keep it in an air-tight container in the fridge; it should keep for the week. The spinach was also a great addition and doesn’t call a lot of attention to itself.

I’ll also repeat myself and say how you really need to find a local (non-chain) pizza shop in your area and try to buy a bag of dough. Waiting to try making your own pizza is just depriving yourself of some of the best pizza you’ll ever have!
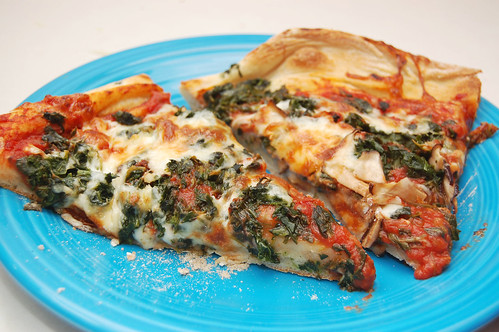
Spinach and Mushroom Pizza
1 16 oz bag of pizza dough
1 cup freshly shredded mozzarella cheese
1 package frozen spinach, cooked according to package instructions
1/2 cup sliced shiitake mushrooms
1 tablespoon olive oil
flour, to sprinkle on work surface
Heather-Ghost Baker’s Mom’s Marinara Sauce
1 tablespoon olive oil
1 clove garlic, minced
1/2 to 1 small onion, finely chopped
1 16 oz. can crushed tomatoes
1 6 oz. can tomato paste
3/4 tablespoons sugar
1 teaspoon basil
1 teaspoon oregano
3/4 teaspoon salt
For sauce – Add olive oil to a medium saucepan set to medium temperature. Add garlic and onion and cook until tender, about 5 minutes. Stir in crushed tomatoes and tomato paste and add remaining ingredients. Reduce heat to low; cover and cook for 30 minutes, until mixture is thickened. Stir occasionally. Makes about 3 cups of sauce.
In the meantime, preheat oven to 525 F and cook spinach according to package instructions in a small saucepan. Saute sliced mushrooms in a separate small pan for 2 to 3 minutes.
When sauce is just about done, flour a cookie sheet and roll out dough to a 16 inch circle. Drizzle olive oil over the dough. When sauce is done, pour and smooth sauce over pizza dough, followed by spinach, mushrooms and cheese.
Transfer cookie sheet to oven and cook for approximately 11 minutes (we use a pizza stone, so we preheat the oven with the pizza stone in the oven, then carefully transfer the uncooked pizza to the heated stone. It takes two of us to transfer the pizza without letting it fall apart, so proceed with caution if you go this route).
Let pizza cool for 2-3 minutes. Slice and serve!
If you’re working with lentils or other beans, you may sometimes notice that the instructions say, “rinse and pick over.”
The first time I encountered this I was baffled. I thought, “What am I picking over? Is there something bad in here?” Everything looked fine to me!
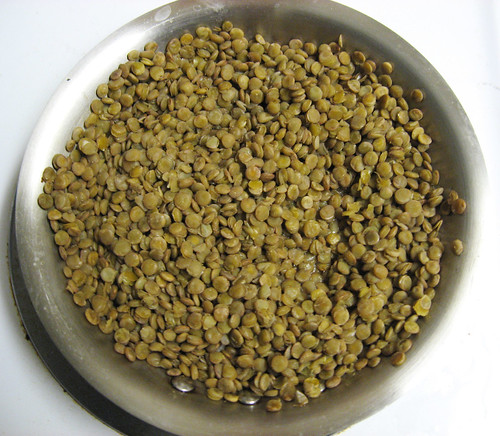
Sometimes in beans or lentils you might sometimes find a few little rocks that managed to sneak their way in. I know, it sounds crazy. I’ve actually never encountered one yet; I’ll have to ask the Chef Edwin, the lentil guru himself, how frequently this occurs.
While rinsing or after rinsing, try spreading out the lentils or beans, feel them and look at them. If you see something that looks off, just throw it away. The rest of the batch should be fine. You don’t need to be nervous about it, but do take a look – just thinking about biting down on a rock makes me cringe!
I started a new project at work this week and the change of pace has really been nice. In an attempt to hit the ground running and ramp up quickly I’ve been spending extra hours at the client site; which unfortunately leaves me a bit drained in the evenings. I’ve been without soup for lunch for far too long! Time to change that and introduce a new ingredient: wild rice.

Wild rice is a great change from your classic white or brown you’re probably more use to cooking with. Not only is it great for you (great source of protein, lysine and dietary fiber. also low in fat), but it’s got a great earthy nutty flavor to it. It’s hard to describe; it tastes “thick.” When cooked the rice “blossoms,” as the inside breaks out of its darker skin. Because of its thickness, it can take longer to cook (45+ minutes) and takes more water (four cups of water to one cup of rice).
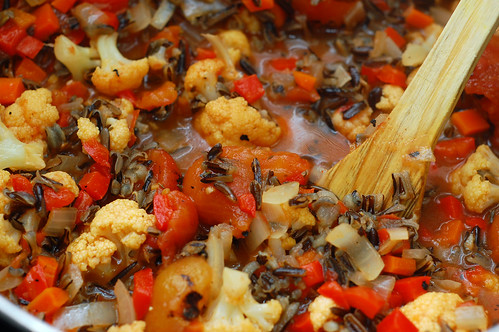
I wanted something that that said “comfort food;” a label I don’t often give to the healthier soups. At the same time I wanted to preserve the wild rice’s presence instead of it serving as a filler. I decided on it’s major accompaniment to be red bell pepper and fire roasted tomatoes and was very pleased with the result. The moderate use heavy cream keeps it relatively healthy while making it indulgent. I’ve had to use sheer force of will to save it for lunch. The only thing I’d change is possibly adding another pepper. Either way, this earns a spot on my favorite soup list. Let us know what you think!
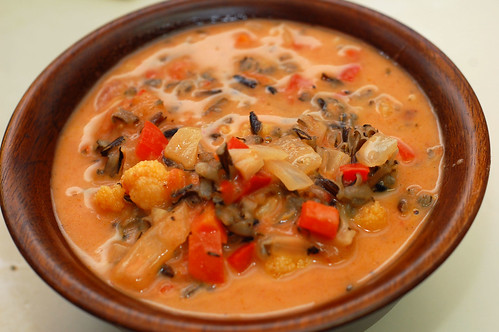
Creamy Red Bell Pepper Soup with Wild Rice
3 tablespoons oil
1 cup uncooked wild rice; rinsed and drained
1 yellow onion; diced
1 red bell pepper; diced
3 garlic cloves; minced
1 large carrot; diced
1 28oz can diced tomatoes
3 cups vegetable stock
8oz cauliflower; chopped into small florets
1/2 teaspoon paprika
1 teaspoon parsley
1/2 teaspoon thyme
1/2 to 1 cup combination of heavy cream and stock
Cook the rice per the package’s instructions; probably in four cups of lightly salted water for 45 minutes. Rice should be chewy but not crunchy. Remember we’ll be cooking it longer with the rest of the ingredients.
In a large pot, sweat the onion, bell pepper, garlic cloves and carrot in oil for 10 minutes. Add the can of tomatoes along with the rice, cauliflower, stock and spices. Simmer for 30 minutes allowing everything to mingle well. Add salt and pepper to taste. Remove from heat.
Now here’s where your tastes come in. You have two questions: how creamy and how thick? Start with at least 1/4 cup heavy cream and taste. If you want thick and lightly creamy, you’re done. If you want creamier, add more cream. If you want less thick add more stock. Either way, mix together and enjoy.
Hello, folks. I’m not feeling too chatty at the moment. Sadly my grandmother (my dad’s mom) passed away earlier this week. She lived a long life (over 90 years) and thankfully did not experience a debilitating and drawn out illness. My husband and I will be heading up north for the funeral and to be with family, so I’ll be unable to answer your comments and questions for a few days. You will, of course, have Chef Edwin available to answer all your DinnerCakes needs.
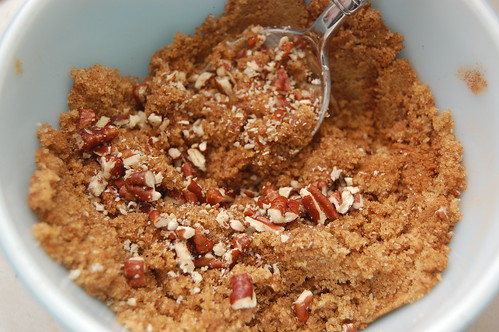
In times of stress I’m grateful that I can turn to baking to relax me; I can get into the rhythm and let stress (usually) melt away. I was able to squeeze in a crumb cake this week, inspired by a beautiful “big crumb coffee cake” found on Smitten Kitchen.
The Smitten recipe calls for a rhubarb filling that frankly made me a little nervous. I decided to replace it with a Cinnabon/cinnamon roll filling which worked out really well. It kept the cake moist (I’ve known some crumb cakes to be sadly dry) and gave it a little depth of flavor. I use the past tense because the cake is now gone.
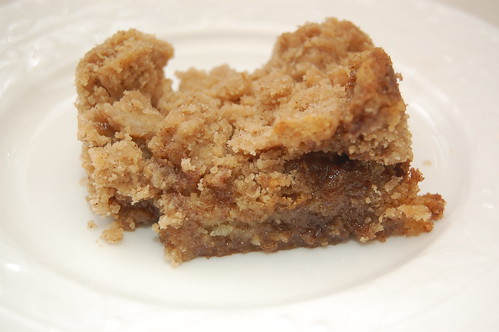
Cinnacrumb Cake
For the cake and big crumb recipe, please see Smitten Kitchen.
Leave out the rhubarb filling and replace it with the following –
Cinnabon/cinnamon roll filling
3/4 cup packed light brown sugar
1 tablespoon ground cinnamon
Pinch salt
1 1/2 tablespoons unsalted butter, melted
1/8 tsp nutmeg
1/8 tsp cloves
dash allspice
1 tablespoon ground pecans
Follow Smitten’s instructions for the cake. Pour half the batter into a prepared 8-inch-square baking pan (I lined mine with parchment paper). Combine the cinnamon filling ingredients and sprinkle over the batter and try to spread it out evenly. Using a toothpick, marble the cinnamon mixture into the batter. Finish by pouring the rest of the batter on top and sprinkle with crumbs in large chunks.
On my cake, the cinnamon mixture bubbled up over top of the crumbs a little bit in one corner. I was fine with this, but if it will bother you then you may want to cut the cinnamon filling in half.
Bake for about 50 minutes on 325F; a toothpick inserted into the center should come out clean.
Enjoy.
A friend of mine had a birthday celebration Friday night so a group of us got together at Cactus Cantina in NW to celebrate. I’m a firm believer that no one should go without a birthday cake so I took it upon myself to fill this need. Heather supplied me with a recipe from one of her favorite cookbooks: CakeLove: How to Bake Cakes from Scratch

I baked this chocolate pound cake pretty much verbatim from the recipe, save a few “realistic” adjustments. The author definitely likes his unique ingredients (sorry, I don’t have potato starch). I topped it with a raspberry chocolate ganache I whipped up and the cake was a success. Mmm…
If you put a variety pack of cookies in front of me, 95% of the time I would not choose an all chocolate cookie. This may be surprising, but I gave up on chocolate cookies after several attempts where I couldn’t even taste the chocolate.

I thought up this recipe one night while lying in bed, after one of my battles with black bean brownies. I was thinking about other ways to use black beans instead of flour and agave syrup instead of sugar. I was also thinking about a batch of Tastespotting photos I’d oogled recently that boasted salty and sweet desserts.

The recipe below is a little different from what I’d originally planned (no black beans and no agave… it’s probably for the best!), but it turned out exactly the way I was hoping it would. What’s the difference? For starters, I greatly prefer the taste of baked goods made with unsweetened cocoa instead of melted chocolate. It captures the taste of the chocolate more and it makes the final product less dense.

These cookies are slightly crispy on the outside and soft and chewy on the inside. The chocolate chips makes them unmistakably dark and chocolatey, and the pistachios add just a hint of saltiness. The instant coffee deepens the chocolate flavor without being particularly noticeable.
I had to take these to work the day after I made them because it quickly became clear that I couldn’t handle having them in the apartment. Whoops?
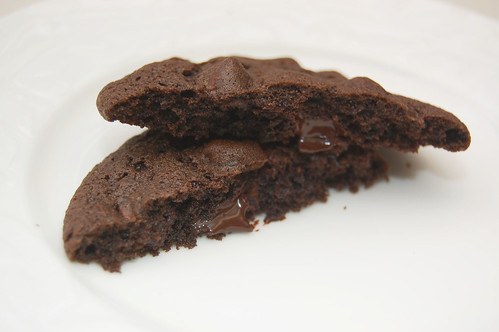
Salty & Sweet – Chocolate Cookies with Pistachios
1 stick unsalted butter, room temperature
1/8 cup granulated sugar
3/4 cups brown sugar
1 cup all purpose unbleached flour
2 ounces unsweetened cocoa (I used Ghirardelli)
1/8 (granulated) instant coffee
1/8 teaspoon kosher salt
1/2 teaspoon baking soda
1 egg
1 egg yolk
1 tablespoon milk
1 cup semisweet chocolate chips (again, I used Ghirardelli)
1/2 cup pistachio kernels
Preheat oven to 375F. Line two baking sheets with parchment paper.
Combine flour, cocoa, instant coffee, salt and baking soda in a medium bowl. Set aside.
In the bowl of a stand mixer using a paddle attachment (or using electric beaters if you don’t have a stand mixer), combine butter and sugars. When combined, add eggs one at a time. Slowly beat in the flour mixture, adding the milk at the halfway point. Stir in pistachios and chocolate chips. The mixture will resemble thick brownie batter.
Scoop batter using a tablespoon measuring spoon and, with the assistance of another spoon, drop rounded balls onto a parchment lined baking sheet approximately two inches apart. Bake for 15 minutes.
Makes approximately 2 dozen cookies.
A friend of mine recently requested more tofu recipes and since I become giddy as a school girl when I receive requests, I decided to accommodate immediately. I also had an extremely late Saturday night and there’s something about the oily feel of some stir fries that just felt so right on Sunday.
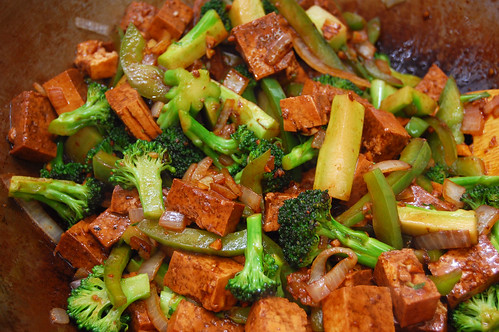
On the rare times I cook with tofu it’s often in stir-fries. It’s easy to add and since tofu doesn’t really have much of a flavor on its own; the multitude of ingredients has the potential to make a real impact on the stuff. One of the key things to note about tofu is you often want to marinate it prior to cooking; ensuring that whatever flavor you’re shooting for really “sticks” with it. Of course there’s no universal time to go by, but 30 minutes is a good guideline.
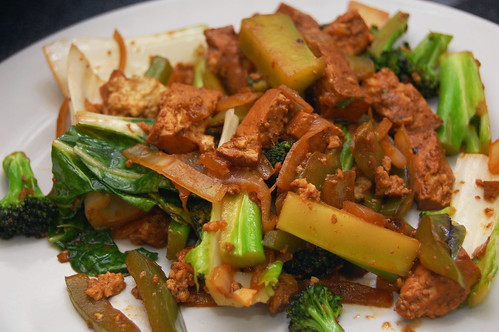
Got any good tofu recipes? Send em along!
Tofu Stir-Fry with Broccoli and Bok Choy
1 1/4 pound firm tofu
3 tablespoon sesame oil
2 tablespoon dark soy sauce
2 tablespoon chili oil
1 tablespoon ginger; minced
2 garlic cloves; minced
1 teaspoon agave nectar
1/4 teaspoon salt
3 tablespoons peanut oil
1 large yellow onion; chopped
1 green bell pepper; sliced
10oz broccoli; chopped into roughly equal sizes (cut large florets in half)
1 head bok choy; chopped
Cut the tofu into 3/4 inch pieces (roughly) and a wide container; preferably tupperware. Mix the oils, soy sauce, ginger, garlic, agave and salt and coat your tofu with it. The bottom layer should be partially covered. Marinate for fifteen minutes then rotate the tofu so the top layer is marinating. If using tupperware, simply lid and turn upside-down. Marinate for another fifteen minutes.
Heat your wok to high and add your oil. Swish around and add your onion and bell pepper; stir-frying for approximately 3-4 minutes or until onions become translucent. Add the broccoli and stir-fry for another 3-4 minutes until broccoli begins to soften slightly. Add your tofu with marinade and continue cooking for five minutes; until tofu is hot. Add your bok choy and (yet again) stir fry until leaves begin to wilt. Serve immediately and enjoy.
Continuing on from an earlier Kitchen Tips, today we’ll talk about roasting. Whether working with cuts of meat or vegetables the basics are the same. Roasting can considered a style of baking because, just like baking, your food is cooked by being subjected to heat on all sides from hot air.
Roasting is almost always done uncovered, in a shallow pan and with little to no water. Why? Browning. These settings allow your food to keep (relatively) dry to brown and crisp. Adding water can result in more of a steaming effect which you don’t really want.
With vegetables (and I suppose meats as well), you want to keep into consideration spacing. As your vegetables cook they will release their moisture. If you crowd your vegetables they will essentially steam/moisturize each other; giving less browning (there are some exceptions to this, but not many). The spacing depends on the situation, but I recommend starting with half an inch and exploring from there. Remember, pans are cheap, but good food is priceless!


