Food Photography – The Story of My Mom's Birthday Cake

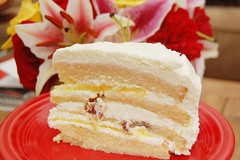
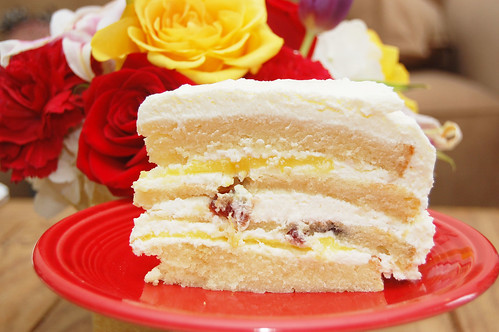
Well, I promised an update on how my mom’s birthday cake turned out, and here it is! I made a cranberry-lemon pound cake with lemon curd filling and Italian meringue lemon buttercream frosting.

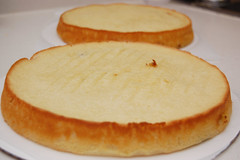
pound cakelayers

The cake and buttercream are from, my favorite, CakeLove: How to Bake Cakes from Scratch, and the lemon curd is from Martha Stewart (the CakeLove lemon curd recipe called for more egg yolks and butter than any living thing should ever ingest).

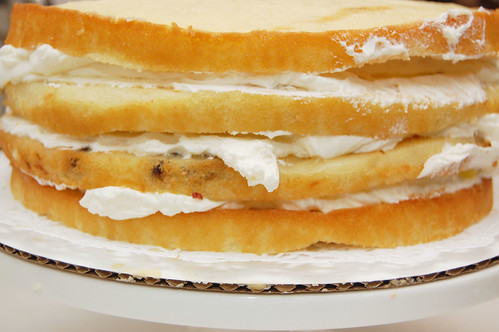
stacked

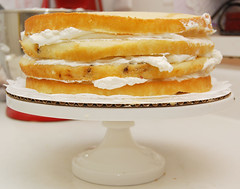
I was very pleased with how everything turned out and how it fit together. With a little help from Wilton’s 10-inch cake circles, my layers sliced and stacked without any difficulty.

layers on cake standfrosting

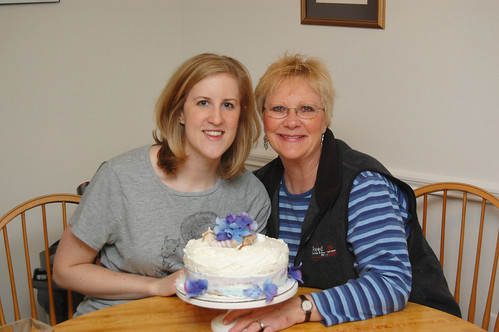
My mom arrived just as I was putting the finishing touches on the cake decor; I didn’t even have time to change out of my fat squirrel t-shirt… I hope it gives you a good laugh!

heathermombday

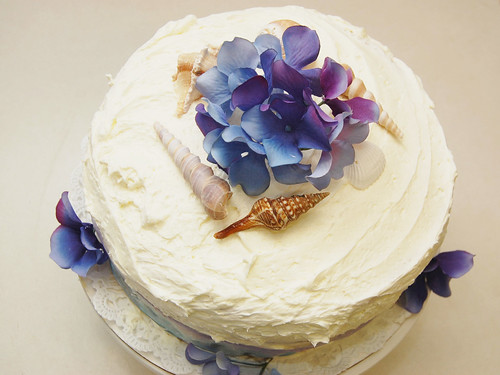
I was especially happy with the decorations. Remember I told you that I actually drew specs? My mom loves the ocean, so I wanted to use a few sea shells as tastefully as possible.

topcake top

She also likes hydrangea, which I think happen to look very beautiful even when they’re fake.

bdaycake

I did unfortunately learn that I don’t care for lemon curd at all… not even a little bit. I scraped it off easily enough on my slice and enjoyed the rest.

top of cakecake slice with flowers

It was extremely rich – one slice and you’re set for life! Next time I think I’ll try something a little lighter. You really don’t want to know just how many sticks of butter and individual eggs were sacrificed in the making of this cake… really, it’s better this way.

cake slice

Warm and Satisfying Sweet Potato Biscuits

Most summers, my family tries to sneak in at least a brief vacation to Nags Heads, NC. Though Nags Head is gradually becoming more built up, luckily some things haven’t changed.

cooked biscuits

Our favorite and most consistent restaurant is Kelly’s Restaurant and Tavern in the Outer Banks; if you haven’t been then you’re really missing something special. It’s a nicer establishment than most (ie, expensive), but it’s well worth the expense. Usually when we go I always order the flounder, but it’s incredibly difficult to restrain myself from filling up on their signature Sweet Potato Biscuits.

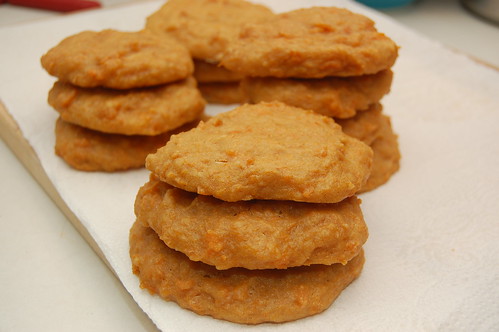
These biscuits aren’t beauty pageant winners – they stay fairly flat and don’t rise in the oven. They aren’t the light, flaky, buttery kind, in fact they’re quite dense and heavy. What makes them so great? They smell heavenly, they’re very unique, they’re filled with sweet potatoes which are actually good for you and they stick to the roof of your mouth. Yum!

sweet potato biscuits

Kelly’s will give you the Sweet Potato Biscuit recipe if you ask for it, but you’ll be surprised to learn that they’re made using Bisquick. While this isn’t necessarily a bad thing, I prefer making it all from scratch – which really isn’t much more difficult and you’ll likely have all of the ingredients already on hand.

I read a few different biscuit recipes to come up with a combination of ingredients that I thought could replace the Bisquick while maintaining the great taste I’m used to. I made these Friday night, just in time for the series finale of Battlestar Galactica (if you happened to watch this, what did you think? my husband joked, “the moral of 4 seasons: robots will probably kill you”). We scarfed a few of these down until our stomaches hurt (hey, I warned you they were dense). These are best enjoyed warm.

sweet potato biscuits

Sweet Potato Biscuits

1 pound sweet potatoes (approximately 2 sweet potatoes)
1 cup light brown sugar
1/4 cup milk (I used skim)
2 cups all-purpose unbleached flour
2 teaspoons baking powder
1/2 teaspoon baking soda
1 teaspoon salt
1 teaspoon sugar
4 tablespoons unsalted butter

Preheat oven to 350 F.

Peel sweet potatoes, then cut into 2 inch pieces and boil until there is very little resistance when pierced with a fork. Mash sweet potatoes using a masher or the back of a fork. Add all remaining ingredients and mix well.

Using two spoons, drop biscuit mixture onto a parchment paper lined cookie sheet; biscuits should be approximately 2 1/2 inches wide and 1/2 inch thick.

Bake for 16-18 minutes. The moistness of the mixture makes it so that these biscuits do not rise much. Keep an eye on them so that they don’t overcook. Biscuits are ready when they have set and they are slightly firm to the touch.

Makes about 1 1/2 dozen biscuits.

Note: Be sure that these are completely cooled before putting them away, if there are any left. Do not store in an airtight container because the tops will get “sticky.”

Kitchen Tips – Beating Egg Whites

My biggest pet peeve with cookbooks is when they throw around undefined terminology, leave too much to the imagination and have no photos accompanying recipes.

If you’re relatively new to baking and a recipe advises you to beat egg whites until they’re “stiff white peaks,” you may find yourself wondering what in the world this means.

First separate the egg whites from the yolks. Let the whites get to about room temperature, or at least not quite as cold. For best results, you will need the assistance of an electric mixer or stand mixer – your arms likely don’t have the stamina!

With your electric or stand mixer, beat the egg whites on high speed with a whisk attachment for several minutes. Do not rush the process. You’ll know you have “stiff white peaks” when the egg whites resemble marshmallow fluff. Your egg whites should also triple in volume. Follow your recipe instructions when adding other ingredients such as sugar.

Patience and beating at high speed is key!

white peaks

Seven Layer Tortilla Pie

I have to be honest with you, Internet. Right now I am angrily biting the nail polish off my nails. I have extremely breakable nails, so I try to keep clear nail polish on them; you know, the super thick stuff. This stuff is also great fun to peel off when irritable. Come on, you know you’ve done it before… please?

red peppermashed black beans

I had big plans to bake something to bring to work tomorrow for some upcoming and recently passed birthdays, and I needed it to be flourless. But at this point I’m feeling like God made flour for a reason, and we just shouldn’t fight it.
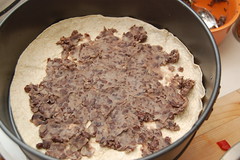
layer onelayer one with black beans

I know, I can’t even believe it myself, but I tried those cursed black bean brownies again. No changes or alterations, just completely by the book. I was low on agave syrup, so I used half agave and half honey. They came out tasting so strongly of honey that it’s practically oozing from them. Don’t worry, my curiosity about these things has been sated. I’m burning the recipe – never again!
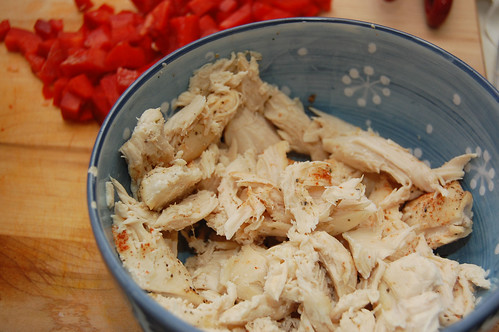
shredded chicken

Next I tried a flourless chocolate cake. The recipe stressed to gently fold in the beaten egg whites to the melted chocolate. Maybe I was too careful, because now it just seems completely bland.

Ghost failures twice in one night!!!
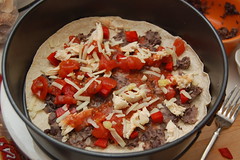
layer one completelayer two

I don’t even want to think about baking anymore right now. Let’s talk about dinner, okay? Dinner, unlike tonight’s stupid desserts (grrr!), turned out quite well.
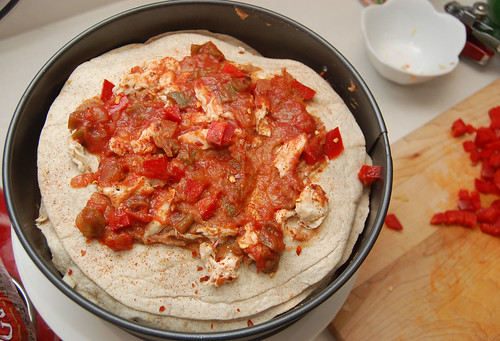
top layer

A few years ago I tore a recipe out of a magazine for some kind of tortilla pie. The tortillas were stacked high and stuffed with cheese and black beans; it looked great. Unfortunately, I lost this recipe before ever getting to try it. So instead I tried to create something similar but with less cheese and more beans.
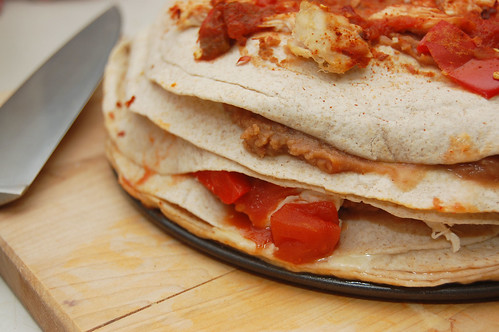
tortilla pie

Seven tortilla layers total – I alternated layers of black beans and refried. I also included shredded chicken, diced red pepper, garlic, a combination of diced tomatoes and salsa, and the tiniest bit of cheese on each layer. I just included spice on the top layer, but feel free to mix the spice throughout. I also cooked mine in a springform pan to avoid any potential toppling problems, but I think that you could get away with using a pie plate or cake pan as well. My husband really loved this and kept making trips back to the kitchen for leftovers. Enjoy!
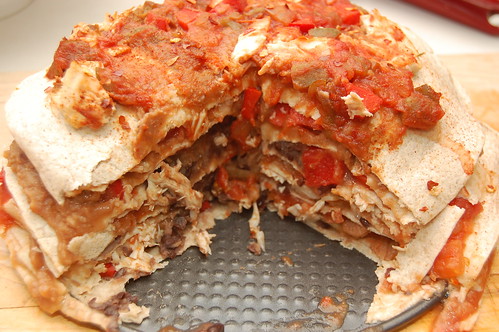
tortilla pie inside

Seven Layer Tortilla Pie

1/2 pound chicken breast, baked and shredded
1 can black beans, drained and mashed
1 can fat free refried beans
1/2 cup reduced fat cheddar cheese, grated fresh
3 cloves garlic
1 can diced tomatoes
1/2 cup salsa
1 red pepper, diced
7 flour tortillas
1/2 teaspoon red pepper flakes and cayenne pepper, optional

Preheat oven to 375F. Measure and prep ingredients and bake chicken (if looking for a way to bake the chicken, you can use my style found here. Because it’s only one half pound you will not need to bake it as long. Be sure to cut into the middle of the thickest piece to make sure it’s fully cooked. Shred with a fork). Combine diced tomatoes and salsa in the same bowl.

Lay one flour tortilla in the bottom of a springform pan (or pie dish or cake pan with high sides). Spread a thin layer of the mashed black beans over the tortilla. Follow with shredded chicken, garlic, red pepper, salsa mixture and sprinkle with cheese. Be a little careful near the edges so that your filling doesn’t spill out. Lay another tortilla over this and push down gently to level it. This time spread refried beans over the tortilla, then include other ingredients as before. This recipe makes just enough, so don’t make your “filling” too thick or you will run out. I was especially stingy with the cheese.

Continue to alternate layers. On very top layer, sprinkle remaining ingredients evenly along with 1/2 teaspoon of red pepper flakes and cayenne for some heat. Be sure to take the salsa mixture to the edges of the top tortilla so that the top does not dry out and become too crispy while baking.

Bake for 25 minutes. Serve in wedges.

Oat & Herb Baked Chicken

If you’re planning a wedding, have recently gotten married or just love weddings in general, then you’ve probably heard of a website called The Knot. The Knot is a spectacular place to find local vendors, get ideas for flowers, dresses, cakes and color combinations and to help out with planning and etiquette questions.

processing

I recently went to The Knot for the first time since my wedding in July 2008 to look up a friend’s wedding website. I was surprised to discover that when you log in after your wedding has passed, you’re redirected to a site called The Nest. The Nest features advice for married people – money tips, decorating your home and saving, love, beauty, babies and dinner recipes.

oat mixture

Of course I clicked first on the dinner recipe tab. It was pleasantly surprised by what I found. Many of the recipes on the site are designed to be relatively easy and healthy, and they’re geared towards serving two people.

One of the recipes that caught my eye was, well, one of the less healthy ones, something called “Herb Oven-Fried Chicken.” What sparked my interest was that instead of using plain breadcrumbs or “Shake ‘n Bake” to lightly coat the chicken, this recipe called for oats! Let me make sure it’s clear – I love oats!

cutting chicken

By pulsing the oats in a food processor, you get a fine powder that adds an interesting and wholesome taste to your chicken breasts. I added a lot more flavor to the coating by including more spices in the oat mixture. I also baked it in the oven (and removed a lot of the oil) instead of cooking it in a toaster oven. I don’t have a toaster oven, but even if I did trying to cook raw chicken in it sounds like an odd idea to me (even though apparently The Nest pulled this recipe from a book solely dedicated to cooking with a toaster oven, my question is “Why?” I understand not having a stand mixer or food processor, but why would you need a substitute for a conventional oven?).

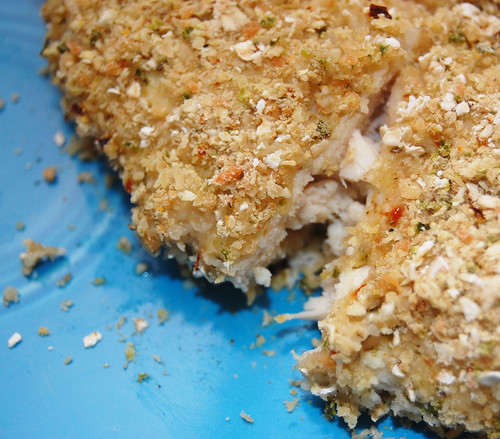
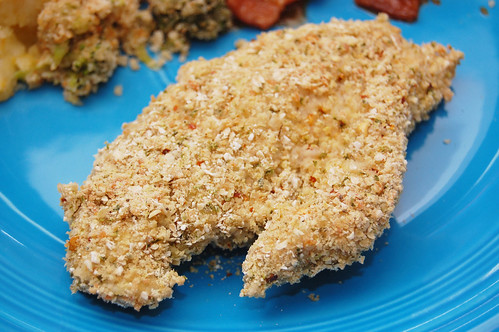
My husband and I enjoyed this chicken with a side of mashed potatoes and mashed rutabaga and baked beans. It doesn’t taste like a typical breaded chicken; if you don’t like oats then you probably won’t like this. But I highly recommend this spicy and unique take on chicken breasts!

chicken breast

Oat & Herb Chicken

adapted from The Nest (who excerpted it from Lynn Alley’s The Gourmet Toaster Oven: Simple And Sophisticated Meals for the Busy Cook)

1/2 cup milk*
3 cloves garlic, minced
1 1/2 teaspoon salt
1/2 tablespoon oil
1 pound boneless, skinless chicken breasts
1 cup rolled oats (you can use Quaker Quick or Old-Fashioned, but not Instant)
1/2 teaspoon red pepper flakes, rosemary, Italian seasoning, black pepper, celery seed and paprika
1/2 cup grated Parmesan cheese
1/4 cup fresh basil leaves
1/2 teaspoon paprika

My 1 lb of chicken breast contained 3 medium chicken breasts. Cut chicken breasts in half longways. In a small bowl, combine chicken, buttermilk, garlic, 1/2 teaspoon of salt and oil. I refrigerated this marinade for about 5 hours, but do it for however long you can.

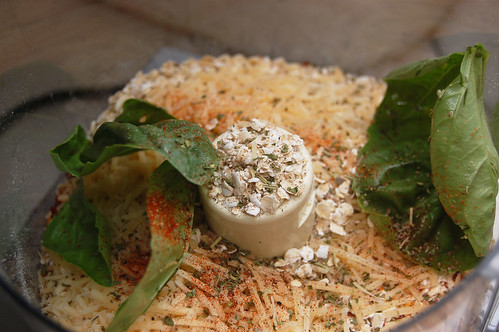
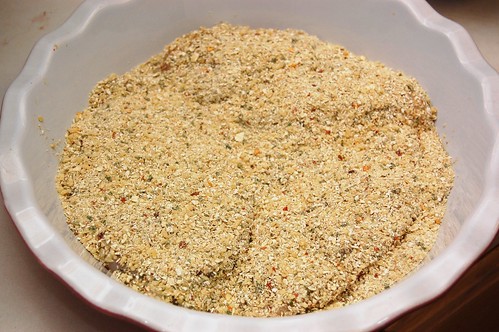
When ready to cook, preheat oven to 425F. Combine oats, red pepper flakes, the remaining teaspoon of salt, parmesan, basil, rosemary, Italian seasoning, black pepper, celery seed and paprika in your food processor. Pulse until the oats are mostly powdered. Spread oat mixture out on a plate. Shake the excess buttermilk off the chicken gently and lay both sides of the chicken in the mixture to thoroughly coat.

Place chicken in a shallow baking dish (I actually used a ceramic pie dish). Bake for about 15 minutes, depending on thickness of your meat. The crust should be a little crispy. Be sure to test for doneness by cutting into the thickest piece and ensuring that it’s bone white in the center. Remove chicken and serve with vegetable of your choice.

*Note about Milk – The original recipe called for buttermilk, but I used skim milk because that’s what I had on hand and it worked out fine. Buttermilk will give you more of an authentic fried chicken type taste, and next time I make this I’ll probably try out buttermilk. For my calorie-counting friends, give buttermilk a chance! Wikipedia says, “Buttermilk is lower in fat and calories than regular milk because the fat from buttermilk has already been removed to make butter. It is high in potassium, vitamin B12 and calcium.” Yum.

D’oh! As I started to type I noticed that my hand felt sticky. I looked down only to find that my wedding ring is covered in cake! This is a pretty typical day in the life of Ghost Baker… actually this is a good day – normally if cake’s involved it’s probably also squished into my clothes or in my hair.

fermented black beans

The reason for today’s mess is that I’m working on a fairly detailed birthday cake for my mom for this weekend. I’ve even drawn specs for the cake to compare what different decorations might look like. We always want to impress our moms, right? Please keep your fingers crossed for me, and I’ll let you know how it goes!

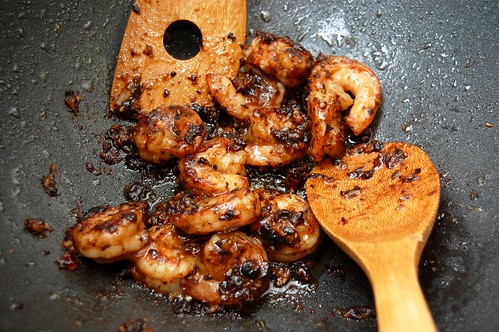
Today’s recipe, however, features dinner, not cake. I was given Martha Stewart’s Cooking School: Lessons and Recipes for the Home Cook for Christmas (are you sensing a pattern? I was lucky enough to receive many excellent cookbooks!). Though I’d flipped through the book and oogled things several times before, this was the first time I tried a recipe. I was drawn to Martha’s “Stir-Fried Shrimp with Black Bean Sauce.”

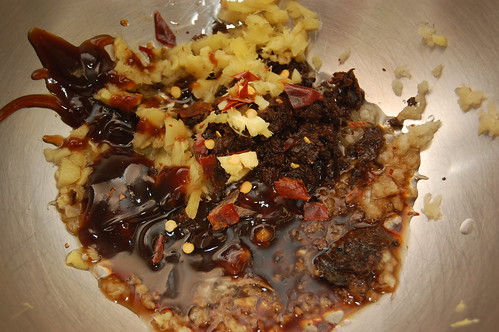
black bean sauce

This recipe does require a trip to your local Asian grocery store, but if you haven’t been to one before consider this your special invitation! You can find great deals on certain things at Asian grocery stores (rice in bulk, various sauces, etc).

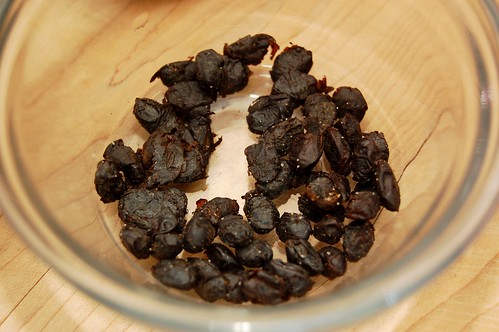
Let me warn you that fermented black beans smell a bit strong, but they’re just soybeans that have been preserved in salt. They are not the same thing as typical black beans. They give the dish a distinct flavor. If you like Asian food then you will likely enjoy this dish.

This would also work really well with tofu – either replacing the shrimp with tofu or adding tofu in with the shrimp. I didn’t alter Martha’s recipe too much, but I did try to make things a little simpler and take the edge off the salty black beans. I eliminated the soy sauce and scallions and added a little more hoisin sauce. If you try this with tofu, please let me know how it goes! Aside from a trip to the Asian market, this dish comes together very quickly and requires little prep.

shrimp with black bean sauce

Stir-fried Shrimp with Fermented Black Bean Sauce
adapted from Martha Stewart’s Cooking School: Lessons and Recipes for the Home Cook
serves 2

5 cloves garlic, minced
2 teaspoon peanut oil
1 tablespoon fermented black beans, rinsed and crushed with the back of a spoon (found in Asian market in a small, usually clear bag)
1 tablespoon fresh ginger root, minced (be sure to lightly peel the papery covering off)
1 tablespoon Chinese cooking wine (found in Asian market, or if you have to you can substitute dry sherry or white wine)
3 teaspoons hoisin sauce (found in Asian market, or the international food section of your grocery store)
1 teaspoon red pepper flakes
12 medium frozen shrimp, peeled and dethawed under cold running water
1/2 tablespoon cornstarch
1/2 cup white rice, cooked in a rice cooker or according to package instructions

In a medium bowl, whisk together garlic, peanut oil, black beans (don’t forget to mash them first with the back of your spoon), ginger, Chinese wine, hoisin sauce and red pepper flakes. Set aside.

Heat wok on medium high until it sizzles when you sprinkle a few drops of water on it. Add oil to the wok (never add oil to an unheated wok… remember what my Chinese cooking instruction said, “hot wok, cold oil”). Right before adding the shrimp to the wok, toss it with the cornstarch to coat it. Add shrimp to the wok, count to 5 and then press down on the shrimp with your wok utensil for a few seconds to sear it. Stir it quickly a few times, then let it sit for another few seconds. Continue this pattern until your shrimp turn pink and curl up, just another minute or two. Shrimp cook quickly. Pour in the sauce mixture and turn the heat up on the wok. Cook for just under a minute without stirring to let the flavor lock in, then stir before serving to coat.

Serve shrimp immediately over rice.

Food Photography – Braised Pork with Clams, Mariner's Style

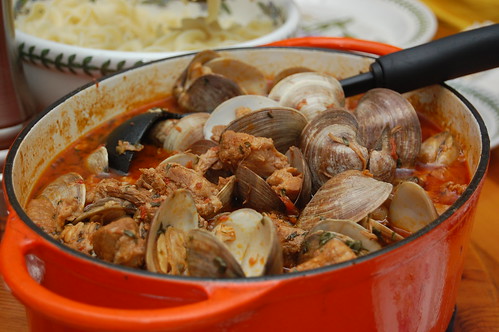
Braised Pork with Clams, Mariner's Style (Portugal)

(Pictured: Emeril’s recipe for Braised Pork with Clams, Mariner’s Style (Portugal), cooked by my father-in-law for dinner on Saturday night and served over pasta. Enjoying this awesome and unique dish with just a bit of bite made adding a Dutch Oven to my wish-list a top priority.)

Dessert for Breakfast – Maple & Brown Sugar Oatmeal Ice Cream

Hello, hello! If you were on the east coast this weekend, then you enjoyed some incredibly gorgeous and mild weather. I was in Richmond celebrating some birthdays, and it was a little disconcerting to experience almost 80 degree weather in the same city that saw 11 inches of snow earlier in the week.

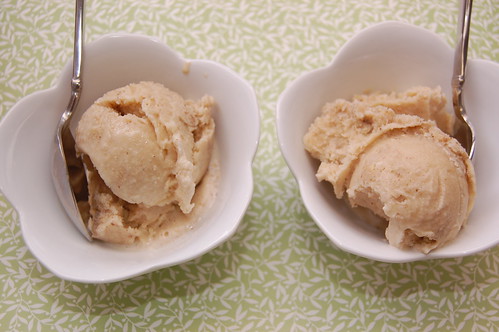
Maple & Brown Sugar Oatmeal Ice Cream

In any event, the return of the sun made me crave a cool and creamy treat – nothing that a little dessert for breakfast couldn’t fix!

I absolutely love maple & brown sugar oatmeal, and I don’t think I’m alone. I remember in college when I was an RA I set up a snack station in the study lounge during exam week; the maple & brown sugar oatmeal all disappeared over night.

Maple & Brown Sugar Oatmeal Ice Cream

So it occurred to me to try making Maple & Brown Sugar Oatmeal Ice Cream, inspired by my favorite ice cream recipe book, The Ultimate Ice Cream Book: Over 500 Ice Creams, Sorbets, Granitas, Drinks, And More by Bruce Weinstein. You will need an ice cream machine for this recipe. You can actually buy some fairly decent yet inexpensive ones these days; I own a Deni that is probably 6 or 7 years old at this point.

It does have a bit of a chewy consistency because of the oatmeal. If you’d like it to be less noticeable then you can use Quick Quaker Oats (not instant) instead of Quaker Old-Fashioned Oats. To get that maple taste I used pure maple syrup, feel free to use your favorite brand. It’s just enough to add sweetness, without being overpowering.

Also, because I try to lighten the fat content of things wherever possible, I used light cream instead of heavy cream. Most great custard recipes call for heavy cream, and if you’re making this ice cream for guests or to impress then you’ll probably just want to use heavy cream as well. Every time I use light cream it just doesn’t freeze as well in the ice cream machine, and I wind up having to freeze it overnight in a separate container so that it’s not soupy. I don’t mind doing this but it can be a hassle, and of course it delays the immediate gratification of enjoying the ice cream right out of the machine.* Good luck!

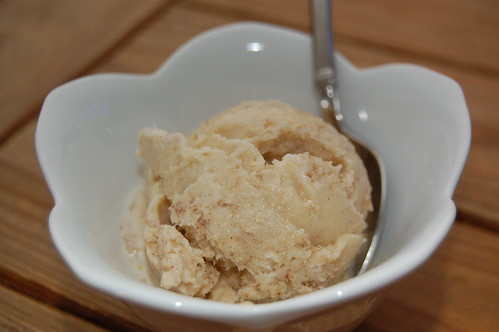
Maple & Brown Sugar Oatmeal Ice Cream

Maple & Brown Sugar Oatmeal Ice Cream
inspired by Bruce Weinstein

3/4 cup brown sugar
3 large egg yolks
2 cups skim milk
1 1/2 cups roll oats (not instant)
1/2 teaspoon salt
1/2 teaspoon ground cinnamon
1 1/2 cups light cream*
2 tablespoons pure maple syrup

In a medium bowl, beat sugar and egg yolks until thickened. Set aside.

Bring the milk to a low boil in a medium saucepan. Add oats, salt and cinnamon. Reduce the heat and simmer for approximately 10 minutes, stirring continuously until the oatmeal is thick and creamy (if you taste it at this point you’ll think it’s too salty… but don’t worry, it all comes together). Slowly beat the hot oatmeal into the eggs and sugar (this will kill any harmful bacteria present in the eggs). All the mixture to cool slightly, then stir in the cream. Cover and chill or refrigerate overnight.

Once chilled, stir the mixture into your ice cream machine according to the manufacturer’s instructions. When finished, the ice cream will still be very soft. Transfer to a freezer-safe container (I usually use corningware or a covered glass bowl) and freeze overnight. Before serving, let it sit out for three minutes so that it’s easier to spoon the ice cream into your favorite bowl.

*Update: Hello, everyone. I received a few questions about light cream versus heavy cream. As you might guess, heavy cream has a higher butterfat content than light cream. This higher fat content lends itself to thickening and increasing in volume. Heavy cream can also hold its form a little better for pastries or cheesecakes. Substituting light cream for heavy cream in something like cheesecake will probably not work out well. I noted above that substituting light cream for heavy, as I did in this recipe, really doesn’t work well in ice cream machines and so you need to do extra freezing to harden the ice cream. If you choose to use light cream, make sure you plan ahead to allow plenty of time for freezing.

Who Needs Scallions? Mashed Potatoes and Rutabaga

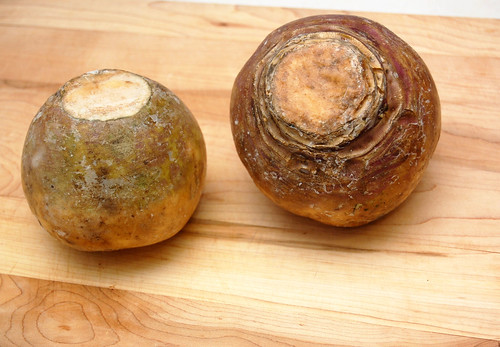
Two dinner posts in one week instead of dessert? This is Ghost Baker blasphemy! And I picked rutabaga to work with; such a bizarre looking vegetable. Maybe hitting our 100th DinnerCakes post this week has made me loopy.

rutabagas

Don’t worry, I’ve just been cooking a lot lately and trying new things… and thankfully they seem to be working out well! Weight loss and weekly baking weren’t really fitting together, though I believe Chef Edwin got a good laugh at my dreams of a pound cake diet (which he sarcastically termed my “pound diet”).

My mother-in-law got me a subscription to Food Network Magazine for Christmas which I have already toyed with before here. This was a really cool gift because now I get great, seasonal recipes delivered directly to my door (er, mail slot). Today’s recipe was inspired by the Nov/Dec 2008 issue featuring some fancy potato recipes.

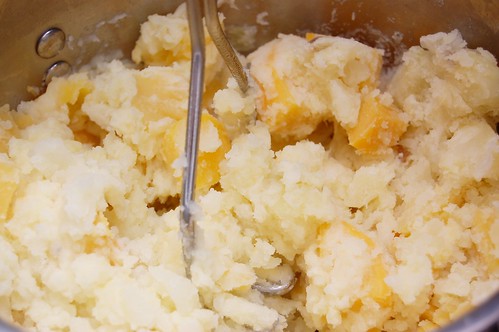
mashing

The original recipe called for a few things that I thought were a little unnecessary for my purposes (a weeknight side dish). And my husband quickly vetoed my quest for fresh parsley and scallions in the grocery store stating incredulously, “Who has ever eaten something and said it needs more scallions!?”

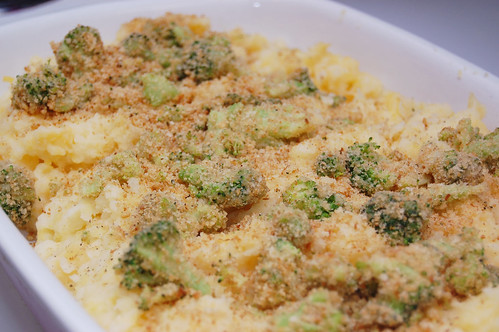
So here we are! I took out some of the “fluff,” used basic Russet potatoes instead of Yukon Gold and added broccoli. This recipe makes a shallow baking dish full of mashed potatoes and rutabaga. We had enough leftover for a full week of dinners and/or lunches… quite a bit, really. But I surprisingly never got tired of it! This dish really is a nice surprise. I’d only had rutabaga once before at Thanksgiving 2008. I thought it had a very distinct, almost bitter taste that didn’t agree with me, but combining it with potatoes makes it much more mild and very enjoyable.

mashed potatoes and rutabaga

Mashed Potatoes and Rutabaga
adapted from Food Network Magazine

1 pound rutabaga (yellow turnip), peeled and cut into 1-inch pieces
1 pound Russet potatoes, peeled and quartered
3 tablespoons unsalted butter, room temperature
3 tablespoons margarine, room temperature (I did half regular butter and half margarine in an attempt to reduce the fat content, but you certainly don’t have to)
3/4 cup half and half, warmed
salt, to taste (I used coarse Kosher salt)
1/2 tablespoon oil (I used Smart Balance oil)
2 cups broccoli florets, chopped
3/4 cups plain breadcrumbs

In a large pot, cover cut rutabaga and potatoes with cold, salted water and bring to a boil on medium heat. Once the water begins to boil, reduce to a simmer until the vegetables are tender (they should hold there form, but there should be little resistance when pierced with a fork). This will take approximately 30 minutes.

Drain the water and turn the heat down to low. Stir in 3 tablespoons of the butter (not the margarine) and mash (I used a potato masher) until smooth (I like to leave just a few potato chunks in mine, but I know everyone has there own preference!). Add the warm half and half and salt. Keep warm on low setting.

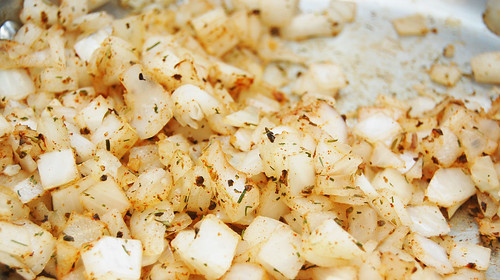
Meanwhile, melt the remaining 3 tablespoons of margarine with the oil in a skillet on medium. Add the breadcrumbs and broccoli and cook until broccoli is tender, stirring so that the breadcrumbs don’t burn.

Pour the potato mixture into a shallow baking or casserole dish. Sprinkle potatoes with the breadcrumb/broccoli mixture and serve.

Note – after discussing this dish with Edwin, we think mashed cauliflower might also be good in here, possibly as a substitute to the Russet potatoes. Let us know if you try it out!

Stuffed Cabbage Leaves – Cooking with Winter Vegetables

My husband got me a really interesting new cookbook for Christmas called In Season: Cooking with Vegetables and Fruits by Sarah Raven. I don’t usually spend a lot of time thinking about ways to cook using vegetables that are in season; a better description of my style would be haphazard or erratic (and let’s face it, I don’t really spend a lot of time thinking about vegetables, period). But this is a beautiful book with a lot of great ideas.

onions

For January and February cooking, the book recommends cabbages, chicories, citrus, evergreen herbs and winter salad greens. I decided to try a stuffed cabbage recipe.

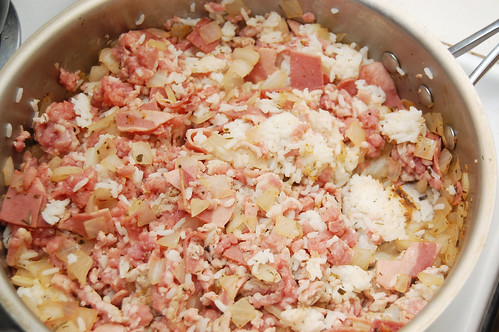
rice onions turkey bacon and pork

Back in November, Edwin posted a quasi-Indian style vegetarian cabbage roll dish. This one is pretty different from that (the original recipe author is from Hungary). The recipe in the book called for a lot of things – bacon, ground beef, chopped mixed herbs and sauerkraut. It was my goal to pare it down a bit. I also tried to make it a little healthier, eliminating the bacon for turkey bacon and holding off on the ground beef completely.

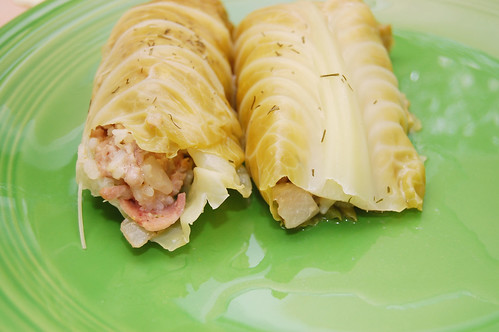
cabbage rolls

This was my first dish from this book, and I was a little disappointed at the way the instructions are written. A few of the steps seem to leave a great deal to the imagination. For example, Edwin’s cabbage recipe calls for boiling the cabbage head until the leaves begin separating. My recipe didn’t mention anything about that, and so I found it very difficult to peel off the leaves in one piece. I probably pulled off about 6 large, fat leaves and the rest were moderately ripped and shredded in the process. Hopefully it was just a fluke for this recipe.

I think this turned out well and I will likely make it again. What do you put in your cabbage rolls?

cabbage rolls ready

Stuffed Cabbage Leaves
adapted from In Season: Cooking with Vegetables and Fruits
(yields about 20 rolls, total prep and cook time is approx. 1 1/2 hours)

1 cabbage
2 bay leaves
3/4 cup (6 ounces) turkey bacon, chopped
1 onion, chopped
3 garlic cloves, minced
1 teaspoon paprika
1/4 teaspoon ground cumin
1/2 teaspoon marjoram, thyme and dill
salt and pepper (dash)
1 pound ground pork
1/2 cup cooked long-grain white rice
1 egg, beaten
1 cups chicken broth

Preheat oven to 350F.

(I’ve inserted Edwin’s instructions here for peeling the leaves so that you don’t have the same problem I did) – Core the hard part of the cabbage (the stem mostly) from the base. Boil in a large pot of boiling, salted water. In about 5-10 minutes, when the leaves begin separating, remove from the pot. Let cool.

Remove the thickest part of the cabbage leaves to make them easier to roll.

Fry the turkey bacon in a shallow pan and set aside. In the same pan, add onion, garlic, marjoram, thyme, dill, paprika, cumin, salt and pepper on low heat so as not to burn it.

In a large skillet, combine raw pork, cooked rice, cooked turkey bacon and onion mixture. Add the beaten egg to bind the mixture and season with salt and pepper. Stir occassionally until cooked.

When cooked, place approximately two spoonfuls of the mixture on a cabbage leaf. Roll the leaf, starting from the stem and and tuck in the edges. Place the rolls, seam down, in a shallow baking or casserole dish. Pour brother over the leaves and add bay leaf and a dash of dill. Cook, covered, for approximately one hour.