Kitchen Tips – Don't Warp Your Pots and Pans!

My first year out of college was also my first year in law school. I didn’t have a lot of extra time (or sanity), so I frequently made breakfast for dinner. Eggs and pancakes kept me going through the long and lonely nights!

It was also during this time that I realized if I immediately ran the pan under cold water after removing my eggs, I could save oodles of time on clean up. The egg residue wouldn’t cling to the sides of the pan, and I wouldn’t have to do any scrubbing (or, more likely, I wouldn’t have to watch the pans stack up in the sink until I ran out of room to turn the faucet on).

I also quickly realized that drastic temperature changes, like moving a very hot pot or pan immediately from the stove to cold water, is an excellent way to warp it. D’oh!

Pots and pans are expensive. Learning how to care for your cookware and utensils (I’m sure we’ll get to caring for utensils in a future Kitchen Tips post) can save you a lot of time and money in the long run. Here’s a great article from About.com called 10 Ways to Ruin a Nonstick Pan.

Also, be sure to read the packaging when you first buy a pot or pan; certain makes and models will have specific instructions – copper bottom cookware, stainless steel and clay or enamel cookware all have slightly different quirks.

Good luck!

Two thumbs up to Anna at Cookie Madness for including on her site an archive of “Go-To” recipes. I found myself there last week as I was looking for ideas for my brother’s birthday cake. His birthday isn’t until this Saturday, but because he happened to be home for Easter I had to improvise.

My brother seems to really enjoy Cool Whip based desserts (pumpkin pie that has a layer of Cool Whip – which we refer to in the family as “Silly” Pumpkin Pie, Million Dollar Pie, Banana Cream Pie, etc.) as well as desserts that have a lot going on – like fruit, nuts and coconut. He’s not interested in things like rich chocolate cake or red velvet. Apparently there are a lot of people like that out there, but I’ve never really understood them myself. Luckily Anna had tried and tagged pretty much the perfect cake.

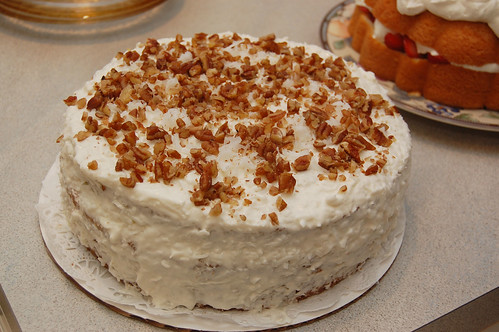
hummingbird cake


Hummingbird Cake
is Southern Living’s most requested recipe ever! First published in 1999, it combines chopped bananas, crushed pineapple and pecans for a unique and delightful cake. In 2001 they even posted a Lightened Hummingbird Cake, which cuts down on the sugar, eggs and oil, and removes the pecans entirely. Hummingbird Cake is also made without the assistance of either an electric beater or stand mixer (but sorry, I did use one for the frosting!).

I went for the original, non-lightened version, but I did change the frosting. The Southern Living recipe recommends a cream cheese frosting and, while I love cream cheese frosting, it just felt all wrong for this cake. I like cream cheese frosting on fairly plain, rich cakes. The Hummingbird Cake has so many neat flavors that I thought cream cheese frosting would just make it thick, unnecessarily dense and take away from the other things going on.

As you might have guessed from my comments above, I decided to use a Cool Whip based frosting. I added just a tiny bit of fat free cream cheese to the Cool Whip to give it a little thickness. Even though the cake recipe doesn’t call for it, I also added coconut (I was already so close to the Million Dollar Pie recipe that my brother loves that I figured, “why not?”).

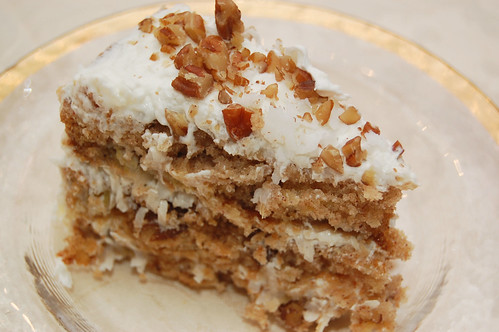
I had to spread my frosting a little thin so that I’d have enough to cover this entire three layer cake. I’d probably recommend adding a little extra Cool Whip so that you don’t have to worry about skimping, but I’m so glad that I changed the frosting from the original cream cheese. It really left the emphasis on the cake, while giving it a little “oomph” and adding oh-so-delicious coconut. If you’re shopping for cake ideas for someone who doesn’t love decadent cakes, you have GOT to make this!

hummingbird cake slice


Hummingbird Cake Recipe
from Southern Living

Coconut Cool Whip Frosting

2 oz. fat free cream cheese, softened
1/2 cup powdered/confectioners sugar
1/4 cup milk (I used skim)
8oz. fat free Cool Whip, thawed (plus a little extra)
1-2 cups shredded coconut (start out with 1 cup and add more as desired)

In an electric or stand mixer add cream cheese and beat until softened. Slowly beat in sugar and milk. Now, fold in Cool Whip (do not beat!) using a spoon until fully incorporated. Stir in desired amount of coconut.

In Search of Energy – "Soldiers" to the Rescue

My husband and I are trying (I repeat, “trying”) to get into a gym routine and be more active on a regular basis. As you might imagine, this is a difficult task for someone who takes as much pleasure in baking (and eating) as I do! But I’m fairly certain I’m not the only person who struggles with that, right? (I’m hoping for a chorus of “Amens” here!)

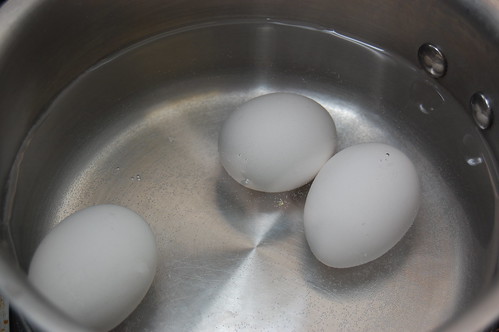
eggs, before boiling

I was thinking about foods that I could make that might raise our energy level while being somewhat light and not weighing us down. I was also considering what to do with those hard-boiled eggs leftover from Easter. This also led me to remember something that my mom used to make on occasion when I was little.

My mom called them “Soldiers,” but a quick googling of “Soldiers” plus “hard-boiled eggs” led me to an odd dish from the UK where buttered strips of toast are dipped into soft-boiled egg yolk.

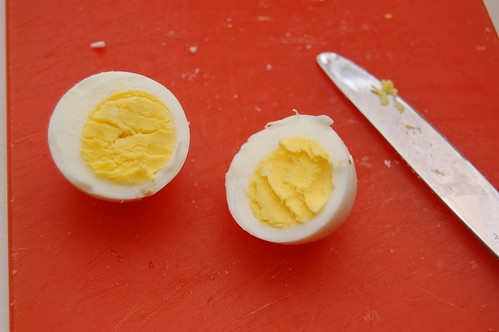
hard-boiled eggs

There actually are some similarities between what my mom refers to as Soldiers and the UK version – I wonder (and will have to ask) whether this recipe is something that was passed down and changed throughout generations like a game of telephone.

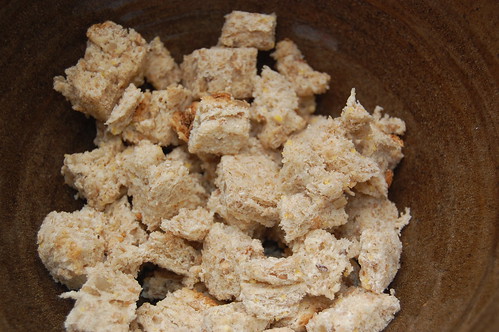
cubed bread

In any event, this really hit the spot! Eggs are a great source of protein, especially if you don’t eat meat. As long as you enjoy eggs in moderation (like most things), you shouldn’t run into any issues with cholesterol. I’m not sure exactly how to describe the taste – it’s a very simple dish with the egg yolk and pepper being the two flavors that jump out most distinctly to me. As a kid I remember thinking it was just a really fun thing to eat. It’s definitely light and is great to enjoy either an hour before a workout or after.

soldiers


“Soldiers”

serves 2

3 large eggs
4 slices of your favorite bread, ends cut off
butter or margarine
salt and pepper, to taste

To hard boil the eggs – Place the three large eggs in a medium saucepan and add cold water until eggs are just completely covered. Set to high heat. When water with eggs starts to boil, remove the pan from heat and cover with a lid. Let the pan sit for about 12 minutes. Run eggs under cold water to cool. Cold hard-boiled eggs are easier to peel.

To peel eggs, roll on a flat surface (like your kitchen counter) with the palm of your hand, pressing down gently. When the shell cracks it should be fairly easy to peel off. When eggs are peeled, cut into cubes.

Stack slices of bread and trim off ends. Butter one side of each slice and cut bread into cubes. Add to a medium size bowl and then add egg pieces. Season generously with pepper and add a bit of salt. Toss to combine and serve.

Scenes From Easter

Hello, hello! I hope that, if you celebrated it, you had a Happy Easter! For my husband and I, it was filled with lots of food and family!

heather-gb_easter 2009

Since I got the new camera a few months ago, I can’t help snapping away at everything. The little decorations that appear on the Easter table at home were no exception.

heather-gb_easter 2009

I always love my mom’s Easter table setup and place settings. We typically do Easter brunch instead of dinner.

heather-gb_easter 2009

She made a tasty new grape punch this year. In the past we’ve had mimosas or smoothies.

heather-gb_easter 2009

We have some really neat Ukrainian style eggs that have been in the family for years.

heather-gb_easter 2009

They’ve been hollowed out and are very delicate. I believe they were decorated by my aunt and cousin, who are both very talented at it.

heather-gb_easter 2009

I also learned that the family cat, Emma, loves to pose.

emma

She wouldn’t stop rolling around and showing off in the sun patch.

heather-gb_easter 2009

Easter is not complete without the kielbasa.

heather-gb_easter 2009

When we moved to Virginia years ago, we eagerly embraced the southern tradition of ham biscuits. The biscuits are brushed with stone ground mustard; they’re my favorite.

heather-gb_easter 2009

After Easter brunch it’s time for Easter baskets.

heather-gb_easter 2009

We finished off with a sneak peak at the baby bird that hatched in the wreath on my parents’ front door.

heather-gb_easter 2009

Food Photography – Perils of Life as a Chocolate Bunny

my butt hurts!

Hope you enjoy my recreation of a favorite Snorg Tee in celebration of Easter this coming weekend. This one has always cracked me up, and I don’t mind a little cruelty to chocolate bunnies (mwhahah)!

They were very good models.. Mmmmm!

Spinach and Mushroom Pizza with Mom's Marinara Sauce

Groan – It’s hard to write this post when I’m still so full from dinner… four hours later! But if I had it to do over again, I’m sure I’d still wind up eating way too much.
flour cookie sheet

My husband, Morgan, and I got back into town yesterday evening from a few long and difficult days. Thanks to everyone who sent good thoughts our way.

rolled doughspread sauce

Getting back into the swing of things, my cooking/baking wish for the next week is that I’ll avoid baking at least until Easter because I indulged in way too many delicious and fattening things at northern bakeries (ever had Checkerboard Cake? We bought some after my dad exclaimed that he used to enjoy it from time to time while growing up. I had never had it before, and now you can bet I’ll be trying to make it soon).

saucespinach

So today was mostly comprised of cleaning up the apartment, organizing for the week, grocery shopping and decompressing. The weather was gorgeous, and Morgan and I decided to pick up some pizza dough from the nearby Italian Store (I’ve mentioned here before that they have outstanding dough).

mushrooms

We bought ingredients for a spinach and mushroom pizza, but this time we made the sauce from scratch using my mom’s excellent marinara sauce recipe. It’s recently become an obsession of ours to make this sauce for spaghetti, chicken, pizza and anything that could possibly use marinara sauce.

cheesepizza

I have to say this is our finest pizza yet. Making this sauce from scratch is so easy and probably less expensive than buying ready made sauce. We have leftover sauce, so we keep it in an air-tight container in the fridge; it should keep for the week. The spinach was also a great addition and doesn’t call a lot of attention to itself.

slices

I’ll also repeat myself and say how you really need to find a local (non-chain) pizza shop in your area and try to buy a bag of dough. Waiting to try making your own pizza is just depriving yourself of some of the best pizza you’ll ever have!
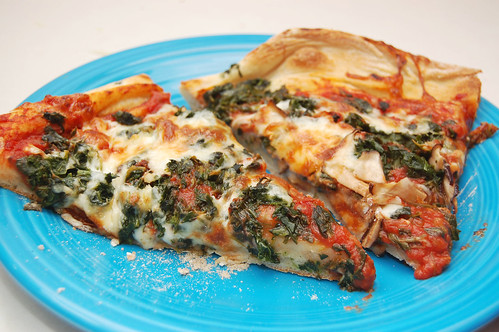
sliced


Spinach and Mushroom Pizza

1 16 oz bag of pizza dough
1 cup freshly shredded mozzarella cheese
1 package frozen spinach, cooked according to package instructions
1/2 cup sliced shiitake mushrooms
1 tablespoon olive oil
flour, to sprinkle on work surface

Heather-Ghost Baker’s Mom’s Marinara Sauce
1 tablespoon olive oil
1 clove garlic, minced
1/2 to 1 small onion, finely chopped
1 16 oz. can crushed tomatoes
1 6 oz. can tomato paste
3/4 tablespoons sugar
1 teaspoon basil
1 teaspoon oregano
3/4 teaspoon salt

For sauce – Add olive oil to a medium saucepan set to medium temperature. Add garlic and onion and cook until tender, about 5 minutes. Stir in crushed tomatoes and tomato paste and add remaining ingredients. Reduce heat to low; cover and cook for 30 minutes, until mixture is thickened. Stir occasionally. Makes about 3 cups of sauce.

In the meantime, preheat oven to 525 F and cook spinach according to package instructions in a small saucepan. Saute sliced mushrooms in a separate small pan for 2 to 3 minutes.

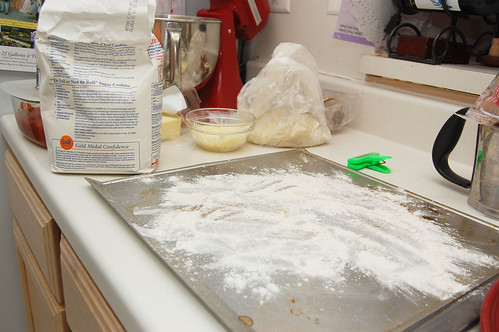
When sauce is just about done, flour a cookie sheet and roll out dough to a 16 inch circle. Drizzle olive oil over the dough. When sauce is done, pour and smooth sauce over pizza dough, followed by spinach, mushrooms and cheese.

Transfer cookie sheet to oven and cook for approximately 11 minutes (we use a pizza stone, so we preheat the oven with the pizza stone in the oven, then carefully transfer the uncooked pizza to the heated stone. It takes two of us to transfer the pizza without letting it fall apart, so proceed with caution if you go this route).

Let pizza cool for 2-3 minutes. Slice and serve!

Kitchen Tips – What the heck does "picked over" mean?

If you’re working with lentils or other beans, you may sometimes notice that the instructions say, “rinse and pick over.”

The first time I encountered this I was baffled. I thought, “What am I picking over? Is there something bad in here?” Everything looked fine to me!

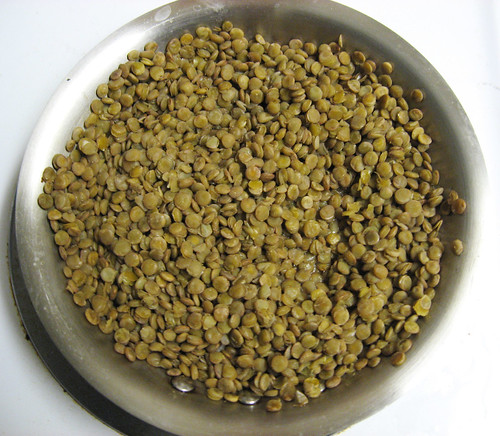
lentils

Sometimes in beans or lentils you might sometimes find a few little rocks that managed to sneak their way in. I know, it sounds crazy. I’ve actually never encountered one yet; I’ll have to ask the Chef Edwin, the lentil guru himself, how frequently this occurs.

While rinsing or after rinsing, try spreading out the lentils or beans, feel them and look at them. If you see something that looks off, just throw it away. The rest of the batch should be fine. You don’t need to be nervous about it, but do take a look – just thinking about biting down on a rock makes me cringe!

Cinnacrumb Cake

Hello, folks. I’m not feeling too chatty at the moment. Sadly my grandmother (my dad’s mom) passed away earlier this week. She lived a long life (over 90 years) and thankfully did not experience a debilitating and drawn out illness. My husband and I will be heading up north for the funeral and to be with family, so I’ll be unable to answer your comments and questions for a few days. You will, of course, have Chef Edwin available to answer all your DinnerCakes needs.

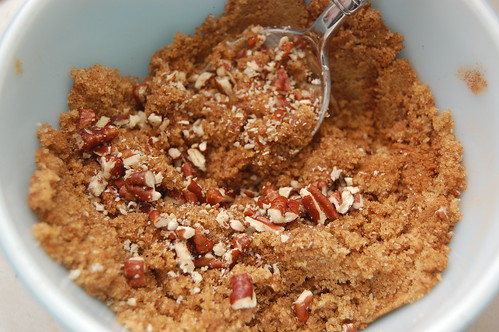
combining the cinnamon mixture

In times of stress I’m grateful that I can turn to baking to relax me; I can get into the rhythm and let stress (usually) melt away. I was able to squeeze in a crumb cake this week, inspired by a beautiful “big crumb coffee cake” found on Smitten Kitchen.

swirl the cinnamon mixturebig crumbs

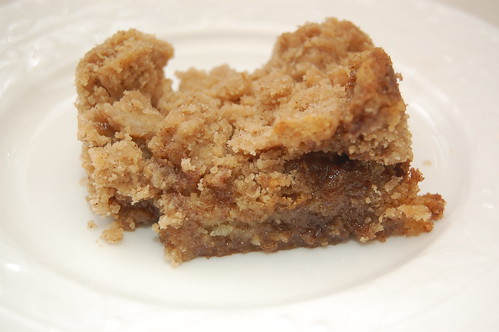
The Smitten recipe calls for a rhubarb filling that frankly made me a little nervous. I decided to replace it with a Cinnabon/cinnamon roll filling which worked out really well. It kept the cake moist (I’ve known some crumb cakes to be sadly dry) and gave it a little depth of flavor. I use the past tense because the cake is now gone.

cinnacrumb cake

Cinnacrumb Cake

For the cake and big crumb recipe, please see Smitten Kitchen.

Leave out the rhubarb filling and replace it with the following –
Cinnabon/cinnamon roll filling
3/4 cup packed light brown sugar
1 tablespoon ground cinnamon
Pinch salt
1 1/2 tablespoons unsalted butter, melted
1/8 tsp nutmeg
1/8 tsp cloves
dash allspice
1 tablespoon ground pecans

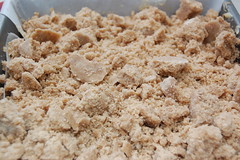
Follow Smitten’s instructions for the cake. Pour half the batter into a prepared 8-inch-square baking pan (I lined mine with parchment paper). Combine the cinnamon filling ingredients and sprinkle over the batter and try to spread it out evenly. Using a toothpick, marble the cinnamon mixture into the batter. Finish by pouring the rest of the batter on top and sprinkle with crumbs in large chunks.

On my cake, the cinnamon mixture bubbled up over top of the crumbs a little bit in one corner. I was fine with this, but if it will bother you then you may want to cut the cinnamon filling in half.

Bake for about 50 minutes on 325F; a toothpick inserted into the center should come out clean.

Enjoy.

Salty & Sweet – Chocolate Cookies with Pistachios

If you put a variety pack of cookies in front of me, 95% of the time I would not choose an all chocolate cookie. This may be surprising, but I gave up on chocolate cookies after several attempts where I couldn’t even taste the chocolate.

chocolate pistachio cookies

I thought up this recipe one night while lying in bed, after one of my battles with black bean brownies. I was thinking about other ways to use black beans instead of flour and agave syrup instead of sugar. I was also thinking about a batch of Tastespotting photos I’d oogled recently that boasted salty and sweet desserts.

chocolate and pistachio

The recipe below is a little different from what I’d originally planned (no black beans and no agave… it’s probably for the best!), but it turned out exactly the way I was hoping it would. What’s the difference? For starters, I greatly prefer the taste of baked goods made with unsweetened cocoa instead of melted chocolate. It captures the taste of the chocolate more and it makes the final product less dense.

two cookies

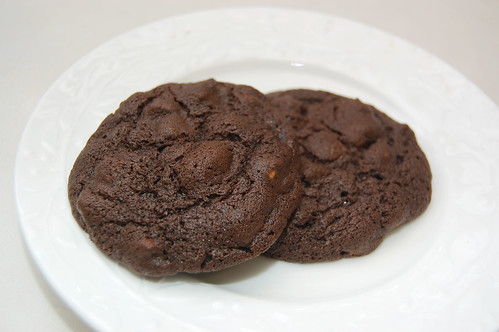
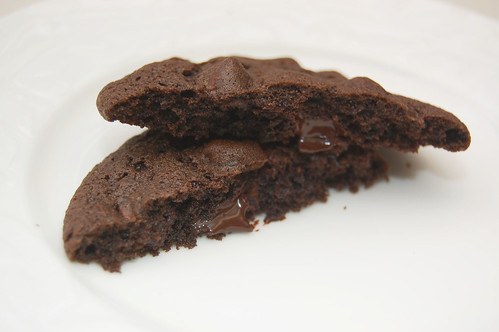
These cookies are slightly crispy on the outside and soft and chewy on the inside. The chocolate chips makes them unmistakably dark and chocolatey, and the pistachios add just a hint of saltiness. The instant coffee deepens the chocolate flavor without being particularly noticeable.

I had to take these to work the day after I made them because it quickly became clear that I couldn’t handle having them in the apartment. Whoops?

broken open

Salty & Sweet – Chocolate Cookies with Pistachios

1 stick unsalted butter, room temperature
1/8 cup granulated sugar
3/4 cups brown sugar
1 cup all purpose unbleached flour
2 ounces unsweetened cocoa (I used Ghirardelli)
1/8 (granulated) instant coffee
1/8 teaspoon kosher salt
1/2 teaspoon baking soda
1 egg
1 egg yolk
1 tablespoon milk
1 cup semisweet chocolate chips (again, I used Ghirardelli)
1/2 cup pistachio kernels

Preheat oven to 375F. Line two baking sheets with parchment paper.

Combine flour, cocoa, instant coffee, salt and baking soda in a medium bowl. Set aside.

In the bowl of a stand mixer using a paddle attachment (or using electric beaters if you don’t have a stand mixer), combine butter and sugars. When combined, add eggs one at a time. Slowly beat in the flour mixture, adding the milk at the halfway point. Stir in pistachios and chocolate chips. The mixture will resemble thick brownie batter.

Scoop batter using a tablespoon measuring spoon and, with the assistance of another spoon, drop rounded balls onto a parchment lined baking sheet approximately two inches apart. Bake for 15 minutes.

Makes approximately 2 dozen cookies.

Chicken and Black Beans with Avocado Salsa

My husband and I have been feeling a little lazy lately about cooking. We’ve both been busy, and on days when you’re just drained it’s not only hard to cook, but it’s likely that your kitchen may not be stocked with fresh options.

On this particular day I knew we didn’t have anything in the fridge. We had some chicken in the freezer, but we try not to defrost chicken in the microwave if we can help it (and I haven’t yet tried Edwin’s ice bath method).

avocado

I went to the grocery store after work and picked up some chicken breast (that I didn’t have to defrost). On my way to the cash register I spotted some avocados. I don’t think avocados are in season, and I know that they’re high in fat, but at that moment I just wanted some avocados!

For my calorie conscious friends, listen, avocados are good in moderation!

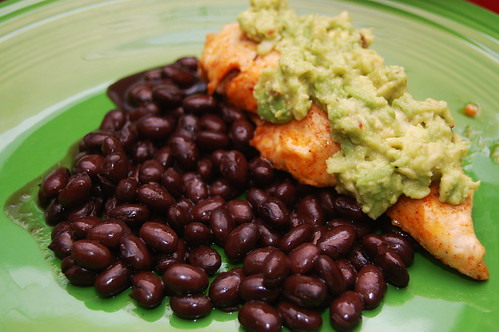
As I was walking home, I still had no idea what I was going to do with my small avocado and chicken. I thought about making chicken sandwiches with slices of avocado on top, but I knew I didn’t have buns. I decided on a citrusy, guacamole-like salsa over baked chicken and black beans. What an awesome change to spice up our typical routine! This dish is light but filling. The lime juice gives it a lot of zip, and it’s not very spicy.

chicken avocado

Chicken and Black Beans with Avocado Salsa

1 lb boneless skinless chicken breasts
1 can black beans

For the Chicken Marinade
1 tablespoon olive oil
1 tablespoon sweetened lime juice
1/2 teaspoon chili powder
dash cayenne

For the Avocado Salsa
1 small Haas avocado, peeled and sliced
1 chili, minced with seeds removed (or 1/4 teaspoon red pepper flakes)
1 tablespoon sweetened lime juice
1/4 teaspoon salt
3 cloves garlic, minced
dash black pepper
dash cayenne

Cut chicken breasts in half longways and marinate in olive oil, sweetened lime juice, chile powder and cayenne for at least 30 minutes. Preheat oven to 375F and bake for approximately 15 minutes. Cut into the middle of the thickest piece to ensure the chicken is thoroughly cooked.

While chicken is baking, warm black beans in a small sauce pan on the stove.

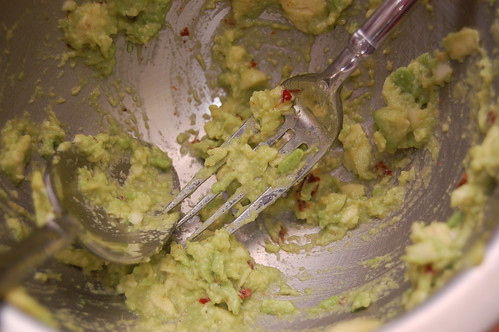
Peel and slice avocado and place in a medium size bowl. Add minced chili or red pepper flakes, sweetened lime juice, salt, minced garlic, black pepper and cayenne. Mash avocado with the back of a fork while combining ingredients. Don’t mash too much, you want the salsa to be chunky.

Spoon black beans onto a plate and follow with cooked chicken breast. Spoon avocado salsa over the chicken and serve!