A Secluded Cabin In The Woods, A Good Book and Home Fries

You may have picked up (or not!) that I’ve been a wee bit quiet around here the last few days. My husband and I took the opportunity last week to abscond for a mini vacation.

cabin

It had been a while since we went anywhere for more than a long weekend. It’s just been a busy year, and it’s rare for all the stars to align so that we’re able to make plans in advance.

tree

We rented a cabin in West Virginia at Lost River State Park. The park was recommended to me by a co-worker, and it sounded like just the kind of low on planning/high on relaxation trip that we needed.

halfway up the mountain

The mountains in West Virginia are truly gorgeous. Typically we do our mountain trips to Douthat State Park or Warm Springs, VA, which are excellent, but the mountains in West Virginia just seemed endless. Rain was really only intermittent, and the weather behaved at a perfect 70-75 degrees.

side of a mountain

If you like the mountains, cabins at state parks really are the way to go. If you’re a technophile you might go mad (no television, no cell phone reception, no internet), but the cabins are inexpensive, well-maintained and generally spacious. The cabins we’ve stayed at have fireplaces, bedding and towels and a fully functioning kitchen with a stove, fridge, microwave, pots and pans and utensils.

five counties

I’ll throw out another plug while I’m at it – if you’re looking for something a little less rustic, on our last night in West Virginia we ate at a nice restaurant attached to a gorgeous inn with great mountain views – The Guest House at Lost River. The owner encouraged us to walk around and explore the property after our meal. It was beautiful and the rates are pretty reasonable for how nice it is. There’s not much in vicinity, but I thought my husband broke it down nicely, “if you just want to chill in opulence, it’s your place.”

handm

Getting back to cabins – because you’re in remote regions, cooking your own food is usually the only game in town. There was nearby no grocery store to run to for eggs and milk, but luckily we picked up a few things before we left. I was able to throw together some curried home fries for brunch one day.
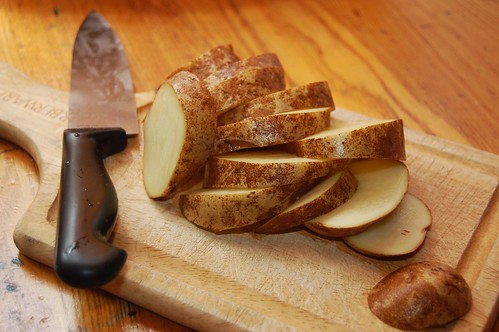
potatoes

I just don’t buy into the idea that meals need to be complicated or time consuming to be good. I have a great memory of enjoying brunch at a friend’s house a few years ago – omelets, home fries with rosemary and thyme and mimosas.
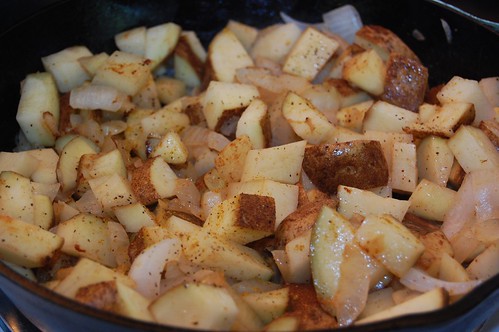
chopped potatoes

I tried to pack only a few spices so that I wasn’t carrying the entire kitchen with me, so we brought salt and pepper, curry powder, cayenne, Nature’s Seasoning and paprika. I cubed two russet potatoes into 1 inch pieces and seasoned them generously. I cooked them for about 20 minutes in the cabin’s heavy cast iron skillet; they probably would have cooked faster if I had covered them. Whether you’re vacationing in the mountains or enjoying brunch with mimosas, home fries are a delicious addition.
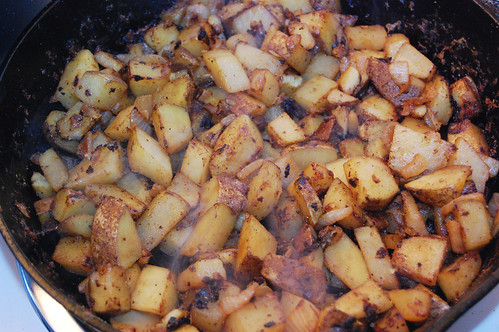
smoking potatoes

Lost River Home Fries

1 medium onion, diced
2 russet potatoes, washed and cubed
non-stick cooking spray
salt and pepper, curry powder, cayenne, Nature’s Seasoning and paprika as desired

Heat large skillet to medium temperature and spray with non-stick cooking spray. Dice onion and add to skillet. Wash potatoes well, cut into thin slices and cube. Add potatoes to skillet about 2 minutes after onion. Add seasonings and stir potatoes frequently so that they don’t burn or stick to the pan. I was most heavy handed with the curry powder and salt.

Cook for about 20 minutes, or shorter if your skillet has a cover (if you have a cover, cook for half the time covered and half the time uncovered). You should be able to pierce the potato with a fork without resistance. Season with a little extra curry powder and salt on top before serving, as some of the spices do get cooked away.

Kitchen Tips – Egg Whites Only

Edwin and I hope you’re enjoying the new site design that we unveiled this week! Coming to a clean and simplified site makes me feel all warm and fuzzy… it’s like having a freshly cleaned room!

In addition to the new design, we’re also trying out some posting changes. Kitchen Tips will be posted on Fridays, and Saturdays will be a day of rest for now. This is for a few reasons, but mostly because we thought you all might enjoy greater variety of content throughout the week. Like most things on DinnerCakes, this change is certainly open to debate – so please tell us if we’re way off base!

Now on to the Tips!

When you grow up around someone who cooks, you don’t always realize how much you’ve picked up just by observing.

I was recently helping a friend who was making a cake for her boyfriend’s mom’s birthday. The recipe called for some whole eggs (egg yolk and egg white) and then a few whites only. I was surprised when she was unsure how to separate the egg white from the yolk, aside from just breaking all the eggs into a bowl and then fishing the yolks out.

It takes a little practice, but it’s just a careful dance of cracking open the egg and letting the egg white run down as you pass the yolk back and forth between the two halves of shell. This would probably make a good tutorial video (if we had video tutorial capability… I’ll tuck this away in the back of my mind!), but I hope these photos help make a little sense of it.

eggs7eggs6

Crack the egg in the middle.

eggs4eggs3

Carefully pour the yolk back and forth, letting the egg white run down.

eggs2eggs1

mixed chocolate truffles

(Pictured: Dark, Milk and Chai Ginger Chocolate Truffles made for a co-worker’s birthday last week. Truffles are covered in coconut, pistachio, cashew, powdered chocolate or pecan).

Bakeless Cookies? That's crazy talk!

I remember three years ago sitting among a group of women who were telling me they couldn’t believe I’d never tried, heard of, made, or otherwise been exposed to bakeless cookies – three years later here I finally am! Yesterday for the first time ever I made “bakeless cookies.”

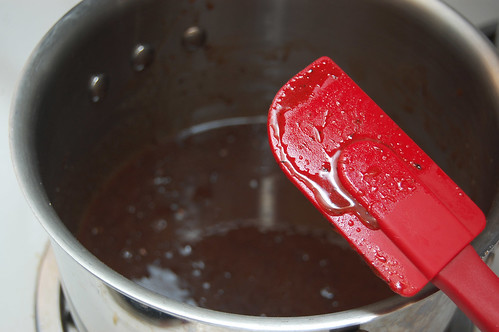
spatula

This recipe is straight out of my bridal shower recipe box. A few months before getting married, my bridesmaids threw me a dessert themed bridal shower (they know me well, huh?). They requested that each of the guests bring a dessert recipe, and they collected them all in a cool wooden box painted blue and orange, the colors of my alma mater. I’m looking forward to slowly trying each of the recipes in this box!

recipe box

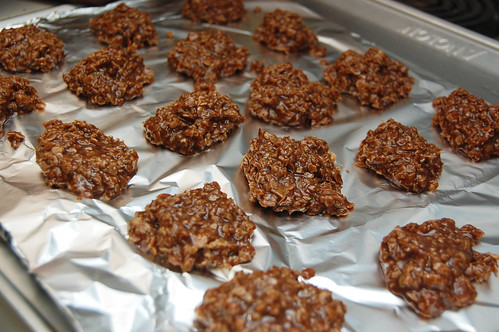
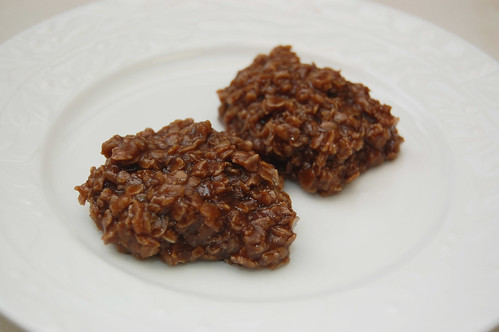
So back to bakeless cookies – I’m not sure I “get” them. I guess I assumed they would firm up, but they’re still very soft. I can pick them up now without too much sticking to the foil, but the consistency is akin to warm, soft fudge or chewy caramel candies (without quite that level of stickiness). I wanted to just describe them as “little goo balls,” but Edwin advised me against using that imagery… woops? They did firm up quite a bit after I put them in the fridge, but they’ll always be soft.

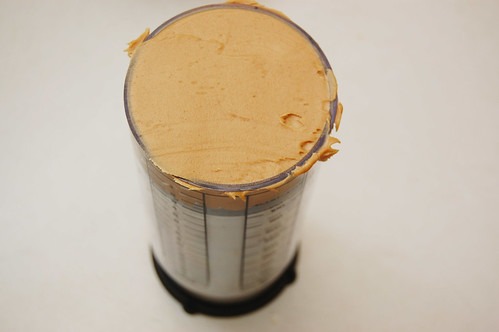
peanutbutter

While sadly I probably can’t pack these cookies up to take to work (because they’re so soft I’d worry they’d just meld together, and I think the consistency might confuse people expecting a typical flour-based cookie), I will say that they’re pretty addicting. I started out with just one, then I snuck back for seconds, and then the cycle continued on. I’m interested to hear what you all think about bakeless cookies, whether you try your hand at these or if you have your own recipe. There’s definitely no confusing them for baked cookies and nothing compares to cookie dough, but maybe they do have a place in the cooking/baking world after all? It’s hard to say no to chocolate + peanut butter, and it’s no secret that I’m a little obsessed with oats. These cookies are very chewy and oaty.

bakelesscookies

And in DinnerCakes housekeeping news – something big is coming to DinnerCakes tomorrow! If you’re a regular reader, then you may have a pretty good idea of what I’m talking about. Edwin and I are very excited about it – please check back tomorrow to find out what we’ve been working on behind the scenes!

bakeless

Bakeless Cookies
from my husband’s Aunt Claudia, who received this from her grandmother Louise

2 cups granulated sugar
dash of salt
1/2 cup milk
1/2 cup oleo (same thing as margarine)
1/2 cup peanut butter (chunky or smooth)
3 cups quick cooking oats
3 tablespoons cocoa

Melt margarine in a medium size pan. Add sugar, milk and cocoa; stir constantly. Once the mixture starts to boil, cook for 5 more minutes and then add peanut butter, blending until smooth. Remove from heat and add in oatmeal fast.

Drop by tablespoons onto foil. As they cool they will firm up just enough so that you can pick them up and pop them into your mouth!

Kitchen Tips – How to Avoid Green Speckled Carrot Cake!

Happy Saturday, DinnerCakes readers!

Today’s Kitchen Tip I learned just a few weeks ago at a cook-out. I got into a discussion about baking with the wife of one of my husband’s friends. She told me a great story about carrot cake!

She and her husband had another couple over for dinner, and she unwrapped her freshly baked carrot cake to get it ready for serving. She cut into it and noticed that there were green flecks throughout the cake! She knew it couldn’t be mold because she had just made it. One of the dinner guests thought she had put some zucchini in the cake.

Yikes! How many of you would have died from embarrassment like she felt?

It turns out that the only thing she did differently this time as opposed to in previous cakes was that she left on the outer layer of the carrot. She washed it of course, but she included the whole carrot rather than removing that top layer.

I did some googling and it looks like she’s not alone. Quite a few people have suffered the green speckled carrot cake phenomena. I can’t pinpoint exactly why, though. Some sites get extremely technical talking about the oxidation of the carrots. Other possible explanations I found were that sometimes if carrots are pushed above the soil when growing, the sun may turn them greenish, and that overbaking could also make them yellowish.

The bottom line is that you should peel off the outer carrot skin to be safe, and watch your cake to make sure that you don’t overbake it. If anyone comes across a more definitive explanation (in layman’s terms!) please let us know!

Poor Man's Potato Cakes

Several readers lately have asked Edwin or myself about how they can use what they have on hand – either learning new ways to use a specific ingredient that they happen to have an abundance of, or ways to improvise with what’s available.

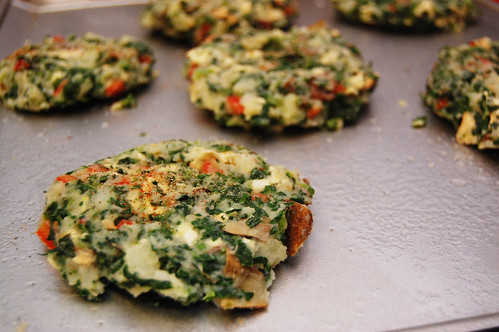
potato cakes_oven ready

Tonight was a bit of an improvising night for me and my husband. We had a great time on Saturday morning at the Arlington Farmer’s Market, which means we brought home various produce that looked good but that we didn’t know what we’d use it for. Among these items were two small to medium sized Russet potatoes.

I’d been eying a recipe for Potato Latkes lately; however when I started making them last night I quickly realized that I didn’t have Yukon potatoes or an onion (how could I not have an onion?). I decided instead of throwing in the towel that I’d, well, improvise!

The result of my improvisation should not be referred to as latkes. To anyone who has had latkes or knows what they are, I’m sure I’m not fooling you! Latkes are typically a Jewish tradition, and it’s really just a simple potato pancake fried until crispy with some grated onion and an egg.

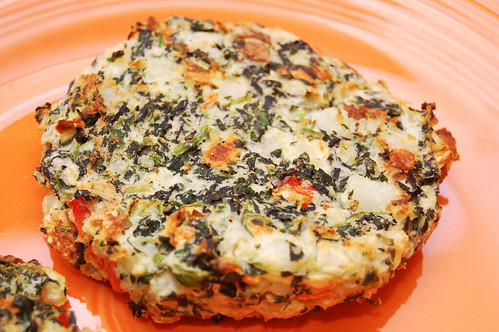
potato cakes

Yeah… that’s not what I made!

I located a red pepper in the fridge that was almost past its prime – in the “latkes” it went! Joining the red pepper were my favorites – frozen spinach and a bit of garlic. And for my final insult, instead of using 6 tablespoons of olive oil and frying my little cakes, I axed the oil completely and simply broiled them!

In the end I was left with potato cakes that were crispy on the outside, soft on the inside, brimming with healthy veggies and a nice kick of salt and pepper. My adventure was a success, and I was able to use some quality produce that we didn’t want to go to waste. There are really endless combinations that you can create!

My husband and I ate these potato cakes on their own, but a side of baked beans would make a nice compliment. Enjoy!

potato cake halves

Poor Man’s Potato Cakes

2 small/medium sized potatoes, cut into 1 inch squares
1 small red pepper (or 1/2 large), diced
1 package frozen chopped spinach (10 oz.)
2 cloves garlic, minced
1 egg
1 square of matzah, crushed
1 tsp kosher salt
dash of black pepper and cayenne

Steam cubed potatoes in a colander, covered, over boiling water until tender, approximately 10 minutes. Cool and mash.

Cook spinach according to package instructions. Drain thoroughly and set aside to cool.

In a medium bowl, combine mashed potatoes and diced red pepper. Add in spinach, garlic, egg, crushed matzah, 1/2 tsp of the salt and some black pepper. Spray a large cookie sheet with cooking spray. Form mixture into patties and place on the sheet. The mixture should stick together without sticking to you. Sprinkle remaining salt over the potato cakes along with some more pepper and a dash of cayenne on each.

Broil (remember to keep your oven door partially open) at the top of the oven for 9 minutes, then carefully turn patties over with a spatula (don’t burn yourself!) and broil for an additional 4 minutes.

Serve, sprinkling with more salt and/or pepper as needed.

Taco Salad with Drunken Black Beans

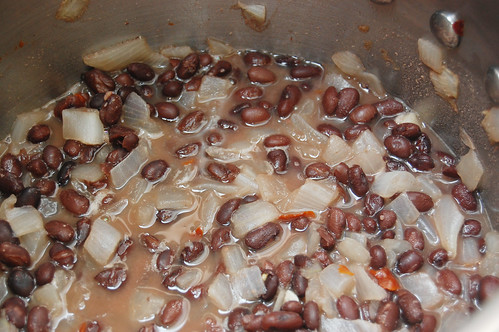
So remember back when I said I had seen a great recipe for a layered tortilla pie, but then I lost it? Well a few weeks ago I found the recipe and wow it was good. What really made it different and delicious was the way the black beans were cooked – soaked in beer!

black beans

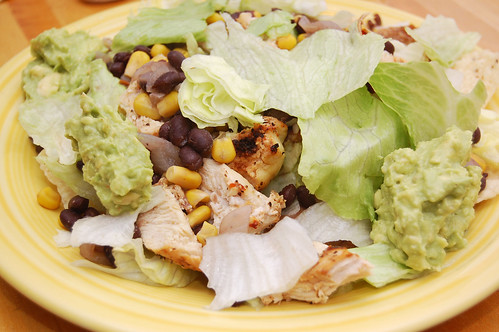
It occurred to me on Friday that this style of cooking beans would be amazing in a taco salad. I’d never actually made a taco salad before, and without the assistance of a giant taco shell to throw everything in I’m not sure how authentic it is, but I thoroughly enjoyed the final product. The husband loved it, I loved it, it got me to eat lettuce (even if it was only iceberg lettuce) and all was right with the world.

guacamole

This is also one of those meals that I think you could stretch to feed any amount of people. I’ll warn you that the two of us had a lot of leftover black beans, but I knew that going in to it and actually wanted leftovers to throw in tortilla shells and try other things. If you’re serving one or two people and you don’t want leftovers, just cut the black bean recipe in half. Of course, if you do this you’ll have to finish off half a can or bottle of beer on your own instead of using the whole can for the beans… hopefully this isn’t a problem for anyone.

taco salad with guac

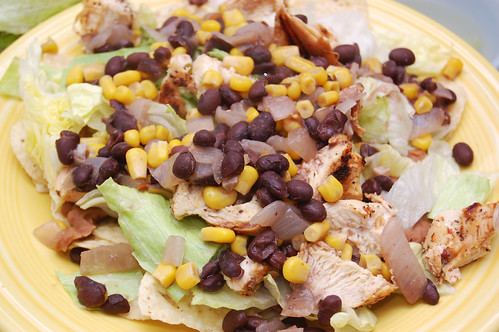
The chicken plays a relatively minor role here, and if you’re a vegetarian or just not that into meat I think you could leave it out and still have a great dinner (or very large lunch!). The black beans really make up the main flavor. You can definitely taste the beer that they’re soaked in, and I think it’s excellent. I’m actually tempted never to make black beans again unless they’re cooked in beer. You don’t even need to use a fancy one – we just used a can of Bud Light. It works; trust me!

taco salad

Taco Salad with Drunken Black Beans
(black bean recipe adapted from Everyday Food: Great Food Fast)

1 head of ice berg lettuce, rinsed and shredded
1 can refried beans (15 oz.), heated in a small saucepan
bag of tortilla chips
1 lb. chicken, marinated in some lime juice, salt and pepper, then grilled and cut into 1-2 inch pieces

For Guacamole:
1 medium Haas avocado, peeled and sliced
1 chili, minced with seeds removed (or 1/4 teaspoon red pepper flakes)
1 tablespoon sweetened lime juice
1/4 teaspoon salt
1 clove garlic, minced
dash black pepper
dash cayenne

For the Black Beans:
1 medium onion, diced
1 teaspoon red pepper flakes (use less for less heat)
2 cloves garlic, minced
1/2 teaspoon ground cumin
dash of kosher salt
1/4 teaspoon black pepper
2 cans black beans (15 oz. each), drained and rinsed
12 oz. beer
1 can whole kernels of corn (15 oz.), drained

To make the black beans – Add onion, red pepper flakes, garlic, cumin, salt and pepper to a large skillet on medium for 5 minutes, stirring often. Add rinsed and drained black beans and beer to the skillet and bring to boil. When boiling, reduce to medium-low and simmer until most of the beer evaporates; approximately 15 minutes. Stir in corn and remove from heat.

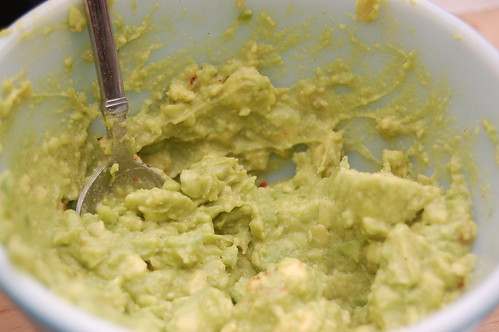
To make the guacamole – Peel and slice avocado and place in a medium size bowl. Add minced chili or red pepper flakes, sweetened lime juice, salt, minced garlic, black pepper and cayenne. Mash avocado with the back of a fork while combining ingredients. Don’t mash too much, you want it to be a little chunky.

To put the taco salad together – Create a layer of tortilla chips on the the bottom of several dinner plates or one very large serving plate. Next smooth heated refried beans over the tortilla chips. Add a layer of shredded lettuce, followed by the black bean mixture and chicken, then topped off with another layer of lettuce. Add dollops of guacamole to the sides of the plate or in separate bowls for serving.

Well, I wasn’t entirely sure about posting this recipe since Edwin had just posted an asparagus and pasta dish earlier in the week, but then I thought, “DinnerCakes face-off?”

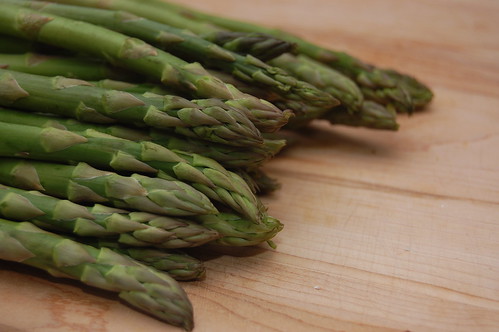
asparagus

Of course I didn’t consult Edwin about this, so perhaps later today we’ll have a DinnerCakes rumble. Maybe all the Ghost Baker recipes will suddenly disappear! Maybe my photo over in the right sidebar will be replaced with a Lolcat! Actually the Lolcat thing would be sort of awesome.

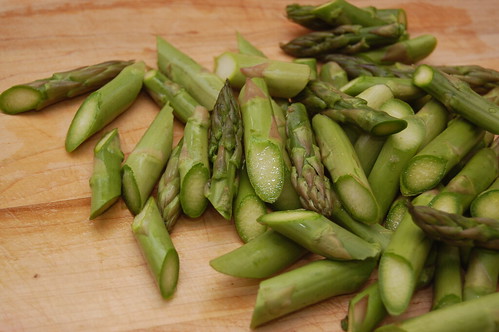
cut asparagus

In any event, a few short weeks ago my good friend’s boyfriend was in town on business. My husband and I went to dinner with him and his co-worker at Clyde’s in Georgetown. The wait was a lot longer than what they originally said and the food didn’t knock our socks off, but I liked the idea behind my dish – I ordered mini ravioli with spinach and asparagus.

peascream sauce

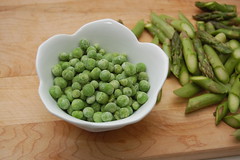
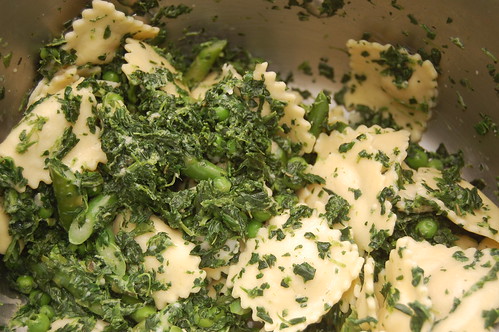
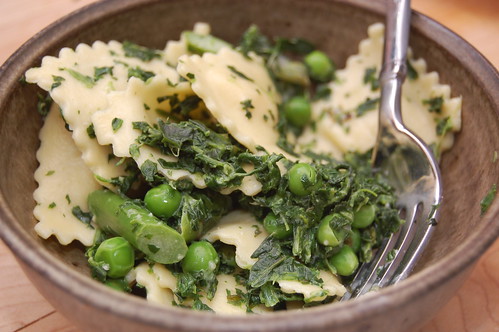
As you know, I have to take any opportunity that tricks me into eating more vegetables than I normally might, so I decided to adapt this dish at home. In addition to spinach and asparagus, I also threw in some peas. The ravioli has just enough cheese so that I’m slightly less aware of the massive amount of veggies present. I also found that I could get away with using only the tiniest amount of cream sauce, just enough to keep the ravioli moist and the veggies flavorful.

combined

I really enjoyed this! I’ve had instances in the past where asparagus doesn’t cook quite right, but for this dish I decided to steam them and they were perfect! The cream sauce is really barely noticeable; this is not one of those dishes you get at a restaurant where you have to wade through the sauce to find noodles. *If you’re not a big fan of garlic you may want to use one clove instead of two, as the sauce does have a more noticeable garlic flavor (which I like).

Ravioli with Asparagus, Spinach and Peas

I’d have to say that any dinner that results in me happily eating THREE different kinds of vegetables is a success! It also received the seal of approval from my husband.

Ravioli with Asparagus, Spinach and Peas

Ravioli with Asparagus, Spinach and Peas

1 package of light four cheese ravioli (9 oz.)
13 asparagus, cut diagonally into 1 inch pieces
3/4 cup frozen peas
1 package frozen chopped spinach (10 oz.)
2 cloves garlic*
1/4 cup cream
salt and pepper, to taste
dash onion powder
dash marjoram
1 teaspoon parsley flakes
1 tablespoon shredded parmesan cheese

This dish isn’t time consuming, but it does take a little maneuvering to cook each item separately. You may want to frequently check your vegetables while they’re cooking to make sure you get your desired consistency.

Cook spinach according to package instructions. While spinach is cooking, slice your asparagus and get your other ingredients ready. When spinach is done, drain and set aside. Boil ravioli according to package instructions; steam cut asparagus in a colander (covered) while pasta cooks.

While pasta is cooking, combine cream, garlic, salt and pepper, onion powder, marjoram, parsley flakes and shredded parmesan in a small sauce pan. Stir frequently to prevent a film from forming over the cream sauce. The peas should only take a short amount of time to cook – so start peas when pasta is about halfway cooked. When the peas are done, combine them with the spinach. The asparagus will likely finish steaming just a minute or two before the pasta is done. When done, remove asparagus from colander and combine with spinach and peas.

Drain ravioli when cooked. Return to pot and toss with a glug of extra virgin olive oil. Gently add in the spinach, asparagus and peas, then pour hot cream sauce over pasta and vegetables. Toss just once or twice to incorporate the cream sauce.

This recipe yields enough for two people to have seconds.

Food Photography – "What Have You Got There, Tom?"

This past Monday would have been my friend Jeff’s 28th birthday.

I thought about saying or making something special here on Monday, but it just didn’t feel right. My husband and I did honor Jeff that night by eating some giant cheeseburgers and root beer on tap from Ray’s Hell Burger, and I made a Coca-Cola cake. We ate entirely too much and skipped our trip to the gym, just as Jeff would have wanted. Several of his friends as well as his parents also took the opportunity to eat or drink in honor of him.

Ray's Hell Burger

We’re all trying every day to keep his memory, spirit and bad jokes alive. I’ve been told it gets easier with time, but in a lot of ways it’s harder. We’re realizing that we do actually have to carry on the rest of our lives without him; it’s confusing, infuriating and painful.

Ray's Hell Burger

Thankfully we’re not alone, and we do have one another to share the burden with. Jeff had a lot of wonderful, compassionate friends. We keep in touch, reminisce about the great and sometimes completely bizarre stories and remind one another how lucky we were to have had his friendship.

jeffsandwich

The title of this post is a quote from the greatest Space Ghost Coast to Coast episode ever, frequently quoted by Jeff.

Twice Baked

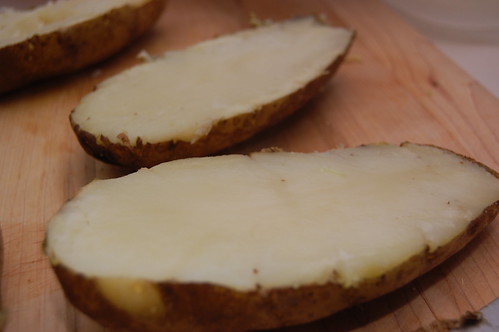
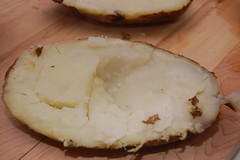
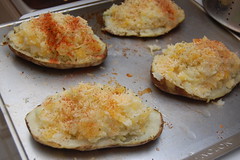
Twice baked potatoes are probably my favorite way to eat potatoes. I think I was first introduced to them by my father-in-law several years ago. If you’ve never had them before, twice baked potatoes are made by cooking a Russet potato, cutting it in half longways, scooping out the insides and mixing them with delicious things, and then spooning it all back the potato and cooking them just a few minutes longer.

slicing

Back in March I shared a recipe for mashed potatoes and rutabaga that several of you seemed interested in. I also enjoyed that one a lot, so I decided to work with rutabaga again – this time combining the mashed rutabaga into twice baked potatoes.

scoopingTwice baked

I know rutabagas are mostly a winter vegetable; I guess I’m having trouble letting go? I think I may even miss rutabagas during the summer! Please keep in mind for this recipe that I tend not to load up my potatoes with hefty amounts of sour cream, butter and cheese, so if you think you might want more of something feel free to add it!

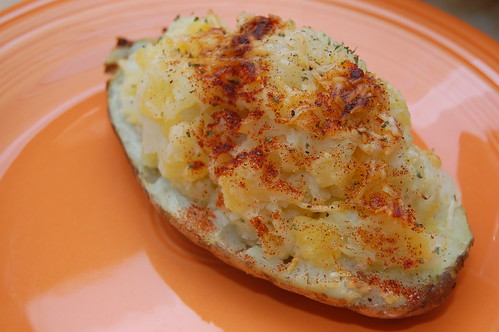
Twice baked potato and rutabaga

Twice Baked Potatoes with Rutabaga
makes 4 twice baked potatoes

1 medium rutabaga
2 Russet potatoes
1/4 cup sour cream (I used fat free)
1/2 cup milk
3 tablespoons unsalted butter or margarine, softened
1/4 – 1/2 cup grated cheddar cheese (plus a little more to sprinkle at the end)
salt and pepper, to taste
paprika and chives for garnish

To bake the potato, preheat oven to 400°F. Wash potatoes and poke holes in each with a fork (to prevent exploding!). Lightly brush with a little bit of olive oil and place in the oven for about one hour, or until you can insert a fork into the potato without much pressure.

Alternately, you can cook the potatoes in a microwave for about 10 minutes on high. Remember to still poke holes and brush with olive oil.

While the potatoes are cooking you can cook the rutabaga. Wash and peel the rutabaga and cut into one inch pieces. I’ve cooked rutabaga either by boiling for approximately 30 minutes (again until you can insert a fork into them without much pressure) or steaming them. Feel free to use whatever works best for you.

When Russet potatoes are done, slightly cool and then cut in half longways. Scoop out the inside and mash using a potato masher in a medium sized bowl. When rutabaga is cooked, add to the bowl and mash with the Russet potato. Stir in sour cream, milk, butter, cheese and salt and pepper. Mash and stir until you reach your desired consistency.

Spoon back into potato skins and return to the oven for an additional 10 minutes. Garnish with paprika, chives and cheese.