Hearty and Sweet Agave Trail Mix Cookies

Ever since 101 Cookbooks posted that Black Bean Brownie recipe I have been interested in agave syrup (you know, the one I attempted and failed because of accidentally doubling the black beans, but then created something kind of marvelous in its place?). Cookie Madness also picked up on the agave craze and has been investigating.

granola

Agave is a type of plant, typically found in Mexico, that has thick, pointy leaves. It actually looks a little like aloe. There are a lot of things you can do with it (like make tequila… no thanks!), but you can also use the syrup/nectar from it as an alternative to sugar. Vegans may like it as a substitute to honey, and diabetics can appreciate its low glycemic index.
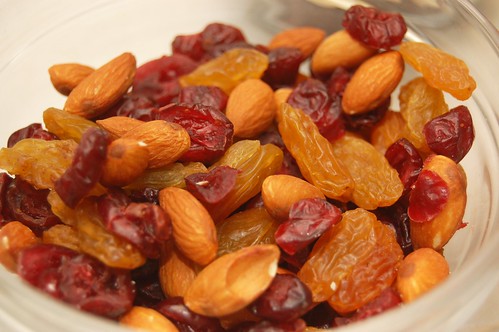
trail mix

It’s a powerful little plant, so it’s not a one-to-one ratio of subbing in agave syrup for sugar. One cup of granulated sugar can generally be replaced with 1/3 cup of agave syrup.
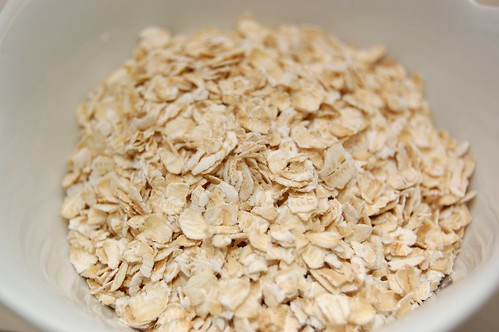
oats

So I was chowing down on a small bowl of my new favorite cereal – Nature’s Path Organic Pumpkin Flax Plus Granola with Omega-3 – with all this in mind while I was thinking up a new wholesome cookie recipe (I know the granola sounds really questionable and much like Chef Edwin’s personal hell… but I promise you, it tastes great!). I wanted a cookie that would be hearty and full of oats but without tasting bland, tough and like bran (we’ve all had THOSE before). Mid-bite I remembered a small bag of trail mix that someone gave me as a gift that had been sitting in the pantry. Yum, a trail mix cookie was born!

agave

The key players were Nature’s path granola, trail mix that included dried cranberries, almonds and golden raisins, oats, a little bit of coconut and a small combination of semi-sweet, white and peanut butter chips. Everything came together beautifully.
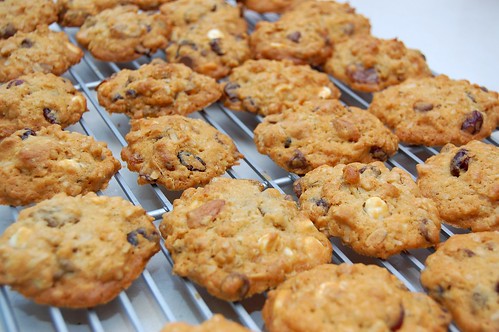
trail mix cookies

I was a little nervous at first because the agave syrup and butter didn’t seem to want to combine, but once I began adding other ingredients it was fine. Because I used agave, I didn’t get the crispy, browned edges and bottom that typically come from using sugar, so it might feel a little different. But the taste was great. My husband kept going back to the jar (very unusual for him!) and exclaimed that he loved finding a bite with a dried cranberry. I also gave him some to take to work and apparently they went over extremely well. This cookie has a lot of tasty nooks and crannies to explore!
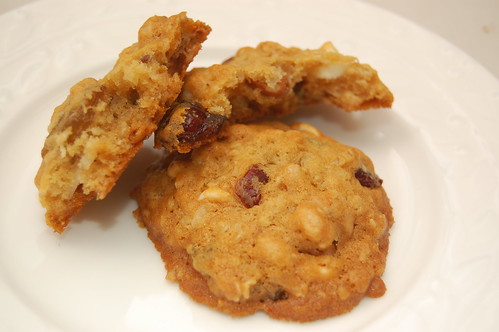
Trail Mix Cookies

Agave Trail Mix Cookies

3/4 cup Nature’s Path Organic Pumpkin Flax Plus Granola with Omega-3
3/4 cup trail mix (a mix of dried cranberries, almonds and golden raisins)
1/2 cup oats (regular, not instant)
1/4 cup white chocolate chips
1/4 cup semi-sweet chocolate chips
1/4 cup peanut butter chips
1/4 cup shredded coconut
7 ounces (slightly more than 3/4 cup) all-purpose flour
1/2 teaspoon baking soda
1/2 teaspoon baking powder
3/8 teaspoon salt
1/3 cup agave syrup
1 stick unsalted butter, room temperature
1 large egg
1/2 teaspoon vanilla

Preheat oven to 350 F. In a large bowl, combine granola, trail mix, oats, semi-sweet, white and peanut butter chips, and coconut. Set aside.

In a medium bowl, sift flour, baking soda, baking powder and salt. Whisk to combine.

Beat room temperature butter until smooth. Add agave syrup, vanilla and egg. Beat well. Fold in flour, baking soda, baking powder and salt. Then fold in granola, oats, trail mix, chips and coconut.

Use a tablespoon to scoop large balls of dough onto a parchment lined baking sheet. Place balls approximately 2 inches apart. Bake approximately 12-15 minutes. Cool on baking sheet for 3 minutes, then transfer to wire rack to cool completely (these cookies cooled surprisingly fast). Store in an air-tight container.

Makes about 2 dozen cookies.
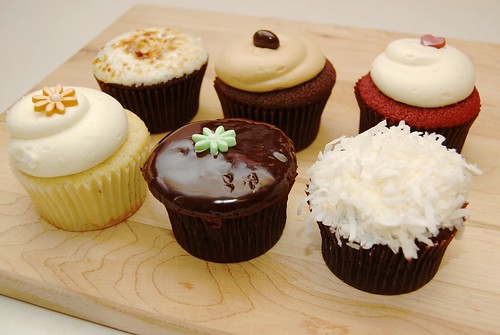
Food Photography – Georgetown Cupcake

Georgetown Cupcake

(Pictured: A half-dozen mouth-watering cupcakes from Georgetown Cupcake in Washington, DC. From top left to bottom right – toasted marshmallow, mocha, red velvet, vanilla with vanilla frosting, chocolate with chocolate ganache and chocolate with coconut frosting.)

And yes, my husband and I did eat all of them in one night.

Creamy Orecchiette Pasta with Broccoli and Vermont Cheddar

If you caught the cover of the February/March 2009 Food Network Magazine, then you saw a gorgeous Orecchiette Pasta with Broccoli Rabe Pesto. I couldn’t wait to make it.

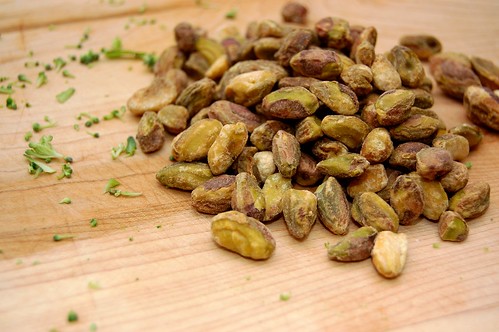
pistachios

Except I didn’t know much about broccoli rabe – which turns out to be nothing at all like broccoli. So I decided to go with what I know and see if this recipe works with regular broccoli. I also replaced the parmigiano-reggiano cheese with a sharper, more pungent cheese to give it a bit of zip.

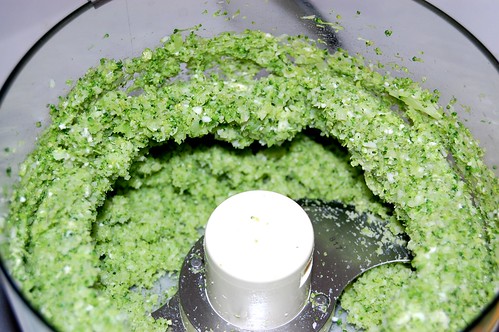
broccoli mixture

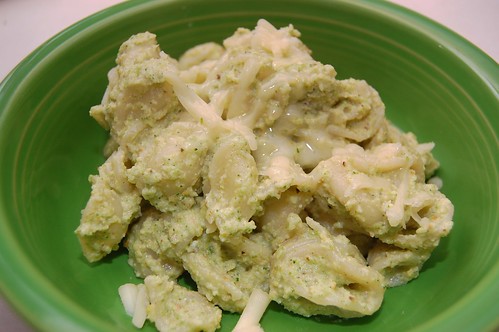
Without the bright green contrasting colors this dish may not look as lovely the Food Network Magazine cover, but I really enjoyed it. The orecchiette pasta is a lot like shells, hiding little salty pistashio nuggets in every other bite. It’s like a grown-up macaroni and cheese, with broccoli and pistachio being the more dominant tastes than the cheese.

If you’re in the mood for something a little different, this is for you!

orecchiette pasta

Orecchiette with Broccoli and Vermont Cheddar
Adapted from Food Network

2 1/2 cups broccoli, chopped
1/2 cup pistachios, toasted
1 cup Vermont Cheddar, shredded
1/2 cup part-skim ricotta cheese
1/2 pound orecchiette pasta

Cook pasta according to package instructions. Meanwhile, puree broccoli in bowl of a food processor. Add toasted pistachios, followed by Vermont Cheddar. Finally add ricotta and pulse until smooth. Add salt and pepper to taste.

Add broccoli mixture to a large skillet and add 1 cup of the pasta water. When pasta is cooked, drain and add to the skillet with the broccoli mixture. Stir vigorously to combine and cook until the sauce is creamy and hot. Add more salt and pepper to taste. Garnish with shredded Vermont Cheddar.

Kitchen Tips – Creaming Butter and Sugar

You know you’re obsessed with baking when you describe to a friend that watching the stages of creaming butter and sugar is a “euphoric experience.” Luckily that friend was none other than my co-blogger Chef Edwin, so he did not report me to the authorities and the men in white coats never came to get.

From very early in my baking career I began seeing the phrases “cream butter,” “cream butter and sugars,” or “cream until light and fluffy.” Of course, I had no idea what this meant, and I heard a variety of explanations when I asked others.

creaming2

The best and clearest step by step explanation that I’ve found was in my frequently raved about favorite cake book CakeLove: How to Bake Cakes from Scratch by Warren Brown (thank you again for the wonderful gift, Lisa!). Warren Brown is also a bit of a personal hero to me because he went to law school, became a lawyer, realized he didn’t enjoy it and left to open a bakery! He writes:

“For a while before I started baking, I didn’t recognize the disconnect between my daily conscious self and the voice of discontent in my head. I acted happy but I was really torn. I don’t know when this started but the conflict seemed normal. I just figured I’d deal with it like everyone else who was moping about in their late twenties: bury it, ignore it, or wait for something to change. But settling started to take a toll. I felt like a bobbing mooring, not going under but also not going anywhere. Even though I knew that I wanted out of practicing law, I didn’t know what I should do instead or how to get there. To figure it out I tried looking at my future retrospectively, picturing myself twenty years in the future. I envisioned two possible paths: work hard for twenty years and develop an expertise in law, then pursue the dreams that were already building in my head; or skip the middle-aged agony and get on with my pent-up passions right away. I chose the latter because my gut said, “Who are you kidding – avoid the midlife crisis you can predict! Start baking!”

If that’s not a battle cry, I don’t know what is. I withdrew from law school in 2006 after realizing very early on that law school and I were incompatible in every way. It was one of the best decisions I’ve made. I have not opened a bakery (yet?), but clearly I have great respect and admiration for Warren Brown (Mr. Brown, if you need a new spokesperson, please contact me).

But back to creaming – creaming aerates your cake batter and adds bubbles to it, making it light and fluffy instead of dense or tough. It also allows your cake to rise and develop a great texture.

poundcake

The absolute best way to do it is to combine room temperature (not microwaved) butter with your sugar(s) in a stand mixer on the lowest speed using the paddle attachment (not whisk). If you don’t have a stand mixer but you see a good deal of baking in your future, then consider giving the economy a little boost and investing in one. I use it constantly.

Do not rush the creaming process. As the sugar pushes through the butter you’ll see the volume slightly increase as the mixture becomes fluffy, light yellow and a little grainy. Creaming should take at least 3 minutes; do not turn up the speed on the mixer any higher than low. If you don’t have a stand mixer, do your best with electric beaters. You really can’t get the same effect trying to do this by hand. Also, creaming is not a concern for brownies or cookies.
When done properly, as I said above, watching the butter and sugar push and pull and become fluffy is so satisfying! You will make some truly mouth-watering cakes. And if at first you don’t succeed – keep plugging away!

Creamy and Sweet Pumpkin Pie Rice Pudding

A few weeks ago Joy the Baker posted a great looking rice pudding recipe that planted a seed in my head. I love rice pudding, particularly Kozy Shack brand, and I couldn’t believe that I’d never tried to make it before on my own.

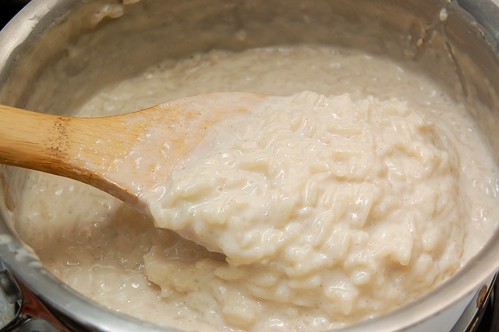
cooking rice pudding

But the pudding can scorch so easily. It’s a delicate balance of stirring continuously while keeping the heat low. It was relaxing and fun, though. And in testing different ingredients and styles I was able to use my favorite ingredient.

You know what I’m talking about…

Pumpkin!

pumpkin rice pudding

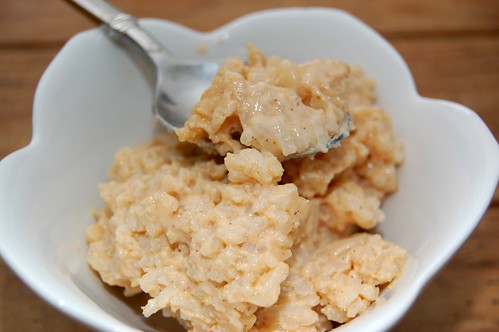
It’s like creamy pumpkin pie, or a pumpkin spice frappuccino – just a hint of pumpkin and a lot of sweet cinnamon and cold milk.

Next time I make this I might add more pumpkin (you know me) and milk to make it even creamier, but right now I’m just enjoying each bite of this sweet little treat (well, what’s left of it)!

pumpkin rice pudding2

Pumpkin Pie Rice Pudding

1/8 teaspoon salt
2 cups whole milk
1/2 cup long grain rice
1/4 cup plus 1 tablespoon light brown sugar
1/8 teaspoon cinnamon
1/4 cup Libby’s canned pure pumpkin
dash of cloves
dash of nutmeg

Cook rice in rice cooker or according to package instructions. Once rice is cooked, set aside. Add milk, sugar and salt to a medium pot. Bring to a low boil, stirring continuously so you don’t scorch the milk. Add the cooked rice and pumpkin and keep stirring! Add cinnamon and dash of cloves nutmeg. Keep stirring until the milk cooks down and the rice plumps, about 10 minutes. Make sure the heat stays low and that you don’t stop stirring.

Remove the pot from the stove and pour pudding into Corningware or medium-sized bowl. Make sure you put an oven mitt or trivet underneath the bowl and set it in the fridge. Chill in refrigerator and serve cold.

Note – During one of my prior attempts I used skim milk instead of whole and it the texture wasn’t quite the same. I’d refrain from switching to skim on this one.

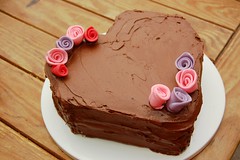
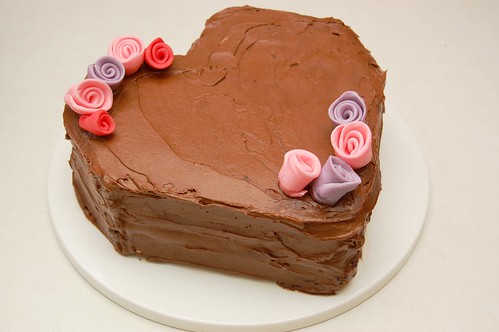
I know I said that I wouldn’t be baking anything on Saturday for Valentine’s Day, but… I lied? I saw one too many Tastespotting photos of heart-shaped desserts and I just couldn’t take it anymore!

blackberry swirl cake

Usually when I make cakes, I don’t worry too much about decoration. Spending a long time on decorating a cake seems onerous to me. I’d rather focus on the ingredients and the taste; I’m satisfied with simple decoration, like a few fresh flower blooms on a smooth frosted cake.

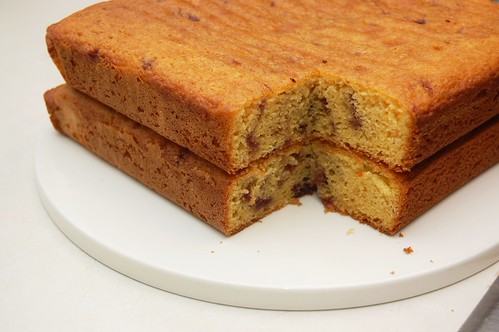
But on Friday night/Saturday morning I decided to bake a heart-shaped cake, focusing on decoration. I planned to make two 8×8 square cakes and cut them to the shape of a heart – I didn’t want my husband’s head to explode by buying a heart-shaped cake pan (I have, um, a few specialty pans).

blackberry swirl cake2blackberry swirl cake cooked

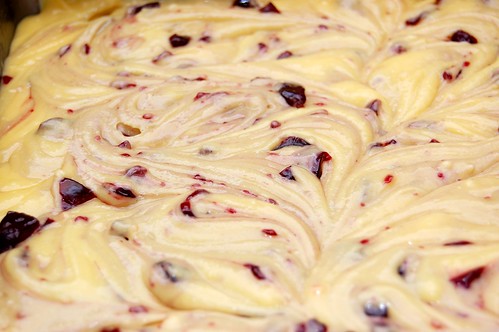
To make the cake batter, I adapted a recipe for Cherry Cheesecake Cupcakes from Cupcakes! From the Cake Mix Doctor by Anne Byrn (a good book if you’re looking to move past box cake mixes but still not quite ready to bake completely from scratch). I combined one package of plain yellow cake mix, vanilla instant pudding mix, whole milk, vegetable oil, eggs and almond extract. I lined the pans with parchment paper and poured the batter into the cake pans, swirling 3/4 of a jar of blackberry preserves into the batter.

I cooled the cakes for 15 minutes in their pans, lifted them out by holding on to the parchment paper and then chilled them in the refrigerator overnight (to make sure they were firm enough to work with easily).

first heart cut

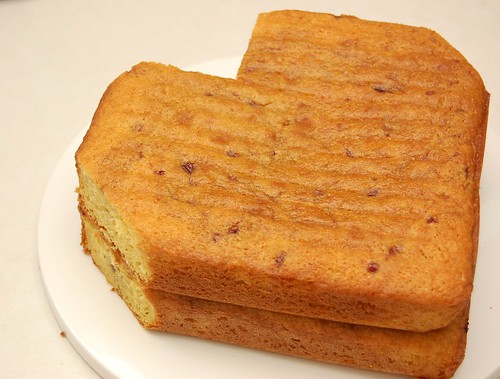
The next morning I gently stacked the cakes on top of each other and cut a small square off of one corner to make the dip of the heart and trimmed the points off. Then I cut the corners off of either side, to make the sides of the heart less pointy. I then carefully removed the top cake and set it aside.

final heart cut

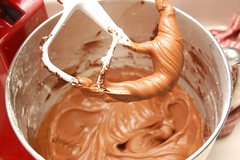
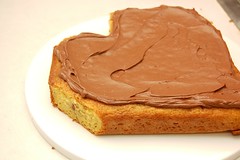
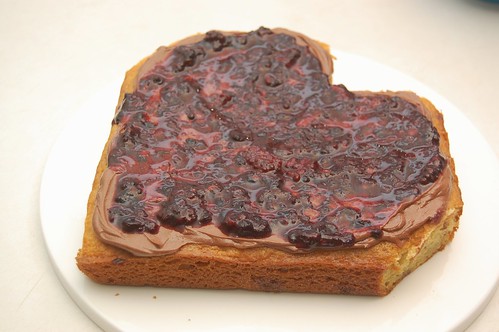
I made a simple chocolate buttercream frosting, also from the Cake Mix Doctor book. With a thin layer of chocolate buttercream, I frosted the top of the bottom cake, leaving a little extra frosting around the edges (the outline of the heart) to make a sort of pool. I mashed 1 cup of fresh blackberries with a few spoonfuls of confectioners’ sugar (or you could use more blackberry preserves) and spread it on top of the chocolate buttercream frosting.

buttercreamfirst icing

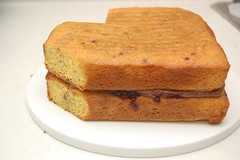
I lightly frosted the bottom of the top cake with buttercream frosting so that the top cake wouldn’t get soggy from sitting on top of the blackberry preserves. I then set the top layer on top of the bottom cake.

blackberry preserves

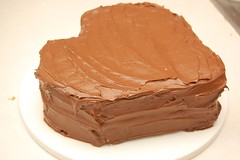
I finally frosted the entire cake with the chocolate buttercream frosting, setting the cake in the freezer when I finished. After 15 minutes, I removed the cake from the freezer and refrosted any areas that needed to be smoothed or where crumbs had gotten into the frosting (this wasn’t much of a problem since I had refrigerated the cakes overnight before frosting).

top layerheart shaped cake

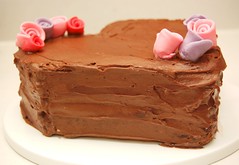
I bought some Wilton fondant, tore off a few pieces of it and separated it into separate bowls. I let one drop of food coloring on each and massaged it in to create the colored fondant. I worked it into a thin layer and then gently rolled it to make the fondant flowers.

heartshapedcakewithfondantflowersheart shaped cake with flowers

My husband and I really enjoyed this cake, and of course, I was really proud that I had the patience to work on my cake decorating skills! So keep this post in the back of your mind if you have an anniversary coming up or even a kid’s birthday. It’s actually not terribly time consuming, and it’s a lot of fun!

blackberry yellow cake with chocolate frosting and fondant flowers

Happy Valentine’s Day… almost!

mini chocolate cakes

My husband, Morgan, and I have never been big on Valentine’s Day. I generally don’t care for holidays with a lot of expectation involved because they make me nervous! Morgan and I have a great time just going to a low-key restaurant/brewery or sitting in pajamas and watching a movie. But you want me to go somewhere fancy… and dress up… and have it be the most romantic day of the year? Well, I’ll take a rain check!

But wait, that doesn’t mean I don’t want a box of chocolate! And you can keep all the gourmet chocolates and truffles; I just want some good old Russell Stover.

And maybe it’s because I don’t like all the expectation associated with V-Day, but as of right now I don’t intend to bake anything on Saturday (it’s Russell Stover or bust!). But if you’d like to tempt your honey, I highly recommend this melt-in-your mouth, warm and chocolatey little cake.

mini chocolate cake

I found this recipe in an old Kraft foods magazine. It was described as easy to prepare and, “under 200 calories, wonderful chocolate taste without being overly sweet.” Though I’ve heard people use the phrase “overly sweet,” I can’t say I understand the concept. My mantra is closer to, “bring on the sweets!” so I made a few small changes by adding about 1 cup of peanut butter chips along with 1/2 cup of bittersweet chocolate chips. It’s likely that these are no longer under 200 calories as advertised… whoops!

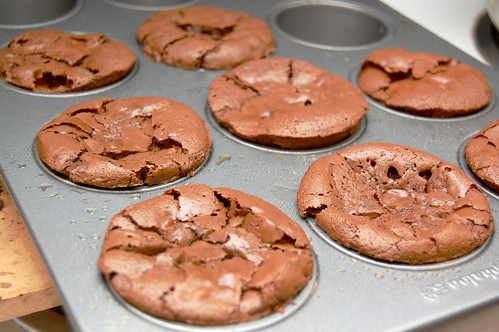
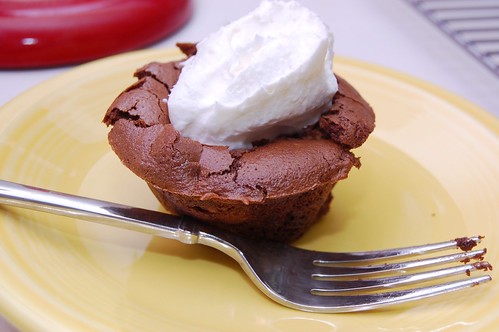
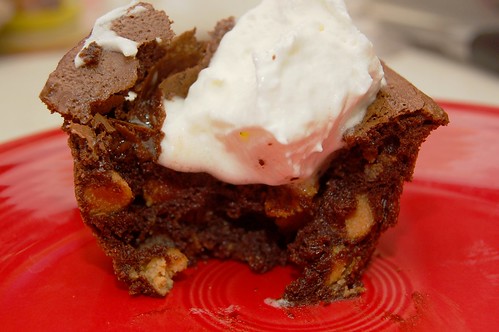
This recipe is also listed on the Kraft website, and I noticed in the comments that a lot of people complained that the cake completely fell in the middle just a few minutes after taking it out of the oven. I had this problem as well, probably because these cakes are flourless so the structure just isn’t the same, but a simple dollop of Cool-Whip disguises that instantly. And because you’re serving it warm out of the oven, they’re really not sitting around long enough for anyone to notice.

These little cakes are very easy to whip up, so you don’t have to worry about spending a lot of time in the kitchen instead of with your significant other. And because they’re individual serving sizes you get instant portion control! These sweet little cakes are truly heavenly.

mini chocolate cake cut open

Flourless Triple Chocolate Fudge Cups with Peanut Butter Chips
adapted from Kraft

3 squares semi-sweet baking chocolate (I used Baker’s brand)
1 tablespoon oil (I used Smart Balance)
1/3 cup unsweetened cocoa powder
1 cup peanut butter chips
1/2 cup bittersweet chocolate chips
4 egg whites
1/2 cup packed brown sugar
4 tablespoons thawed Cool Whip Lite Whipped Topping

Preheat oven to 350 F. In a microwave safe bowl, microwave semi-sweet and bittersweet chocolate and oil for 20 second intervals, stirring between each interval until melted. Stir in cocoa powder and set aside.

Beat egg whites and sugar on high for approximately 3 minutes. Reduce speed and blend in melted chocolate. Stir in peanut butter chips.

Spoon batter into 6 paper muffin cups (I decided not to use paper cups when I made them, but I think it would be easier if you did… as I’ll describe in a minute).

Bake for approximately 20 minutes, or until center is puffed and set. Let cool in pan for 5 minutes. The tops will fall in as they cool. Gently slide out of the muffin pan when cool. Because the tops have fallen, it will be a little difficult to get them out without breaking the top more. Do the best you can, and plop Cool Whip on the rest to serve!

Makes 8 little cakes.

Food Photography – Sweet and Moist Chocolate Pound Cake

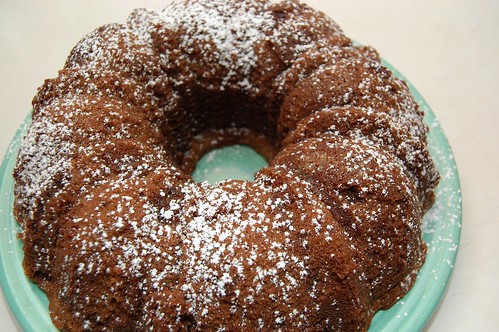
chocolate pound cake

(Pictured: Chocolate Pound Cake from Warren Brown’s CakeLove: How to Bake Cakes from Scratch. I absolutely love this book! It’s probably not best for beginners, and some of the ingredients he uses are a little out there, but so far both cakes I’ve made (his “LCD Pound Cake” and this “Chocolate Pound Cake”) have been PHENOMENAL. I can’t wait for my next “excuse” to make more!)

Guinness Beer Brownies And [photos of] Babes

As Edwin mentioned on Friday, we were both out of town this weekend for a mutual friend’s birthday party (we had a good time – we went out for a great dinner and then later I beat Edwin in a sit-up contest!). This friend happens to enjoy his chocolate with a side of chocolate, so Edwin and I separately embarked on a mission to create some sinfully decadent chocolate treats for the birthday boy.

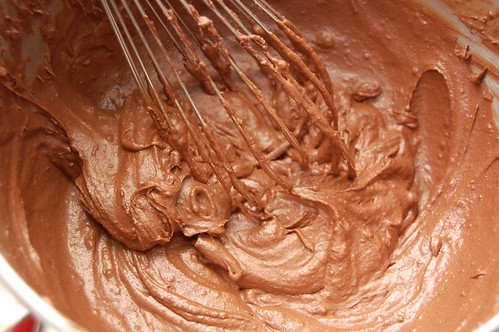
guinness brownie batter

I decided to make Guinness Brownies, thinking that the Guinness would add extra chocolately richness, making them even more intense. I found a surprising number of recipes for Guinness Brownies, right now I have four of them printed out in front of me from websites like Cookie Madness, Godiva and more.

When I began comparing them all they seemed fairly similar. I considered using agave nectar in place of sugar (as a slightly healthier alternative). I also bought some Wilton’s fondant in an attempt to make fondant Miis. But then I remembered a cardinal baking rule that I always violate and usually pay for – never try something new on short notice, especially when you’re making it for someone else.

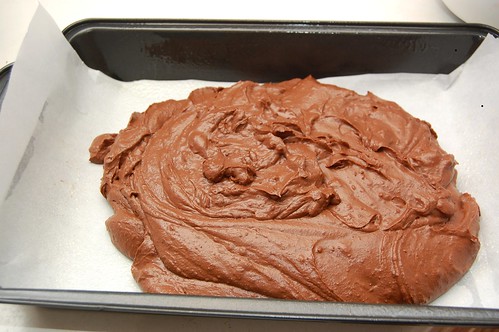
guinness brownie batter in pan

So instead I made minor baking changes and finished the brownies off with silly decorations as a gag for my friend. I used half whole wheat flour and half all-purpose white flour, and I amplified the chocolate. I used very dark Ghirardelli chocolate bars and unsweetened cocoa powder.

In place of dark bittersweet chocolate I used 7 ounces of Ghirardelli “Twilight Delight,” which is 72% cacao. Just listen to this description:

Highly aromatic, this bar has mocha, blackberry and dark cherry notes with an intense chocolate flavor and silky smooth texture. This sensuous chocolate has a long finish and a delightful, lingering flavor.

guinness brownie

I also used 1 ounce of Ghirardelli “Midnight Reverie,” with 86% cacao. Both of these are seriously dark chocolates, but I wanted to work with the heavy taste of the Guinness. The sugar, white chocolate chips and semi-sweet chocolate chips sweetened the brownies and kept them from being bitter, but the very dark chocolate and Guiness kept them distinctive.

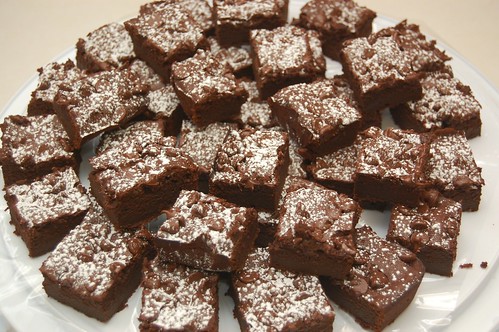
I sifted confectioners’ sugar over the brownies when done. This was listed as an optional component in the recipes I found, but I would suggest that it’s mandatory, especially if you’re using super dark chocolate.

guinness brownies with confectioners sugar

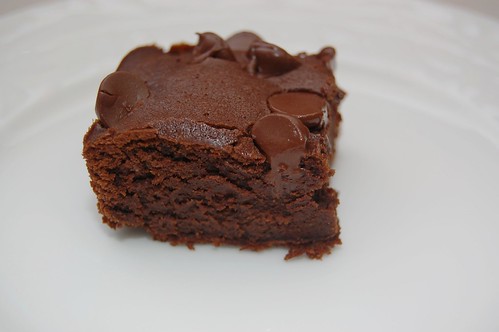
I recommend this brownie if you’re looking to intrigue the chocolate lover who thinks they have tasted it all before. You can’t really make out the Guinness, but the taste is definitely dark. The texture is also very different from a typical brownie – the batter tasted exactly like chocolate mousse, and they came out of the oven very fluffy and light instead of tough or dense.

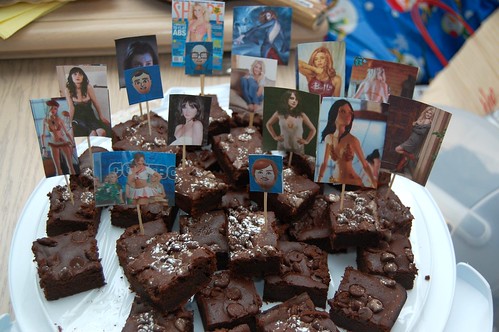
And, don’t underestimate the power of silly toothpick photo decorations. I printed a few of my friend’s favorite things (yes, mostly this means women on tv that he finds attractive), attached the photos to toothpicks, popped them in the brownies before serving, and we all had a good laugh!

guinness brownies with toothpick decorations

Guinness Stout Brownies
from Cookie Madness

1/2 cup all-purpose flour
1/2 cup whole wheat flour
3/4 cup unsweetened Ghirardelli cocoa powder
1/4 teaspoon salt
6 tablespoons unsalted butter, room temperature
7 ounces Ghirardelli “Twilight Delight” chocolate, chopped
1 ounce Ghirardelli “Midnight Reverie” chocolate, chopped
3/4 white chocolate chips (I just used Tollhouse)
4 large eggs, room temperature
1 cup granulated sugar
1 cup plus 1/4 cup Guinness Stout beer at room temperature (also be sure before you pour it into the batter that you spoon off the foam)
3/4 teaspoon vanilla
1 cup semi-sweet chocolate chips (for sprinkled on top at the end)
Confectioners’ sugar for sifting over the brownies before serving

Preheat oven to 375 F. Line a 9×13 baking pan with parchment paper (with enough hanging out so that you can grab it to remove the brownies). Spray sides with non-stick cooking spray where parchment paper does not cover.

In a medium bowl, whisk flour, cocoa powder and salt. Set aside.

Cut butter into cubes. In a microwave safe bowl, microwave Twilight Delight, Midnight Reverie and white chocolate chips (all chopped) with butter for 20 seconds at a time. Stir between 20 second intervals to avoid burning your chocolate.

In the bowl of a stand mixer with the paddle attachment (or in a large bowl with a regular mixer), beat eggs and sugar on high for 3 minutes. Gradually add melted chocolate mixture. Beat until fully combined. Gradually add flour mixture.

Spoon foam off of Guinness and gently whisk the beer into the batter, then add vanilla. (The Cookie Madness instructions say that the batter will seem thin, but my batter was thick although fluffy like mousse). Pour batter in your baking pan and level with a spatula. Bake approximately 28-30 minutes in the center rack of your oven, or until a toothpick inserted in the center comes out almost clean. The top of the brownies should be set.

Let brownies cool in pan for 10-20 minutes, then carefully lift brownies out of the pan by holding parchment paper. Allow brownies to cool completely on wire rack. Dust with confectioners’ sugar before serving.

Kitchen Tips – Butter, Butter, Who's Got the Butter?

One of the first “lessons” I learned in baking was about butter. When I was first starting out I always microwaved butter to soften it. Who wants to let the butter sit out and just wait for it to get to room temperature? Usually the things I made seemed to turn out alright, and I didn’t worry about it.

Finishing Touches

Then I started reading more about baking and everything I read cautioned against microwaving butter. I began noticing that the things I made were not really alright – they were on the flat side and they often spread too much.

Butter gives baked goods their structure. If the butter gets too warm or melts, the emulsion breaks and you’ll never get that structure back. The butter will also never add air pockets to your batter or dough, which affects the texture.

I know some people will probably protest that they’ve been microwaving their butter for years without a problem. I haven’t even been able to convince my own mother to stop microwaving butter. I’ll write a future “Kitchen Tips” post about what it really means to “cream butter” in recipes and then you’ll see what I mean… it’s a beautiful thing when done right!

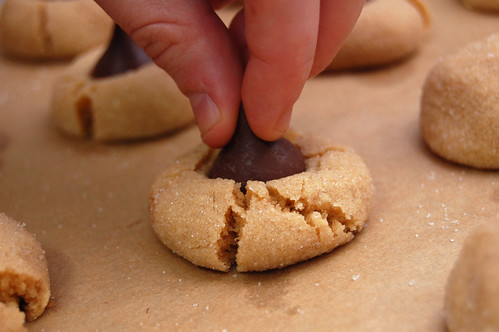
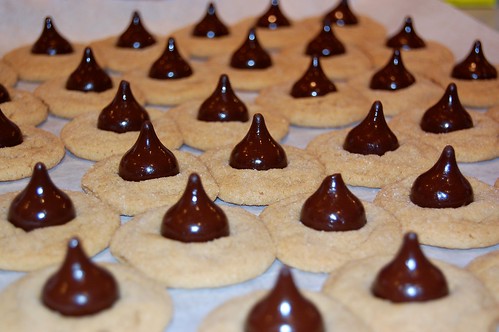
pbblossoms

If you’d like to read more about the importance of butter’s temperature, check out this great article from NYTimes.com. Some of it is a bit extreme, but the important thing to take away is to let your butter sit out until it reaches room temperature (about 65 degrees) on its own. The time will vary based on the temperature of the butter to begin with, but I usually let mine sit out for about 30 minutes. Make sure you don’t let it melt!

(Photos: The first photo shows peanut butter blossoms from the Bake-a-Thon made with room temperature butter. The second photo shows peanut butter blossoms made with microwaved butter when I was home for this past Christmas).