The Eyes Have It (Eyeball Cupcakes)

Halloween has to be the best “holiday” of the year. Don’t get me wrong; Christmas is cool, Thanksgiving is fun, but Halloween is a free pass to go nuts. Whether you’re one of thousands of girls who take advantage of the one day it’s socially acceptable to tramp it up, an individual who plays out his/her secret fantasy without fear of judgment (furries are people too, or so I’m told), or just someone who likes a little make-believe; this day has something for you. Halloween is the best night of the year to go out. No other day will complete strangers be so open to meet you; so willing to start random conversations.

00065

And then of course, there’s the baking. The great thing about every holiday is the themed baking. There are plenty of ideas out there on Halloween-themed culinary delights and I took full advantage. Last year’s vampire cupcakes were a hit, but here at DinnerCakes we are ever venturing forward; forging new paths. This will be a two-parter, folks. And by two parter, I mean two posts that are Halloween themed. (ok, so I guess that’s not really a two-parter at all. whatev.)

Making the eyes

My friend Lindsey and I were talking, discussing potential works of art to bring to her party and she mentioned recently coming across “eyeball” cupcakes. Doing a quick search on foodblogsearch gave me plenty of examples. Having dabbled in fondant before (sometimes successfully), I decided to give it a shot.

Almost

This is more of a how-to on the decorative process than it is a recipe. For the cupcakes, I used a recipe from Joy Of Cooking (also known as my bible). You could use anything. Like yellow cake? Do that. All about red velvet? Go for it. The world is your oyster (pantry).

They're Looking At Me!

Eyeball Cupcakes (of DOOM!)
Two dozen cupcakes (give or take)
Two pounds of white fondant (this is more than enough, you WILL have leftovers, but this is unavoidable)
Two cups royal icing in a pastry bag or plastic bag with the tip cut off (butter cream also works well)
Red and black icing for veins and pupil, respectively (royal works well, but any icing in a tube at the store will work)
Lifesavers

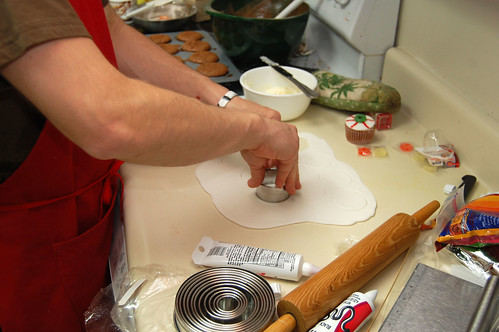
After the cupcakes have cooled, begin working on the fondant. Start with half and work it in your hands; warming it up. When it’s comfortably pliable, set it on a clean working surface to roll it out. Note, some fondant can stick to some (most?) surfaces. Not as big a deal with the small shapes we’re making here (pastry cutter for the win), but you could always dust the surface with corn starch. Roll out your fondant like you would a pie crust; from the center out. Feel the surface of the fondant to see how smooth and even it is. You’re going for 1/4 to 1/8 of an inch thick. This process is really forgiving since you’re going to be making really small shapes. Use a pie cutter of the proper size (or a glass or anything round) to cut the whites of the eyes for each cupcake.

Spread a layer of icing on the top of each of the cupcakes. This is your glue. Glue your eyeball whites onto the cupcakes. Depending on your icing, it might dry somewhat quickly, becoming less awesome in the glue category. You may want to consider only icing half first, gluing on the whites, then continuing with the other half.

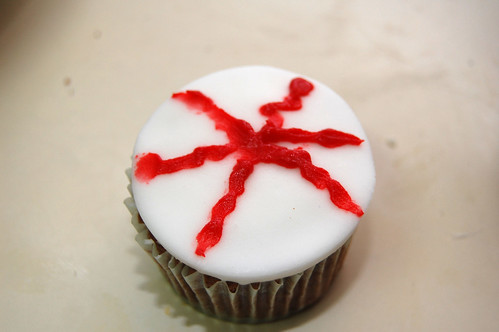
Next, the veins with the red icing. Start from the center, drawing squiggly lines out; as many as you want. Don’t worry too much about how pretty the center is. After you’re done with this, you’ll place lifesavers at the center and dot its hole with black icing.

And then, BAM.

Everything [but the Kitchen Sink] Cookies

My husband and I are journeying to Chicago for Halloween this year (farther west than I’ve ever been, I’ll embarrassingly admit). Last year we hosted a very successful party at our apartment, but because our lives have been a little chaotic for the last few months, we thought a change of scenery might do us some good this year.

Everything Cookies, Fun Ingredients

A bunch of us are converging on a friend’s apartment, and of course I can’t show up empty-handed. Kudos to the other half of DinnerCakes, Edwin, for suggesting this outstanding recipe from Sunday Nite Dinner!

Everything Cookies, Oats and Raisins

Hopefully these cookies survive airport security and are well-received by my friend. And, Kari, if you’re reading this post right now, “Surprise, cookies!”

Everything Cookies, Chips and More Chips

Sweet, hearty, crunchy yet chewy, a buttery cookie smell that takes you back to elementary school, a hint of fruit – these cookies are a breath of fresh air. They call for a flurry of ingredients, but even just measuring them all and getting them together was absolutely heavenly!

Everything Cookies, Tossed

Ghost Baker’s verdict and salty suggestions:

You must make these cookies; how’s that for a suggestion? I really didn’t change anything about the recipe except, following a note at the top, I increased the salt quantity from 1/2 teaspoon to 3/4.

Everything Cookies, Hand Mixing

Because these cookies already include, well, everything, I wouldn’t add any more ingredients. If you like an even more peanut buttery taste (the peanut butter as it stands is subtle, I like it) then swap the measurements of the chocolate chips and peanut butter chips. You could also exchange the walnuts for pecans or, if you really just have to go wild, swap in craisins instead of raisins.

Everything Cookies, Ready to Eat

Everything Cookies
from Sunday Nite Dinner

Ingredients

1 1/2 cups low fat granola
1 cup golden raisins
1 cup old fashioned rolled oats
1 1/2 cups chocolate chips (dark or semi-sweet work well)
1 cup peanut butter chips
1 cup chopped walnuts
1 2/3 cups all-purpose flour
1 teaspoon baking soda
1 teaspoon baking powder
3/4 teaspoon salt
1/2 cup packed dark brown sugar
1/2 cup granulated sugar
1 cup (2 sticks) unsalted butter, cut into small pieces (room temperature)
2 large eggs
1 teaspoon vanilla extract

Preheat your oven to 350°F.

In a large bowl, toss granola, raisins, rolled oats, chocolate chips, peanut butter chips and walnuts; set aside.

In a medium bowl, sift flour, baking soda, baking powder and salt. Then whisk the ingredients together until combined.

In your stand mixer bowl (or another large bowl if you don’t have a stand mixer), combine the granulated and dark brown sugar. Add a few pieces of butter at a time and beat until it’s thick and smooth. Add vanilla and beat in the eggs, one at time. Fold in your flour mixture and beat until fully incorporated. Add the granola, raisins and chips and mix well together by hand (you would probably break your wooden spoon even if you tried).

Using a tablespoon, scoop a hefty 2 tablespoons of dough at a time and roll into 2-inch balls. Place the balls onto baking sheets lined with parchment paper. Space your dough balls approximately 2 inches apart.

Bake until the cookie edges turn golden brown, about 15 minutes. Cool your cookies on the baking sheets for 3 minutes, then transfer onto a wire rack (your mouth works, too). Cool for about 30 minutes, then store in an air-tight container.

This recipe makes about 3 dozen cookies.

Fish, the Final Frontier

I grew up in a house of seafood lovers and fishermen, spending summers at the Jersey Shore. I watched my dad catch, clean and cook fish. I set crab traps in the lagoon using hotdogs and fish heads (crabs go nuts for that stuff!). But, I never really learned how to cook fish myself.

Other than my parents, I can’t think of anyone I know who frequently cooks fish. Why? The American Heart Association recommends eating fish at least two times per week.

When I asked some of my friends why they don’t cook fish, I heard things ranging from, “seems hard” to “I never think to.” People seem genuinely stymied by the idea of cooking fish! After searching for some recipes, I almost was too – page after page of recipes for fish tacos and fish casserole almost made me lose my appetite forever.

Grouper, Pan-fried

Ghost Baker’s demystification of fish:

If you want the best, always cook fresh fish. The times I’ve purchased frozen fillets they have never dethawed into anything special. Put your best foot forward and buy your fish the same day that you cook it.

Fresh fish should never smell “fishy;” that’s a sure sign that it’s been sitting out. If you get a whiff of something at the grocery store that is overpoweringly fishy, just keep walking.

When you look at the fillet, make sure any liquid on it is clear and not cloudy. It shouldn’t look faded or dull.

Today I purchased a grouper fillet (maybe not the most attractive fish in the sea, but he’s tasty!). I coated the fillet with an egg (beaten), and lightly covered it with breadcrumbs. I used salt, pepper, a little bit of Old Bay and a little bit of Mrs. Dash to season the fillet. A good fillet doesn’t need to be doused in butter or deep fried – some light seasoning makes it very flavorful and preserves all those good vitamins.

Grouper

I pan fried my fillet using only a tablespoon or two of oil on low heat. The cook time depends on the thickness of your fillet, mine was relatively thin and took about 8 minutes. You can tell your fish is done when the fillet is golden brown and the meat flakes off easily when tested with a fork.

My husband prepared side dishes of wild rice and green beans. In the span of 25 minutes (including both cook and prep time) we had a healthy and delicious dinner ready to eat! Cooking with fish isn’t messy – there’s no beef blood to deal with or salmonella chicken scares. The biggest “hassle” is simply going to the store to buy it fresh. It cooks quickly, requires minimal prep, and the list of health benefits of eating fish high in Omega 3 fatty acids only continues to grow!

Delightfully Spicy Black-Bean Cakes

For someone that lists cooking and baking as her two favorite hobbies, I’m probably not as much of a food snob as I should be. I love going out to a fancy dinner, but when I’m cooking, I’m mostly interested in something that’s healthy and relatively quick.

Spicy Black-Bean Cakes, Grated Sweet Potato

Thus, my favorite cookbook is Everyday Food: Great Food Fast, From the Kitchens of Martha Stewart Living. Several of the recipes found in this book are staple dinners in my home.

Spicy Black-Bean Cakes, Rinsing Black Beans

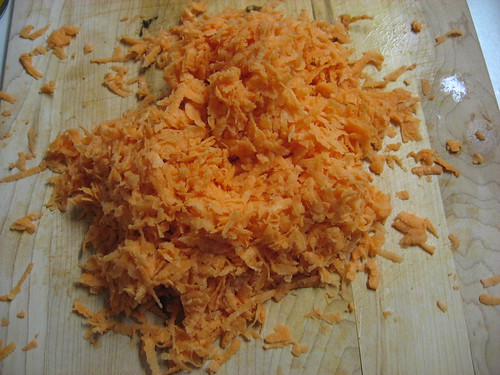
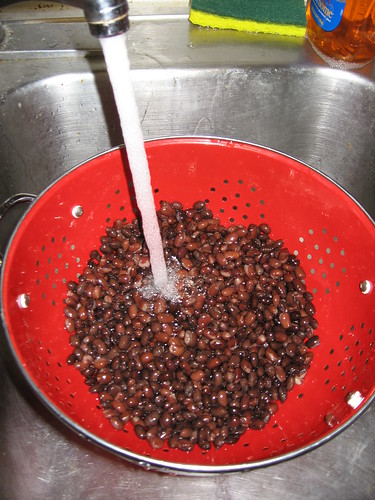
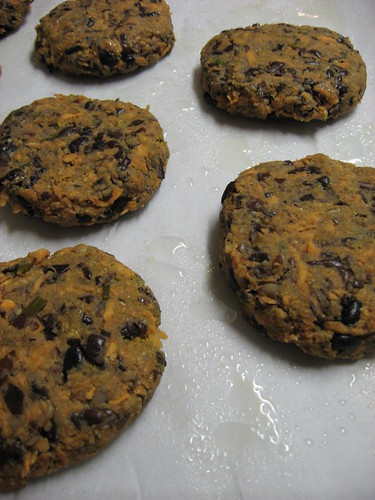
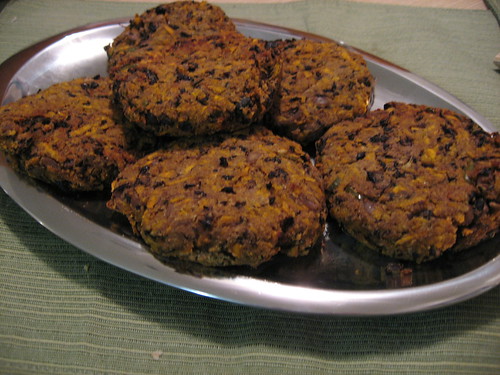
Last night we enjoyed Spicy Black-Bean Cakes (hey, they’re DINNERCAKES!). These crispy bean cakes are broiled rather than pan-fried, and the recipe doesn’t use much oil (click here for more information about using the broiler on your oven). My only complaint is that the prep time lies, lies, lies! If you can grate a large sweet potato, finely chop and thinly slice your ingredients, drain, rinse and mash two cans of black beans, and flatten 8 patties in 20 minutes, then my only explanation is that your kitchen is magical like Fantasia.

Spicy Black-Bean Cakes, Divided into 8 Balls

Ghost Baker’s verdict and serving suggestions:

I’m a garlic lover, so I upped the recipe to 8 garlic cloves in my garlic press instead of 6 (just make sure you have a toothbrush handy for after dinner). If you like your food hot, don’t be afraid to add a 1/4 teaspoon of cayenne, though these cakes are already quite spicy as is.

Spicy Black-Bean Cakes, Flattened into Patties

The recipe calls for a lime sour cream sauce to pour over the cakes, but in the interest of cutting down on fat content (and because I don’t love sour cream to begin with), I just cut this part out. I served these cakes over a leafy salad with a side of corn.

Spicy Black-Bean Cakes, Crispy and Ready to Eat

Spicy Black-Bean Cakes
Makes 8 cakes, Prep time around 45 minutes, Cook time about 15 minutes total
adapted from Every Food: Great Food Fast

2 tablespoons olive oil
4 scallions, thinly sliced
8 garlic cloves, pressed

2 jalapeno chiles, finely chopped (you can remove the ribs and seeds if you like less heat)

1 tablespoon ground cumin

1/4 teaspoon of cayenne (optional)

2 cans (15 oz cans) black beans, drained and rinsed

Coarse salt and

fresh ground pepper
1 large sweet potato, peeled and coarsely grated (about 2 cups, be prepared for tired arms!)

1 large egg, lightly beaten
1/2 cup plain dried breadcrumbs

In a small skillet over medium heat, warm 1 tablespoon of the oil. Cook scallions until softened (about 1 minute).

Add the garlic, jalapeno, cumin and optional cayenne – cook about 30 seconds or until fragrant, stirring continuously. You may want to make sure you have some ventilation – all the spices combined on the stove got to me a little. Transfer contents of the skillet to a large bowl.

Add the rinsed and drained beans to the bowl. Mash beans with a potato masher or fork, leaving about 1/4 of the beans whole. Season with salt and pepper.

Move an oven rack to the top of the oven and heat the broiler, leaving the oven door slightly open.

Fold in the grated sweet potato, egg and breadcrumbs. Divide into 8 balls of equal size, then flatten into patties.

Cover a baking sheet with parchment paper, and brush the paper with the remaining tablespoon of oil. Place the patties on the sheet about 1/2 inch apart.

Broil on the top rack until golden brown, about 10 minutes. With a thin metal spatula, carefully turn the cakes after 10 minutes. Broil for another 3 minutes, then serve!

The Quest for a Quality Macaroni Dish

So I’m going to pretend that last night’s culinary escapade didn’t happen (officially. unofficially, you learn more from failure than success) and move straight on. Life is like a river, loyal readers (do we have any of those yet?). It flows ever forth.

The Arlington Public Library had a book sale this weekend. I’m a bit of a book whore, I have to admit (love knowledge), so I went twice. My partner in crime Heather and I were having a discussion earlier in the week about how neither of us really had a quality macaroni and cheese recipe under our belt. We were both raised on the out-the-box variety: me the classic blue box, Heather the classier, more sophisticated deluxe kind. Coincidentally on my first visit to the book sale, I came across Macaroni And Cheese for the low low price of a dollar. Feeling this was fate, I took this book home with me.
Simple Mac and Cheese Ingredients
I’ve not given this book the time it deserves for a proper review, but it definitely looks promising. It starts off with a brief about why macaroni and cheese is awesome (as if you didn’t know this by now) followed by a mini-guide on the different kinds of cheeses and pastas along with how to put it all together. Despite the name, no seasoned cook should expect to find any secrets here but beginners may find this useful. The remainder of the book is broken into five chapters for the varying categories of mac & cheese: Easy and Cheesy, Soups and Salads, Stove-Top Mac and Cheese, Baked Mac and Cheese, Sweets. The photography is excellent and this is not one of those cookbooks leaving you frustrated; wishing there were more photos of the dishes (hate. those. books). You can expect a photograph every two to three recipes.
Cheesy
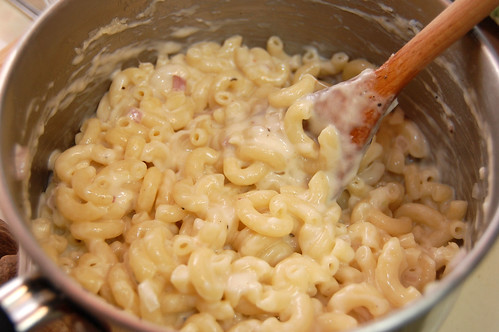
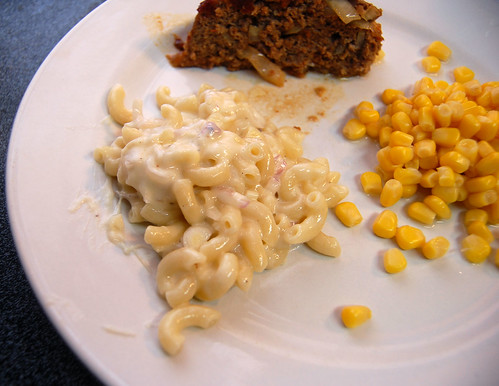
Eager to try a recipe out but still nursing bruised confidence after last night’s adventure, I opted for the first recipe from the Easy and Cheesy Recipe: Alpine Macaroni and Appenzeller with Crème Fraîche. This was a recipe with a very cheesy texture but not an overly cheesy taste. With only an eight item ingredient list this recipe, was not overly complicated and instead focused on simplicity. Perfect.
Alpine Macaroni and Gruyère with Crème Fraîche
adapted from Macaroni & Cheese (I cut the recipe in half)

6 ounces elbow macaroni
2 garlic cloves, minced
1 shallot, chopped
5-6 ounces Gruyère, shredded/grated (possible alternatives: Appenzeller, Emmenthal, Comtè)
2 ounces crème fraiche (or more if desired)
a grating nutmeg
1-2 tablespoons of unsalted butter
salt a pepper to taste

Cook the pasta as you cook all pasta: in a rapidly boiling pot of salted water until al dente. Reserve half a cup of the liquid.
Put a bit of the water back into the pot first to prevent burning followed by the pasta, garlic, shallot, cheese, crème fraiche, nutmeg and butter. Toss gently. If too thick or dry, add more water. If the cheese doesn’t melt turn the heat on low briefly and continue to toss.

They Can't All Be Winners

I had a grand vision of a fondant cake rock climbing scene. It would have been epic.

It started off promising


Nice straight edges

Beginning to get worried

Oh god what happened

Better luck next time…

Now THAT'S a Perfect Pumpkin Cookie

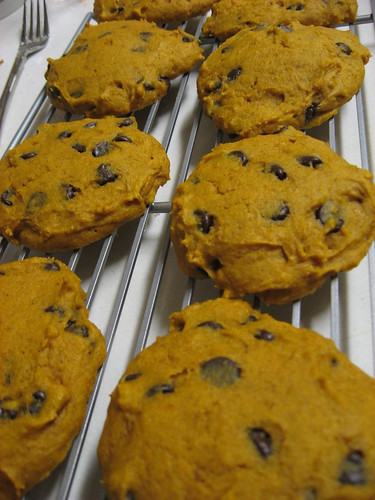
Eureka! Joy the Baker has blessed us with the most marvelous Pumpkin Cookie recipe that I’ve tried. This recipe dances circles around the one I tried last week.

Part of the key is flattening and smoothing the dough with a thin metal spatula before baking. At first I thought this step seemed a little odd to me, but having a flatter cookie (still very soft and cake-like) came out so much tastier than the poofy, muffin-like variety.

Also this recipe called for more of your typical pumpkin pie spices such as nutmeg and cloves. It tastes exactly the way delicious pumpkin desserts were meant to!

Pumpkin Cookies, fresh out of the oven

Ghost Baker’s verdict and pumpkin-packed suggestions:

If you like a caramel taste to your pumpkin cookies, then butterscotch chips would be great. I knew from my previous pumpkin cookie attempt that I wanted more chocolate (who doesn’t?). Instead of just 1 cup of chocolate chips, I added an extra 1/2 cup and used bittersweet chocolate chips. I also used a whole can of pumpkin instead of a half can.

Pumpkin Cookies, in an air tight container

Pumpkin Chocolate Chip Cookies
adapted from Joy the Baker

2 cups all-purpose flour
1 1/2 teaspoons baking powder
1 teaspoon baking soda
1/2 teaspoon salt
1 teaspoon ground cinnamon
1/2 teaspoon nutmeg
1/2 teaspoon ground cloves
2 eggs
1 cup sugar
1/2 cup canola or corn oil
1 can pumpkin
1 teaspoon vanilla extract
1 1/2 cups chocolate chips (can also substitute or mix with butterscotch chips, white chocolate chips, etc.)

Preheat your oven to 325 degrees. Prepare two baking sheets with buttered parchment paper.

Combine flour, baking powder, baking soda, salt, cinnamon, nutmeg and cloves in a medium bowl. Set aside.

In a large bowl (or stand mixer), lightly beat eggs and sugar until smooth (about 1 minute). On low, add the oil, pumpkin, and vanilla until blended. Remove bowl from stand mixer and fold in the flour mixture until fully incorporated. Stir in chips.

Using an ice cream scoop or 1/4 measuring cup, scoop dough onto baking sheets, spacing 2 inches apart.

Don’t forget to use a thin metal spatula to smooth and flatten the dough!

Bake cookies one sheet at a time for about 16 minutes – the top should feel a little firm and a toothpick or fork inserted in the center will come out dry. Let the cookies sit for about 5 minutes before removing to a wire rack.

Cool the cookies completely before storing in an air tight container. Try not to eat them all in one sitting! Makes about 2 dozen cookies.

It's Not The Recipe, It's the Art… Sorta

A few weeks back a friend and I went to Homestead Farm in Maryland for apple picking. I’m a huge (read: obsessed) fan of apples, going through a minimum of two a day, however this was my first time picking. Needless to say I went a little overboard and ended up with a 28 pound bag of Cameos, Pink Ladys (best. apple. ever.) and Sun Fujis.

Now, 28 pounds is a lot of apples; stretching the limits of my fridge’s storage capacity (and my roommate’s patience with my obsession for food), so I decided to take full advantage of this by going into apple cooking/baking overload. We’re talking apple crisp, baked apples, apple honey challah bread, apple tarts…. These all had… varying levels of success.

One of the things I have never done is a pie. My mom makes awesome pies. Growing up she’d always do at least two pies: one cherry for my sister and one apple for me (no, we didn’t eat the entire pie ourselves). I friggin’ loved those pies. So what better way to learn how to bake a pie than via the mom? So I took a trip down to Richmond Saturday to learn the art of pie making (and to make a potato gun with the dad, but that’s another story).

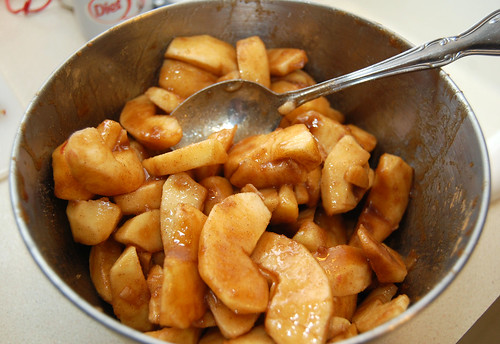
Cinnamon Apples

One of the big things mom stressed was “reading the dough.” According to her, you have to be able to vary the recipe based on how things turn out. Maybe it’s a dry day and therefore the dough is dry, or maybe the opposite. Or maybe things just aren’t coming together, so you have to improvise.

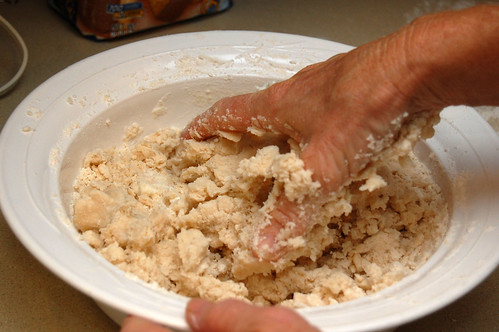
Mixing the Dough

My mom uses a very simple recipe for pie crust; one she apparently got off a Crisco box (as a piece of the food snob in me dies to hear this). The apple pie filling? I have no idea.

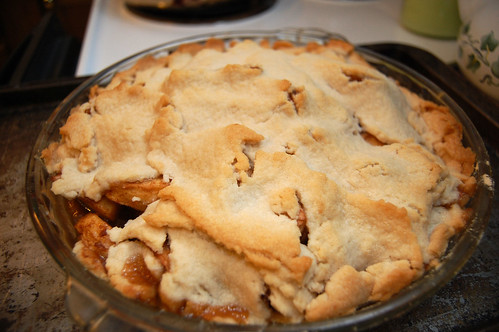
Apple Pie

Mom’s Apple Pie (with help from Crisco)

Ingredients:
Crust:
– 1 1/3 cups of flour
– 1/2 cup of shortening
– 3-5 Tbsp of water
Filling:
– 2 pounds of baking apples (I’m a fan of granny smith)
– 1/2 cup granulated (white) sugar
– 1/2 cup light brown sugar
– juice from half a lemon

Make the filling:
Peel and core the apples, cutting them in half then slicing them further; eight to twelve per apple. Combine the apples, lemon juice, white and brown sugar until apples are thoroughly coated. Let sit.

Make the crust:
Preheat the oven to 400°F and put a rack in the middle.

Put the flour in a large mixing bowl and “cut” the shortening into the flour – meaning, cut the shortening into chunks instead of just dumping the whole slab in the bowl. Then using either a pastry blender or just some butter knives, cut into the butter until you get it a mealy consistency. Something like coarse cornmeal.

Add the water one tablespoon at a time and get dirty. Mix the dough in your hand(s) until the dough is a bit tacky and sticks together. If too sticky, add flour. If not sticky enough (i.e., falling apart), add more shortening. If too dry, add water. Ask yourself what will happen if you try to roll this dough out and how it’s going to cooperate.

After you’ve “read” your perfect (::cough::) pie crust, divide it into two halves. Lightly flour a clean surface and roll out the dough. There’s a bit of flexibility on how thick you want this – basically, go for a diameter and two inches larger than the diameter of your pie pan (8-10 inches suggested for pan sizes). It’s better to have a crust that’s too large than too small. Roll from the center out, trying to get a uniform circle shape. The thickness doesn’t matter so much as the diameter.

Carefully take your rolled out dough and transfer it to your pie pan. If it’s sticking too much make a mental note of this for next time, and use a pastry cutter as a quasi-spatula to separate it from your work surface. After this, fill your pie with the filling and repeat with the second half of dough. Make a few holes in the top of the pie crust for heat to escape.

Put your pie in the oven and cook for 45 minutes. Remove when the crust is golden brown.

Easy Chicken Enchiladas, A Real 30 Minute Meal

Hello, hello!

Rachel Ray is supposed to be the cooking icon of the young generation, but I’m still on the fence about many of her recipes. I was given a copy of 2, 4, 6, 8: Great Meals for Couples or Crowds as a Christmas present last year and I’ve perused 30 Minute Meals, but sometimes I think that the recipes are a little needlessly complicated. At least, the recipes I’ve tried in 30 Minute Meals have never been completed in just 30 minutes – but I’d love feedback from others!

If someone bought me 2, 4, 6, 8: Great Meals for Couples or Crowds as a beginner book, I’d probably run away and never look back! From what I’ve gathered in conversations with friends over the years, I think a lot of people would like to cook and get more comfortable in the kitchen, but they’re intimidated. They don’t know where to start.

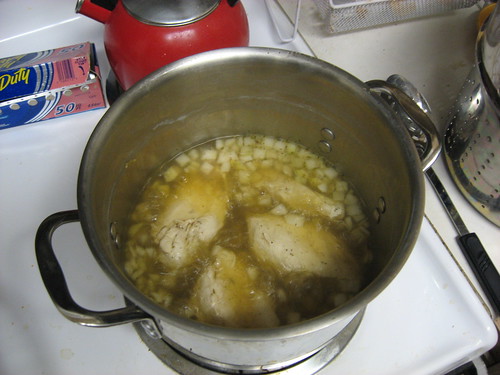
Chicken Enchiladas, Poaching Chicken
Don’t be afraid to start small! I like recommending Kraft Foods – they have a lot of very simple and quick recipes. They used to offer a free quarterly recipe book and free calendar, but now I believe they’ve switched to online newsletters only. The tiny recipe books at the grocery store checkout counters are also a great way to get your feet wet.

Chicken Enchiladas, Rolled Tortillas
But Rachel Ray doesn’t have to be scary to beginner cooks! This week I tried Rachel Ray’s Easy Chicken Enchiladas recipe. I actually don’t think I’d ever poached chicken before (as the recipe calls for), and I found that it came out a little rubbery or, to use some rather gross imagery, sweaty tasting. The overall flavor of the enchiladas was good; the cinnamon made it taste almost like a simplified and less spicy mole sauce.

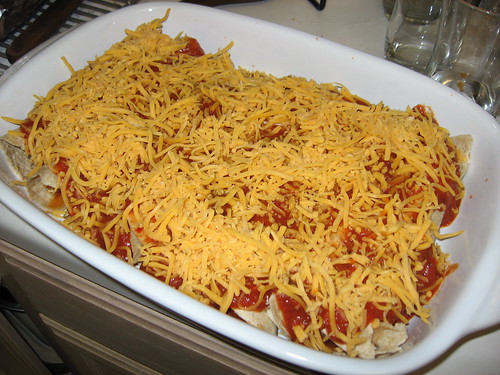
Chicken Enchiladas, With Sauce and Cheese
Ghost Baker’s verdict and simplifying suggestions:

Let’s lock in our flavor and spices while not making this recipe needlessly complicated. If you have time, marinate your chicken with some of the sauce first. Instead of poaching the chicken, give it a juicier texture by grilling it and then shredding. If you like more punch in your cheese (I do!), swap the Monterey Jack for a sharp yellow cheddar. Don’t be afraid to go heavy on the spices if you like it hot!

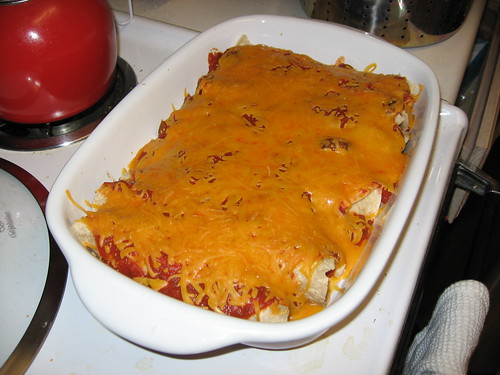
Chicken Enchiladas, Cooked and ready to serve

Rachel Ray’s Chicken Enchiladas
adapted from Food Network

Ingredients:
8 soft corn tortillas

Filling:
4 pieces boneless skinless chicken breast, 6 to 8 ounces
2 tablespoons tomato paste
1 teaspoon chili powder, 1/3 palm full
1 teaspoon ground cumin
Salt

Sauce:
2 cups tomato sauce
2 teaspoons hot cayenne pepper sauce, several drops
1/4 teaspoon ground cinnamon, 2 pinches
1 teaspoon chili powder
2 1/2 cups Monterey Jack shredded cheese, available on dairy aisle

Directions:

If you can, marinade chicken for at least one hour with some of the sauce.

Preheat the oven to 275 degrees F.

Wrap corn tortillas in foil and warm in the oven. Grill chicken for 10 minutes or until cooked through (bone white). Remove chicken breasts to a bowl and shred with 2 forks. Add tomato paste, spices and salt and work through the chicken using the forks.

Combine all sauce ingredients and heat through, keeping warm until needed.

Remove tortillas from oven and switch broiler on high.

Pile chicken mixture into warm corn tortillas and roll. Line casserole or baking dish with enchiladas, seam side down. Pour hot tomato sauce over the chicken enchiladas and top with sharp yellow cheddar cheese. Place in enchiladas in oven 6 inches from broiler and broil 5 minutes to melt cheese and set enchiladas. Enjoy!

Pumpkin Chocolate Chip Cookies, so they say

Hello hello!

Welcome to DINNERCAKES – the blog that brings you fun and fresh recipes from oven to stove top, hosted by Edwin Bachetti and Heather (Ghost Baker)!

It’s a beautiful fall day here in Arlington, Virginia, and I can’t think of a better way to kick off this blog than with something not only completely appropriate for the season, but also that contains my favorite ingredient – pumpkin!

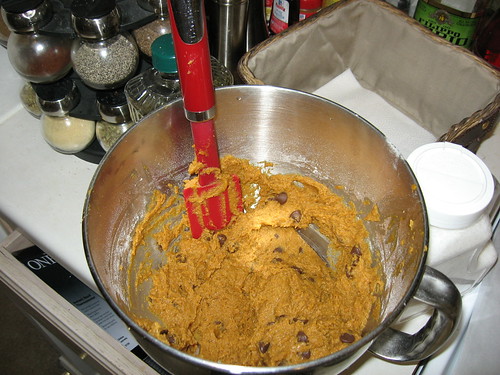
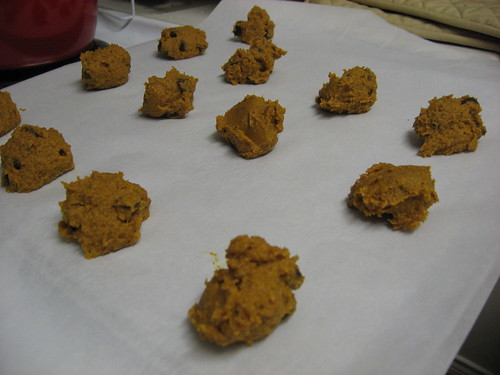
PUMPKIN CHOCOLATE CHIP COOKIES MIXING

My co-host may try to fight it, but October is all about pumpkin. I’m convinced he just hasn’t experienced the right kind of pumpkin confection yet, and it’s my duty to change all that!

Why do we, minus Edwin of course, love pumpkin? Is it the imagery it brings to mind – scrambling around the pumpkin patch with mom and dad looking for that perfect pumpkin to take home or the smell of dried leaves and their extraordinary palette of colors? Pumpkin alone isn’t exactly bland, but it’s not overpowering. It’s an excellent compliment to so many meals in the form of pumpkin ravioli, pumpkin enchiladas, or as a dessert. Pumpkin, done right, can take on so many forms.

My brother and I are well-known in the family as being able to finish off a whole pumpkin pie at Thanksgiving by ourselves (I wish I was joking). My mouth waters every time I come across a new pumpkin recipe.

I was delighted when I came across a recipe for Pumpkin Chocolate Chip Cookies on Cookie Madness. I practically ran home from work to try this recipe.

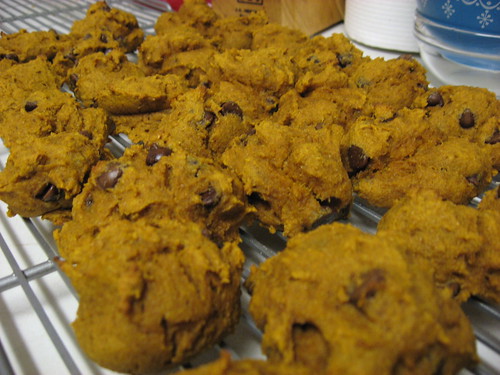
I gobbled one down the minute they came out of the oven and I thought, “good, but not GREAT.”

IMG_2355PUMPKIN CHOCOLATE CHIP COOKIES BAKING SHEET

Ghost Baker’s verdict and spicey suggestions:

This Pumpkin Chocolate Chip Cookie recipe was, just as Cookie Madness writes, “super-cakey.” They came out almost like little muffins, except without the delicious muffin top. The overpowering flavor seemed to be the 2 cups of flour – it needs some zip!

PUMPKIN CHOCOLATE CHIP COOKIES

Instead of one cup of chocolate chips, try adding either an additional 1/2 cup or splitting the total amount with chocolate chips and butterscotch chips.

Also, what is a pumpkin dessert without the pumpkin pie spice? Spice these cookies up by adding 1/4 tsp of nutmeg, 1/4 tsp of cloves, and 1/4 tsp of allspice.

The recipe without these suggestions is a great treat to bring to the office, I know my husband says his office scarfed them down, but if you really want to pack in some punch some additional spices and chips are a must!

Pumpkin Chocolate Chip Cookies

adapted from Cookie Madness

1 cup canned pumpkin
1 large egg
1 cup granulated sugar
6 tablespoons vegetable oil
1 teaspoon vanilla
1 teaspoon cinnamon
1/4 teaspoon nutmeg
1/4 teaspoon cloves
1/4 teaspoon allspice
1/2 teaspoon kosher salt
1/2 teaspoon baking soda
1 1/2 teaspoons double-acting baking powder
2 cups all purpose flour or white whole wheat flour (9 oz)
1 cup semi-sweet chocolate chips
1/2 cup butterscotch chips

Preheat oven to 375 degrees F.

Beat pumpkin, egg, sugar, oil, vanilla, cinnamon, salt, baking soda and baking powder together in a mixing bowl. Fold in the flour and stir just until mixed. Stir in chocolate and butterscotch chips.

Using a tablespoon measure or ice cream scoop, drop onto parchment lined cookie sheets 1-2 inches apart (don’t worry, they don’t spread). Bake at 375º for 13 to 15 minutes.

Remove from tray and begin eating immediately! I’ve found these cookies are best while warm.

Makes about 32 cookies.