Stromboli with Prosciutto, Mix & Match with Pizza Dough

I was blessed with a husband who also enjoys cooking.

pizza dough

A few months ago Morgan and I took a “Date Night: Pizza Party” couple’s cooking course at Sur La Table. It was a lot of fun and we learned how to make a variety of delicious pizzas. Because we don’t always have the time to make our dough, we like to buy ready-made dough at The Italian Store in Arlington, VA. They make amazing pizzas, pastas, subs and sandwiches, and you can buy enough dough to make a 16″ pizza at an inexpensive price. Try inquiring at your local (non-chain) pizza place, Italian restaurant or even grocery store to see if they sell dough.

saute the mushrooms and garlic

We happened to have some dough and a bit of prosciutto in the fridge on Friday night, so instead of making pizza, Morgan decided to make stromboli. One big difference between cooking and baking is that you have a little more room with cooking to experiment. You can add more or less of an ingredient without ruining it and add new flavors liberally.

folding the stromboli

Below is our recipe for stromboli with prosciutto from Friday night, but perhaps a better recipe is: buy some ready-made dough from your local pizza place and buy some cheeses, meats and/or tomato sauce at the grocery store, break open the wine and invite your significant other or spouse into the kitchen for a fun night of mix and match pizza toppings or stromboli filling where you can’t go wrong!

stromboli

Stromboli with Prosciutto

16 inch ball of ready-made pizza dough
6 ounces shiitake mushrooms
cooked prosciutto, sliced and torn into pieces
1/4 cup parmesan cheese
1 cup mozzarella cheese
3/4 cup crushed tomatoes
2 tablespoons extra-virgin olive oil
3 cloves garlic, minced
salt, pepper and garlic powder, to taste

Preheat oven to 400 F with a pizza stone in the oven. Heat 1 tablespoon oil in skillet over medium heat and saute mushrooms, garlic, salt and pepper for about 5 minutes.

Lightly flour and oil a baking sheet. Roll out dough to form a circle and cut in half. Distribute filling equally on both halves – crushed tomatoes, mushrooms, prosciutto, garlic and cheeses. Fold dough over on each half and press edges down to seal.

Carefully transfer both strombolis to the preheated pizza stone in the oven. Bake for 15 minutes. Instead of removing the pizza stone from the oven, remove from the stromboli individually with a large spatula. Sprinkle with garlic powder, cool slightly, slice and serve!

Stuffed Shells with Beef, Shedding New Light on a Old Classic

Unlike Edwin, I am not a flexitarian. However, my husband Morgan and I try to limit ourselves to lean meats such as chicken or fish. We rarely eat a strictly vegetarian dinner and once every few months, we break down and cook with beef.

Stuffed Shells filling with spinach

I was inspired by a recipe I found on blogchef.net – these stuffed shells are a little different than the kind you might typically find. Aside from the addition of beef, the blogchef recipe replaces ricotta cheese with mozzarella. It also removes the usual spinach and adds dry red wine.

Stuffed Shells Ready to Go in the Oven

But because I’m not a flexitarian, I need to get my vegetables wherever I can. I added half a bag of fresh spinach leaves, more garlic, and a can of Hunt’s diced tomatoes with green peppers, onions, and celery. I also left out the red wine and parsley.

This recipe isn’t very difficult, but stuffing the shells gets a little time consuming. It’s very filling and makes an enjoyable and attractive winter meal for both the holidays as well as the weekly dinner rotation!

Stuffed Shells

Stuffed Shells with Beef
inspired by Blogchef.net

1 lb ground beef
1 large onion, diced
5 cloves garlic, minced
1 (8oz) bag shredded mozzarella cheese (fresh is always better, if you don’t mind grating)
1 bag fresh spinach leaves
½ cup Italian breadcrumbs
1 egg (beaten)
1 (26 oz) jar of spaghetti sauce (I use Paul Newman sauces)
1 (15 oz) can Hunt’s diced tomatoes with green peppers, celery and onion
Grated parmesan cheese, as desired
24 jumbo pasta shells (cooked according to package directions and drained)
salt and pepper, to taste

Cook shells according to package directions. In a large skillet, brown ground beef, garlic and onion. Drain off excess grease (if you really want to cut down on even more fat, you can actually quickly rinse the ground beef, but you risk losing flavor). Preheat oven to 400 F.

In a large bowl, combine meat, shredded mozzarella, beaten egg, breadcrumbs, fresh spinach leaves, salt and pepper.

In a 13×9 inch oven safe dish, add half the spaghetti sauce and half the canned diced tomatoes.

Stuff the cooked and drained shells with the meat/cheese/spinach mixture and place on top of the sauce in the oven safe dish. Pour the remaining spaghetti sauce and diced tomatoes over the stuffed shells. Sprinkle with parmesan as desired.

Bake for 20-25 minutes and serve.

Butternut Squash and Onion Soup (That Won't Ruin Your Diet)

A friend recently sent me a recipe for roasted butternut squash and shallot soup she found from Cooking Light. I love butternut squash soup, but I love it the way you should never have it – with heavy cream and sherry.

roasted butternut squash

Cooking Light outlines a healthier way to enjoy this soup, but unfortunately the recipe was a little expensive and called for ingredients that I don’t usually keep on hand, such as shallots, fresh ginger root and fresh chives. Ginger root is not expensive but I don’t love an overpowering ginger taste, shallots may be a little sweeter than regular onions but they’re also more expensive, and fresh chives are also expensive, especially if they’re only acting as a garnish.

I tried to minimize the cost of this recipe and make it a little more manageable for the average pantry. I found the onion taste to be a tad strong, but my husband had no complaints. Yet you do have to like onions to enjoy this recipe. There are other milder versions of this soup, as well as versions that incorporate nuts and apples. These sound absolutely delicious, and I’m excited to try them, but for this particular recipe I was trying to keep it simple.

I served this as the main course for dinner for my husband and I, so we had two full bowls with a little bit leftover. This would also be great as a side to have with a grilled cheese sandwich; I had a piece of bread with my soup and I enjoyed dipping the bread into the soup. If you have other vegetables in your kitchen that you would like to use, such as carrots, that would make an excellent addition as well.

butternut squash onion soup

Butternut Squash and Onion Soup
inspired by Cooking Light

4 cups (1-inch) cubed peeled butternut squash (about 1 1/2 pounds)
1 tablespoon olive oil
1/4 teaspoon salt
2 thinly sliced scallions
1/2 cup chopped onion
3 cloves minced garlic
1 tablespoon minced fresh ginger
2 1/2 cups fat-free, less-sodium chicken broth
2 tablespoons (1-inch) slices fresh chives
black pepper to taste

Preheat oven to 375°. Combine butternut squash cubes, oil, salt, minced ginger, minced garlic, chopped onion and minced ginger in a jelly-roll pan. Bake for 50 minutes or until tender, stirring occasionally. Cool 10 minutes.

Pour half the squash mixture and half the broth into a blender. Remove the center piece of the blender’s lid to allow heat to escape; lay a folded paper towel over the opening. Blend mixture until smooth, then pour into a large saucepan. Pour the remaining squash mixture and broth into the blender and repeat previous process. Cook over medium heat for five minutes or until thoroughly heated. Top with scallions and pepper as desired.

This has got to be the craziest vegetable I’ve ever worked with. My friend Lindsay and I were rock climbing and somehow the conversation transitioned to food. Why, I have no idea. I feel a study should be conducted on how often I talk about food in comparison to how often I talk about… anything else. Anyway, Lindsay told me of this magical vegetable called spaghetti squash, aptly named because its flesh falls away in strands similar to spaghetti. This blew my mind. “So you can make spaghetti with squash? Madness!” So of course being the vegetable freak I am I had to try it.

Spaghetti Squash Close Up

Like just about every vegetable, spaghetti squash has high nutritious value, being a good source for folic acid, potassium, vitamin A and beta carotene (thank you Wikipedia). It’s also a low calorie food making it a great option for post Thanksgiving meals. I recommend going with the smaller sizes which are much easier to work with (I’m sporting a nice burn on my left hand right now) and more flavorful.

Spaghetti Squash with Tomato Sauce

To be fair, spaghetti squash will never truly compete with pasta for the same dishes. You can’t get a true al dente texture with spaghetti squash, but instead a crunch. Still, it’s a nice variation that I will be revisiting again. This is something that might go great with a flavorful butter sage sauce or a garlic pesto.

Spaghetti Squash with Tomato Sauce

1 small spaghetti squash; approximately 2 pounds in weight
8 ounces of your favorite spaghetti sauce

While bringing a large part of water to a boil, piece the squash in several places. This will help the insides cook. Add the squash carefully to the pot, preferably with tongs and boil for approximately 25 minutes until the skin is tender. If the pot isn’t large enough to cover the squash in water, then occasionally rotate with your tongs 3-4 times during the cooking process.

While the squash is cooking, prepare your spaghetti sauce or heat your premade sauce in a medium sized pot. Once the squash is ready, strain in a colander and let sit to cool down and continue to drain. After a few minutes, transfer to a cutting board and cut in half. Scoop out the seeds and fibrous center. Then, pull the fork lengthwise through the flesh of the squash to separate it into strands. Either throw in with your tomato sauce or serve into a bowl and add the sauce separately.

As promised, I’m posting an actual dinner recipe for the first time in five posts! It’s a miracle, my sweet tooth is sated (don’t worry, not for long).

salmon filets

Salmon won out as the healthiest, lightest thing I could think of to compensate for my total failure in watching what I eat in the last few weeks. Wild salmon is high in protein, Omega-3 fatty acids and vitamin D. WebMD lists salmon as one of the top “super foods,” lowering your cholesterol, reducing your risk of cancer and heart disease and even brightening your mood (and yes, pumpkin is on that list, too).

lemons

I looked for a salmon recipe that had the spirit of the season, and I think I found what I wanted. The glaze was almost sweet, combining honey and apple cider as a marinade. Maybe it was just enough to satisfy my sweet tooth while still providing all the benefits of a healthy fish fillet. Also note when buying your salmon that you want wild instead of farmed.

cooking salmon

Below I altered the recommended amount of white wine for the spinach leaves. Maybe I got carried away somehow, but the wine taste was a little too strong and I didn’t think it mixed well with the honey and cider taste of the salmon. I also served mine with a side of asparagus in addition to spinach leaves, since cooking the leaves really decimated them.

And good luck in your own battle of the Thanksgiving bulge, let me know if you have more healthy recipes or tips to stay away from the baked goods!

glazed salmon

Honey and Cider Glazed Salmon
adapted from Simply Recipes

1/2 cup apple cider (not hard cider)
1 1/4 tablespoons honey
2 large or 4 small wild salmon fillets (if you can’t find skinless, just don’t eat the skin)
1 teaspoon olive oil
Salt and pepper, to taste
1/2 teaspoon minced garlic
2 lemons, cut in half
1 Tbsp butter
12 ounces fresh baby spinach
1 tablespoon white wine

Preheat oven to 350°F with a baking dish in the oven. Set salmon fillets flat in a large baking dish.

In a saucepan on medium-high heat, boil cider and honey for 1 to 2 minutes. Pour cider mixture over the salmon, let it sit for 10 minutes.

Heat olive oil in a large skillet on medium-high. Sprinkle one side of the salmon with salt and pepper. Place the fish in the pan for approximately 2 minutes. Brush periodically with cider glaze.

Turn the salmon and brush with remaining cider glaze. Remove from heat and transfer the salmon to the baking dish in the oven. Add the two sliced lemons to the dish. Bake for 6 minutes, salmon is cooked when it flakes when tested with the tip of a knife.

While the salmon, wash your skillet and place back on the stove to melt the butter (on medium-high heat). Add the spinach, salt, pepper and garlic. Cook just until leaves begin to wilt (a little less than one minute). Pour the wine sparingly over spinach and cook for an additional minute.

Drain excess liquid from spinach in a drainer.

Winning Over Skeptics Everywhere – Spicy Lentil Walnut Burgers

Without a doubt, this is my favorite dinner in the rotation.

Spicy Lentil Walnut Burgers, Walnuts about to be Chopped

At first I was skeptical. I’ve never been a crazy lentil-lover like Edwin. And as I’ve hinted, despite my passion for cooking and baking, my palate isn’t terribly adventurous! When Edwin gets excited and exclaims to me that he found green candied cherries for baking Christmas cookies, I respond with, “bleh!” When my husband suggests to me that I make a fajita for lunch using leftovers, I look at him with horror (I don’t really like eating leftover meat… it’s a weird thing, I know).

Spicy Lentil Walnut Burgers, Cooked Lentils

So, when searching my favorite, tried and true cookbook for something new and delicious, my eyes only lingered over “Lentil-Walnut Burgers” long enough to conjure images of frozen veggie burgers and strike fear into my heart. The next time I picked the book up I paused over this recipe again, considering it. And so it went like this for a few weeks until I finally found the courage to dive in.

Spicy Lentil Walnut Burgers, Spices, Salt and Peppers

This story also illustrates a fact about me that friends over the years have found enormous pleasure in teasing me about – apparently, if there’s ever something that I react to immediately with vehement hate, chances are in time I’ll grow to be head over heels in love with it. I’ll never admit this to be true, but I can’t exactly say they’re wrong either…

Spicy Lentil Walnut Burgers, Mixing/Mashing

Ghost Baker’s Favorite Dinner, Putting the Spice in Spicy:

I’ve made this recipe several times since the first time, and I’ve even made it for dinner guests. Be warned that my recipe for these little dinner cakes is spicy! I adore spicy food and lots of garlic, but I do like to serve them with milk. I add two more cloves of garlic than the original recipe calls for, as well as more red pepper flakes, salt and pepper.

Spicy Lentil Walnut BSpicy Lentil Walnut Burgers, Just added to the Skillet

I also love the texture – they should be just a tad crumbly and grainy. The second time I made them I mixed the ingredients a little too much and I think you lose something. The recipe says to use a food processor; however I don’t have one and I don’t think one is absolutely necessary (again, you don’t want to over-blend). It also suggests serving with a yogurt-cilantro sauce, but I don’t do cilantro.

Spicy Lentil Walnut Burgers, My Husband Stole One...

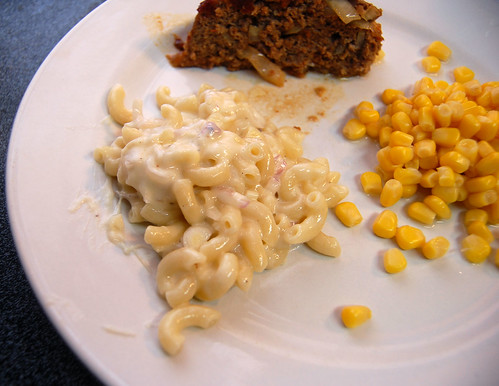
My husband enjoys these burgers with the same accoutrements you would add to a hamburger, I like mine plain on the bun, and one of my dinner guests once asked for cheese on his – so have fun with it! We typically accompany these with a side of Szechuan green beans or couscous.


Spicy Lentil Walnut Burgers, Ready to Eat


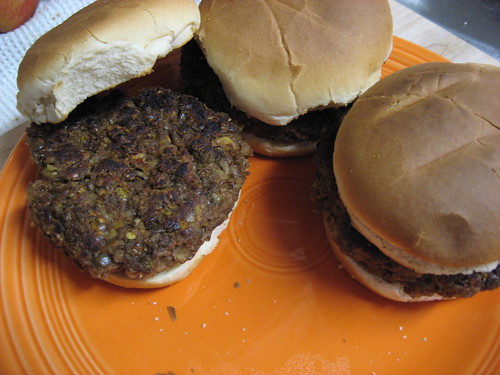
*Note – I would have taken a photo of all four burgers together with some toppings and sides, but when I turned around I caught a glimpse of my husband running into the other room with a burger in one hand yelling, “Take a photo of THIS!” and stuffing it into his mouth…

Spicy Lentil-Walnut Burgers
adapted from Everyday Food: Great Food Fast

Makes 4 burgers (serves 4), Prep time about 40 min, Cook time about 20 min

3/4 cup lentils, picked over and rinsed
3/4 cup walnuts, coarsely chopped
1/3 cup plain dried breadcrumbs
5 garlic cloves, minced (or use a garlic press)
2 teaspoons ground cumin
2 teaspoons ground coriander
1/2 teaspoon red pepper flakes
1 teaspoon coarse salt
1/2 teaspoon fresh ground pepper
4 tablespoons olive oil
1 large egg
4 Hamburger buns

Preheat the oven to 350˚F. Place lentils in a small saucepan, cover with an inch of water. Bring to a boil, then reduce to a simmer. Cover, and cook until the lentils are tender but holding their shape, 15 to 20 minutes (it’s important that you don’t overcook them and make lentil-mush). Drain and cool.

Meanwhile, spread the chopped walnuts on a baking sheet to toast in the oven for about 10 minutes. They should be a little darker and very fragrant. Set the walnuts aside to cool.

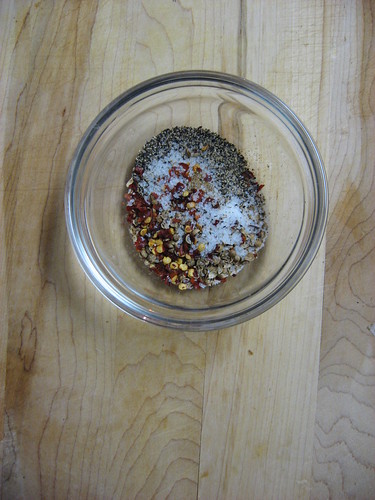
When the walnuts have cooled I like to chop them a little more finely. Then combine them in a large bowl along with the breadcrumbs, garlic, cumin, coriander (if you have whole instead of ground, just put them in a plastic bag and crush with the flat side of a meat tenderizer or even a can), red pepper flakes, salt and pepper. Mix with a wooden spoon. It should appear finely ground except for some pieces of walnut.

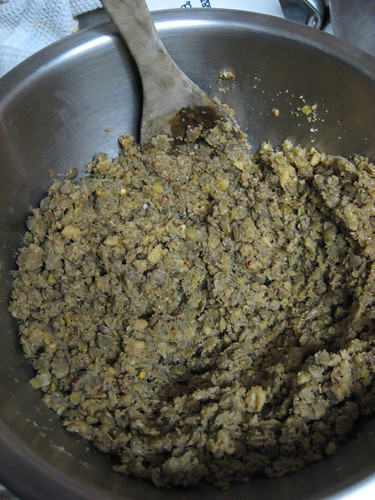
Add the lentils and 1 tablespoons of the oil. Don’t be afraid to be a little rough in your mixing – the contents of the bowl should appear chopped and fully incorporated but with some lentils remaining whole.

Whisk the egg in a small bowl and add it to the lentil mixture. Mix well, but be careful here not to mix it into mush. Divide it into 4 equal-size parts and roll into balls; flatten with the palm of your hand into 3/4-inch-thick patties.

Heat a large nonstick skillet and add the remaining 3 tablespoons of oil. Add the burgers and cook over medium-low heat until crisp and browned, turning carefully with a thin-edged spatula, 8 to 10 minutes per side. Do not turn more frequently or else they will start to crumble. Transfer to a paper towel-lined plate to drain any excess oil.

Add to your bun and serve!

Fish, the Final Frontier

I grew up in a house of seafood lovers and fishermen, spending summers at the Jersey Shore. I watched my dad catch, clean and cook fish. I set crab traps in the lagoon using hotdogs and fish heads (crabs go nuts for that stuff!). But, I never really learned how to cook fish myself.

Other than my parents, I can’t think of anyone I know who frequently cooks fish. Why? The American Heart Association recommends eating fish at least two times per week.

When I asked some of my friends why they don’t cook fish, I heard things ranging from, “seems hard” to “I never think to.” People seem genuinely stymied by the idea of cooking fish! After searching for some recipes, I almost was too – page after page of recipes for fish tacos and fish casserole almost made me lose my appetite forever.

Grouper, Pan-fried

Ghost Baker’s demystification of fish:

If you want the best, always cook fresh fish. The times I’ve purchased frozen fillets they have never dethawed into anything special. Put your best foot forward and buy your fish the same day that you cook it.

Fresh fish should never smell “fishy;” that’s a sure sign that it’s been sitting out. If you get a whiff of something at the grocery store that is overpoweringly fishy, just keep walking.

When you look at the fillet, make sure any liquid on it is clear and not cloudy. It shouldn’t look faded or dull.

Today I purchased a grouper fillet (maybe not the most attractive fish in the sea, but he’s tasty!). I coated the fillet with an egg (beaten), and lightly covered it with breadcrumbs. I used salt, pepper, a little bit of Old Bay and a little bit of Mrs. Dash to season the fillet. A good fillet doesn’t need to be doused in butter or deep fried – some light seasoning makes it very flavorful and preserves all those good vitamins.

Grouper

I pan fried my fillet using only a tablespoon or two of oil on low heat. The cook time depends on the thickness of your fillet, mine was relatively thin and took about 8 minutes. You can tell your fish is done when the fillet is golden brown and the meat flakes off easily when tested with a fork.

My husband prepared side dishes of wild rice and green beans. In the span of 25 minutes (including both cook and prep time) we had a healthy and delicious dinner ready to eat! Cooking with fish isn’t messy – there’s no beef blood to deal with or salmonella chicken scares. The biggest “hassle” is simply going to the store to buy it fresh. It cooks quickly, requires minimal prep, and the list of health benefits of eating fish high in Omega 3 fatty acids only continues to grow!

The Quest for a Quality Macaroni Dish

So I’m going to pretend that last night’s culinary escapade didn’t happen (officially. unofficially, you learn more from failure than success) and move straight on. Life is like a river, loyal readers (do we have any of those yet?). It flows ever forth.

The Arlington Public Library had a book sale this weekend. I’m a bit of a book whore, I have to admit (love knowledge), so I went twice. My partner in crime Heather and I were having a discussion earlier in the week about how neither of us really had a quality macaroni and cheese recipe under our belt. We were both raised on the out-the-box variety: me the classic blue box, Heather the classier, more sophisticated deluxe kind. Coincidentally on my first visit to the book sale, I came across Macaroni And Cheese for the low low price of a dollar. Feeling this was fate, I took this book home with me.
Simple Mac and Cheese Ingredients
I’ve not given this book the time it deserves for a proper review, but it definitely looks promising. It starts off with a brief about why macaroni and cheese is awesome (as if you didn’t know this by now) followed by a mini-guide on the different kinds of cheeses and pastas along with how to put it all together. Despite the name, no seasoned cook should expect to find any secrets here but beginners may find this useful. The remainder of the book is broken into five chapters for the varying categories of mac & cheese: Easy and Cheesy, Soups and Salads, Stove-Top Mac and Cheese, Baked Mac and Cheese, Sweets. The photography is excellent and this is not one of those cookbooks leaving you frustrated; wishing there were more photos of the dishes (hate. those. books). You can expect a photograph every two to three recipes.
Cheesy
Eager to try a recipe out but still nursing bruised confidence after last night’s adventure, I opted for the first recipe from the Easy and Cheesy Recipe: Alpine Macaroni and Appenzeller with Crème Fraîche. This was a recipe with a very cheesy texture but not an overly cheesy taste. With only an eight item ingredient list this recipe, was not overly complicated and instead focused on simplicity. Perfect.
Alpine Macaroni and Gruyère with Crème Fraîche
adapted from Macaroni & Cheese (I cut the recipe in half)

6 ounces elbow macaroni
2 garlic cloves, minced
1 shallot, chopped
5-6 ounces Gruyère, shredded/grated (possible alternatives: Appenzeller, Emmenthal, Comtè)
2 ounces crème fraiche (or more if desired)
a grating nutmeg
1-2 tablespoons of unsalted butter
salt a pepper to taste

Cook the pasta as you cook all pasta: in a rapidly boiling pot of salted water until al dente. Reserve half a cup of the liquid.
Put a bit of the water back into the pot first to prevent burning followed by the pasta, garlic, shallot, cheese, crème fraiche, nutmeg and butter. Toss gently. If too thick or dry, add more water. If the cheese doesn’t melt turn the heat on low briefly and continue to toss.