
Dear DINNERCAKES Readers,
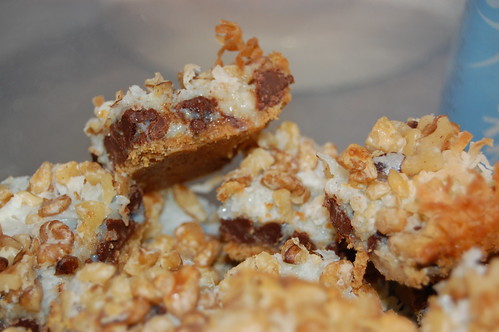
We hope you enjoy a wonderful holiday with family, friends and lots of food! Have a save and fun day! Thanks for reading.

Merry Christmas,
Edwin & Heather
Dear DINNERCAKES Readers,
We hope you enjoy a wonderful holiday with family, friends and lots of food! Have a save and fun day! Thanks for reading.
Merry Christmas,
Edwin & Heather
December is a special time of the year for many of us. Whether you’re celebrating the religious or secular aspects of the season, there’s a bit of magic in the air. It’s a time to enjoy family and friends, to reflect on the year, to simply remember what’s important in life.

Part of that for me is making sure the important parts aren’t drowned out by the unimportant. I talk specifically about the rampant commercialism that seems to go hand in hand with the holidays. I’m sure this is nothing you haven’t heard before. We all want to express our love and appreciation for those special people in our lives and somehow this has evolved into purchasing gifts for them. This isn’t to say a symbol in material form is inherently bad, but it’s easy to get caught up in a belief that love must be expressed in through a price tag.
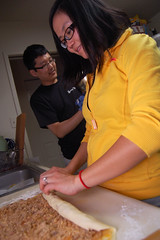
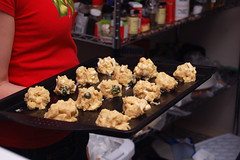
I have many people in my life that I am truly grateful for; people that are hard to imagine without. And I want to tell them this. I want them to know what they mean to me and that I am thinking of them; whether they be someone from my past who I’ve fallen out of touch with or someone new and still getting to know. And I want to do this without attaching a receipt to the act or making them feel obligated to do the same. (How many times have you received a gift from someone only to feel a twinge of regret for having not bought them one as well?)

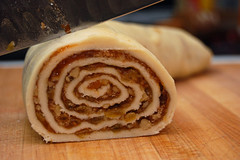
I started a tradition last year with some friends that I call Bake-A-Thon. Bake-A-Thon is a day in December where a bunch of my fellow baking enthusiasts (Heather included) and I get together to bake cookies for the entire day. After all the baking is done and the cookies have been cooled, we divvy them up and send them to out respective loved ones. This is our way of taking our passion and using it to show our love and appreciation for those special people in our lives.

Bake-A-Thon 2008 took place this past weekend and went even better than last year’s. Each baker selected one cookie recipe and together baked several batches from each. This year’s line up was Lebkuchen, Peanut Butter Blossoms, Pumpkin Oatmeal Chocolate Chip, Rugelach Pinwheels and White Chocolate Cherry Chunkies. We all had fun and the cookie turnout was immense. Bake-A-Thon will be a tradition for years to come.

Making Holiday Bark is almost more like making art and playing with your food than it is cooking or baking.
When I was younger I used to absolutely love sketching, painting, collaging, sculpting, or any other artsy activity that I could just spend hours completely focused on. I seem to have lost this hobby in the daily grind somewhere after high school, but I still miss it and have hopes and plans to pick it up again someday (though, no day like the present, right?). Making Holiday Bark helps me get my artistic fix, and in delicious, edible form!

Making any kind of bark candy can be as simple or as detailed as you make it. If you have kids, they will probably love attempting to help mix and swirl the chocolate (and get it all over their faces). If you’re setting out trays of food for a Christmas or New Year’s party or would just like something fun to bring to work, this is a very attractive option.
In its simplest form, you can get away with using only two kinds of chocolate and one kind of nut or flavor. No cooking or baking is required, though if you’re really looking to unlock the full flavor of the nuts then you may want to heat them in a shallow pan until warm and fragrant. You can even make bark while waiting for Christmas cookies to come out of the oven.
Basically, when you think you might explode if you have to make one more Christmas cookie – Holiday Bark to the rescue.
And, if I left this part out, it tastes and smells heavenly. Don’t forget to use ingredients that you enjoy and just have fun with it!

Holiday Bark
8 oz white chocolate, chopped
8 oz semi-sweet chocolate, chopped
6 oz bittersweet chocolate, chopped
2.25 oz (or ½ cup) hazelnuts, chopped
2.25 oz (or ½ cup) pecans, chopped
Place chopped white chocolate in a microwave safe bowl. Place semi-sweet and bittersweet together in another microwave safe bowl. Microwave bowls separately for 10-15 second intervals, stirring thoroughly after each interval until melted. Do this until both bowls contain melted chocolate. (I’ve been told that if I don’t use a double boiler to melt chocolate that I’ll burn it, but I haven’t burned it yet! Don’t worry.)
Line a jelly roll pan with parchment paper. Stir in nuts to the bowl containing semi-sweet and bittersweet chocolate. Spread the chocolate and nut mixture on the parchment paper using a rubber spatula. Drop spoonfuls of white chocolate over this, and swirl the chocolates using a fork or skewer (I used a fork because the nuts make it a little tougher to swirl).
Refrigerate for approximately 1 hour until hard. Break bark into large chunks and store in your refrigerator until serving.
I really enjoyed last week’s experiment with a lentil loaf, but having been so successful forced me to ask what an appropriate accompaniment to it should be. Mashed potatoes were the obvious choice, but was there anything I could do differently? That’s how we roll here at DinnerCakes.
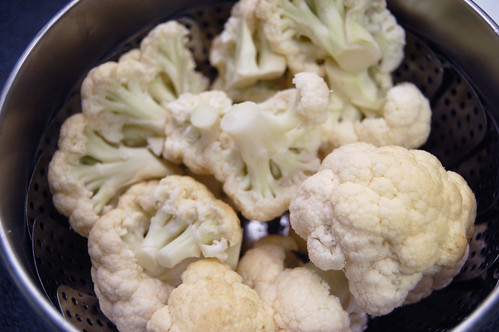
Now, there’s nothing wrong with white potatoes. As I’ve mentioned before, they are fat free, cholesterol free, low in sodium and high in vitamin C. However, they also have a somewhat high glycemic index and, well, they aren’t exactly low on the calorie scale either (a fact that is always on my mind this time of year). Enter the cauliflower. This sucker is the ultimate competitor for the white potato. It too is fat free, cholesterol free, low in sodium and has even more vitamin C than the white potato, providing you 100% of your daily vitamin C need with just 100 grams. And to top it all off, less than half the calories of the white potato. K.O.
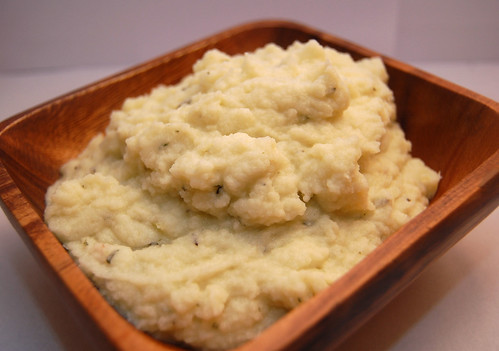
Cauliflower mashed potatoes is a pretty well known substitute and is incredibly easy to make. It’s so easy that I’m almost ashamed to write about it (almost). With a food processor and some common kitchen ingredients, you’re good to go. Without a doubt, I will be doing these again.
Cauliflower “Mashed Potatoes”
1 head of cauliflower
1 tablespoon butter
1/4 milk/cream/water (optional)
1 teaspoon dried thyme
2 teaspoons parsley
Cut the cauliflower into florets and steam for until tender; approximately 10 minutes. Don’t worry about overcooking. Once ready, transfer to a food processor along with the butter, thyme and parsley. Chop until smooth. If you like a creamier consistency, considering adding milk, cream or even water a bit at a time, continuing to process.
Unlike Edwin, I am not a flexitarian. However, my husband Morgan and I try to limit ourselves to lean meats such as chicken or fish. We rarely eat a strictly vegetarian dinner and once every few months, we break down and cook with beef.
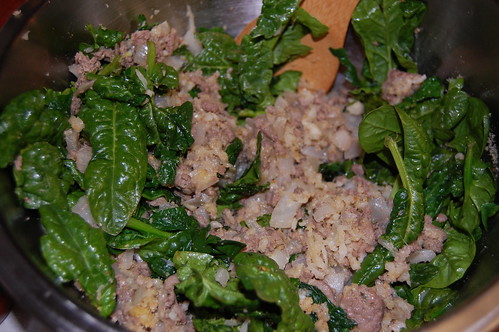
I was inspired by a recipe I found on blogchef.net – these stuffed shells are a little different than the kind you might typically find. Aside from the addition of beef, the blogchef recipe replaces ricotta cheese with mozzarella. It also removes the usual spinach and adds dry red wine.
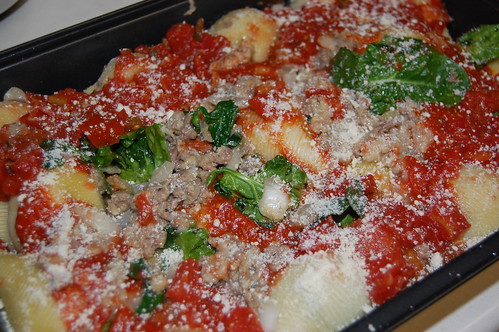
But because I’m not a flexitarian, I need to get my vegetables wherever I can. I added half a bag of fresh spinach leaves, more garlic, and a can of Hunt’s diced tomatoes with green peppers, onions, and celery. I also left out the red wine and parsley.
This recipe isn’t very difficult, but stuffing the shells gets a little time consuming. It’s very filling and makes an enjoyable and attractive winter meal for both the holidays as well as the weekly dinner rotation!

Stuffed Shells with Beef
inspired by Blogchef.net
1 lb ground beef
1 large onion, diced
5 cloves garlic, minced
1 (8oz) bag shredded mozzarella cheese (fresh is always better, if you don’t mind grating)
1 bag fresh spinach leaves
½ cup Italian breadcrumbs
1 egg (beaten)
1 (26 oz) jar of spaghetti sauce (I use Paul Newman sauces)
1 (15 oz) can Hunt’s diced tomatoes with green peppers, celery and onion
Grated parmesan cheese, as desired
24 jumbo pasta shells (cooked according to package directions and drained)
salt and pepper, to taste
Cook shells according to package directions. In a large skillet, brown ground beef, garlic and onion. Drain off excess grease (if you really want to cut down on even more fat, you can actually quickly rinse the ground beef, but you risk losing flavor). Preheat oven to 400 F.
In a large bowl, combine meat, shredded mozzarella, beaten egg, breadcrumbs, fresh spinach leaves, salt and pepper.
In a 13×9 inch oven safe dish, add half the spaghetti sauce and half the canned diced tomatoes.
Stuff the cooked and drained shells with the meat/cheese/spinach mixture and place on top of the sauce in the oven safe dish. Pour the remaining spaghetti sauce and diced tomatoes over the stuffed shells. Sprinkle with parmesan as desired.
Bake for 20-25 minutes and serve.
There are days when soup simply won’t do. Days when the hunger is ravenous and you really need something to sink your teeth into. It is on these days that I often find my vegetarian repertoire unable to meet my needs and I find coming back to my carnivorous ways. (What? I’m not strictly vegetarian. It’s allowed.) “No more!” I exclaimed last week. It was time for a better solution; something hearty and filling. Of course what better to be a part of said solution than lentils in the form of a tasty “meat” loaf.
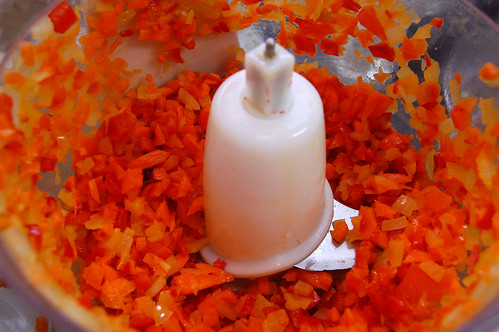
I loved Mom’s meat loaf as a kid, always taking a thick slice to go with my extra large helping of mashed potatoes and corn. (Corn goes with everything. It’s been proven.) Delicious. It’s been a while since I’ve had that glorious loaf of meat and it occurred to me that this might be part of the problem with my current diet: not enough comfort food. There was (is?) a significant lack of balance.

The term lentil loaf does not sit well with me. There are just too many… connotations with the word ‘loaf,’ however that is exactly what this is. I scoured the wonders of the internet for inspiration, including my personal hero, Alton Brown, to concoct this delicious recipe. I was very pleased with the result. The only significant issue is the texture. This recipe is not as solid as a traditional meat loaf, but won’t fall apart as you cut into it with your fork. Perhaps another egg would help…
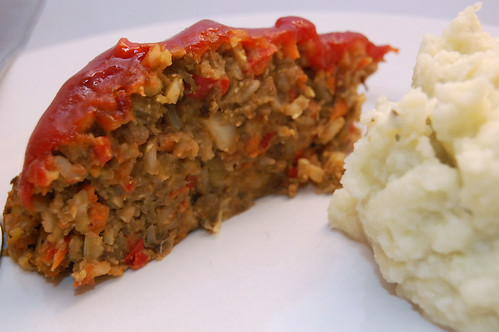
Vegetarian Lentil “Meat” Loaf
adapted from Alton Brown and My Vegan Cookbook.
3/4 cup green lentils; cooked and drained
1/2 cup brown rice; cooked and drained
3 cloves garlic; minced
1 yellow onion; chopped
1 large carrot; chopped
1 red bell pepper; chopped
1 egg
1/4 cup bread crumbs, corn meal or vital wheat gluten
1 teaspoon thyme
1 teaspoon parsley
1/2 teaspoon cayenne pepper
2 teaspoons salt
2 tablespoons balsamic vinegar
2 tablespoons soy sauce
Preheat the oven to 325°.
While the lentils and and rice are cooking saute the garlic, onion, carrot and bell pepper in a pan on medium heat until onions are translucent; approximately 5 minutes. Let cool then chop in a food processor into finely chopped. Transfer to a bowl and chop the lentils (once they’ve cooled) in the food processor into a paste.
Combine all the ingredients together in a mixing bowl then move to a glass baking pan, forming it into a loaf. Bake for 45 minutes until heated through.
On Monday my office had a white elephant gift exchange, something like Secret Santa except the gifts are meant to be inexpensive and sometimes humorous. I’ve never participated in one of these before, so I was pretty excited and a little nervous. I heard that in our office the gifts were usually a mix of gags and real gifts, so I opted for a something in the middle.
I acquired a wonderfully tacky Christmas cookie jar from my mother-in-law. Imagine a very shiny and bright red, green and gold round Christmas tree ornament, except enlarged about five times. I thought this would be a perfect white elephant gift, remembering the quote, “One man’s trash is another’s treasure.” But I was nervous that maybe this was TOO silly.
So to “sweeten” the deal, I scoured my cookbooks for a Christmas cookie recipe to fill the cookie jar with, something classic that would appeal to multiple people, but something that I wasn’t already planning on baking. I settled on a great, versatile recipe found in one of my old Kraft Food magazines.
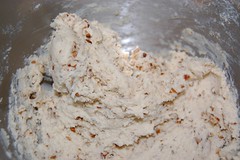
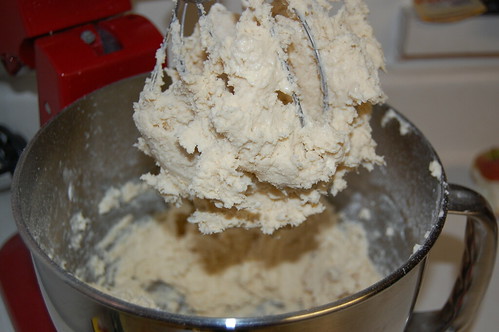
I’ve mentioned before that Kraft has some very useful recipes, especially for people strapped for time or those trying to get into cooking and baking but aren’t sure how. This particular cookie recipe can make four variations of cookies, all using the same basic dough recipe but with minor variations. I chose to only make one kind this time – Thumbprints Cookies.
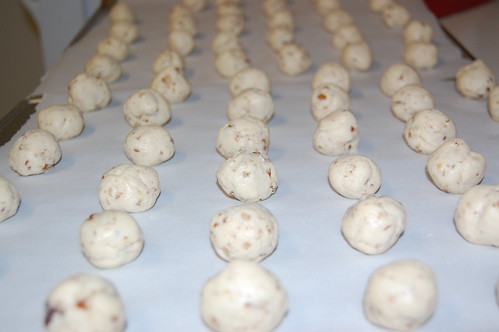
Because I still fear the scale, I substituted fat free cream cheese in place of regular. This probably wasn’t the best decision because, well, fat tastes good! If you’re making food for others you want it to shine, and I broke one of my cardinal rules by substituting. To make up for this and sweeten the dough a bit without adding more sugar, I added a teaspoon of ground anise seed. Anise seed is expensive, but I’m always willing to blow my budget a bit when holiday food is involved. The anise seed was very aromatic and added a distinctive, but not overpowering, sweetness.

For future confections, I need to make a rule that I will never post about baked goods the same day I make them – I always enjoy them more the next day! I’m glad I reserved judgment on these cookies. My husband really loved them right out of the oven, but I think they got even better after they set. It’s rare when I find a cookie my husband really gets excited about; these are a keeper!

Blackberry & Apricot Thumbprint Cookies
adapted from Kraft Foods Magazine
1 package cream cheese (8 0z, I used fat free)
1 1/2 sticks butter, softened (3/4 cup)
1 cup granulated sugar
2 tsp. vanilla
2 1/4 cups flour
1/2 tsp. baking soda
1 cup finely chopped pecans
1 tsp. anise seed, ground
blackberry and apricot jam (or jam of your choice, but the apricot is excellent)
Beat cream cheese, butter, sugar and vanilla in a large bowl until well blended. Add flour and baking soda gradually. Mix well. Stir in pecans and anise seed (you can grind the anise seed by putting it in a bag and hitting it with a tenderizer). Make sure it’s well-blended. Cover and refrigerate dough for 30 minutes (make sure you do this so that the butter doesn’t get to soft; you don’t want your cookies to fall flat in the oven).
Preheat oven to 350 F. Using a 1/2 tablespoon measure, scoop dough in 1 inch balls, rounding dough into balls. Place on parchment lined baking sheet about 1 1/2 inches apart. Indent the dough using your thumb. Bake for 10 minutes.
Remove from oven. The indentations may have risen in the oven, just push it down as needed and carefully fill eat cookie with jam. Continue baking for 8-10 minutes.
Makes about 5 dozen cookies.
Think back to the past few weeks in the kitchen and ask yourself which vegetable was used most often. Chances are it was the onion. These suckers are the fundamentals of many recipes, adding a subtle but crucial flavoring to much of what we eat. Plenty of dishes start with the sauteing of onion, celery and carrots, forming what is called by its French term “mirepoix.” Yes, I have worked with many an onion in my time and look forward to many more in the future. Thank you onion, for your awesomeness.

As amazing and functional as the onion is, it’s often not the star of the show. The onion serves as the background, the ingredient that helps other ingredients shine. In some meals people may not even know the onion is there. There are cases, however, in which the onion does take center stage, and these roasted stuffed onions are a perfect example.

Vegetarian Roasted Stuffed Onions
adapted from Smitten Kitchen
6 large red and yellow onions
2 celery ribs; chopped
2 garlic cloves; minced
1/2 teaspoon salt
1/2 teaspoon butter
8 ounces baby spinach; coarsely chopped
2 cups italian bread; cut in 1/2 inch cubes and lightly toasted (croutons work in a pinch)
8oz can of lima beans; drained (optional)
1/2 stick of butter; melted
1/2 stock of any kind (turkey, perhaps?) or water
Preheat the oven to 425°.
Onion shells: Cut 1/2 inch off the top of each onion and just enough from the bottom so it stands upright. Hollow out the onions using a melon baller; leaving all but 2 or 3 layers. I find the easiest way to do that is scooping out a bit from the center then working out to the edge. Once you’ve got the proper diameter, dig down a bit more and work out again. Repeat until near the bottom.
Place the onions in a glass baking ban with 1/2 cup of water, tightly covered with foil. Roast until the onions are tender, 25-30 minutes. Remove and let cool
Stuffing: While the onions are roasting, take about 2 cups of the scooped out onion and coarsely chop. Saute in a large pan over medium heat with oil, garlic, celery, salt and pepper for about 5 minutes; until soft. Combine with lima beans, butter and stock in a mixing bowl. Let cool enough to handle.
Remove the onions from the baking pan and pour out any excess water. Stuff the onions with your filling until it is heaped up on the top. Take any leftover stuffing and place in the baking pan as “bedding.” Trust me, it’ll still be delicious. Bake onions for about 20 minutes or less, until heated through.
A friend recently sent me a recipe for roasted butternut squash and shallot soup she found from Cooking Light. I love butternut squash soup, but I love it the way you should never have it – with heavy cream and sherry.
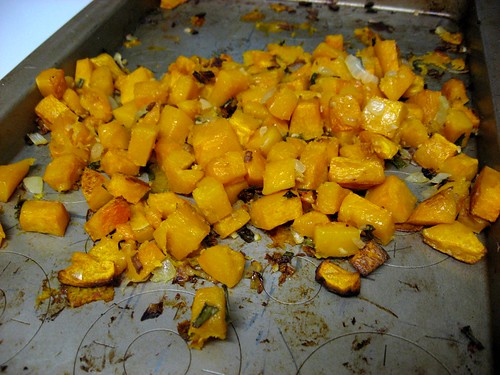
Cooking Light outlines a healthier way to enjoy this soup, but unfortunately the recipe was a little expensive and called for ingredients that I don’t usually keep on hand, such as shallots, fresh ginger root and fresh chives. Ginger root is not expensive but I don’t love an overpowering ginger taste, shallots may be a little sweeter than regular onions but they’re also more expensive, and fresh chives are also expensive, especially if they’re only acting as a garnish.
I tried to minimize the cost of this recipe and make it a little more manageable for the average pantry. I found the onion taste to be a tad strong, but my husband had no complaints. Yet you do have to like onions to enjoy this recipe. There are other milder versions of this soup, as well as versions that incorporate nuts and apples. These sound absolutely delicious, and I’m excited to try them, but for this particular recipe I was trying to keep it simple.
I served this as the main course for dinner for my husband and I, so we had two full bowls with a little bit leftover. This would also be great as a side to have with a grilled cheese sandwich; I had a piece of bread with my soup and I enjoyed dipping the bread into the soup. If you have other vegetables in your kitchen that you would like to use, such as carrots, that would make an excellent addition as well.
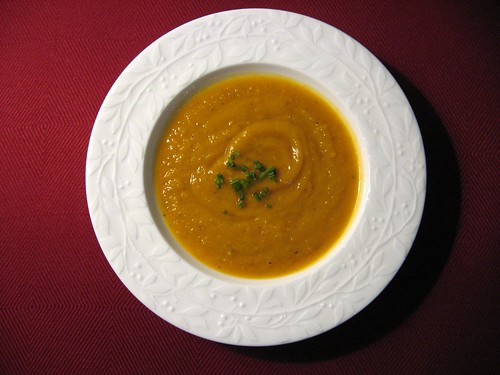
Butternut Squash and Onion Soup
inspired by Cooking Light
4 cups (1-inch) cubed peeled butternut squash (about 1 1/2 pounds)
1 tablespoon olive oil
1/4 teaspoon salt
2 thinly sliced scallions
1/2 cup chopped onion
3 cloves minced garlic
1 tablespoon minced fresh ginger
2 1/2 cups fat-free, less-sodium chicken broth
2 tablespoons (1-inch) slices fresh chives
black pepper to taste
Preheat oven to 375°. Combine butternut squash cubes, oil, salt, minced ginger, minced garlic, chopped onion and minced ginger in a jelly-roll pan. Bake for 50 minutes or until tender, stirring occasionally. Cool 10 minutes.
Pour half the squash mixture and half the broth into a blender. Remove the center piece of the blender’s lid to allow heat to escape; lay a folded paper towel over the opening. Blend mixture until smooth, then pour into a large saucepan. Pour the remaining squash mixture and broth into the blender and repeat previous process. Cook over medium heat for five minutes or until thoroughly heated. Top with scallions and pepper as desired.
Don’t buy stock ever again. That’s right, I said it. There’s just no reason to, really. First off, there’s quality. Homemade stock is just so much better tasting and better for you (not processed). Second, it’s easy to make and we’ll show you the basics today. If you don’t have stock but are in desperate need, consider water. Water is awesome and chances are it’ll do more for your food than canned stock. I wish I could take credit for this but I can’t. Michael Ruhlman, the cooking heavyweight showed me the light and today I am going to spread the word. Read his article, join the empowered, then come back and take your next steps.
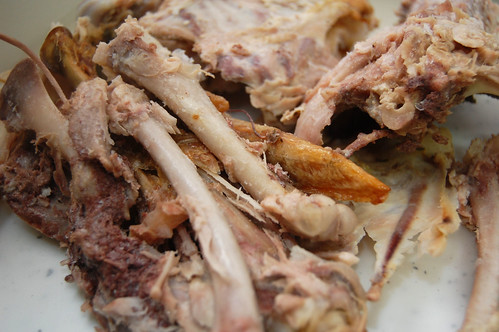
As Michael says, Thanksgiving is THE best time to make stock. You’ve got an entire turkey to use and many think turkey stock tastes better than chicken stock; both are quite healthy. Once you’ve stripped your carcass of all it’s tasty meat, don’t throw it away! Keep it, love it, nurture it; into an excellent broth for use all winter. Cooking stock requires a long slow cook to pull the flavor from the bones, but if you use the recipe below you can cut back significantly on the effort required using a crock pot. Everyone loves convenience.
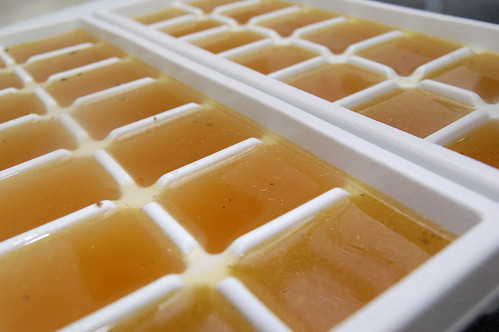
Turkey Stock via Slow Cooker
Adapted from Simply Recipes
This recipe is very flexible with portions with regard to the vegetables. Consider saving the end pieces that you normally throw away in regular cooking for this.
2 tablespoons olive oil
1 turkey carcass; stripped of its meat.
1 yellow onion; chopped
1 large carrot; chopped
3 stalks of celery; chopped
1 tablespoon dried thyme
2 tablespoons dried parsley
1 teaspoon peppercorn
Add one tablespoon of olive oil to a large pot and sauté the onion in medium heat until softened and slightly transparent, 2 to 3 minutes, then transfer to your slow cooker. Add another tablespoon of olive oil and sauté the turkey bones for 4-5 minutes.
Transfer the turkey, carrots, celery, thyme, parsley and peppercorns to your slow cooker. Cover with water and cook for 8-10 hours. Let cool slightly then strain into a large bowl. Let sit for 5-10 minutes and skim off any fat that rises to the surface. If you really want to make sure you get as much fat as possible place your stock, covered, in the fridge overnight. More of the fat will rise and harden, making it easy to remove.
To store, I recommend pouring into ice cube trays and freezing. This is a convenient way to use a bit at a time. Stock in the freezer will last for at least six months.


