There’s just something about rice noodles that seem so…. cool to me. Maybe it’s because they’re so different from the standard flour-based noodles I grew with under my German and Italian parents. The texture is so much more flimsy that the first time I had them it blew my mind. “These are noodles? Seriously?”

Stir Fry Some Veggies

I don’t cook with rice noodles that often and perhaps that’s what keeps it special for me; absence making the heart grow fonder and such. For New Years Eve I decided to cook my lady friend a special dinner of one of her favorite dishes: drunken noodle with thai iced tea. Both were a big success, but I felt the drunken noodle had room for improvement. It needed more veggies (reoccuring theme in my life), so I decided to give it another shot with my own spin. The second time around was an improvement but I still wanted more vegetables so I’ve modified the recipe accordingly. My new best friend cauliflower is making another appearance.
Noodley Goodness

Drunken Noodles get their name not from the inclusion of alcohol but for the vast amounts of liquid you’ll need to get through the heat. As I mentioned in my last post, I can’t handle much spice in my food so I really brought this one down in intensity. Thai chiles are friggin’ HOT and I made the folly of trying a piece after chopping a few. This….. did not go well. If you’re more manly than I am then just up the amount of these you use; up to a 1/4 cup (maybe more? good lord). The same goes with the Tien Tsin chiles. If you don’t have these, then don’t bother buying them just for this recipe. Just substitute in more thai chiles. This dish is great because you can adjust the amount of heat to your liking with little effort. I will definitely be coming back to this.
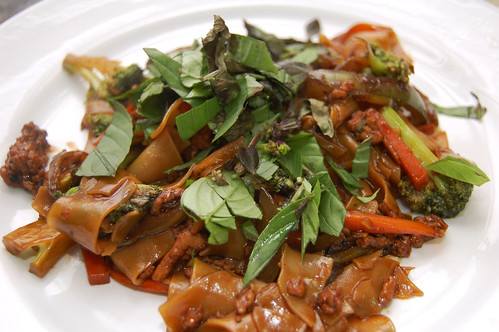
Mild Drunken Noodle with Many Veggies

Mild Drunken Noodle with Many Veggies
adapted from Epicurious

1 12 ounce package of rice flakes

4 tablespoons peanut oil
1 anaheim/cubanelo chile; cut into strips
2 green bell peppers; cut into strips
8 cloves of garlic; minced
1 Thai chile; chopped
4 Tien Tsin dried chili peppers
1 head of broccoli; cut broken into florets
1 head of cauliflower; broken into florets
1 large carrot; peeled and into small planks
1 pound ground chicken

1/4 cup fish sauce
1/4 cup dark soy sauce
1/4 cup “regular” soy sauce (feel free to use low sodium. I did.)
1 tablespoon sweetener (splenda works but so does sugar)
1/2 cup fresh Thai or regular basil leaves

Cut the broccoli and cauliflower florets into small, roughly equal size pieces. The larger florets you’ll quarter, the mediums you’ll cut into thirds, etc.

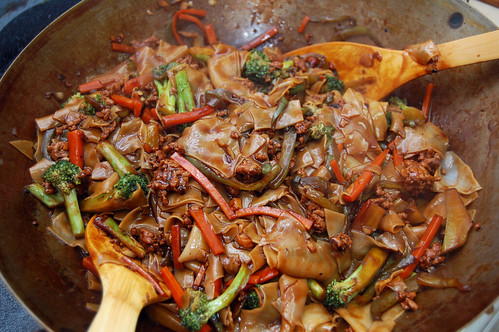
Under high heat, heat two tablespoons of oil in a hot wok then add the bell peppers, cubanelo chile and thai chile. Stir fry until softened; about 1 minute. Add the dried peppers and half the garlic and cook briefly until fragrant, about 20 seconds, followed immediately by another table spoon of oil along with the broccoli, cauliflower and carrots. Continue to stir fry until vegetables begin to soften; 3-4 minutes. Move everything out of the wok into a bowl.

Bring the wok to medium-high heat. While reheating bring a large pot of salted water to a boil. Heat the remaining table spoon of oil and garlic together until fragrant but not burning; one minute or less. Add the ground chicken and cook until “browned.”

At the same time you add the chicken to the wok, throw the rice flakes into the boiling water, stirring occasionally, these should only take a few minutes to boil; roughly the same time it takes to brown the chicken. These will stick and clump together very easily, so be sure to stir on occasion and add to the stir fry immediately after straining.

Once the chicken is ready, raise to high temperature and return the vegetables to the wok along with the rice flakes, sauces and sweetener. Cook until everything is heated and coated and the sauces have enough so the dish is wet but not runny. Once ready remove from heat

Serve with some chopped basil and tall glass of your beverage of choice.
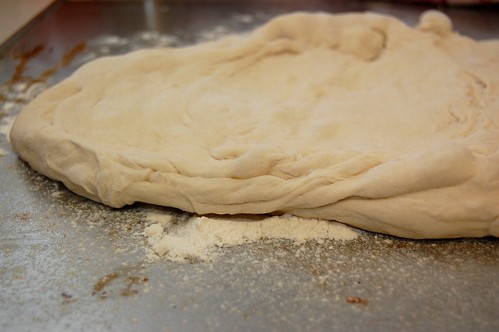
Stromboli with Prosciutto, Mix & Match with Pizza Dough

I was blessed with a husband who also enjoys cooking.

pizza dough

A few months ago Morgan and I took a “Date Night: Pizza Party” couple’s cooking course at Sur La Table. It was a lot of fun and we learned how to make a variety of delicious pizzas. Because we don’t always have the time to make our dough, we like to buy ready-made dough at The Italian Store in Arlington, VA. They make amazing pizzas, pastas, subs and sandwiches, and you can buy enough dough to make a 16″ pizza at an inexpensive price. Try inquiring at your local (non-chain) pizza place, Italian restaurant or even grocery store to see if they sell dough.

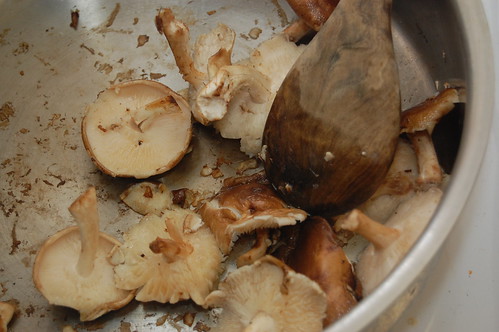
saute the mushrooms and garlic

We happened to have some dough and a bit of prosciutto in the fridge on Friday night, so instead of making pizza, Morgan decided to make stromboli. One big difference between cooking and baking is that you have a little more room with cooking to experiment. You can add more or less of an ingredient without ruining it and add new flavors liberally.

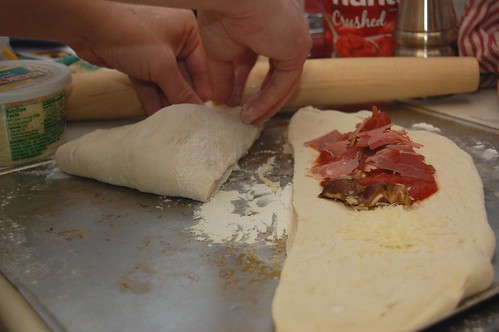
folding the stromboli

Below is our recipe for stromboli with prosciutto from Friday night, but perhaps a better recipe is: buy some ready-made dough from your local pizza place and buy some cheeses, meats and/or tomato sauce at the grocery store, break open the wine and invite your significant other or spouse into the kitchen for a fun night of mix and match pizza toppings or stromboli filling where you can’t go wrong!

stromboli

Stromboli with Prosciutto

16 inch ball of ready-made pizza dough
6 ounces shiitake mushrooms
cooked prosciutto, sliced and torn into pieces
1/4 cup parmesan cheese
1 cup mozzarella cheese
3/4 cup crushed tomatoes
2 tablespoons extra-virgin olive oil
3 cloves garlic, minced
salt, pepper and garlic powder, to taste

Preheat oven to 400 F with a pizza stone in the oven. Heat 1 tablespoon oil in skillet over medium heat and saute mushrooms, garlic, salt and pepper for about 5 minutes.

Lightly flour and oil a baking sheet. Roll out dough to form a circle and cut in half. Distribute filling equally on both halves – crushed tomatoes, mushrooms, prosciutto, garlic and cheeses. Fold dough over on each half and press edges down to seal.

Carefully transfer both strombolis to the preheated pizza stone in the oven. Bake for 15 minutes. Instead of removing the pizza stone from the oven, remove from the stromboli individually with a large spatula. Sprinkle with garlic powder, cool slightly, slice and serve!

Are you getting tired of cauliflower yet? No? Good, because strap in for some more of its nutritious deliciousness.

I was feeling very ambitious last week while at the local asian supermarket. I was buying ingredients for a drunken noodle recipe I was preparing for someone as a New Years meal before the festivities and decided to purchase a few vegetables that I can’t get at my regular grocer: chinese eggplant. I’m really not a huge fan of eggplant in general, actually. However, about a year ago I took a cooking class and learned to make an amazing sezchuan stir-fry with chinese eggplant so I felt bold. The results were…. disappointing.

The Mighty Chickpea

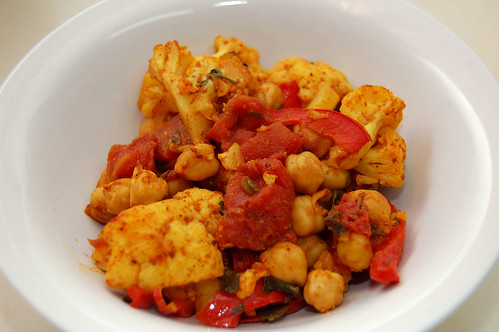
It can be very frustrating to put a lot of time and effort into something only to end up with failure. But, as the saying goes, you learn more from failure than success. Fortunately Heather came to my rescue a few days later with this recipe from the New York Times. My indian food repertoire is quite limited so I was excited to try this and it didn’t hurt that I’ve been having good luck with cauliflower lately.

The Makings of a Stir-Fry

I’m not a fan of spicy food. In fact, I’m quite the wuss in that area so I dialed down the heat and added a bit of my own variation to the spices. On top of that I felt it needed some protein so I included chickpeas. Overall, I was quite satisfied with this recipe and may bring back a bit more of the spice when I do it again.

Indian Cauliflower Stir-Fry with Chickpeas

Indian Cauliflower Stir-Fry with Chickpeas
adapted from New York Times

2 tablespoons peanut or canola oil
1 large head of cauliflower; broken into florets
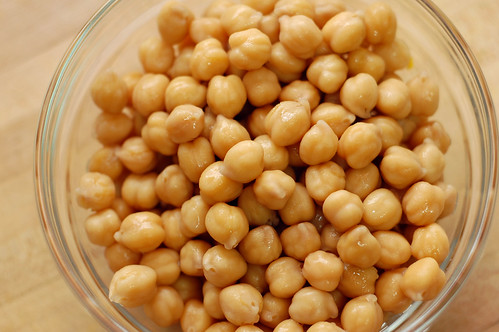
1 cup dried chickpeas; cooked and drained (or one can of cooked chickpeas)
1 red bell pepper, sliced into strips
1 can diced tomatoes
1 serrano chile; seeded and minced
1 1/2 teaspoon ginger; minced
1 1/2 teaspoon garlic; minced
1 teaspoon ground cumin
2 teaspoons ground coriander
1/2 teaspoon tumeric
1/2 teaspoon garam masala
1 teaspoon ancho chili
1/2 teaspoon hot curry
1/2 cup cilantro; chopped
lime

Steam the cauliflower for 10 minutes until just tender. Remove from heat and immediately rinse in cold water to stop the cooking. Then cut the florets into equal sizes; probably quartering the larger florets and halving the medium sized ones. Set aside.

Combine the minced ginger and garlic with a pinch of salt and mash it together by scraping your knife against it several times into you have something similar to a very chunky paste. Don’t try to overdue it. Just scrap it a few times. Set aside.

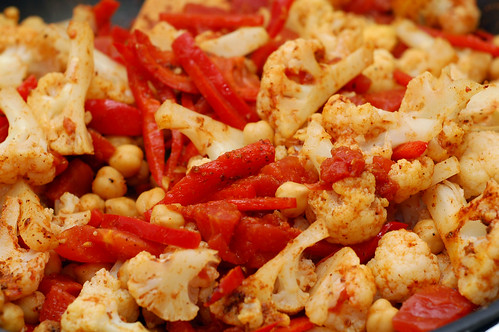
Heat one tablespoon of oil in a large pan or wok over medium heat. Add the additional table spoon of oil with the cumin, coriander and curry for about 20 seconds then follow with your ginger-garlic paste, chile and bell pepper; sauteing for approximately one minute. Add your chickpeas and stir-fry for one minute. Follow with the rest of the rest of the spices, cauliflower and tomatoes; stir-fry for five minutes until fragrant and some of the juices have reduced down. Add the cilantro, toss and cook for 30 seconds and then serve.

Add a spritz of lime before eating.


If you heard a scream on Monday evening at around 10:40 PM, it may have been me.

You see, my husband and I were invited to a birthday dinner on Tuesday night, so on Monday I decided that I would bake something for the birthday girl. I’d been dying to make 101 Cookbooks’ Amazing Black Bean Brownie Recipe for a long time, but you know how my husband felt about that idea. Monday night, I hoped, was my chance.

Failed Black Bean Brownies

I ran to the grocery store after work to get the ingredients, and I finished dinner just in time to start baking during the first new episode of The Bachelor (yes, I watch The Bachelor and I like it!). I also made peanut butter frosting from the Peanut Butter and Chocolate Triple Layer Cake that Edwin and I made in November to frost the brownies. What could go wrong when you have peanut butter and chocolate?

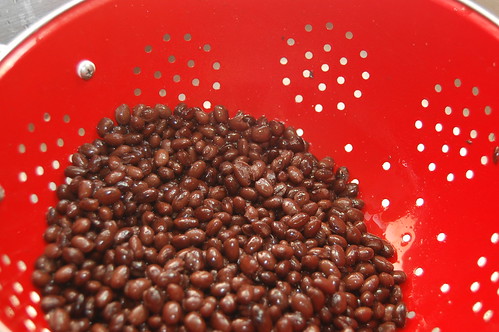
black bean failure

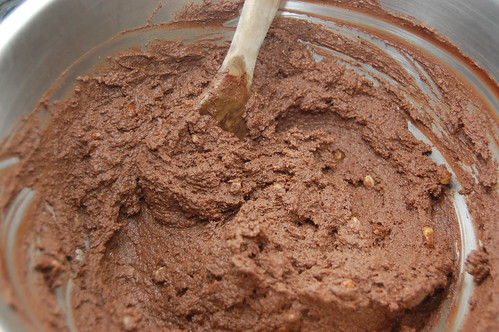
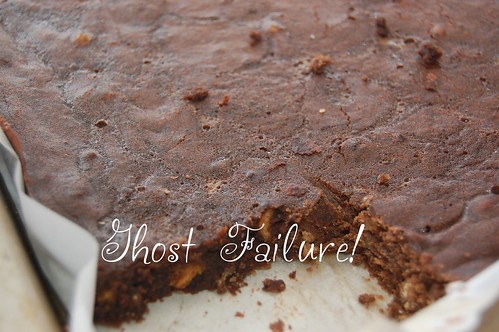
Fast forward to over an hour and a half later, and I had a freshly cooked and cooled black bean brownie in my hand. They smelled a little beany, but since I was assured these brownies had no beany taste to them I didn’t worry. I took the first bite and……. BEAN CITY!

DSC_0023


Wow, I thought, maybe I just have an uncultured palate? I ate another one and it was still a black bean extravaganza; I couldn’t believe it. I slumped on the couch and furiously typed away to Edwin, whining that I didn’t know what could have gone wrong. Then, as my eyes scrolled down the ingredient list, I finally caught the problem… the enormous, outrageous, glaring problem. It is with great embarrassment that I admit to you, DinnerCakes readers, that my tired, pre-occupied-with-The-Bachelor eyes mistook 2 cups of black beans for 2 cans of black beans. Yes, I doubled the amount of black beans.

If anyone would like to try some, they are still in my fridge. I can’t bear to throw them out.

failed black bean brownies

So at 10:40 PM on Monday night I could go to bed, forget the whole thing and hope that a simple birthday card would suffice, or I could try, try, try again. I decided to press on.

I found a simple brownie recipe, and I made some changes to include the things I’d hoped to accomplish with the black bean brownies (without the black beans this time). I used bittersweet and semi-sweet chocolate only, both granulated and light brown sugar, margarine instead of butter (I know it’s a “no-no,” but at this point I’d run out of unsalted butter), peanut butter chips and Taster’s Choice instant coffee. I also added cream cheese to the batter to make the brownies a little more like fudge.

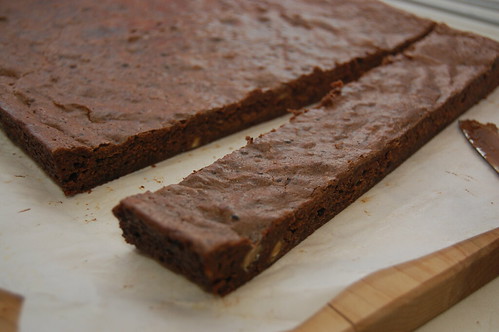
mocha fudge brownies being cut

I didn’t even try the brownies when I took them out of the oven. I was scared, worn out and very late for bed! But when I finally did frost and try them the next day before the birthday dinner, they were amazing! Hallelujah!

Mocha Fudge Brownies

Somehow, I’d made it from brownie hell to brownie heaven.

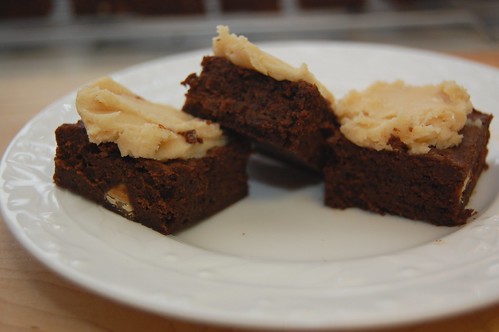
These brownies are excellent. They are dense, rich and fudge-like. The peanut butter frosting and instant coffee are a great combination that give these babies some kick. I may never make brownies without adding some instant coffee again. Say goodbye to dry, “ho-hum” brownies. And please, let’s never talk about black beans.

mocha fudge brownies with peanut butter frosting

Mocha Fudge Brownies with Peanut Butter Frosting
adapted from Bon Appetit

5 ounces semi-sweet chocolate chips
4 ounces bittersweet chocolate chips (I used Ghirardelli for both chocolates)
1/2 cup peanut butter chips
1/2 cup margarine
1 cup granulated sugar
1/2 cup light brown sugar
4 large eggs
1 teaspoon vanilla extract
1/2 cup all purpose flour
1/4 teaspoon salt
1/4 cup instant coffee (I used Taster’s Choice)
1/2 cup cream cheese

Preheat your oven to 350 F and line a 13×9 inch baking pan with parchment paper (leaving some extra on the sides so that you can carefully lift the brownies out when cooled).

Combine semi-sweet and bittersweet chocolate chips in a microwave safe bowl with the margarine. Microwave on high for 15 seconds at a time, stirring between intervals until melted. When melted, stir in instant coffee.

In a large bowl, combine sugars, eggs, cream cheese and vanilla extract for about 5 minutes. Beat in flour and salt, then add chocolate mixture. Stir in peanut butter chips. Carefully pour into prepared pan.

Bake brownies for 30 minutes. Note that a toothpick inserted in the center will not come out totally clean, as these are fudgey. Transfer your pan to a wire rack and cool completely. When cool, remove brownies by lifting parchment paper. Do not cut and frost until your ready to serve, and cut over a cutting board for the cleanest edges.

To make the frosting, see the Peanut Butter and Chocolate Triple Layer Cake from November. Remember to halve the recipe; if you make it as shown for the cake you will have quite a bit extra.

Walkin' In A (Cupcake) Winter Wonderland

Back in December, Baking Bites was running a holiday cupcake contest that got me excited. Photography has been a side hobby of mine that I’ve really enjoyed exploring with the cooking for DinnerCakes, so this seemed right up my alley. I had also recently constructed a home-made light box so it felt like the planets were in alignment for me. Surely, this was destiny.

But alas, I was quite unhappy with the results and decided not to even bother submitting it. However, my father (a former quasi-professional photographer) had been harassing me recently about a lack of updates on my personal flickr site, so I decided to throw up the least-sucky of all the shots from that shoot.

Cupcake Winter Wonderland

Apparently the ladies over at Cupcakes Take The Cake came across my photo and thought it was nice enough to post on their site. It was an honor and nice surprise to find this out. If you love cupcakes and decorative design, then check out Cupcakes Take The Cake. I know I will.

Ahhh, the holidays are over. Thanksgiving, Christmas, New Years: the trifecta of bad (but delicious) eating. It’s no mystery why so many people list “lose weight” or “get back into shape” as one of their New Years resolutions. All things considered, life is pretty good for most of us. We don’t have to hunt or forage for food, worrying whether or not we’ll have enough to last the winter. The amount of physical labor required by us on a regular basis is almost non-existent, maxing out at carrying groceries up some flight of stairs for some. In comparison, life is good, but life is also sedentary and this does lend itself to its own set of problems.

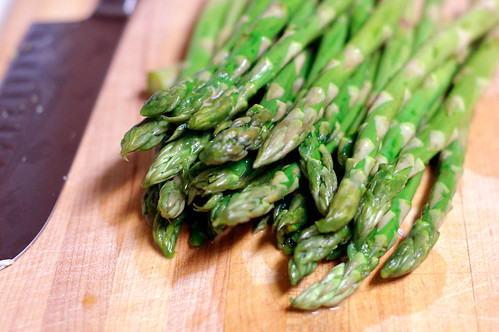
Asparagus

So, the punch line to this little diatribe of mine (since I’m sure you’ll nodding away right now) is to eat well and inject some exercise in your regular routine. We try to keep it pretty healthy here at DinnerCakes (when it’s not baking, as Heather shudders reading this) so I strongly recommend you try some of our recipes if you haven’t already. We’ll keep pumping them out and welcome any feedback you may have, whether it be on issues with a meal, requests for a particular type of recipe or simply to let us know how things are working out.

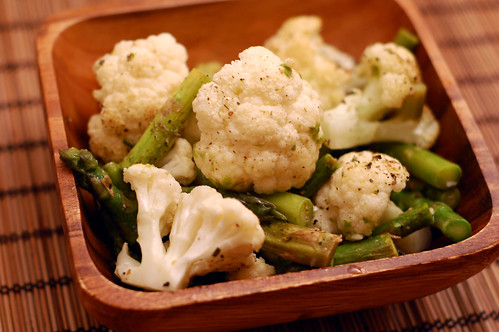
Asparagus and Cauliflower - Ready To Bake

Anyway, back to the recipe! Since my first experiment with cauliflower was so successful, I decided to try another. This is a simple roasted dish that would work well as a side. While cauliflower is in season right now, the asparagus is not. That aside, this is a great dish.

Roasted Cauliflower and Asparagus with Lemon and Garlic

Roasted Asparagus with Cauliflower with Lemon and Garlic
Cauliflower cooks a bit slower than asparagus, so be sure to cut into small florets (smaller than the pictures here).
3 tablespoons olive oil
½ teaspoon salt
1/8 teaspoon ground black pepper
1 bunch of asparagus; chopped into threes
1 head of cauliflower; chopped
3 garlic cloves; minced
Juice of one lemon


Preheat the oven to 450
°.

Chop the vegetables and toss all the ingredients into a bowl until coated. Transfer to a glass baking pan and roast for 15-20 minutes; until the vegetables are soft. The cauliflower will still be crisp to the bite.

Until a little too recently, the word “salad” struck fear into my heart. It’s just so cold, leafy and usually bland, unless you add one of the things that defeats the purpose of eating a salad anyway, like cheese, egg, salad dressing, etc. Yes, I know it’s strange. And my co-workers at my previous job had a great time ragging on me about my feelings toward salad; now Edwin carries that torch!

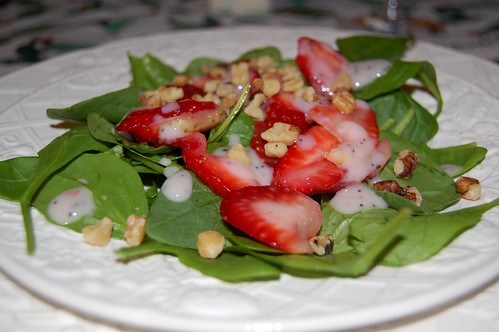
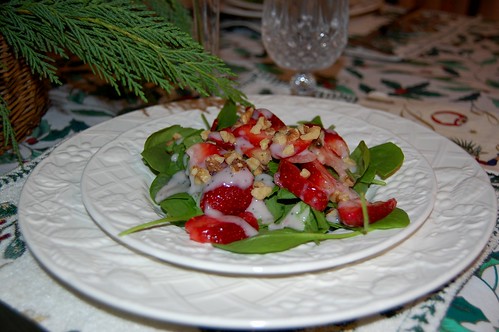
Strawberry Spinach Salad with Yogurt Poppy Seed Dressing

However, I look forward to the holidays because my mom likes to think outside the box when preparing a holiday salad. She spends some good time hunting through her massive collection of cookbooks for forgotten gems. My all-time favorite salads have been born on these occasions, and the salads usually contain fruit.

This past Christmas she made Strawberry Spinach Salad with Yogurt Poppy Seed Dressing. But it’s not just a Christmas salad or winter salad, it’s adaptable to any occasion and it’s easy to put together. The combination of sweet strawberries on a bed of spinach leaves with a few crunchy walnuts tastes heavenly, and it looks bright and beautiful especially on a white plate. This recipe even enchanted a salad-phobe like myself!

My mom also suggests another variation that she believes would work well – substituting the strawberries for blueberries and the strawberry yogurt for blueberry yogurt. In the version below, she swapped out the recipe’s suggestion of pecans for walnuts, a more heart-healthy nut (thus, dad-approved).

I hope you enjoy this salad as much as I do. Don’t wait to try it out!

Strawberry Spinach Salad with Yogurt Poppy Seed Dressing

Strawberry Spinach Salad w/Yogurt Poppy Seed Dressing
adapted from Pillsbury Quick Cooking magazine (1993)

Dressing
1/3 cup honey
1 cup Strawberry yogurt
1 tsp poppy seeds

Salad
1 bag Baby Spinach leaves
1 qt. sliced strawberries
1/2 cup chopped walnuts

In a large bowl, toss spinach, strawberries, and nuts. Combine dressing ingredients in a small bowl and add to a gravy boat, so that you can drizzle however much you like on individual plates. Serve chilled and enjoy!

Cream Cheese Spinach and Artichoke Dip

Happy New Year! Edwin and I hope you had a safe New Year’s Eve.

I enjoyed a fun gathering of a few friends at my apartment. Two of these friends had been staying with my husband and I for the last few nights, so I wasn’t interested in spending a lot of time in the kitchen preparing food on New Year’s Eve. On nights like that it helps to have some quick and reliable recipes for finger foods to set out.

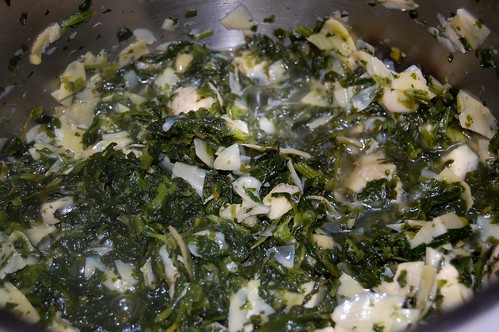
spinach and artichoke cooking

I never liked spinach and artichoke dip until one day in college I ordered an amazing sandwich at a now-closed restaurant in Charlottesville, VA – sliced chicken with spinach and artichoke dip (spread on the sandwich as if it was mayo). It was surprisingly delicious and I miss ordering it!

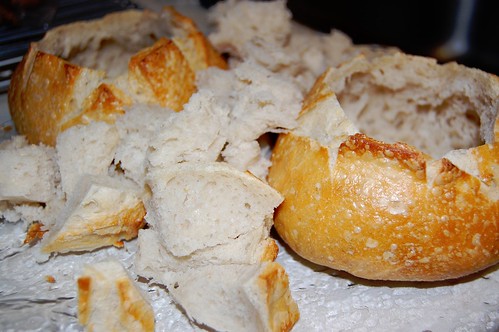
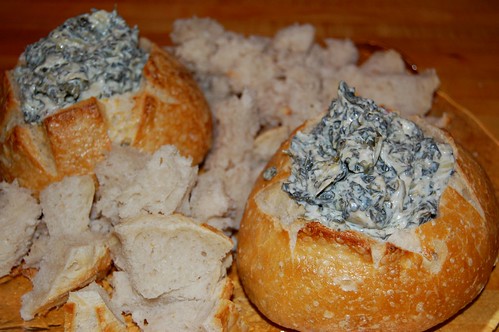
bread bowl

Since I began experimenting with spinach and artichoke dip, I’ve received a lot of good feedback about this recipe, particularly because it isn’t mayonnaise based and contains a lot of the good stuff (spinach and artichokes). The great thing about it is that you can modify it to best fit your palate and it will still be delicious. I tend to use a little more spinach and artichokes (because I have to trick myself any way possible into eating more vegetables). I’m also heavy handed with the garlic powder and red pepper flakes.

Enjoy!

spinach and artichoke dip

Cream Cheese Spinach and Artichoke Dip

1 cup frozen chopped spinach
1 cup artichoke hearts
8 oz cream cheese
1/2 cup Parmesan cheese
1 tsp crushed red peppers
salt, pepper and garlic powder to taste
Sour dough boule (optional)

Cook spinach according to package instructions. Drain and set aside.

Rinse, drain and chop artichoke hearts (sometimes when you buy them in a jar they’ve been sitting in flavored oil, make sure you rinse them unless you want that taste to carry over).

Boil artichokes in 1/2 cup water on medium for 5 minutes. Add spinach for an additional minute. Drain well.

In a microwave safe bowl, microwave cream cheese for one minute until soft. Stir until smooth. Combine cream cheese and spinach/artichoke mixture in a medium sized bowl, stirring well. Add Parmesan cheese and spices to taste, stirring until thoroughly combined.

Add dip to a serving bowl of your choice. I like to buy a sour dough boule, cut a hole in the top, pull out the bread inside and cube it all for dipping. I pour the dip into the bread bowl and arrange the bread cubes around it.

Total prep and cook time is about 20 minutes (if you’re slow like me).

It occured to me recently as I was preparing for the day that I was on my 6th straight box of cereal without having an alternative for breakfast. (unless you count sleeping through breakfast) This was a problem. Variety is the spice of life and provides some welcome balance. Plus, cereal was beginning to get really old. Enter steel cut oats.

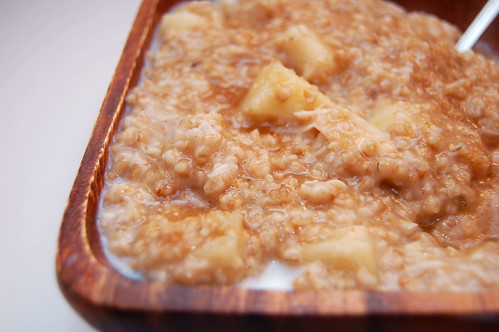
The Cauldron Boils.... Steel Cut Oats

Steel cut oats are the super heroes of the oatmeal family. Everyone knows oatmeal is good for you, being high in fiber and proven to help lower cholesterol; but steel cut oats are also whole grain and have a lower glycemic index to boot. Steel cut oats are from the inner part of the oat kernel (known as the groat) that have have been chopped into smaller pieces. Your classic rolled oats is the groat that’s been steamed, rolled and flaked. Quick cooking oats are the same as rolled oats except chopped.

Steel cut oats offer a nuttier flavor and have a chewier texture than rolled oats. Rolled oats sometimes can resemble a paste or porridge. Steel cut oats are thicker. Creamier. The only down side is the time it takes to cook. Because it’s less processed you’re looking at approximately 30 minutes to cook. I think it’s well worth the effort. Give this recipe a shot or any variation that you apply to your regular oatmeal. I doubt you’ll be disappointed.

Steel Cut Oats with Apple and Coconut

Steel Cut Oats with Apple and Coconut
Adapted from Fatfree Vegan Kitchen
If you like your apples crisp like me, then add them at when serving. Otherwise, add with the oats and coconut.
1 3/4 cups water
1/2 cup steel cut oats
1 cinnamon stick
1/2 teaspoon salt
1/2 teaspoon sugar
1 large apple; chopped
1/4 cup unsweetened coconut flakes (if you can only find sweetened, opt out on the sugar)

Put the water, cinnamon stick, salt and sugar in a small pot and bring to a boil. Add the oats and coconut (and potentially the apple); simmering for 25-30 minutes. Remove from heat and serve with milk, ground cinnamon and additional sugar to taste.

Pumpkin Oatmeal Bites, My Favorite Christmas Cookie

Well, my co-contributor Chef Edwin is going to smack his forehead when he sees this post, but I can’t let that stand in my way, right? I’m still stuck on Christmas, and I have the leftover Christmas cookies and constantly expanding waistline to prove it!

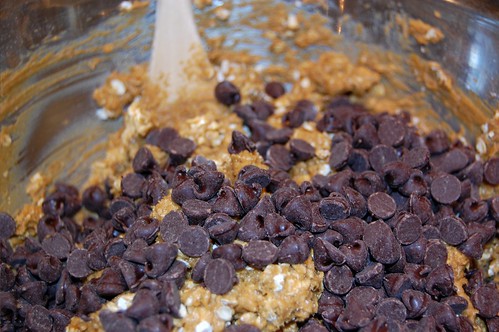
pumpkin oatmeal bites stirring in oats

It seemed to me like more people than ever were baking for Christmas this year, and I had no qualms about sampling everything that came my way. From leftover Bake-A-Thon 2008 treats, to sweet, melt-in-your-mouth Baklava from a friend at my mom’s office, to moist spice cake from a new significant other on my husband’s side of the family… my Christmas holiday consisted of enjoying delectable new desserts. Thank you, everyone!

pumpkin oatmeal bites stirring in chips

I’d like to share with you a recipe that I brought to Bake-A-Thon 2008 this year, but I also made it again on Christmas Eve with my mom. It has been a favorite of mine for years. My mom originally found it in a Better Homes cookbook; I have adapted it to include more pumpkin and more chocolate chips which I think makes them even more moist.

Pumpkin Oatmeal Bites

Readers, I know you may be tempted to think that I’d love any recipe that includes pumpkin, regardless of how it tastes – and I can see why you would think that based on my history here. But truly, this recipe has everything you could want:

1)You only need two bowls to make these cookies.
2) You do not need any fancy tools, appliances or decorating devices.
3) They’re not overly sweet.
4) Because of the pumpkin, they stay incredibly moist after several days. They’re also great for mailing (which I tested this year).
5) If you use high quality chocolate chips (I like Ghirardelli), the chocolate adds a perfect amount of sweetness.
6) It makes 120 cookies. 120! Let’s face it, when you’re baking Christmas cookies you’re probably looking to make more than one dozen.
7) They contain 3 cups of oats and pumpkin is a super food, so you can pretend that you’re eating healthy.

Pumpkin Oatmeal Bites and Morgan

This is the last time I’ll say it for the rest of the year, I promise – give pumpkin a chance!

Edwin and I would love to know what kinds of Christmas cookies you baked this year, and which ones were well received. Please share your favorites with us!

Pumpkin Oatmeal Bites

Pumpkin Oatmeal Bites
Adapted from Better Homes and Gardens, Cookies for Christmas (1985)

2 cups all-purpose flour
1 tsp ground cinnamon
½ tsp baking soda
½ tsp baking powder
½ tsp salt
½ tsp ground nutmeg
1 cup butter, softened
1 ½ cups packed brown sugar
2 eggs
1 cup canned pumpkin
3 cups quick-cooking rolled oats
1 ½ cups semi-sweet chocolate chips (Ghirardelli)

Preheat oven to 350 F. Combine flour, cinnamon, baking soda, baking powder, salt and nutmeg. Set aside.

In a large bowl with a mixer beat butter until softened. Beat in brown sugar until fluffy. Beat in eggs, then pumpkin.

Add flour mixture and beat until combined. Stir in oats and chocolate chips (use a thick, sturdy spoon. I’ve broken flimsy wooden spoons while stirring in all the oats before!).

Use a teaspoon measure to scoop onto parchment-lined cookie sheets, spacing about 1 inch apart. Bake for 12 minutes. Cool for 1-2 minutes, then move to a wire rack. Cookies will cool quickly. Makes about 120.