Food Photography – Go Steelers!

Go Steelers!

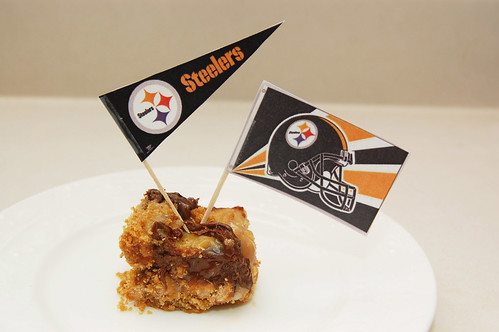
That’s right, I’m getting pumped for Super Bowl XLIII! If you couldn’t tell, I’ll be rooting for the Steelers (and Heath Miller, who graduated from my alma mater, The University of Virginia)!

(Pictured: Eagle Brand’s Double Delicious Cookie Bars – recipe adapted to fit my 8×8 inch pan)

I bought more cauliflower this past week. It couldn’t be helped. I tried not too, but with my recent good experiences using cauliflower, its siren call was too compelling to resist. Alas, such is life.

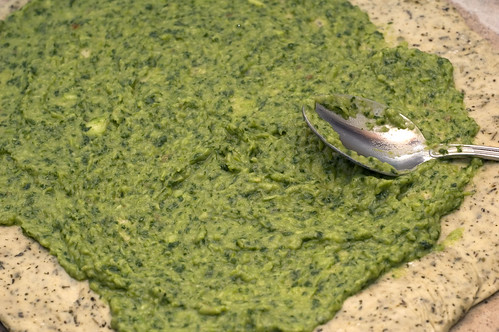
Spreading The Sauce

I’d never made a pizza before; well, if you don’t count those english muffins you make as a kid (good times). I’ve also never had a pizza with cauliflower, so I really have no idea where the inspiration for this one came from. But come it did and here are the results. Not a bad first try if I do say so myself.

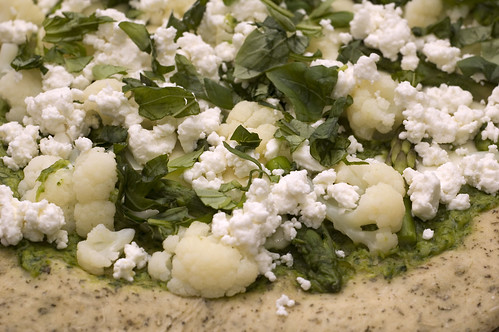
Before Baking

In hindsight, I’d recommend a thin crust for this pizza. I tried half with hazelnuts and half with pine nuts, but can’t recommend one over the other. I prefer the hazel nut, but it’s all about taste.

Garlic Goat Cheese Pizza with Asparagus and Garlic

Garlic Goat Cheese Pizza with Asparagus and Cauliflower

1 lb pizza dough (trader joes garlic herb)
1 roasted head of garlic
1 punch of asparagus; peeled and cut into thirds
1 head cauliflower; cut into florets; florets cut small (thirds, halves depending on size)
1/2 teaspoon salt
4 ounces mozzarella; cut into thing slices
4 ouces goat cheese crumbles
1 handful of your choice of nuts (hazel nut or pine nut)
2 handfuls of fresh basil; roughly chopped

Preheat the oven to 450.

Steam the cauliflower for 4 minutes then set aside. Steam the asparagus for 2 minutes then set aside. In a food processor, process the garlic, all the asparagus but the heads, 1 handful of basil, salt and one table spoon of oil until in a smooth paste. Depending on the size of you’re food processor you may need to push the sides down a few times.

Roll out your dough onto a pizza stone and spread your garlic asparagus paste onto your dough, leaving an inch on the outside bare. Spread your mozzarella slices onto your pizza spread about and bake for 7 minutes. Remove from the oven and spread about your asparagus heads and cauliflower. Sprinkle the goat cheese, your choice of nuts and the other handful of basil. Bake for an additional 10 minutes until the choose is melted and the crust is golden. Enjoy.

Operation Muffin Drop, Destination: Harrisonburg

On Saturday my husband and I made our first trek down to visit his sister at college. Lindsey is a freshman at James Madison University, and we had a great time visiting with her. So much had changed since I’d last been there, 6 or 7 years ago. Her dorm was bright, sunny and even moderately spacious!
Oatmeal Blueberry Applesauce Muffins

We went to a cool little co-op type restaurant off campus for lunch called The Little Grill Collective; be sure to check it out if you’re in the area. We also explored a new library, some campus buildings, and the surrounding area.

Of course I was dying to bake her something she could share with friends, but Lindsey isn’t wild about sweets (she’s lucky, I have no concept of this). After debating the possibilities with Edwin, he helped me decide on MUFFINS!

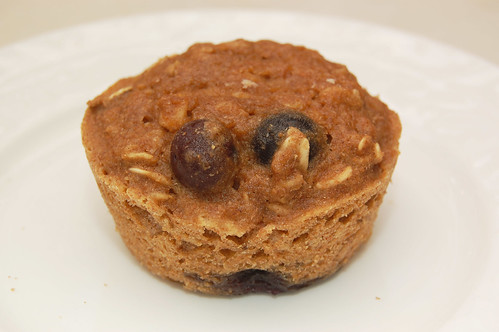
Oatmeal Blueberry Applesauce Muffins

My original idea was to make one batter, divide it between three bowls, and fold in any extra ingredients like blueberries, apples or cranberries. That would be the smart thing anyway, right? I wound up making three separate batters because I couldn’t figure out a way to combine the different recipes I wanted to try and I wanted variety.
Whole Wheat Apple Muffins

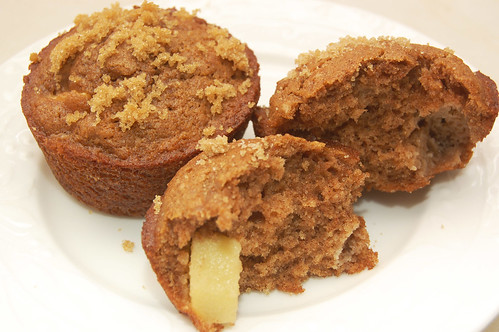
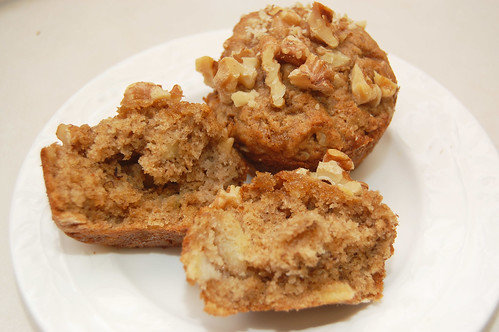
I made Oatmeal Blueberry Applesauce Muffins, Whole Wheat Apple Muffins and Banana Nut Muffins. I halved all the recipes (making about 7 each), and the Banana Nut recipe is the only one that I adapted from the original. If you follow our DINNERCAKES Twitter updates, then you may have heard I was having a difficult time locating a trustworthy Banana Nut muffin recipe. You’d think this is a standard and popular muffin, so I can’t figure out why!

Banana Nut, Oatmeal Blueberry Applesauce Muffins, Whole Wheat Apple Muffins

I used a recipe for plain Banana muffins from Martha Stewart, and I adapted it to add coarsely chopped walnuts to the batter and as a topping. I also added some cinnamon, nutmeg and sprinkled a bit of light brown sugar on top before adding the nuts.

Banana Nut, Oatmeal Blueberry Applesauce Muffins, Whole Wheat Apple Muffins

I’m really happy I brought Lindsey muffins instead of cookies or brownies. Something about baking muffins, smelling them in the oven (stealing one fresh out of the oven) and giving them as a gift is pretty great. I may have liked the Whole Wheat Apple muffins the best, and next time I make the Oatmeal Blueberry Applesauce Muffins I think I’ll add more sugar. Really, I think I’ll be revisiting and experimenting with muffins again soon!
Banana Nut

Banana Nut Muffins (makes 8 regular size)
adapted from Martha Stewart

2 ripe bananas
1/2 cup light brown sugar, packed (with some extra to sprinkle on top)
1/4 cup oil (I used Smart Balance oil)
1/2 large egg (I cracked an egg, beat it lightly, and divided half for this recipe and half for another kind of muffin I made)
1/2 cup all-purpose flour
1/2 cup whole wheat flour
1/2 teaspoon baking powder
1/2 teaspoon baking soda
1/4 teaspoon salt
1/4 cup low fat sour cream
1/2 tablespoon vanilla
1/2 teaspoon cinnamon
1/4 teaspoon nutmeg
1 cup walnuts, coarsely chopped

Preheat oven to 375 F. Peel bananas and place in a stand mixer with a paddle attachment. If you do not have a stand mixer, use a potato masher or large fork to mash.

In a large bowl, combine dry ingredients: brown sugar, flours, baking powder, baking soda, salt, cinnamon and nutmeg. Whisk lightly.

In a medium bowl, combine wet ingredients: mashed bananas, oil, egg, sour cream and vanilla. Whisk lightly.

Make a little space in the middle of your dry ingredients to pour in the wet ingredients. Stir very gently, combining only until moist. Gently fold in 3/4 of the nuts. Be careful not to over mix!

Drop spoonfuls of batter into a well-greased muffin/cupcake pan (I greased the cups and top with butter, lightly floured and then lightly sprayed over that. I had no problems with sticking; I think a little greasing the pan overkill is a good thing!). Fill the cups about 3/4 full. If you like big muffin tops, then fill the cups up to the top but make sure you grease the area around the cups as well. Important: If you have a large muffin pan and won’t be using all the cups, fill the unused cups halfway with water so that everything bakes evenly and doesn’t burn.

When done, sprinkle the tops with light brown sugar and the rest of your coarsely chopped walnuts.

Bake for about 16-18 minutes. Cool for 5 minutes before removing from pan. To safely remove them, insert a knife, toothpick, or cake tester carefully between the pan and the muffin to loosen the sides. Tilt the pan on its side and use the same tool to pop the muffins out individually into your hand.

Simple Yet Delicious – Adobo Black Bean Soup

On inauguration day, while over 1.8 million people flooded capital hill and surrounding area to witness history in the making, I was working far away in Reston. Yes, I missed all the glory and truth be told, even if I had the day off I would probably have just slept in; maybe baked a pie (fact: baking a pie is never a poor use of one’s free time), but definitely keeping myself as far away from DC as possible. There are a lot of great things about living inside the beltway, but every now and then there are events that strongly compel you to stay out of DC (the cherry blossom festival is another taxing escapade).

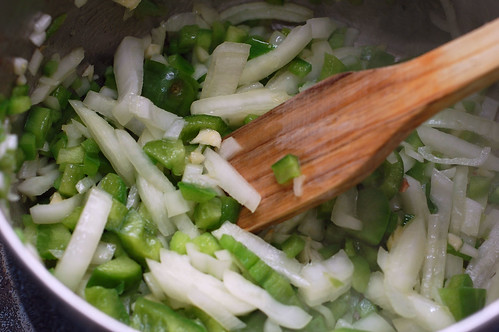
Sweating those aromatics

I’ve never been one for politics and while I am hopeful for the possibilities our new President brings, there was no friggin’ way I was putting up with THAT insanity. And it was cold. Good lord, do I hate the cold… It was still a noteworthy day for me though because I came across some delicious black bean soup at Whole Foods. Due to my lack of time management, I had not prepared a large pot of soup for the week and was forced to brave the elements in search of lunchtime nourishment. I was pleased to find this soup and had to recreate it!

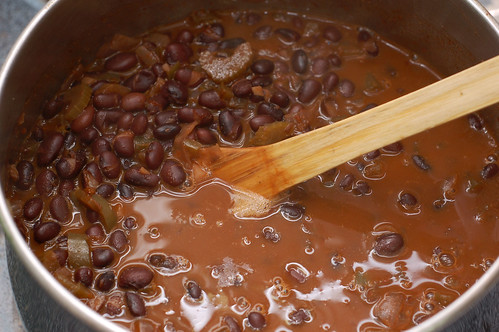
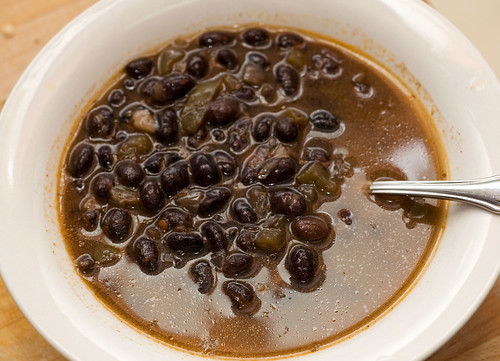
Adobo Black Bean Soup

This soup…. is not the soup I had on Tuesday. Don’t get me wrong, this is good soup and I’m enjoying it quite a bit; but it is not the soup I had at Whole Foods. This soup is milder and less sweet; and still delicious. It’s got a bit of a spicy tweak to it, but not so much as to overpower the taste. Give it a shot. And if you’ve ever tried to make Whole Food’s version, let me know.

Adobo Black Bean Soup

Adobo Black Bean Soup
Inspired by Whole Foods

2 tablespoons of olive oil
1 yellow onion; chopped
1 green bell pepper chopped
2 cloves of garlic; minced
1 teaspoon oregano
1 teaspoon ground cumin
1 teaspoon adobo seasoning
2 chipotle peppers in adobo sauce
4 tablespoons adobo sauce
2 cups dried black beans; cooked and drained
1 teaspoon cocoa
2 tablespoons sherry cooking wine
4 cups water
Salt to taste

In a large sauce pan, heat the oil on medium heat and sweat the onion, bell pepper and garlic until onion is soft and slightly translucent; approximately 3 minutes. Add the oregano, cumin, adobo seasoning, chipotle peppers and adobo sauce. Stir briefly and let cook for approximately one minute. Add everything else and simmer for 30 minutes. Add salt to taste.

Kitchen Tips – Graham Cracker/Cookie Crusts

Kitchen tips is a brand new type of DINNERCAKES post where we’ll share some of the things we’ve learned and continue to learn along the way. Hopefully we’ll make all the mistakes so that you don’t have to!

Cookie Crumbs - NOT finely ground

When making a graham cracker or cookie crust for a pie or bar cookie, I’ve found it’s best to buy a box or bag of pre-ground crumbs whenever possible:

  • finely ground crumbs combine easily with the melted butter
  • the crumbs press into a pie plate smoothly
  • the crust holds together better in the plate
  • it’s easier to cut into for serving (because it’s less thick)

Even if you use a meat tenderizer or rolling pin it’s unlikely that you’ll be able to get a truly fine consistency throughout, but you’ll put in twice the work. Sometimes I still make my own crumbs for fun and so that everything is from scratch, but then I quickly remember it’s not that fun at all (and that my idea of fun is clearly a little off)!

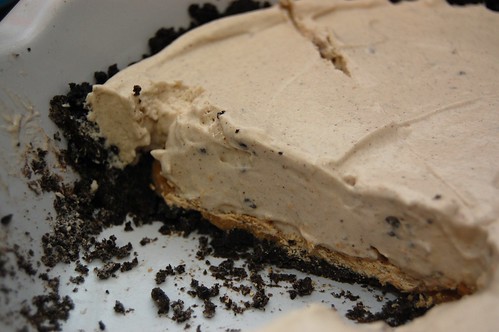
Note: The oreo cookie crumb photo shows crumbs that are NOT finely ground. I was lazy here, and my pie crust suffered for it!

Spicy Shrimp and Couscous

I’ve mentioned my dad’s strict dietary restrictions before, but it wasn’t until he began eating that way that I noticed how misleading healthy eating cookbooks, guides and restaurant menus can be.

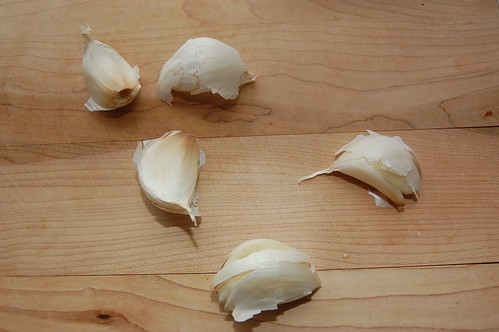
garlic cloves

I’ve opened new “healthy dinners” cookbooks to find macaroni and cheese and beef stroganoff, or soups thickened with heavy cream and butter. If these are lightened up versions of the original, then I’m truly terrified of the original.

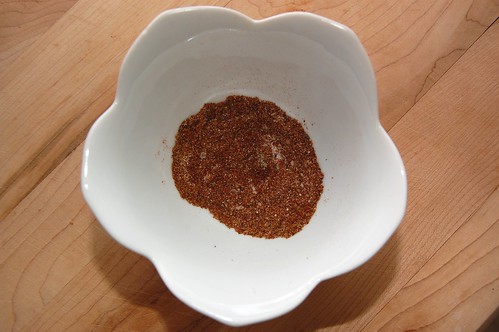
spice

Restaurants like Panera want to showboat as healthy alternatives for lunch, but some of their salads rival fast food cheeseburgers. Most people know that a caesar salad packs in the fat with cheese and heavy dressing, but what about Panera’s Orchard Harvest salad? It sounds absolutely incredible, boasting “field greens, crisp romaine, dried cherries, fresh pears, Gorgonzola, toasted pecans & our cherry balsamic vinaigrette.” Lovely leafy greens combined with fruit and just a hint of nuts, right? The Orchard Harvest salad contains 540 calories and 33 grams of fat, including 8 grams of saturated fat and 0.5 grams of trans fats. Don’t worry, you can also get 48% of your daily value of sodium, or 1140 milligrams. Yikes!

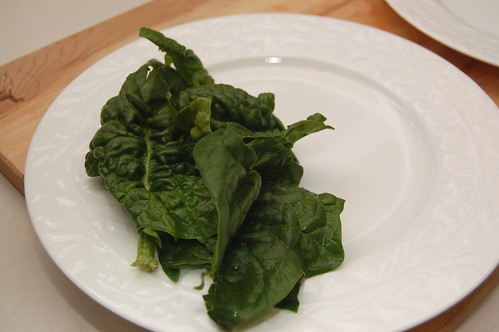
leaf salad

I’ve been eager to share my Spicy Shrimp and Couscous recipe since the last time I made it earlier this week; it’s one of my favorites – quick, easy, spicy, healthy and full of flavor and zip. Buy a bag of frozen shrimp and just use it as needed (and if you’re like me, you can get your husband to remove any legs or tails still on the shrimp… Ghost Baker does NOT mess with shrimp parts!). Couscous smells wonderful when cooked, and did I mention that cooking it only takes five minutes?

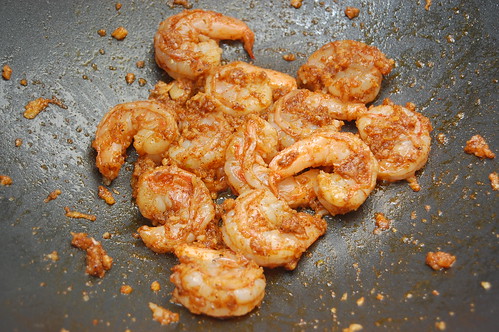
cooking shrimp

If you’re like Chef Edwin and can’t handle spice, then try toning down some of the spice either by decreasing or removing the cayenne and chili powder. If you love spice like I do, then please don’t wait to add this healthy dish to your dinner rotation!

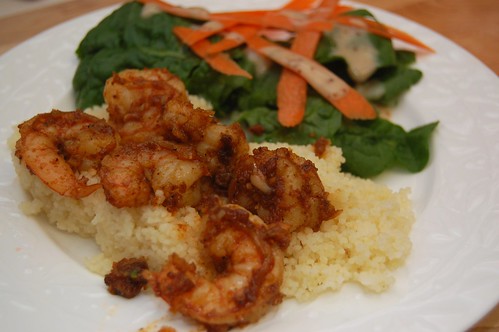
shrimp and couscous

Spicy Shrimp and Couscous
(serves two people)

12 frozen shrimp, thawed (by running under cold water)
1 tablespoon oil
5 cloves of garlic, minced
1/8 teaspoon cayenne
1/4 teaspoon salt, pepper, chili powder, paprika and garlic powder
1/2 teaspoon cumin
1 box plain couscous
1 bag leaf salad of your choice

Begin to cook couscous according to package instructions. Mince garlic and set aside. Combine and stir cayenne, salt, pepper, chili powder, paprika, garlic powder, and cumin together in a small dish. Fluff couscous when it’s done cooking and set aside, covered.

Heat wok on medium heat (you can use a skillet if you do not have a wok). When hot, add a little bit of oil to the wok. Add half of your garlic, stir for 30 seconds, then add peeled and thawed shrimp. Stir for 10 seconds and add remaining garlic along with spice mixture (it’s okay if you decide not to use all of the spice mixture). Cook, stirring occasionally, until shrimp are pink and curled.

To serve, add leaf salad of your choice to a plate along with couscous and cooked shrimp.

Edible Art – Rainbow Cake!

As Heather mentioned yesterday, we’re going to be adding some new kinds of content to the site. There are other aspects of the cooking/baking/food that we love and we want to share that with you. One of the new sections is food photography, where we share some awesome beauty in edible form.

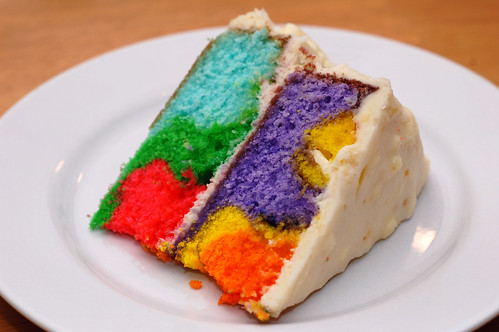
First up, rainbow cake! This has got to be one of the coolest looking cakes I’ve ever made. More to come on this in the future but I wanted to give you all something to look forward to. 😉

Taste The Rainbow

As always, we welcome your feedback. Tell us what you think of the new features and let us know if there’s something you’d like to see.

UPDATE: We got a flurry of interest in this cake and decided to run a RAINBOW WEEK theme. You can check out it out by clicking here for tips on how to make your own cake as well as other ideas you can do with the rainbow theme. Enjoy!

We’ve had a couple readers who were following our twitter posts already try it out themselves. If you do the same, be sure to share it with us!
– Kelly took great shots during the various stages of the process.
– Stephanie rocked this as well.

How About A Little Kahlua Pie With Your Inauguration Day?

Happy Inauguration Day! As I mentioned last week, the DC area has been crazy because of the festivities. Yesterday morning Edwin and I performed a service project for Martin Luther King, Jr. Day through Greater DC Cares. Apparently Usher and Tobey Maguire were somewhere in the school where we were painting, but sadly we didn’t see them.

Kahlua Pie Filling

I’ve never lived in the DC area during a presidential inauguration before, but it’s hard not to be infected by the celebration bug. I have no idea what the future will hold or whether President Obama will keep his campaign promises, but at least for this weekend everyone you see on the street here will tell you that change is coming.

Change is also coming to DINNERCAKES! Edwin and I had our own “state of the union” on Saturday where we discussed some ideas we have for the site, so be on the lookout for some new features! And as always, we welcome your feedback and suggestions.

But back to Inauguration Day – when I think about type of food that accompanies a celebration, I typically think of cake (let’s face it, when I think about most things I think of cake). But because it’s fairly soon after Thanksgiving and Christmas and my pants are still feeling a little tighter than I’d like, why don’t I try to change the way I typically think of celebration food (get it? change? was that too much?). Instead of a heavy celebratory cake, I decided to make a pie.

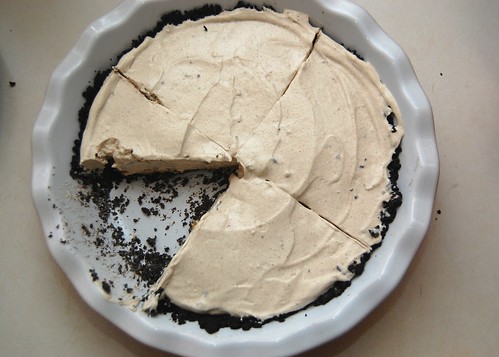
Kahlua Pie

This Kahlua Pie sits in an Oreo cookie crumb pie crust and I adapted it to include a layer of smooth peanut butter for some added sweetness. The pie filling consists of a nice and light fat free Cool Whip mixed with Jell-O Oreo Cookie Pudding and Pie Filling Mix instead of vanilla pudding, Kahlua instead of just Kahlua flavor and fat free milk. I also added just a hint of coffee.

I’m a big fan of Cool Whip pies (like Million Dollar Pie) because they don’t leave people feeling so weighed down and full afterwards. My husband really enjoyed it (he loves light desserts) and noted that he tasted the Oreo cookie crust and Cool Whip foremost, and that the Kahlua adds a nice, subtle flavor. I thought it almost tasted like caramel.

Hope you enjoy this smooth, fluffy pie and have a happy Inauguration Day!

Kahlua Pie

Kahlua Pie
adapted from Kraft Foods

1 1/4 cups Oreo cookie crumbs
1/4 cup melted butter or margarine
1/2 cup peanut butter, smooth
1 package Jell-O Oreo Cookie Pudding & Pie Filling (4 serving size)
1 tablespoon cold coffee
3 teaspoons Kahlua
1 cup cold fat free milk
2 cups fat free Cool Whip

If you can’t find a box of Oreo cookie crumbs at your grocery store and you don’t want to buy a ready-made Oreo Cookie crust, crush about one sleeve of Oreo cookies in a gallon ziploc bag with a meat tenderizer. Mix the crumbs in a bowl with the melted butter. Press the mixture into the bottom and sides of a 9 inch baking dish.

Drop 1/2 cup of smooth peanut butter into the center of the crush. Gently smooth out the peanut butter to make a thin layer at the bottom of the crust. Be careful – move the peanut butter around as little as possible so that it doesn’t start sticking to your crust and pulling it apart.

Mix Jell-O mix with coffee, Kahlua and milk in a medium size bowl until thick. Add the Cool Whip and continue mixing until fully incorporated. Spoon the mixture into the crust and level it. Freeze pie for approximately 4 hours or overnight.

Tip from Kraft – after removing the pie from the freezer, dip the plate into warm water, just to the rim, for about 30 seconds to make it easier for cutting and serving.

At first you don’t succeed, try, try again. That’s how the saying goes and for me, applies no better than in the world of cooking. I was not blessed with any innate culinary skills. I have burnt many a baked good, and overcooked many a meat until tasteless. It is a hobby that is sometimes bittersweet (though I love it all the same).

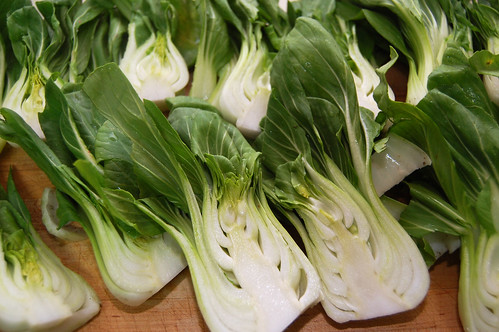
Baby Bok Choy

Bok choy is something I’ve been trying to become comfortable with and the ride has been… educational. I wanted something light to accompany future asian dishes and for some time this vegetable did not want to cooperate. However, eventually progress was made.

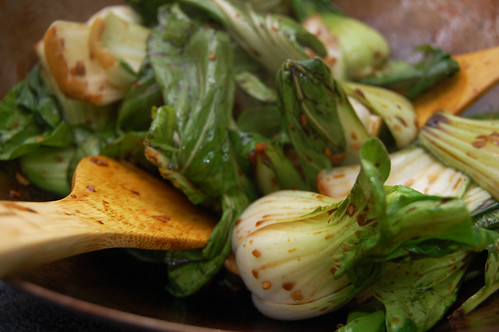
Baby Bok Choy Stir Fry

Bok choy is a cheap healthy vegetable also known as chinese cabbage. This simple dish would go well with a heavy stir fry to balance out the meal.

Baby Bok Choy Stir-Fry with Garlic and Ginger

1 to 1 1/2 pounds baby bok choy
1 tablespoon peanut oil
1 teaspoon sesame oil
3 large loves of garlic; minced
1 tablespoon and one teaspoon of ginger; minced
1 teaspoon salt
1 tablespoon dark soy sauce (use regular if you don’t have any)

Cut the bottom end of the baby bok choy and separate the leaves. Rinse and dry.

Mash the garlic with the salt briefly to get more of the flavor out. Put a wok or large pan on high heat. Immediately, before the wok heats up, add both oils along with the garlic and ginger and cook until fragrant; approximately one minute.

Add the bok choy leaves along with the soy sauce. Continue tossing to coat and stir-fry until green ends begin to wilt and the tougher base is crisp but hot and slightly tender.

Chicken & Spinach Pita Sandwich, My DC Area Favorite

Northern Virginia can be a frustrating place to live. The DC Metro Area is home to constant traffic, a very high cost of living and wall-to-wall people (just turn on your news this weekend to watch the swarms of people here for the presidential inauguration!).

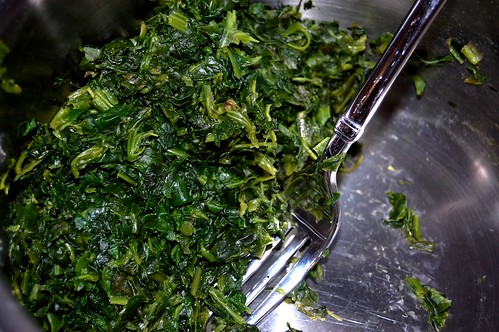
spinach

But Northern Virginia is also full of hidden gems, my favorite being interesting local restaurants and ethnic stores. Lost Dog Cafe is a neat local sandwich and pizza place with a large selection of beer. The owners also established a foundation dedicated to rescuing stray cats and dogs.

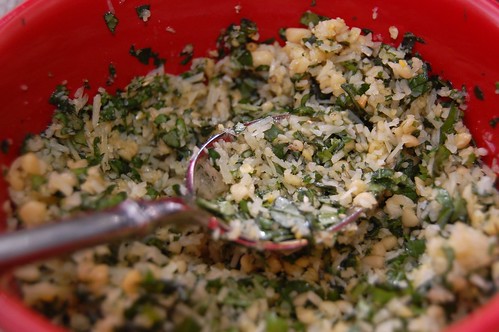
pesto

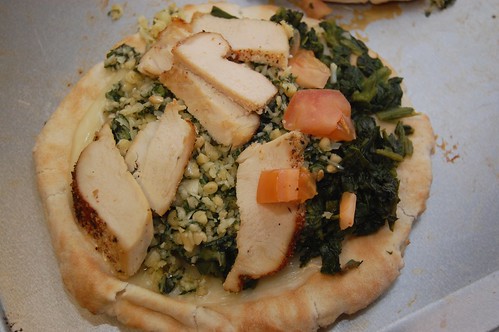
My favorite sandwich at Lost Dog is called “Muttly.” The Muttly is a warm pita full of spinach, chicken, provolone, tomatoes and pesto. Because I’m a picky eater and always trying to figure out new things to tolerate for lunch, I really wanted to recreate this sandwich so that I could enjoy it more frequently (and, of course, cheaper).

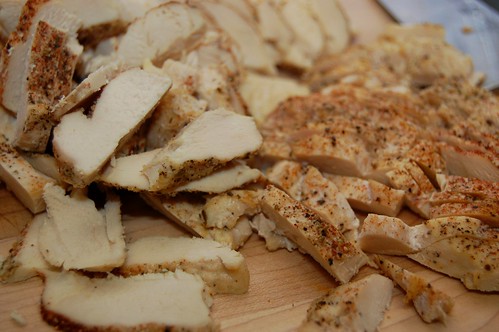
sliced chicken

The outcome was great. Make sure you buy large pitas; mine were a bit small so I wasn’t able to pack in as much spinach as I wanted to. I made the pesto from scratch, which always beats adding more ready-made, processed food to your diet, but the recipe I used was time-consuming. To cut down on time I didn’t chop it quite as much as I should have. I hope you will forgive my “lazy” pesto.

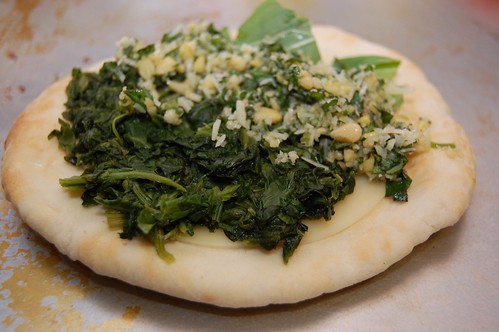
spinach and pesto

Please note that this is not a spicy chicken wrap, a Cajun chicken melt or a chicken sandwich smothered in tangy ranch dressing. I seasoned my chicken generously before baking it, but the flavor is mild (though not bland) and it’s not dripping with any condiments. I love this about the sandwich, but I just wanted to warn you not to expect something like Panera’s Chicken Bacon Dijon calorie festival. Happy lunching!

ghost muttly

“Muttly” (Chicken & Spinach Pita Sandwich)
inspired by Lost Dog Cafe

1 package large pitas
1 lb chicken breast, uncooked
1 small tomato
1 package frozen spinach
1 package sliced provolone cheese
2 tablespoons white wine
paprika, salt, pepper, Montreal chicken seasoning, cayenne, to taste

For the pesto
1 bunch of basil
3 cloves garlic
1/4 cup pine nuts
3/4 cup parmesan cheese
2 tablespoons extra virgin olive oil

Preheat oven to 375 F. Cut your chicken breasts in half so that they resemble chicken cutlets. Sprinkle the bottom of a 13×9 baking pan with 2 tablespoons of white wine. Arrange the chicken pieces in the pan and season generously with paprika, salt, pepper, Montreal chicken seasoning and cayenne. Bake the chicken for 25 minutes.

In the meantime, chop tomato and set aside. Cook package of frozen spinach according to package instructions and set aside.

To make the pesto, you can find some great instructions at 101 Cookbooks. Mine didn’t turn out as authentic or attractive because I don’t have a mezzaluna, but the pesto was fine for me and used less oil. I basically followed this recipe except I chopped it until it was minced, not finely minced (because all that chopping took 101 Cookbooks thirty minutes, and that didn’t sound so great to me!). I would also recommend adding a bit of salt to the recipe.

When the chicken is done, allow it to cook enough that you can handle it comfortably (leave the oven on). Slice the chicken into bite size pieces and set aside.

Arrange the pitas on a baking sheet and add one slice of provolone followed by some spinach, pesto, chicken and tomatoes. If your pitas are malleable, fold it over like a sandwich (without breaking the pita).

When you’re finished putting together the sandwiches, set the baking sheet in the oven for approximately 5 minutes (just until the sandwiches are warm). Remove tray and serve! Wrap tightly and store any leftovers (we had leftover sliced chicken and pesto in addition to leftover sandwiches).