Kitchen Tips – Butter, Butter, Who's Got the Butter?

One of the first “lessons” I learned in baking was about butter. When I was first starting out I always microwaved butter to soften it. Who wants to let the butter sit out and just wait for it to get to room temperature? Usually the things I made seemed to turn out alright, and I didn’t worry about it.

Finishing Touches

Then I started reading more about baking and everything I read cautioned against microwaving butter. I began noticing that the things I made were not really alright – they were on the flat side and they often spread too much.

Butter gives baked goods their structure. If the butter gets too warm or melts, the emulsion breaks and you’ll never get that structure back. The butter will also never add air pockets to your batter or dough, which affects the texture.

I know some people will probably protest that they’ve been microwaving their butter for years without a problem. I haven’t even been able to convince my own mother to stop microwaving butter. I’ll write a future “Kitchen Tips” post about what it really means to “cream butter” in recipes and then you’ll see what I mean… it’s a beautiful thing when done right!

pbblossoms

If you’d like to read more about the importance of butter’s temperature, check out this great article from NYTimes.com. Some of it is a bit extreme, but the important thing to take away is to let your butter sit out until it reaches room temperature (about 65 degrees) on its own. The time will vary based on the temperature of the butter to begin with, but I usually let mine sit out for about 30 minutes. Make sure you don’t let it melt!

(Photos: The first photo shows peanut butter blossoms from the Bake-a-Thon made with room temperature butter. The second photo shows peanut butter blossoms made with microwaved butter when I was home for this past Christmas).
Mexican Rice, Surprisingly Simple

Both Heather and I will be traveling to our hometown of Richmond this weekend to celebrate a mutual friend’s birthday. Much fun will be had, much food will be consumed. Besides the obligatory mass of baked goods that come from two culinary freaks (Heather lives for days like these, I swear), our friend has requested dinner at Texas De Brazil; also known as “oh god why did I eat so much it hurts so good.” I don’t eat meat that often and beef even less frequently, so I can assure you that I will make this experience worth it.

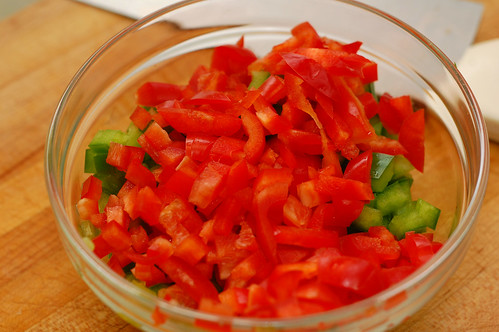
Bell Peppery Goodness

The Lady Friend and I both have pretty active (read: busy) schedules so quality time can be a bit limited. With my weekend trip we had dinner Monday to have some of said quality time. She had recently got me Fresh Food Fast: Delicious, Seasonal Vegetarian Meals in Under an Hour and so far I’ve been pretty happy with it, so we decided to make black bean quesadillas.
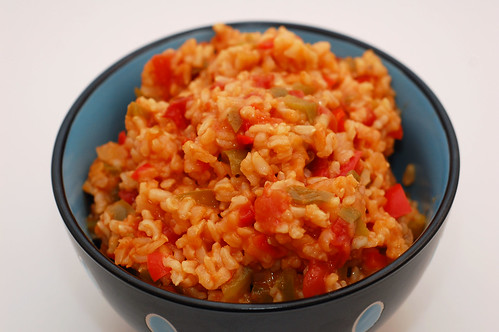
I did a little searching for Mexican rice recipes and was surprised to find very few called for much in terms of spices. At that point I decided to wing it and this was the result. It went quite well.

Mexican Rice

Mexican Rice

2 tablespoons oil
1/2 red bell pepper; chopped
1/2 green bell pepper; chopped
1 jalapeno pepper; chopped
1 yellow onion; chopped
3 garlic cloves; minced
1 cup brown rice
1 3/4 cup stock or water
1 can diced tomatoes
1/2 teaspoon salt or more to taste

Heat the oil in a medium-sized pot and saute the onions, garlic and peppers until softened; approximately 3-4 minutes. Add the remaining ingredients and simmer until the rice is softened; approximately 45 minutes.

Simple Pad Thai, a Quick Fix for Luxuriously Lazy Nights

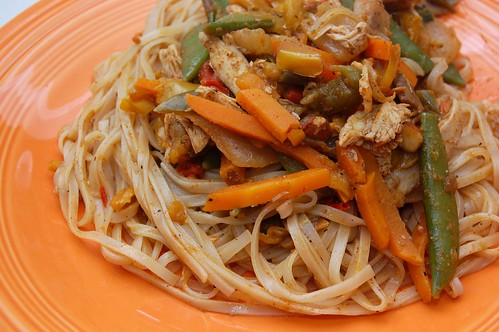
So, I had been saving an empty boxed Pad Thai kit that I used to make dinner the other night, but it seems as though my husband does not value saving empty food boxes in the same way that I do, and he threw it away! Hopefully we’ll be able to make do here anyway.

Pad Thai spice

We picked up the pad thai box in the international section of the grocery store a few weeks ago. Back when the two of us were lazier, these little kits were an excellent choice for quick dinners and a welcome change from spaghetti.

Well, we were feeling lazy again last Friday, and we had half a rotisserie chicken left from when I made Sante Fe Soup earlier in the week. But as I was cooking the noodles and about to open the spice packet, I turned over the box to read the ingredients –

(Peanuts, Pure Cane Sugar, Salt, Corn Starch, Spices [Chili, Cinnamon, Pepper, Cumin, Clove], Hydrolyzed Soy Protein, Yeast Extract, Green Onions, Citric Acid, Peanut Oil, Sesame Oil, Silicon Dioxide [To Prevent Caking])

I already had on hand chili powder, cinnamon, pepper, cumin and cloves, so I thought I could do without this processed version. I picked out a few of the peanuts from the spice packet (woops, that was one thing I didn’t have), threw the rest in the trash and embarked on a journey to recreate it.

pad thai noodles

I knew this wouldn’t be an authentic pad thai – though I have taken a Thai cooking course, this just wasn’t the night to break out the tamarind and fish sauce. I still have nightmares about working with fish sauce; in my Thai cooking course the instructor told us that it’s made by packing a barrel with fish and then collecting the water and liquid that runs off them… voila, fish sauce (shudder).

My attempt at recreating the boxed pad thai was pretty good, but I think I went a little wild with the level of spice. It’s possible that Edwin’s self-proclaimed “spicy wussiness” is making me overcompensate, and noodles are pretty good at retaining spice. I toned things down a little bit in the recipe below. If you have recreated a simple box pad thai with luck, please let me know!

Pad Thai

Thai Kitchen Pad Thai
(revisited especially for lazy Friday nights after a long week!)

1 box Thai Kitchen original pad thai
1/2 rotisserie chicken
handful of peanuts, roughly chopped
1/4 teaspoon salt
1/2 teaspoon black pepper
1/2 teaspoon chili powder
1/4 teaspoon cinnamon
1/2 teaspoon cumin
1/8 teaspoon cloves
1/4 to 1/2 teaspoon cayenne
1 bag frozen stir fry vegetables (or if you prefer fresh vegetables, shop for fresh snow peas, sliced carrots, sliced red and yellow peppers, onion, and broccoli or mushrooms)

Combine peanuts, salt, pepper, chili powder, cinnamon, cumin, cloves and cayenne in a small bowl. Set aside. Remove rotisserie chicken from bone and cut bite size pieces. Set aside. Soak banh pho noodles according to directions on box. In the meantime, heat your wok to medium heat, then add 2 tablespoons oil. Stir fry defrosted or fresh vegetables until desired tenderness is reached.

When noodles are finished soaking, drain and rinse well. Add noodles to the wok, along with the pieces of chicken and spice mixture. Stir-fry for approximately 5 minutes, until fully combined and noodles are tender. Serve hot, garnish with extra peanuts.

Food Photography: Black and White Cookie

Good morning, loyal DinnerCakes readers. Time for another installment of food photography where we whet your pallet with some tasty art.

Black and White Cookie

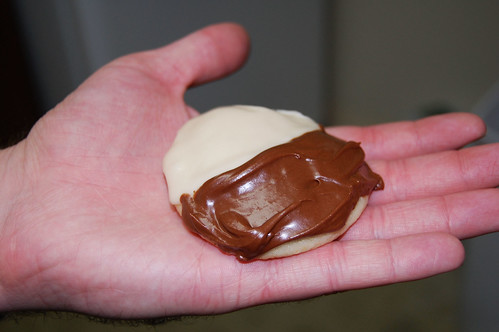
Today’s picture is from quite a while ago when a friend of mine was leaving the area for the greener pastures of New York. After conducting a little spy work to learn her favorite cookie I decided on a recipe by Baking Bites. The rest, as they say, is delicious history.

As you’re probably already aware, the Steelers won their 6th Super Bowl on Sunday! It was an amazing game; Morgan and I were jumping up and down all the way until the end. My heart is still slowly (very slowly) coming back down to its regular speed. Please excuse me in this post if I’m not able to form complete sentences yet!

chopped spinach

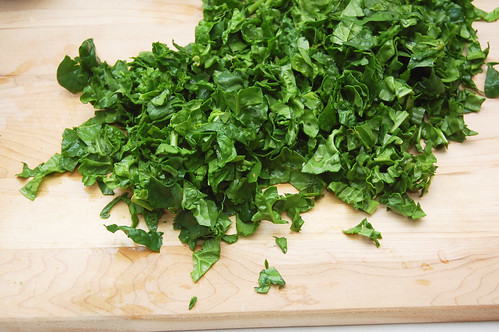
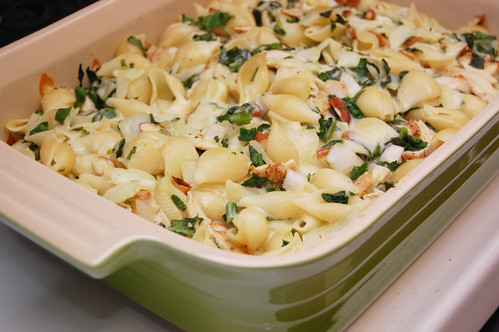
This recipe is originally from 101 Cookbooks, but when I first made it last year I didn’t like it very much. I had high hopes because the recipe and photos looked amazing, but I thought it could be a little more flavorful. After a few changes, this recipe is now one of mine and Morgan’s favorites.

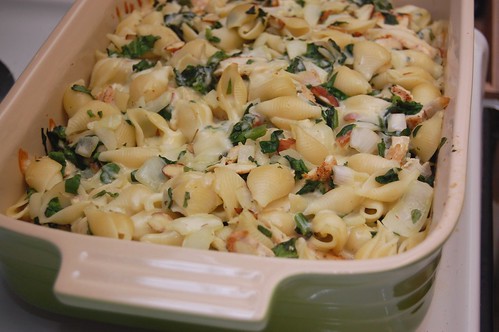
pastacasserole

I’ve read that a trick to make macaroni and cheese more filling (so that you don’t eat as much) is to use a sharper cheese. Keeping this in mind, I added some sharp Vermont cheddar to the casserole. I also added chicken, which really made a huge difference (I’m not good with vegetarian meals, sorry Edwin!).

bakedpastacasserole

The only thing that I don’t love about this recipe is that it is time-consuming. There are several different steps including cooking the chicken, cooking the pasta, softening the veggies, combining everything and then baking it all together. I’d suggest making it on a Sunday night so that you have leftovers to enjoy throughout the week!

Also, I beg you to grate the cheese yourself and use only freshly grated cheeses. The times I’ve made this recipe with pre-shredded cheese it is never, ever as good. Fresh cheese makes a huge difference!

pasta casserole bowl

Chicken and Pasta Baked Casserole

adapted from 101 Cookbooks

3/4 pound pasta shells (101 recommends whole wheat pasta shells, but my grocery store never has whole wheat)
salt, to taste
1 lb. chicken, sliced (I recommend my recipe to bake the chicken, using 2 tablespoons white wine, paprika, salt, pepper, Montreal chicken seasoning, cayenne, to taste)
1 large yellow onion, chopped
5 cloves garlic, minced
3/4 bag fresh leaf spinach, chopped
1 cup almonds, coarsely chopped
6 ounces fresh mozzerella, grated
4 ounces fresh Vermont cheddar, grated

Preheat oven to 375 F. Butter/spray a large, rectangular casserole dish (I’ve found this works a lot better than round CorningWare).

Boil the pasta in salted water per package instructions. Drain, toss with a two tablespoons of olive oil. Set aside.

In the meantime, cook chicken in a baking dish. I use my standard method to bake the chicken, which you can find here.

Heat a tablespoon or two of oil in a skillet or wok. Saute the onions and a bit of salt for 2-3 minutes. Add garlic, then spinach, cooking for approximately 20-30 seconds. Remove skillet or wok from heat and stir in almonds. Combine spinach mixture with pasta in a large bowl and carefully stir. When chicken is done cooking, slice and add. Set aside. (If you like to sneak in more veggies, I’d recommend sliced mushrooms which I have also added before)

Grate cheese and combine in a medium bowl. Begin by adding a layer of pasta to the casserole dish, followed by a layer of cheese. Continue alternating layers, finishing with a layer of cheese. Sprinkle just a dash of cayenne and paprika over the top. Cover dish with foil and bake for approximately 30 minutes.

I think I’ve become a bit obsessed with stir-fries lately. My visits to the asian market has become quite frequent and I always find myself buying more than a I need. It’s sad when you’re like a kid in a candy store in a supermarket. Alas…

Chinese Eggplant

This recipe was inspired by a dish I came across recently thanks to Tastepotting, which reminded me of another dish I had when I took a class by Rebekah Lin Jewell a couple years ago. I’ve never liked eggplant but this dish was amazingly good. However, it and many other Szechuan dishes I’ve seen always have ground pork; not much, just for flavoring. However, I’d always inevitably end up with a back of unidentifiable meat in my freezer six months later.

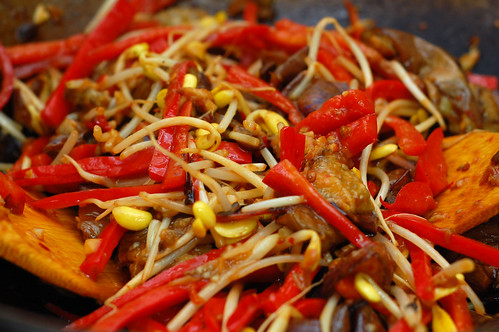
Chinese Eggplant Szechuan with Bean Sprouts

So here is my vegetarian adaption and I’m quite happy with it. As usual, keep my spicy-wussiness in mind when you read this recipe.

Chinese Eggplant Szechuan with Bean Sprouts

3 tablespoons olive oil
1 tablespoon sesame oil
1-2 tablepoons hot bean paste (1 was perfect for me; two had me going for liquid relief)
1 tablespoon bean paste
3 medium-large chinese eggplant; chopped via roll cut
2 red bell peppers; cut into slices
3 garlic cloves; minced
1 tablespoon ginger; minced
1 tablespoon rice wine
1 tablespoon rice vinegar
2 teaspoons salt
1/2 teaspoon sugar
2 cups bean sprouts

Preheat the oven to 450. Toss the chopped eggplant with two tablespoons olive oil and one teaspoon salt. Roast for 15 minutes on a metal baking sheet. While roasting, prepare the other ingredients. Wait until the eggplant is out of the oven and cool enough to work with before continuing.

Heat the remaining oil in a wok and saute the red bell peppers until soft; 1-2 minutes. Add the ginger, garlic and bean pastes, tossing and stirring constantly to prevent burning; approximately 20 seconds. Add the remaining ingredients and stir fry until everything is heated and mixed; approximately 1-2 minutes. Serve with rice and enjoy.

Happy Super Bowl Day!

Here we go, Steelers!

Kitchen Tips: How to Avoid Burning Your Garlic

Gather around children, it’s time for this weeks installment of Kitchen Tips.

Garlic, while an excellent aromatic, burns very easily; and when it burns it becomes very bitter. While there may be dishes that call for a very bitter flavor, many don’t and you burn your garlic, you’re done. Game over. That bitter is not going away.

So when you’re cooking with something on a wok with very few ingredients to absorb the heat (like my Baby Bok Choy recipe), start with a cold wok and cold oil. This heat up process will infuse the oil with all that garlicky goodness without burning. If you’re cooking with other aromatics like onion, consider adding your garlic with the other vegetables or the protein.

Sante Fe Soup with Chicken, A Super Bowl Savior

If you’re like me when planning a party, then you’ll probably make too much food. You’ll also choose things that all need to go into the oven at once, are too time-consuming, and keep you in the kitchen while everyone else is waving their Terrible Towel at the tv.

Sante Fe Soup

I’ll be trying to avoid that problem on Sunday by including an enormous, hearty bowl of chili on the menu.

This “Santa Fe Soup” recipe was given to me by a co-worker at a previous job. I normally don’t go wild for chili, but the chili’s great look and smell won me over when he brought it in for lunch one day. Unfortunately he didn’t tell me where he got the original recipe, and when I googled it I came up with hundreds of variations. I did, however, make a few changes.

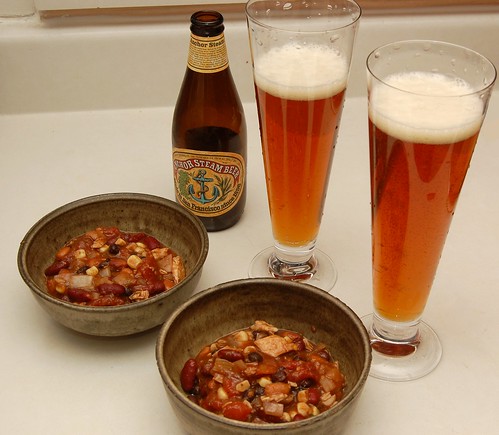
Chili and Beer

The recipe I was given called for 2 pounds of ground round, but I substituted beef for rotisserie chicken. I also substituted chunky stewed tomatoes and tomato paste for crushed tomatoes. The recipe called for two packages of Hidden Valley Ranch Dressing dry mix and one package of taco seasoning mix for seasoning, but I decided just to recreate these mixes using the spices in my kitchen and season it myself. I also halved the recipe, and it still almost filled my spaghetti pot.

This chili is excellent – spicy but not too spicy, thick, and full of variety. I hope you’ll consider it either for your Super Bowl party or a cold winter night!

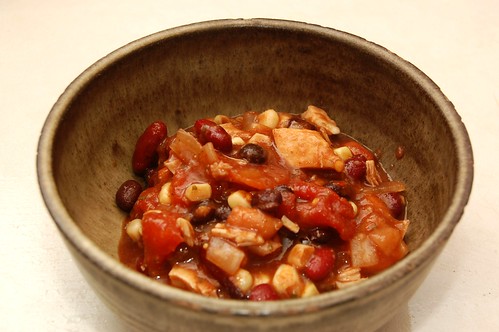
Close up Sante Fe Soup

Sante Fe Soup with Chicken
(recipe below is a half batch, which still makes enough for several dinners for two!)

1/2 cooked rotisserie chicken, cut into bite size pieces (you could also use 1 pound of chicken breast cooked using a method of your choice)
1 chopped onion
4 cloves garlic
1 can black beans
1 can kidney beans
1 can pinto beans
1 can white niblet corn, canned
1 can Rotel tomatoes
1 can stewed tomatoes
1 can tomato paste, 6 oz.
2 teaspoons chili powder
1 teaspoon salt
1 teaspoon garlic powder
1 teaspoon cumin
1 teaspoon cayenne
1 teaspoon paprika
1 teaspoon red pepper flakes
1 teaspoon oregano
1/2 teaspoon marjoram
15 saltines, crushed
1 tablespoon Nature’s seasoning
1 tablespoon parsley flakes

Combine all ingredients, beginning with beans and cooked chicken, in a large pot on medium low heat. Simmer approximately 20 minutes, but the longer the better. Top with tortilla chips, sour cream, or grated cheese to serve, or enjoy it “plain!”

As Heather mentioned yesterday, this Sunday is the Super Bowl. I’m not a fan of the whole watching sports thing; or watching in general for that matter. I figure, why watch when you can do? However I do enjoy hanging out with friends and I also enjoy making something extremely unhealthy without having to worry about eating it all.

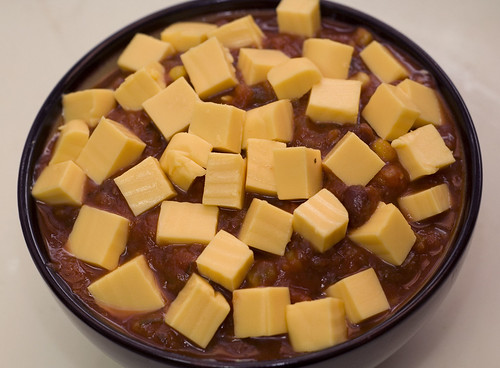
All Ready to Nuke

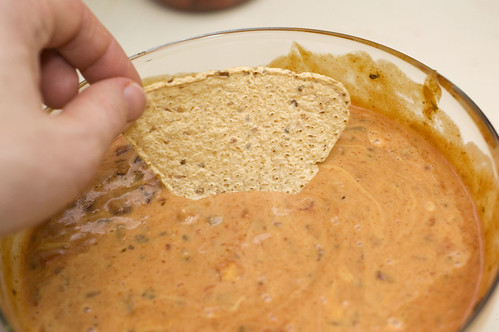
Without a doubt, this sucker fits the ‘unhealthy’ label. Go ahead and throw terms like ‘natural’ and ‘diet’ out the window. My Uncle Rich made this for everyone when we were visiting for Thanksgiving a few years back. This dip is so simple and so delicious. You’ll find yourself coming back for more until you realize the dip bowl is empty (I know I did). Serve with any kind of chip you’d like. It’s more a vessel than anything.

Uncle Rich's Awesome Cheesy Chili Dip

Uncle Rich’s Awesome Cheesy Chili Dip

16 ounces Velveeta cheese
1 12 ounce can of beef chili; no beans
1 15 ounces jar salsa

Cut the cheese into small 1/2 inch cubes. Put half in a bowl and top with the salsa and chili. Add the rest of the cheese. Microwave for 3 minutes and stir. Microwave for another 3 or 4 minutes until all the cheese is melted and everything is hot and gooey. Enjoy.