Crispy Chocolate Chunk Cookies, Good Luck on Game Day

Two of my good friends recently purchased and moved in to their first home. They invited my husband and I over on Sunday to watch the Steelers vs. Cowboys game and get our first glimpse of their new home. It was very exciting, and also time to crank up the oven for an edible housewarming/game day treat.

chocolate mix for chocolate chunk cookies

I keep the recipes I’m looking forward to making in an archived folder online, I have a binder where I print recipes and tear others out of magazines to hold for later, and of course, I have lots of cookbooks. But sometimes you just want to be a little impulsive with what you make!

I received a Great American Recipes preview pack of recipe cards a couple months ago; on Sunday I was cleaning out my recipe binder and I found them again. One of the cards was a simple chocolate chunk cookies recipe and I figured, “why not!”

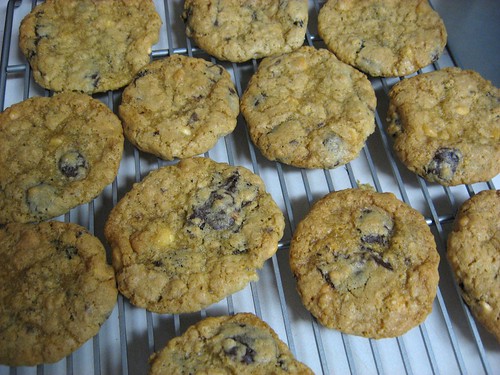
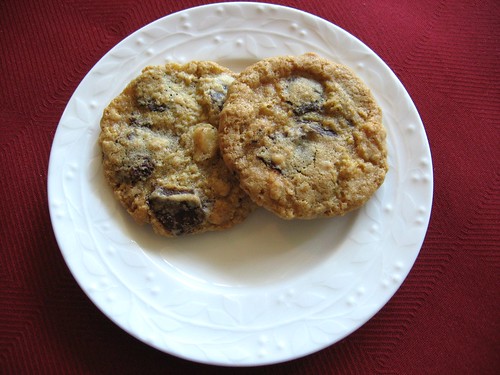
chocolate chunk cookies

I usually lean towards soft, chewy cookies, and the recipe said these would be soft and chewy, but I thought they actually came out on the crispy side (I know many people prefer crispy cookies, so I didn’t stress). I combined semi-sweet, bittersweet, and white chocolate in the cookies, but I think they would be better with bigger chunks of just one type of chocolate. I also added chopped walnuts to half the batch.

Everyone should have a reliable cookie recipe; I don’t think this one will be mine, though they were pretty good. What is your go-to cookie recipe?

chocolate chunk cookies

Crispy Chocolate Chunk Cookies
Adapted from Great American Recipes

1 stick (1/2 cup) softened butter
½ cup granulated sugar
½ cup packed light brown sugar
1 egg
½ tsp. vanilla extract
¾ cup all-purpose flour
½ tsp. salt
½ tsp. baking powder
½ tsp. baking soda
½ cup rolled oats
1 ¼ cups chocolate chunks (I combined semi-sweet, bittersweet, and white chocolate – I would add more to make it at least 1 ½ cups)

Preheat oven to 350 F. Line two baking sheets with parchment paper.

Combine softened butter and both sugars in a large bowl. Beat until creamy. Beat in egg and vanilla extract; set aside.

Sift the flour, salt, baking powder and baking soda into a small bowl. Gradually add this mixture to the butter mixture and beat continuously. Carefully fold in oats and chocolate chunks.

Spoon tablespoonfuls of dough, two inches apart, onto the baking sheets (these cookies will spread). Bake until lightly browned, about 10 minutes. Cool on pan for 2 minutes before transferring to a wire rack.

This makes about 2 dozen cookies.

At the Arlington Farmers’ Market in Northern Virginia on Saturdays you can find a woman that makes the most amazing cookies. She simply goes by “The Cookie Lady” at her stand, and she pulls you in by offering free samples of any of her cookies.

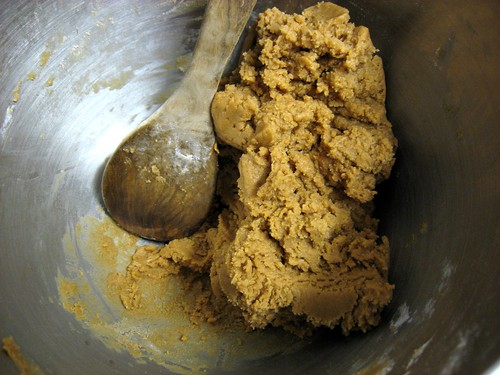
Packed Peanut Butter Cookie Batter

They’re twice the size of a regular cookie, thick, dense and they taste like cookies on steroids. Imagine enjoying a delicious peanut butter cookie – now imagine eating a jar of peanut butter. There is not a lot of subtlety to her flavors, they’re just completely packed and insanely delicious.

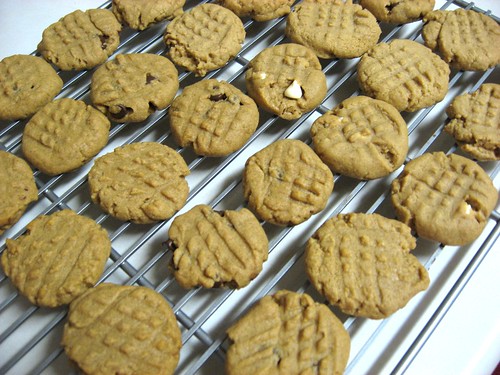
Packed Peanut Butter Cookies

To attempt to recreate these cookies but in a smaller, more manageable form, I was thinking about The Cookie Lady’s peanut butter cookies and also looking at some recipes from Cookie Madness and Smitten Kitchen. Instead of using peanut butter chips, I doubled the amount of smooth peanut butter. I also added 1/2 tablespoon of milk. Half the batch I kept as pure, unadulterated peanut butter cookies, and the other half I experimented by adding semi-sweet chocolate chips, bittersweet chips, or white chocolate chips.

I think these came out really well. They’re still not quite at the level of The Cookie Lady, but they are packed with peanut butter. I liked the plain peanut butter cookies without chips the best, but if you’d like to add something to the batter the white chocolate chips were also a nice touch.

Packed Peanut Butter Cookies

Packed Peanut Butter Cookies
inspired by The Cookie Lady, Cookie Madness and Smitten Kitchen

1/4 cup unsalted butter, softened
1/4
cup packed dark brown sugar
1/4 cup granulated sugar
1 cup creamy peanut butter (I used Jif Reduced Fat Creamy – it’s my favorite)

1/4 teaspoon salt

1/4
teaspoon baking soda
1/4 teaspoon vanilla
3/4 cups sifted flour
1/2 tablespoon milk
1/2 cup white chocolate chips (optional)

Preheat oven to 350 degrees. Line two ungreased cookie sheets with parchment paper. Combine softened butter, dark brown sugar and granulated sugar. Beat in the peanut butter and egg. Beat in the salt, baking soda, vanilla and milk until fully incorporated. Add sifted flour last and stir until blended. If you wish to add white chocolate chips, you can add them now.

Place dough on cookie sheets by 1/2 tablespoon. Gently flatten the dough balls using a fork, making a light criss cross pattern. Bake for approximately 10 minutes until done. Cool on pan for about 5 minutes, then transfer to a wire rack to cool completely. You may also like to decorate the top with some extra sugar.

This recipe makes about 30 cookies.

As promised, I’m posting an actual dinner recipe for the first time in five posts! It’s a miracle, my sweet tooth is sated (don’t worry, not for long).

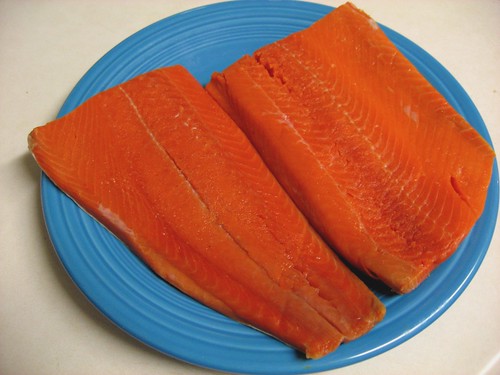
salmon filets

Salmon won out as the healthiest, lightest thing I could think of to compensate for my total failure in watching what I eat in the last few weeks. Wild salmon is high in protein, Omega-3 fatty acids and vitamin D. WebMD lists salmon as one of the top “super foods,” lowering your cholesterol, reducing your risk of cancer and heart disease and even brightening your mood (and yes, pumpkin is on that list, too).

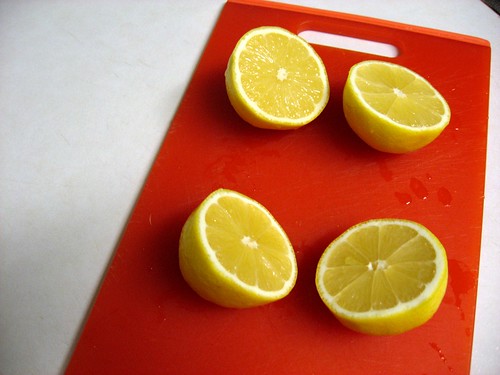
lemons

I looked for a salmon recipe that had the spirit of the season, and I think I found what I wanted. The glaze was almost sweet, combining honey and apple cider as a marinade. Maybe it was just enough to satisfy my sweet tooth while still providing all the benefits of a healthy fish fillet. Also note when buying your salmon that you want wild instead of farmed.

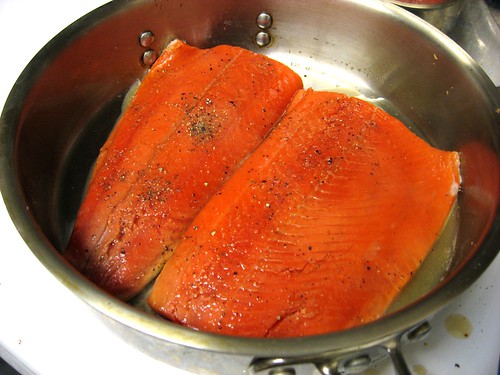
cooking salmon

Below I altered the recommended amount of white wine for the spinach leaves. Maybe I got carried away somehow, but the wine taste was a little too strong and I didn’t think it mixed well with the honey and cider taste of the salmon. I also served mine with a side of asparagus in addition to spinach leaves, since cooking the leaves really decimated them.

And good luck in your own battle of the Thanksgiving bulge, let me know if you have more healthy recipes or tips to stay away from the baked goods!

glazed salmon

Honey and Cider Glazed Salmon
adapted from Simply Recipes

1/2 cup apple cider (not hard cider)
1 1/4 tablespoons honey
2 large or 4 small wild salmon fillets (if you can’t find skinless, just don’t eat the skin)
1 teaspoon olive oil
Salt and pepper, to taste
1/2 teaspoon minced garlic
2 lemons, cut in half
1 Tbsp butter
12 ounces fresh baby spinach
1 tablespoon white wine

Preheat oven to 350°F with a baking dish in the oven. Set salmon fillets flat in a large baking dish.

In a saucepan on medium-high heat, boil cider and honey for 1 to 2 minutes. Pour cider mixture over the salmon, let it sit for 10 minutes.

Heat olive oil in a large skillet on medium-high. Sprinkle one side of the salmon with salt and pepper. Place the fish in the pan for approximately 2 minutes. Brush periodically with cider glaze.

Turn the salmon and brush with remaining cider glaze. Remove from heat and transfer the salmon to the baking dish in the oven. Add the two sliced lemons to the dish. Bake for 6 minutes, salmon is cooked when it flakes when tested with the tip of a knife.

While the salmon, wash your skillet and place back on the stove to melt the butter (on medium-high heat). Add the spinach, salt, pepper and garlic. Cook just until leaves begin to wilt (a little less than one minute). Pour the wine sparingly over spinach and cook for an additional minute.

Drain excess liquid from spinach in a drainer.

My Six Pie Party, a Thanksgiving Day Wrap-Up

I hope that you enjoyed your Thanksgiving holiday! Mine went well, and you can be sure that after enjoying three full Thanksgiving dinners, I will not be stepping on a scale anytime soon.

Granny Smith for Apple Crumble Top PieApple Filling

I also hope to focus more on the dinner side of DINNERCAKES after my baking blitz on Wednesday resulted in 6 pies and 3 loaves. Yes, I am a crazy person.

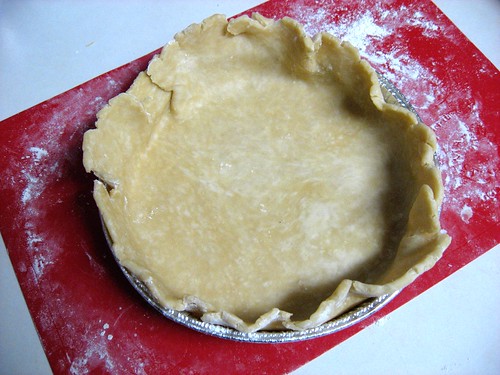
Pie Dough

But, I learned some very important lessons about baking:

  1. If you’re planning on baking 6 pies, invest in more than one pie dish. The pie tins at the grocery store just don’t cut it, it’s still flimsy even after you double up with two tins per pie and it increases your cook time. Next time I will enlist the help of some reasonably priced Pyrex pie dishes.
  2. Making pie dough from scratch doesn’t have to be a harrowing experience. I used Martha Stewart’s Pate Brisee recipe, refrigerated the dough overnight, let it sit out for 10 minutes before working with it, and then just rolled it out to make crust.
  3. If 4 out of your 6 pies require graham cracker crust, just buy a box of graham cracker crumbs instead of using a meat tenderizer to demolish whole crackers. This saves time and sanity.
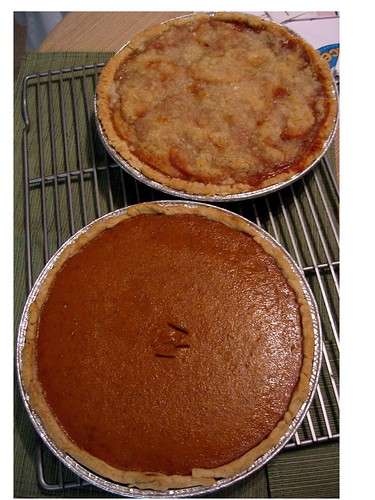
  4. Any marks left in your pumpkin pie after inserting a knife to make sure it’s fully cooked can be easily disguised with a leaf or heart shape made using extra dough.
  5. Do not open a bottle of champagne until you’re done.

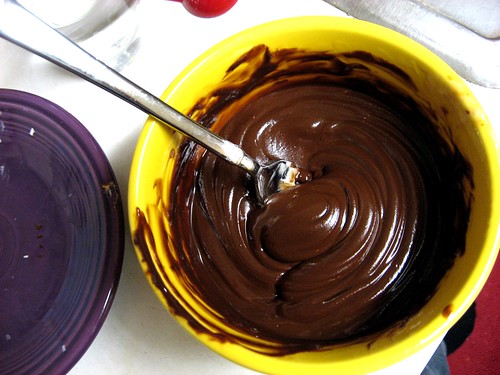
Bittersweet Chocolate for Chocolate Pumpkin Pie

My pie extravaganza included: Heavenly Pie from 101 Cookbooks, Triple-Chocolate Pumpkin Pie from Martha Stewart, Crunch Top Apple Pie from Paula Deen, my favorite Classic Pumpkin Pie from Libby’s, and two Million Dollar Pies adapted from Cooks.com.

The Heavenly Pie is the only one that disappointed me. It’s a chocolate pie with tofu and cream cheese. I know it sounds odd, but it tastes like a delicious chocolate mousse. Unfortunately I can never seem to get the consistency right. This may be because I don’t have the assistance of a food processor, so if you have tried this recipe using one please let me know how it works for you. I can never get it to be completely smooth, I’m always left with little tofu granules. No matter how good it tastes, I don’t like the grainy presentation.

Heavenly Pie and Chocolate Pumpkin Pie

I first saw the Triple-Chocolate Pumpkin Pie in my Martha Stewart Living magazine (yes, I subscribe). I’m usually a purist with pumpkin pie – you know I love pumpkin, and my Libby’s recipe has never failed me. I’m so glad I tried this, though. This pie is absolutely packed with spices and it’s incredibly creamy. The layer of bittersweet chocolate spread over the crust before adding the filling gives it a nice kick, and when it’s cut it’s also very attractive. I did not drizzle milk chocolate over the top simply because I didn’t want to make a mess in someone else’s kitchen (so my pie was more of a double-chocolate pumpkin pie instead of a triple). I’m glad I skipped that part because it is a very rich pie, which isn’t always the best idea after Thanksgiving dinner. This recipe also made a lot more filling than what would fit in the pie dish. I put the extra into some corningware to bake separately, and what I did pour into the crust spilled over a bit. Be careful!

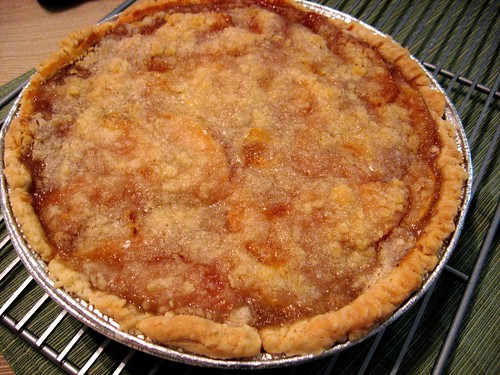
Apple Crumble Top Pie

The Crunch Top Apple Pie from Paula Deen turned out very well. I liked that this pie didn’t need more pie dough for a top – because this was my first time making pie dough completely unsupervised, I didn’t want to take too many risks. I used Martha Stewart’s Pate Brisee pie dough recipe instead of Paula Deen’s. I also packed in an extra cup of apples and I thinly sliced them instead of chopping. The top wasn’t “crunchy,” so I’m not sure about Paula’s naming of this pie, but it was very tart and tasty.

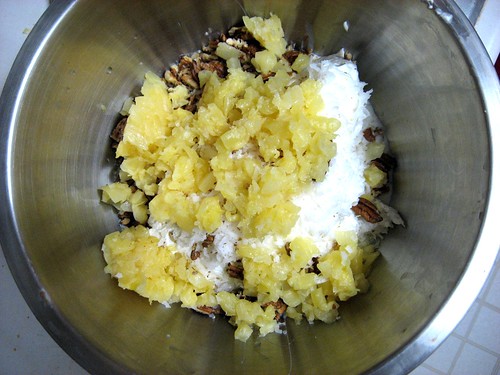
Million Dollar Pie Ingredients

My brother first had Million Dollar Pie at a restaurant called Fisherman’s Wharf in Wanchese, NC. I believe he got the waitress to give him the recipe, but who knows where it is now. I used the Cooks.com recipe to recreate this pie for him. It’s not necessarily a Thanksgiving pie, but it does provide a nice, light alternative to many of the heavy pies usually featured on Thanksgiving. It’s also incredibly easy, and you can add more or less of whatever you do or do not like.

Pumpkin Pie and Apple Crumble Top Pie

I used Martha’s Pate Brisee dough for the regular Pumpkin Pie and the Crunch Top Apple Pie, and I made graham cracker crust for the others. The Triple-Chocolate Pumpkin Pie had a special recipe for graham cracker crust, which was certainly very good. To make a simple graham cracker crust
, combine about 2 cups of graham cracker crumbs with 6 tablespoons of butter. Press the crumbs into your pie dish to form the crust. Bake for about 8-10 minutes in a 350 degree oven until it’s hard (without filling).

Edwin and I would love to hear what you made for Thanksgiving and how it turned out; please comment below to share it with us. Also, thank you for all the kind and encouraging words from friends, family and new visitors in support of DINNERCAKES – we appreciate it!

Breaking Mom's Rules to Make "Dad-approved" Blueberry Lemon Loaf

My dad does not eat red meat.

He doesn’t eat real cheese, eggs, butter, or anything that was baked in a pan greased with Crisco, either. So when he called yesterday and asked if anything I was bringing home for Thanksgiving was “dad-approved,” I got a little quiet.

 "Dad-approved" Blueberry Lemon Loaf - Gradually Adding Flour Mixture

Then I remembered a recipe I saw on Smitten Kitchen a few months ago for Lemon-Blueberry Yogurt Loaf. I knew that my dad would love it… if it wasn’t for the whole-milk yogurt, three eggs and oil.

One of the first rules of holiday baking I learned from my mom was to always use fresh, high-quality ingredients. I’m not sure that Egg Beaters and fat free yogurt comply with this rule, but I had to try!

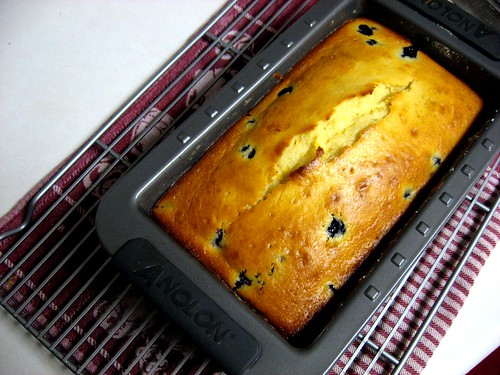
 "Dad-approved" Blueberry Lemon Loaf - Cool in the pan

Egg Beaters have no fat or cholesterol, and they’re made with real eggs. The egg whites are separated from the yolks and combined with vitamins and thickeners. In some recipes you may not even notice a difference, in others a lot could change. I replaced the whole-milk yogurt with a combination of Stonyfield Farm’s organic, fat free plain and lotsa lemon yogurt. I also used Smart Balance Omega Oil in place of canola or vegetable oil.

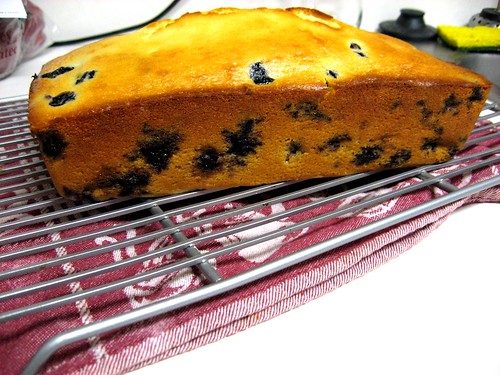
My blueberries sank a little bit, but I think if I had been more cautious while pouring the batter into the pan I could have avoided some of this. In any event, the result was an incredibly moist cake bursting with tart lemon flavor. Hopefully dad feels the same way!

 "Dad-approved" Blueberry Lemon Loaf - Cool Completely

“Dad-approved” Blueberry Lemon Loaf
Adapted from Smitten Kitchen

1 1/2 cups + 1 tablespoon all-purpose flour
2 teaspoons baking powder
1/2 teaspoon kosher salt
1/2 cup plain, organic, fat-free yogurt
1/2 cup lotsa lemon, organic, fat-free yogurt (I used Stonyfield Farm)
1 cup plus 1 tablespoon sugar
3/4 cup Egg Beaters (1/4 equals about 1 egg, but check your label)
2 teaspoons grated lemon zest (approximately 2 lemons)
1/2 teaspoon pure vanilla extract
1/2 cup Smart Balance oil
1 1/2 cups small blueberries, fresh or frozen, thawed and rinsed
1/3 cup lemon juice

Preheat the oven to 350 degrees F and spray your loaf pan with Smart Balance cooking spray. Line the bottom with parchment paper and spray again.

Sift 1 1/2 cups flour, baking powder, and salt into a medium bowl. In a large bowl whisk yogurt, 1 cup sugar, Egg Beaters, lemon zest, vanilla and Smart Balance oil. Whisk the dry ingredients gradually into the wet ingredients. Rinse blueberries in a small bowl and mix with 1 tablespoon of flour. Gently fold the blueberries into your batter so that they do not burst.

Pour batter into loaf pan and bake for about approximately 55 minutes, or until a toothpick inserted in the center comes out clean. Note that using Egg Beaters may increase your cook time a little.

While the loaf is baking, combine 1/3 cup lemon juice and 1 tablespoon sugar in a small pan on your stove until the sugar dissolves. Set pan aside.

Cool your loaf for 10 minutes before flipping out onto a wire rack. Lay a pan underneath the wire rack and poke a few small holes in the loaf using a toothpick – pour the lemon and sugar mixtures over the loaf while it’s still warm.

Cool completely and wrap tightly.

Follow-up to a Labor of Love

Dear DINNERCAKES Readers,

Making the Glaze - Chocolate Peanut Butter Cake

Thanks to Tastespotting, yesterday we experienced many new visitors to our site. Edwin and I would like to thank you very much for your interest in yesterday’s post. At DINNERCAKES we like to post about what’s for dinner, with an extra helping of dessert. However we were very proud yesterday to create and share not only a lovely cake, but to do so in memory of someone who was very special and is very missed.

Thanks for reading,
Edwin & Heather

From the moment Edwin and I saw this cake, we knew it was always our destiny to bake it.

And its creation had special meaning for me. I first learned of this cake a few months ago from mine and my husband’s friend Jeff. Jeff found the cake on Smitten Kitchen and demanded that we spend a day baking and gorging ourselves on it. He found out a few weeks after this that the cancer he’d had for two years was terminal, but he had such an incredible attitude that he just continued making plans for things he wanted to do, see and eat. Making this cake together remained on the top of his list.
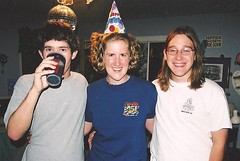
young jeff, heather, morganold morgan, heather, jeff

Unfortunately things went down hill incredibly fast, and my husband, Morgan, and I were with Jeff when he died in mid-September. The three of us had been friends for a long time; he was the best man in our July wedding, one month before he found out he was terminal and two months before he died. I think there may always be a hole in our lives and in our hearts where he was.
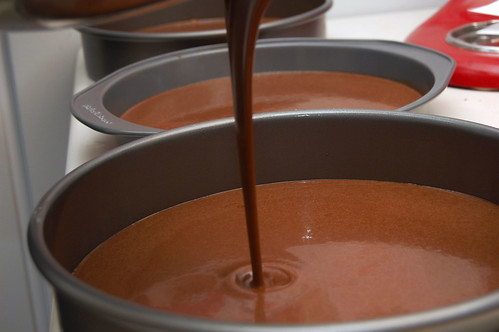
Pouring the Batter

A few weeks ago Edwin sent me a link for this cake. I thought about the plans I had to make it with Jeff and I hesitated. Then I remembered how after Jeff’s death, at his request, we had thrown a celebration of his life where each of his friends either brought over a dish they had shared with him or some food that he loved. I realized that making this cake with Edwin was probably an excellent way to honor my friend and celebrate the things he loved most – food and friends.
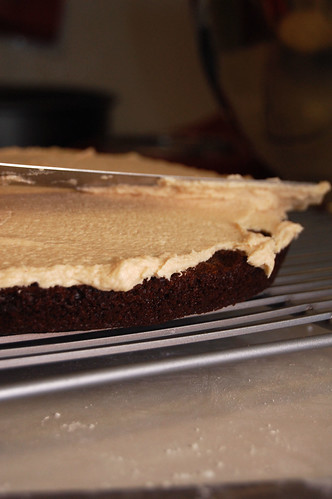
Spreading Closeup

For the First Time on DINNERCAKES, Edwin and Heather Unite:

Thus, Edwin and I set a date and embarked on what we both knew would be a challenging journey. The elusive sour-cream chocolate cake with peanut butter frosting and chocolate-peanut butter glaze had been taunting us to bake it for quite a while.

The result – “This might be the best cake I’ve ever had,” crowed Edwin.

Even Morgan agreed, who can usually take or leave cakes. Nothing was overpowering about the cake, and although it may appear dense in photos, it’s actually very light and incredibly moist.
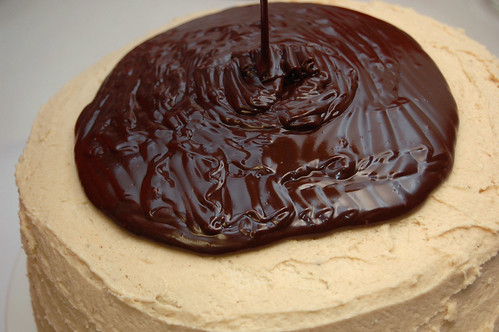
Chocolate Glaze Pour

However, it is extremely rich. A cold glass of milk is vital for the prevention of a sugar-induced coma. This beauty of a cake packs away 2 ½ cups of sugar in the cake batter and 5 cups of confectioners’ sugar in the frosting. If you have diabetes or a heart condition, this cake is not for you!

But now that all is said and done, our dream cake has been enjoyed and divvied up between us, and we’ve exceeded our sugar quota for the entire week, we can’t think of a better way to kick off Thanksgiving week and the holiday season than to share this amazing recipe.
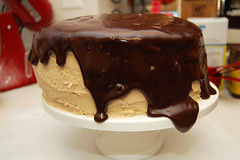
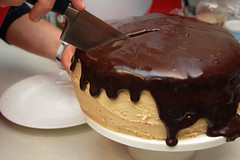
Chocolate Peanut Butter Cake - So GoodThe First Cut - Chocolate Peanut Butter Cake

Edwin and I are thankful for good friends, good food and good times past and present. And I am thankful that, although I did not get to make this cake with Jeff, I was able to share so many other wonderful memories with him.

Hope this beautiful cake kick-starts your Monday! Happy Thanksgiving week from Dinnercakes!
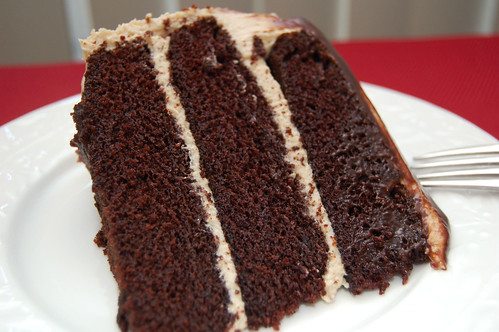
Perfect Slice - Chocolate Peanut Butter Cake

Peanut Butter and Chocolate Triple Layer Cake
Sky High: Irresistible Triple-Layer Cakes
2 cups all-purpose flour
2 1/2 cups sugar
3/4 cup unsweetened cocoa powder, preferably Dutch process
2 teaspoons baking soda
1 teaspoon salt
1 cup neutral vegetable oil, such as canola, soybean or vegetable blend
1 cup sour cream
1 1/2 cups water
2 tablespoons distilled white vinegar
1 teaspoon vanilla extract
2 eggs

Preheat the oven to 350 degrees F. Butter the bottoms and sides of three 8-inch round cake pans (we used three 9-inch rounds so our cakes came out a little thinner). Cut three rounds of parchment paper to line the bottom of each pan; butter the parchment paper.

Sift flour, sugar, cocoa powder, baking soda, and salt into a large bowl. Whisk to combine. Add in oil and sour cream; whisk to blend. Beat in water gradually (we used a stand mixer, but you can also use a whisk). Add vinegar and vanilla. Beat in eggs until well blended. Scrape down the sides of the bowl to ensure batter is well-mixed. Divide evenly between 3 prepared pans.

Bake for 30 to 35 minutes, or until it passes the toothpick test. Cool in the pans for 10-20 minutes. Turnout onto wire racks, carefully peel off the paper liners, and firm them up in the freezer for 30 minutes.

To frost, place one layer flat side up on a cake stand or serving plate. Spread Peanut Butter Frosting evenly on top, repeat with the next layer. Place the last layer on top and frost the entire cake with a thin layer of frosting – you are going to make a crumb coat; this part is crucial (a crumb coat keeps crumbs from showing up on your final layer of frosting).

Put the cake (with a thin layer of the peanut butter frosting all over) back in the freezer for 20 minutes. The frosting will now be somewhat firm on the cake, now you can use the remaining frosting to cover the entire cake, without a crummy mess! When fully frosted, you may want to chill again for 10 minutes.

To decorate with the glaze, set the cake plate on a sheet of parchment paper to catch drips. Pour the glaze directly over the center of the cake, and using a spatula, spread it lightly over the top and to the edges so that it falls down the sides in large drips. To set the cake, you may want to refrigerate it again when you’re done. Edwin and I didn’t make it that far and instead we chowed down immediately.

Peanut Butter Frosting
1
0 ounces cream cheese, room temperature
1 stick (4 ounces) unsalted butter, room temperature
5 cups confectioners’ sugar, sifted
2/3 cup smooth peanut butter, preferably a commercial brand (because oil doesn’t separate out)

Beat the cream cheese, butter and peanut butter until light and fluffy in a large bowl with a mixer. Add the confectioners’ sugar gradually, mixing thoroughly and scraping down the sides of the bowl often. Continue to beat until blended, about 3 to 4 minutes.

Chocolate-Peanut Butter Glaze
8 ounces semi-sweet chocolate, coarsely chopped
3 tablespoons smooth peanut butter
2 tablespoons light corn syrup
1/2 cup half-and-half

I didn’t have a double boiler, so we used to the microwave method, heating for 15 seconds at a time and stirring after each 15 second interval. If you do have a double boiler or a metal bowl that you can set over simmering water, combine the chocolate, peanut butter, and corn syrup. Cook while whisking often until the chocolate is melted and the mixture is smooth. Last, remove from the heat, whisk in the half-and-half and beat until smooth. Pour over the cake while still warm.

Brigadeiro, A Sinfully Sweet Brazilian Candy

I had a friend in high school who moved to the United States from São Paulo, Brazil. One day after school, she took me back to her house and taught me how to make a deliciously sweet and simple Brazilian treat known as brigadeiro.

A brigadeiro is made using cocoa and condensed milk, a thick and sticky blend of milk and sugar that yields some of the most decadent and rich desserts I’ve ever had. It combines all the things that make my ideal candy – smooth, sweet, and full of unadulterated chocolate.

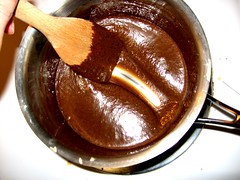
Brigadeiro, thickened - notice the bottom of the pan Brigadeiro, hardened mixture

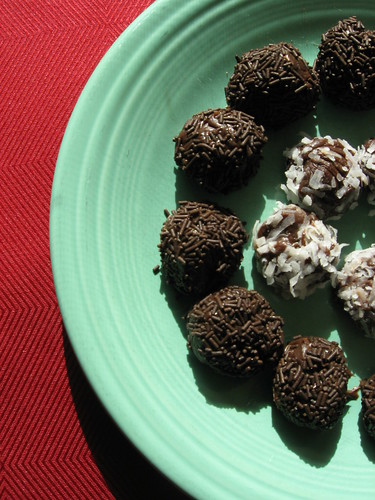
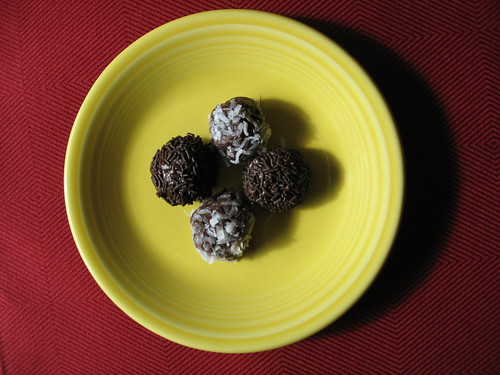
My friend rolled her brigadeiro in chocolate sprinkles (the most common way) and placed each candy in a tiny paper wrapper. But you can get as creative as you like, incorporating any number of sumptuous outer coatings including coconut, pistachios, almond shavings, powdered sugar, more cocoa, etc.

I tried to make brigadeiro around this time last year and I failed. I lost the recipe my friend gave me (in my defense, it was almost 10 years ago), and I decided to follow a recipe I found online. I had also forgotten most of the instructions, which are actually pivotal in this recipe, and the recipe online gave little guidance.

After deciphering some “how-to” videos in Portuguese, I’m proud to say that I’m back in the brigadeiro-making ring. And just in time, too, because these are absolutely excellent to bring to any kind of holiday party.

Brigadeiro

Ghost Baker Suggests Holding the Butter:

The Portuguese videos I watched did not use 1 tablespoon of butter, something that many recipes I found online called for. Since my butter-free recipe worked very well and the experiments with butter did not, I did not include butter in the recipe below. If you think butter is a must, I’d love to hear it!

Enjoy, and good luck not eating them all in one day!

Brigadeiro, serving

Brigadeiro

1 can sweetened, condensed milk (15 oz)
3 tablespoons cocoa, sifted (I used Nestle, because they introduced cocoa powder)
Chocolate sprinkles (and/or coconut, nuts, etc.)

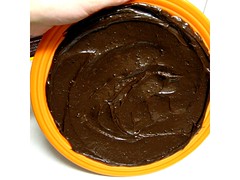
Heat 1 can of sweetened, condensed milk in a small pot on medium-low heat, stirring frequently. Sift in one tablespoon of cocoa at a time (I didn’t use a sifter this time because my sifter was MIA, and you can clearly see little deposits of cocoa in my photos. It still tastes great if you don’t sift it, but you may want to do it to achieve aesthetic perfection).

Use a wooden spoon to combine the cocoa into the condensed milk. Stir, stir and stir some more! Don’t stop stirring or else your chocolate could burn.

After about 5 minutes, you’ll notice the mixture getting thicker. You can tell that it’s done when, while stirring, you are able to see a good bit of the bottom of the pot (see my photos for an example).

Remove from the heat and pour onto a plate. Smooth the mixture out so that there’s a thin layer covering the entire surface. Set this aside, or if you can’t wait – set it in the fridge, for about 15 minutes. The mixture is ready when it’s completely cooled and hardened. Notice in my photo that I’m holding the plate at a 90 degree angle and the mixture hasn’t budged; you should be able to turn the mixture completely upside down without consequence (yep, just like they do Dairy Queen when you order a Blizzard).

In the meantime, ready your chosen toppings. I used chocolate sprinkles and coconut flakes and added these to two separate, small plates.

Using a spoon, scoop up about 1 tablespoon of your hardened mixture. It’s going to be very sticky! Using an additional spoon or very buttered and greased hands, drop it onto your topping and roll it until it’s completely covered and shaped like a ball. Continue scooping, dropping and rolling until you’ve used all your mixture. You may want to store these in mini paper cup wrappers; I just used a plate and covered it with saran wrap. You can try to share with others, but it’s hard!

Many Brazilians actually eat their brigadeiro just straight out of a bowl with a spoon. You can even use the mixture as a topping on ice cream or brownies. So really, you can’t go wrong!

The Cake That's Not A Cake – Pumpkin Cake with Honey Frosting

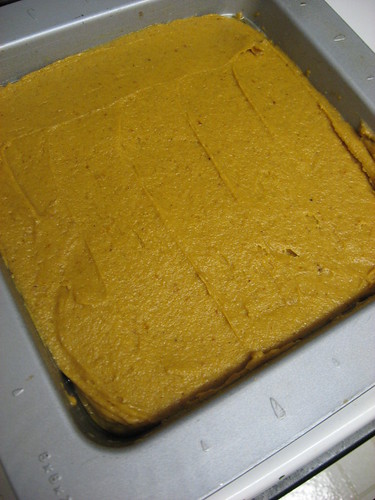
Well, this cake lied to me! It claimed to be a pumpkin cake with honey frosting, but soon after I began working on it I grew skeptical.

The batter was thick, even leveling it out in the pan was a little tricky. But as I tried my first bite it just seemed so familiar. I raced over to my recipe binder and began thumbing through the pumpkin recipes. It turns out this recipe is only one or two ingredients different from my favorite pumpkin BREAD recipe.

Pumpkin Loaf with Honey Frosting, Whisking

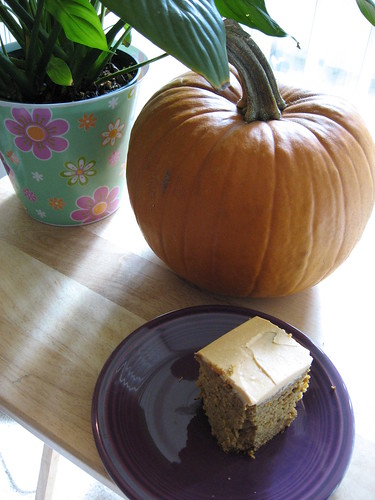
This really is a quick bread with frosting. It’s very heavy and dense, so make sure you serve it in small squares! This would actually be an amazing treat to have with your coffee in the morning and would serve that purpose much better than having it after dinner when you’re already full. In fact, I found some incredibly cute photos from someone who used the original Martha Stewart recipe to bake mini cupcakes. Bite size is the way to go here.

Ghost Baker Suggests Proceeding With Caution:

Beware the cook time. I used a square 8 inch pan because I don’t have a 9 inch, and I had a bit of a scare when I peeked into the oven at 55 minutes and the cake looked completely done. It had pulled away from the edges of the pan and was dark brown in the center and edges. I left it in for 5 more minutes but then became worried I was overcooking it. I did the knife test since I didn’t have any toothpicks, and it came out clean. But this time the knife lied to me. I poked at the center and it seemed a little squishy – it turns out the cake was like a pool that has a thick cover over it for the winter and I threw it back in the oven! To avoid this problem I would just try treating it like a bread and using a loaf pan (or, approximately 15 minutes for mini cupcakes and 25 for regular cupcakes).

Pumpkin Loaf with Honey Frosting, Leveling

I also used pumpkin cream cheese for the frosting instead of regular cream cheese. This gives the cake and the frosting some nice continuity, and it worked well with the honey.

And, woo hoo, you can make this recipe without any fancy gadgets – no stand mixers, food processors, pastry knives, etc. Dust off your whisk and wooden spoon!

Pumpkin Loaf with Honey Frosting, Chowing

Pumpkin Loaf with Honey Frosting
adapted from Martha Stewart
Prep: 25 minutes, Cook: Approx 1 hour and 20 minutes (when using a loaf pan)

CAKE INGREDIENTS
1/2 cup (1 stick) unsalted butter, melted, plus more for pan
2 1/2 cups all-purpose flour (spooned and leveled)
2 teaspoons baking soda
1/2 teaspoon salt
1 tablespoon pumpkin-pie spice (or 1 1/2 teaspoons cinnamon, 3/4 teaspoon ginger, 1/2 teaspoon nutmeg, and 1/8 teaspoon each allspice and cloves)
2 large eggs
1 1/2 cups sugar
1 can (15 ounces) solid-pack pumpkin puree

HONEY FROSTING
1/2 cup (1 stick) unsalted butter, very soft
1 bar (8 ounces) reduced fat pumpkin cream cheese, very soft (or you can use regular)
1/4 cup honey

Preheat oven to 350 degrees. Butter your loaf pan.

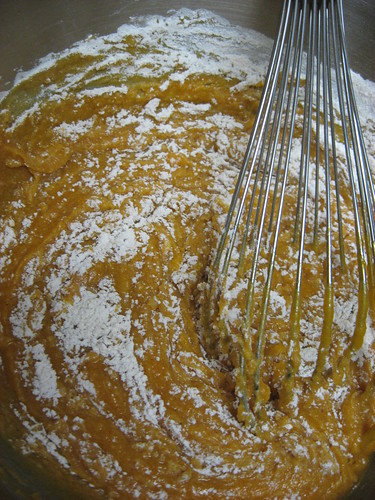
In a medium bowl, whisk together flour, baking soda, salt and pumpkin-pie spice. In a large bowl, whisk together eggs, sugar, butter (melted), and pumpkin puree until combined. Add the dry ingredients to pumpkin mixture and mix gently until smooth.

Turn batter into prepared pan and level the top using a thin spatula. Bake until a toothpick inserted in center comes out clean, approximately 1 hour and 20 minutes.

Cool for 10 minutes while in the pan, then turn out and cool completely (right side up) on a wire rack.

To make the honey frosting – In a medium bowl, whisk softened butter, softened pumpkin cream cheese and honey until smooth and pale orange. Spread over cooled pumpkin loaf. Cut loaf into sliced to serve.

*If you prefer to use a square 9 inch pan, decrease baking time to approximately 50 minutes.

Winning Over Skeptics Everywhere – Spicy Lentil Walnut Burgers

Without a doubt, this is my favorite dinner in the rotation.

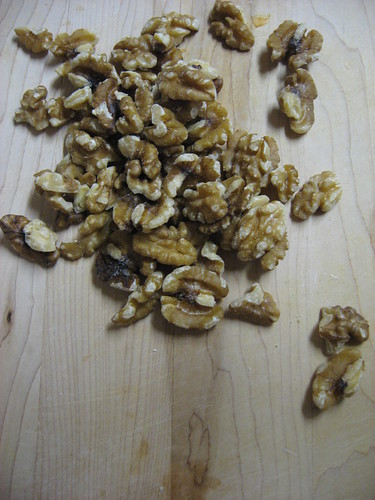
Spicy Lentil Walnut Burgers, Walnuts about to be Chopped

At first I was skeptical. I’ve never been a crazy lentil-lover like Edwin. And as I’ve hinted, despite my passion for cooking and baking, my palate isn’t terribly adventurous! When Edwin gets excited and exclaims to me that he found green candied cherries for baking Christmas cookies, I respond with, “bleh!” When my husband suggests to me that I make a fajita for lunch using leftovers, I look at him with horror (I don’t really like eating leftover meat… it’s a weird thing, I know).

Spicy Lentil Walnut Burgers, Cooked Lentils

So, when searching my favorite, tried and true cookbook for something new and delicious, my eyes only lingered over “Lentil-Walnut Burgers” long enough to conjure images of frozen veggie burgers and strike fear into my heart. The next time I picked the book up I paused over this recipe again, considering it. And so it went like this for a few weeks until I finally found the courage to dive in.

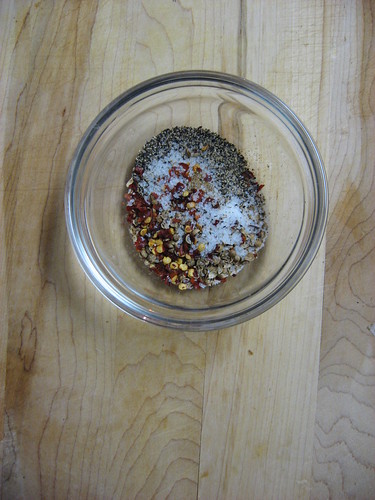
Spicy Lentil Walnut Burgers, Spices, Salt and Peppers

This story also illustrates a fact about me that friends over the years have found enormous pleasure in teasing me about – apparently, if there’s ever something that I react to immediately with vehement hate, chances are in time I’ll grow to be head over heels in love with it. I’ll never admit this to be true, but I can’t exactly say they’re wrong either…

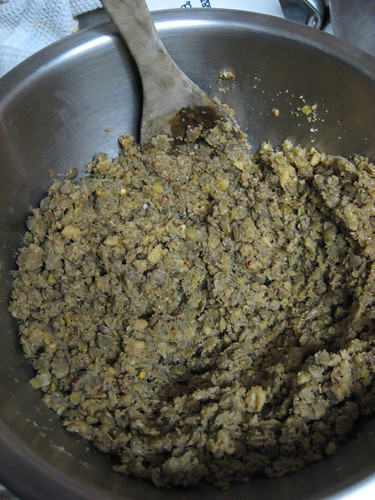
Spicy Lentil Walnut Burgers, Mixing/Mashing

Ghost Baker’s Favorite Dinner, Putting the Spice in Spicy:

I’ve made this recipe several times since the first time, and I’ve even made it for dinner guests. Be warned that my recipe for these little dinner cakes is spicy! I adore spicy food and lots of garlic, but I do like to serve them with milk. I add two more cloves of garlic than the original recipe calls for, as well as more red pepper flakes, salt and pepper.

Spicy Lentil Walnut BSpicy Lentil Walnut Burgers, Just added to the Skillet

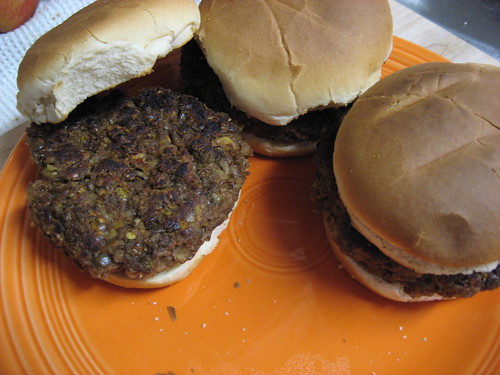
I also love the texture – they should be just a tad crumbly and grainy. The second time I made them I mixed the ingredients a little too much and I think you lose something. The recipe says to use a food processor; however I don’t have one and I don’t think one is absolutely necessary (again, you don’t want to over-blend). It also suggests serving with a yogurt-cilantro sauce, but I don’t do cilantro.

Spicy Lentil Walnut Burgers, My Husband Stole One...

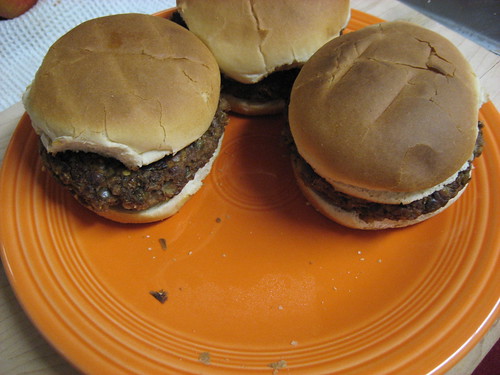
My husband enjoys these burgers with the same accoutrements you would add to a hamburger, I like mine plain on the bun, and one of my dinner guests once asked for cheese on his – so have fun with it! We typically accompany these with a side of Szechuan green beans or couscous.


Spicy Lentil Walnut Burgers, Ready to Eat


*Note – I would have taken a photo of all four burgers together with some toppings and sides, but when I turned around I caught a glimpse of my husband running into the other room with a burger in one hand yelling, “Take a photo of THIS!” and stuffing it into his mouth…

Spicy Lentil-Walnut Burgers
adapted from Everyday Food: Great Food Fast

Makes 4 burgers (serves 4), Prep time about 40 min, Cook time about 20 min

3/4 cup lentils, picked over and rinsed
3/4 cup walnuts, coarsely chopped
1/3 cup plain dried breadcrumbs
5 garlic cloves, minced (or use a garlic press)
2 teaspoons ground cumin
2 teaspoons ground coriander
1/2 teaspoon red pepper flakes
1 teaspoon coarse salt
1/2 teaspoon fresh ground pepper
4 tablespoons olive oil
1 large egg
4 Hamburger buns

Preheat the oven to 350˚F. Place lentils in a small saucepan, cover with an inch of water. Bring to a boil, then reduce to a simmer. Cover, and cook until the lentils are tender but holding their shape, 15 to 20 minutes (it’s important that you don’t overcook them and make lentil-mush). Drain and cool.

Meanwhile, spread the chopped walnuts on a baking sheet to toast in the oven for about 10 minutes. They should be a little darker and very fragrant. Set the walnuts aside to cool.

When the walnuts have cooled I like to chop them a little more finely. Then combine them in a large bowl along with the breadcrumbs, garlic, cumin, coriander (if you have whole instead of ground, just put them in a plastic bag and crush with the flat side of a meat tenderizer or even a can), red pepper flakes, salt and pepper. Mix with a wooden spoon. It should appear finely ground except for some pieces of walnut.

Add the lentils and 1 tablespoons of the oil. Don’t be afraid to be a little rough in your mixing – the contents of the bowl should appear chopped and fully incorporated but with some lentils remaining whole.

Whisk the egg in a small bowl and add it to the lentil mixture. Mix well, but be careful here not to mix it into mush. Divide it into 4 equal-size parts and roll into balls; flatten with the palm of your hand into 3/4-inch-thick patties.

Heat a large nonstick skillet and add the remaining 3 tablespoons of oil. Add the burgers and cook over medium-low heat until crisp and browned, turning carefully with a thin-edged spatula, 8 to 10 minutes per side. Do not turn more frequently or else they will start to crumble. Transfer to a paper towel-lined plate to drain any excess oil.

Add to your bun and serve!