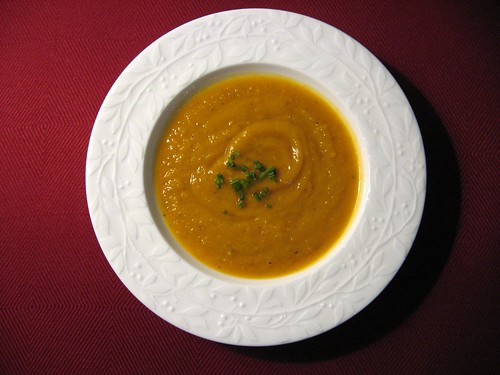
Stromboli with Prosciutto, Mix & Match with Pizza Dough

I was blessed with a husband who also enjoys cooking.
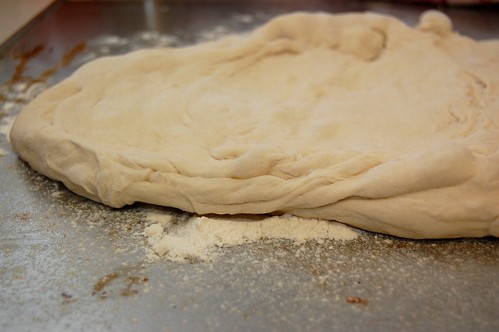
pizza dough

A few months ago Morgan and I took a “Date Night: Pizza Party” couple’s cooking course at Sur La Table. It was a lot of fun and we learned how to make a variety of delicious pizzas. Because we don’t always have the time to make our dough, we like to buy ready-made dough at The Italian Store in Arlington, VA. They make amazing pizzas, pastas, subs and sandwiches, and you can buy enough dough to make a 16″ pizza at an inexpensive price. Try inquiring at your local (non-chain) pizza place, Italian restaurant or even grocery store to see if they sell dough.
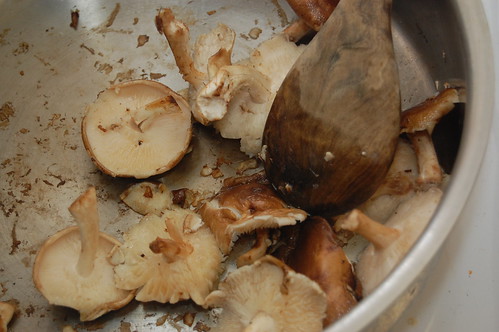
saute the mushrooms and garlic

We happened to have some dough and a bit of prosciutto in the fridge on Friday night, so instead of making pizza, Morgan decided to make stromboli. One big difference between cooking and baking is that you have a little more room with cooking to experiment. You can add more or less of an ingredient without ruining it and add new flavors liberally.
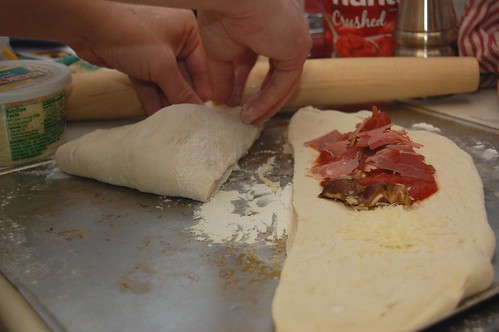
folding the stromboli

Below is our recipe for stromboli with prosciutto from Friday night, but perhaps a better recipe is: buy some ready-made dough from your local pizza place and buy some cheeses, meats and/or tomato sauce at the grocery store, break open the wine and invite your significant other or spouse into the kitchen for a fun night of mix and match pizza toppings or stromboli filling where you can’t go wrong!

stromboli

Stromboli with Prosciutto

16 inch ball of ready-made pizza dough
6 ounces shiitake mushrooms
cooked prosciutto, sliced and torn into pieces
1/4 cup parmesan cheese
1 cup mozzarella cheese
3/4 cup crushed tomatoes
2 tablespoons extra-virgin olive oil
3 cloves garlic, minced
salt, pepper and garlic powder, to taste

Preheat oven to 400 F with a pizza stone in the oven. Heat 1 tablespoon oil in skillet over medium heat and saute mushrooms, garlic, salt and pepper for about 5 minutes.

Lightly flour and oil a baking sheet. Roll out dough to form a circle and cut in half. Distribute filling equally on both halves – crushed tomatoes, mushrooms, prosciutto, garlic and cheeses. Fold dough over on each half and press edges down to seal.

Carefully transfer both strombolis to the preheated pizza stone in the oven. Bake for 15 minutes. Instead of removing the pizza stone from the oven, remove from the stromboli individually with a large spatula. Sprinkle with garlic powder, cool slightly, slice and serve!
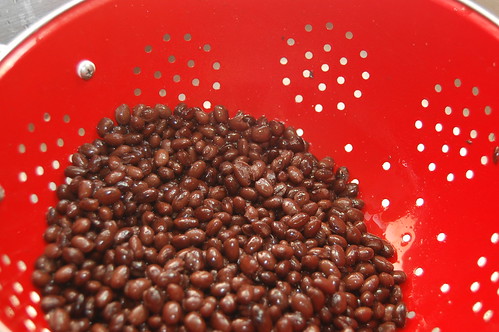

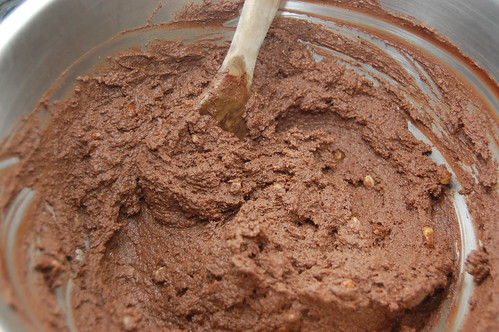
If you heard a scream on Monday evening at around 10:40 PM, it may have been me.

You see, my husband and I were invited to a birthday dinner on Tuesday night, so on Monday I decided that I would bake something for the birthday girl. I’d been dying to make 101 Cookbooks’ Amazing Black Bean Brownie Recipe for a long time, but you know how my husband felt about that idea. Monday night, I hoped, was my chance.

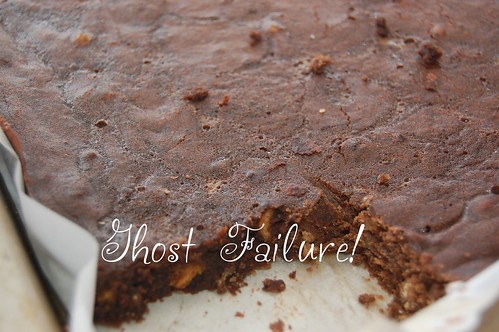
Failed Black Bean Brownies

I ran to the grocery store after work to get the ingredients, and I finished dinner just in time to start baking during the first new episode of The Bachelor (yes, I watch The Bachelor and I like it!). I also made peanut butter frosting from the Peanut Butter and Chocolate Triple Layer Cake that Edwin and I made in November to frost the brownies. What could go wrong when you have peanut butter and chocolate?

black bean failure

Fast forward to over an hour and a half later, and I had a freshly cooked and cooled black bean brownie in my hand. They smelled a little beany, but since I was assured these brownies had no beany taste to them I didn’t worry. I took the first bite and……. BEAN CITY!

DSC_0023


Wow, I thought, maybe I just have an uncultured palate? I ate another one and it was still a black bean extravaganza; I couldn’t believe it. I slumped on the couch and furiously typed away to Edwin, whining that I didn’t know what could have gone wrong. Then, as my eyes scrolled down the ingredient list, I finally caught the problem… the enormous, outrageous, glaring problem. It is with great embarrassment that I admit to you, DinnerCakes readers, that my tired, pre-occupied-with-The-Bachelor eyes mistook 2 cups of black beans for 2 cans of black beans. Yes, I doubled the amount of black beans.

If anyone would like to try some, they are still in my fridge. I can’t bear to throw them out.

failed black bean brownies

So at 10:40 PM on Monday night I could go to bed, forget the whole thing and hope that a simple birthday card would suffice, or I could try, try, try again. I decided to press on.

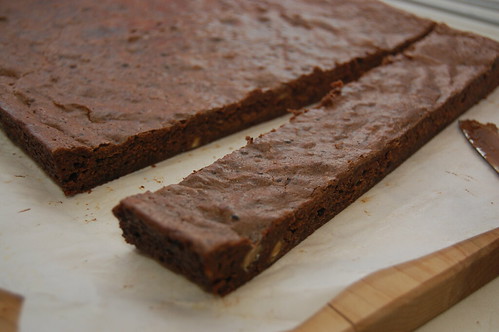
I found a simple brownie recipe, and I made some changes to include the things I’d hoped to accomplish with the black bean brownies (without the black beans this time). I used bittersweet and semi-sweet chocolate only, both granulated and light brown sugar, margarine instead of butter (I know it’s a “no-no,” but at this point I’d run out of unsalted butter), peanut butter chips and Taster’s Choice instant coffee. I also added cream cheese to the batter to make the brownies a little more like fudge.

mocha fudge brownies being cut

I didn’t even try the brownies when I took them out of the oven. I was scared, worn out and very late for bed! But when I finally did frost and try them the next day before the birthday dinner, they were amazing! Hallelujah!

Mocha Fudge Brownies

Somehow, I’d made it from brownie hell to brownie heaven.

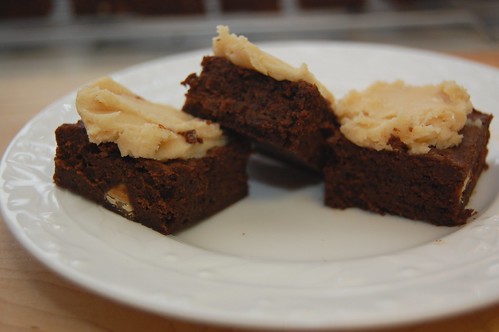
These brownies are excellent. They are dense, rich and fudge-like. The peanut butter frosting and instant coffee are a great combination that give these babies some kick. I may never make brownies without adding some instant coffee again. Say goodbye to dry, “ho-hum” brownies. And please, let’s never talk about black beans.

mocha fudge brownies with peanut butter frosting

Mocha Fudge Brownies with Peanut Butter Frosting
adapted from Bon Appetit

5 ounces semi-sweet chocolate chips
4 ounces bittersweet chocolate chips (I used Ghirardelli for both chocolates)
1/2 cup peanut butter chips
1/2 cup margarine
1 cup granulated sugar
1/2 cup light brown sugar
4 large eggs
1 teaspoon vanilla extract
1/2 cup all purpose flour
1/4 teaspoon salt
1/4 cup instant coffee (I used Taster’s Choice)
1/2 cup cream cheese

Preheat your oven to 350 F and line a 13×9 inch baking pan with parchment paper (leaving some extra on the sides so that you can carefully lift the brownies out when cooled).

Combine semi-sweet and bittersweet chocolate chips in a microwave safe bowl with the margarine. Microwave on high for 15 seconds at a time, stirring between intervals until melted. When melted, stir in instant coffee.

In a large bowl, combine sugars, eggs, cream cheese and vanilla extract for about 5 minutes. Beat in flour and salt, then add chocolate mixture. Stir in peanut butter chips. Carefully pour into prepared pan.

Bake brownies for 30 minutes. Note that a toothpick inserted in the center will not come out totally clean, as these are fudgey. Transfer your pan to a wire rack and cool completely. When cool, remove brownies by lifting parchment paper. Do not cut and frost until your ready to serve, and cut over a cutting board for the cleanest edges.

To make the frosting, see the Peanut Butter and Chocolate Triple Layer Cake from November. Remember to halve the recipe; if you make it as shown for the cake you will have quite a bit extra.

Until a little too recently, the word “salad” struck fear into my heart. It’s just so cold, leafy and usually bland, unless you add one of the things that defeats the purpose of eating a salad anyway, like cheese, egg, salad dressing, etc. Yes, I know it’s strange. And my co-workers at my previous job had a great time ragging on me about my feelings toward salad; now Edwin carries that torch!

Strawberry Spinach Salad with Yogurt Poppy Seed Dressing

However, I look forward to the holidays because my mom likes to think outside the box when preparing a holiday salad. She spends some good time hunting through her massive collection of cookbooks for forgotten gems. My all-time favorite salads have been born on these occasions, and the salads usually contain fruit.

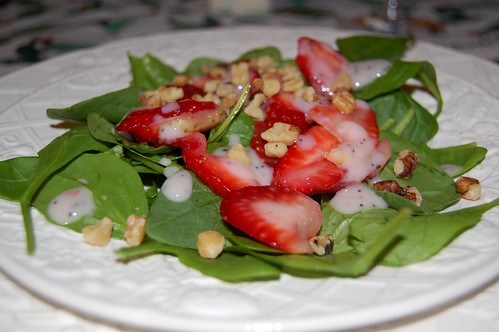
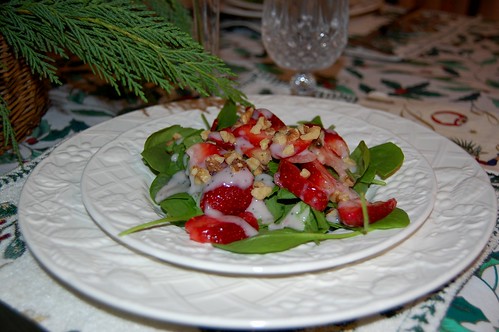
This past Christmas she made Strawberry Spinach Salad with Yogurt Poppy Seed Dressing. But it’s not just a Christmas salad or winter salad, it’s adaptable to any occasion and it’s easy to put together. The combination of sweet strawberries on a bed of spinach leaves with a few crunchy walnuts tastes heavenly, and it looks bright and beautiful especially on a white plate. This recipe even enchanted a salad-phobe like myself!

My mom also suggests another variation that she believes would work well – substituting the strawberries for blueberries and the strawberry yogurt for blueberry yogurt. In the version below, she swapped out the recipe’s suggestion of pecans for walnuts, a more heart-healthy nut (thus, dad-approved).

I hope you enjoy this salad as much as I do. Don’t wait to try it out!

Strawberry Spinach Salad with Yogurt Poppy Seed Dressing

Strawberry Spinach Salad w/Yogurt Poppy Seed Dressing
adapted from Pillsbury Quick Cooking magazine (1993)

Dressing
1/3 cup honey
1 cup Strawberry yogurt
1 tsp poppy seeds

Salad
1 bag Baby Spinach leaves
1 qt. sliced strawberries
1/2 cup chopped walnuts

In a large bowl, toss spinach, strawberries, and nuts. Combine dressing ingredients in a small bowl and add to a gravy boat, so that you can drizzle however much you like on individual plates. Serve chilled and enjoy!

Cream Cheese Spinach and Artichoke Dip

Happy New Year! Edwin and I hope you had a safe New Year’s Eve.

I enjoyed a fun gathering of a few friends at my apartment. Two of these friends had been staying with my husband and I for the last few nights, so I wasn’t interested in spending a lot of time in the kitchen preparing food on New Year’s Eve. On nights like that it helps to have some quick and reliable recipes for finger foods to set out.

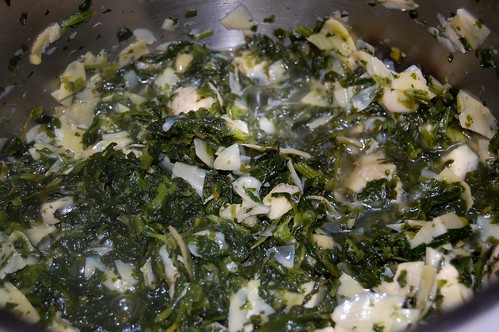
spinach and artichoke cooking

I never liked spinach and artichoke dip until one day in college I ordered an amazing sandwich at a now-closed restaurant in Charlottesville, VA – sliced chicken with spinach and artichoke dip (spread on the sandwich as if it was mayo). It was surprisingly delicious and I miss ordering it!

bread bowl

Since I began experimenting with spinach and artichoke dip, I’ve received a lot of good feedback about this recipe, particularly because it isn’t mayonnaise based and contains a lot of the good stuff (spinach and artichokes). The great thing about it is that you can modify it to best fit your palate and it will still be delicious. I tend to use a little more spinach and artichokes (because I have to trick myself any way possible into eating more vegetables). I’m also heavy handed with the garlic powder and red pepper flakes.

Enjoy!

spinach and artichoke dip

Cream Cheese Spinach and Artichoke Dip

1 cup frozen chopped spinach
1 cup artichoke hearts
8 oz cream cheese
1/2 cup Parmesan cheese
1 tsp crushed red peppers
salt, pepper and garlic powder to taste
Sour dough boule (optional)

Cook spinach according to package instructions. Drain and set aside.

Rinse, drain and chop artichoke hearts (sometimes when you buy them in a jar they’ve been sitting in flavored oil, make sure you rinse them unless you want that taste to carry over).

Boil artichokes in 1/2 cup water on medium for 5 minutes. Add spinach for an additional minute. Drain well.

In a microwave safe bowl, microwave cream cheese for one minute until soft. Stir until smooth. Combine cream cheese and spinach/artichoke mixture in a medium sized bowl, stirring well. Add Parmesan cheese and spices to taste, stirring until thoroughly combined.

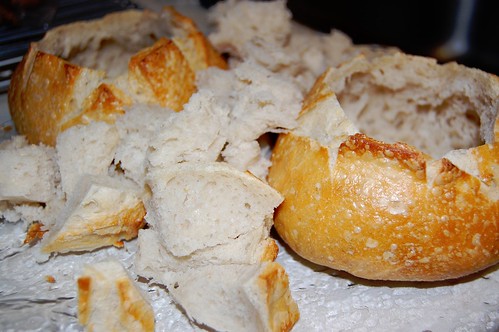
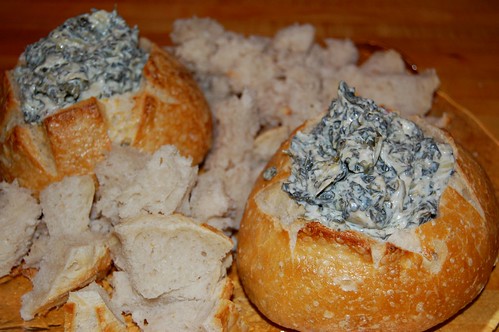
Add dip to a serving bowl of your choice. I like to buy a sour dough boule, cut a hole in the top, pull out the bread inside and cube it all for dipping. I pour the dip into the bread bowl and arrange the bread cubes around it.

Total prep and cook time is about 20 minutes (if you’re slow like me).

Pumpkin Oatmeal Bites, My Favorite Christmas Cookie

Well, my co-contributor Chef Edwin is going to smack his forehead when he sees this post, but I can’t let that stand in my way, right? I’m still stuck on Christmas, and I have the leftover Christmas cookies and constantly expanding waistline to prove it!

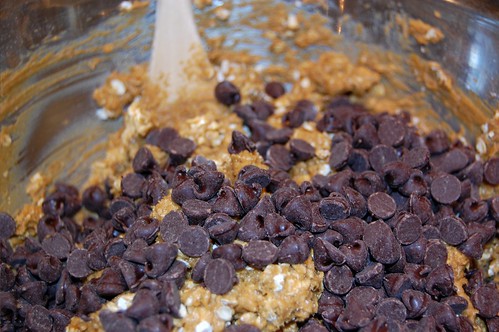
pumpkin oatmeal bites stirring in oats

It seemed to me like more people than ever were baking for Christmas this year, and I had no qualms about sampling everything that came my way. From leftover Bake-A-Thon 2008 treats, to sweet, melt-in-your-mouth Baklava from a friend at my mom’s office, to moist spice cake from a new significant other on my husband’s side of the family… my Christmas holiday consisted of enjoying delectable new desserts. Thank you, everyone!

pumpkin oatmeal bites stirring in chips

I’d like to share with you a recipe that I brought to Bake-A-Thon 2008 this year, but I also made it again on Christmas Eve with my mom. It has been a favorite of mine for years. My mom originally found it in a Better Homes cookbook; I have adapted it to include more pumpkin and more chocolate chips which I think makes them even more moist.

Pumpkin Oatmeal Bites

Readers, I know you may be tempted to think that I’d love any recipe that includes pumpkin, regardless of how it tastes – and I can see why you would think that based on my history here. But truly, this recipe has everything you could want:

1)You only need two bowls to make these cookies.
2) You do not need any fancy tools, appliances or decorating devices.
3) They’re not overly sweet.
4) Because of the pumpkin, they stay incredibly moist after several days. They’re also great for mailing (which I tested this year).
5) If you use high quality chocolate chips (I like Ghirardelli), the chocolate adds a perfect amount of sweetness.
6) It makes 120 cookies. 120! Let’s face it, when you’re baking Christmas cookies you’re probably looking to make more than one dozen.
7) They contain 3 cups of oats and pumpkin is a super food, so you can pretend that you’re eating healthy.

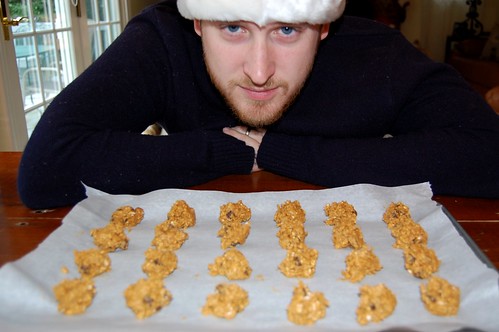
Pumpkin Oatmeal Bites and Morgan

This is the last time I’ll say it for the rest of the year, I promise – give pumpkin a chance!

Edwin and I would love to know what kinds of Christmas cookies you baked this year, and which ones were well received. Please share your favorites with us!

Pumpkin Oatmeal Bites

Pumpkin Oatmeal Bites
Adapted from Better Homes and Gardens, Cookies for Christmas (1985)

2 cups all-purpose flour
1 tsp ground cinnamon
½ tsp baking soda
½ tsp baking powder
½ tsp salt
½ tsp ground nutmeg
1 cup butter, softened
1 ½ cups packed brown sugar
2 eggs
1 cup canned pumpkin
3 cups quick-cooking rolled oats
1 ½ cups semi-sweet chocolate chips (Ghirardelli)

Preheat oven to 350 F. Combine flour, cinnamon, baking soda, baking powder, salt and nutmeg. Set aside.

In a large bowl with a mixer beat butter until softened. Beat in brown sugar until fluffy. Beat in eggs, then pumpkin.

Add flour mixture and beat until combined. Stir in oats and chocolate chips (use a thick, sturdy spoon. I’ve broken flimsy wooden spoons while stirring in all the oats before!).

Use a teaspoon measure to scoop onto parchment-lined cookie sheets, spacing about 1 inch apart. Bake for 12 minutes. Cool for 1-2 minutes, then move to a wire rack. Cookies will cool quickly. Makes about 120.

Merry Christmas!

Dear DINNERCAKES Readers,

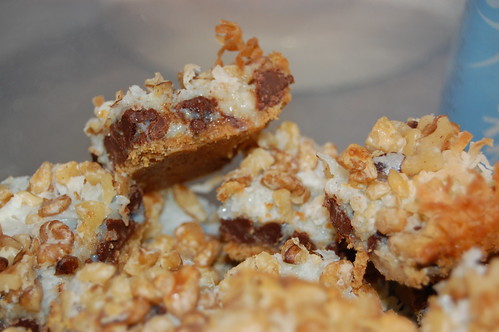
Magic Bars

We hope you enjoy a wonderful holiday with family, friends and lots of food! Have a save and fun day! Thanks for reading.

Christmas Crab

Merry Christmas,
Edwin & Heather

Holiday Bark, Play With Your Food

Making Holiday Bark is almost more like making art and playing with your food than it is cooking or baking.

When I was younger I used to absolutely love sketching, painting, collaging, sculpting, or any other artsy activity that I could just spend hours completely focused on. I seem to have lost this hobby in the daily grind somewhere after high school, but I still miss it and have hopes and plans to pick it up again someday (though, no day like the present, right?). Making Holiday Bark helps me get my artistic fix, and in delicious, edible form!

marbling holiday bark

Making any kind of bark candy can be as simple or as detailed as you make it. If you have kids, they will probably love attempting to help mix and swirl the chocolate (and get it all over their faces). If you’re setting out trays of food for a Christmas or New Year’s party or would just like something fun to bring to work, this is a very attractive option.

In its simplest form, you can get away with using only two kinds of chocolate and one kind of nut or flavor. No cooking or baking is required, though if you’re really looking to unlock the full flavor of the nuts then you may want to heat them in a shallow pan until warm and fragrant. You can even make bark while waiting for Christmas cookies to come out of the oven.

Basically, when you think you might explode if you have to make one more Christmas cookie – Holiday Bark to the rescue.

And, if I left this part out, it tastes and smells heavenly. Don’t forget to use ingredients that you enjoy and just have fun with it!

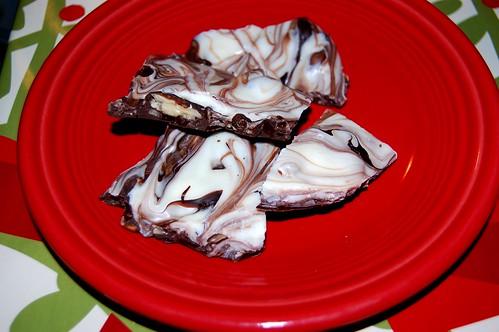
holidaybark

Holiday Bark

8 oz white chocolate, chopped
8 oz semi-sweet chocolate, chopped
6 oz bittersweet chocolate, chopped
2.25 oz (or ½ cup) hazelnuts, chopped
2.25 oz (or ½ cup) pecans, chopped

Place chopped white chocolate in a microwave safe bowl. Place semi-sweet and bittersweet together in another microwave safe bowl. Microwave bowls separately for 10-15 second intervals, stirring thoroughly after each interval until melted. Do this until both bowls contain melted chocolate. (I’ve been told that if I don’t use a double boiler to melt chocolate that I’ll burn it, but I haven’t burned it yet! Don’t worry.)

Line a jelly roll pan with parchment paper. Stir in nuts to the bowl containing semi-sweet and bittersweet chocolate. Spread the chocolate and nut mixture on the parchment paper using a rubber spatula. Drop spoonfuls of white chocolate over this, and swirl the chocolates using a fork or skewer (I used a fork because the nuts make it a little tougher to swirl).

Refrigerate for approximately 1 hour until hard. Break bark into large chunks and store in your refrigerator until serving.

Stuffed Shells with Beef, Shedding New Light on a Old Classic

Unlike Edwin, I am not a flexitarian. However, my husband Morgan and I try to limit ourselves to lean meats such as chicken or fish. We rarely eat a strictly vegetarian dinner and once every few months, we break down and cook with beef.

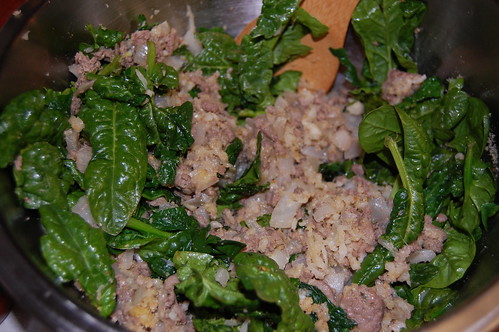
Stuffed Shells filling with spinach

I was inspired by a recipe I found on blogchef.net – these stuffed shells are a little different than the kind you might typically find. Aside from the addition of beef, the blogchef recipe replaces ricotta cheese with mozzarella. It also removes the usual spinach and adds dry red wine.

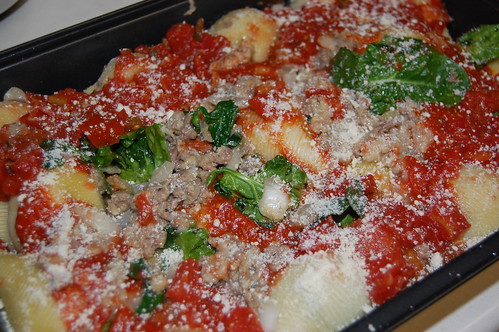
Stuffed Shells Ready to Go in the Oven

But because I’m not a flexitarian, I need to get my vegetables wherever I can. I added half a bag of fresh spinach leaves, more garlic, and a can of Hunt’s diced tomatoes with green peppers, onions, and celery. I also left out the red wine and parsley.

This recipe isn’t very difficult, but stuffing the shells gets a little time consuming. It’s very filling and makes an enjoyable and attractive winter meal for both the holidays as well as the weekly dinner rotation!

Stuffed Shells

Stuffed Shells with Beef
inspired by Blogchef.net

1 lb ground beef
1 large onion, diced
5 cloves garlic, minced
1 (8oz) bag shredded mozzarella cheese (fresh is always better, if you don’t mind grating)
1 bag fresh spinach leaves
½ cup Italian breadcrumbs
1 egg (beaten)
1 (26 oz) jar of spaghetti sauce (I use Paul Newman sauces)
1 (15 oz) can Hunt’s diced tomatoes with green peppers, celery and onion
Grated parmesan cheese, as desired
24 jumbo pasta shells (cooked according to package directions and drained)
salt and pepper, to taste

Cook shells according to package directions. In a large skillet, brown ground beef, garlic and onion. Drain off excess grease (if you really want to cut down on even more fat, you can actually quickly rinse the ground beef, but you risk losing flavor). Preheat oven to 400 F.

In a large bowl, combine meat, shredded mozzarella, beaten egg, breadcrumbs, fresh spinach leaves, salt and pepper.

In a 13×9 inch oven safe dish, add half the spaghetti sauce and half the canned diced tomatoes.

Stuff the cooked and drained shells with the meat/cheese/spinach mixture and place on top of the sauce in the oven safe dish. Pour the remaining spaghetti sauce and diced tomatoes over the stuffed shells. Sprinkle with parmesan as desired.

Bake for 20-25 minutes and serve.


On Monday my office had a white elephant gift exchange, something like Secret Santa except the gifts are meant to be inexpensive and sometimes humorous. I’ve never participated in one of these before, so I was pretty excited and a little nervous. I heard that in our office the gifts were usually a mix of gags and real gifts, so I opted for a something in the middle.

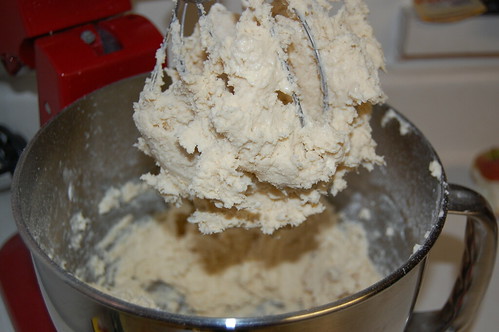
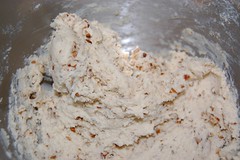
Thumbprint Cookie dough

I acquired a wonderfully tacky Christmas cookie jar from my mother-in-law. Imagine a very shiny and bright red, green and gold round Christmas tree ornament, except enlarged about five times. I thought this would be a perfect white elephant gift, remembering the quote, “One man’s trash is another’s treasure.” But I was nervous that maybe this was TOO silly.

So to “sweeten” the deal, I scoured my cookbooks for a Christmas cookie recipe to fill the cookie jar with, something classic that would appeal to multiple people, but something that I wasn’t already planning on baking. I settled on a great, versatile recipe found in one of my old Kraft Food magazines.

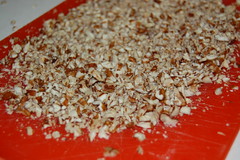
Thumbprint Cookies, PecansThumbprint Cookies, mixing nuts

I’ve mentioned before that Kraft has some very useful recipes, especially for people strapped for time or those trying to get into cooking and baking but aren’t sure how. This particular cookie recipe can make four variations of cookies, all using the same basic dough recipe but with minor variations. I chose to only make one kind this time – Thumbprints Cookies.

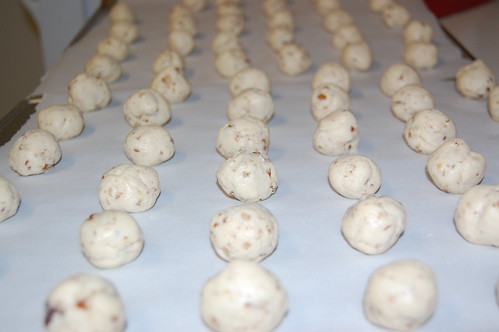
Thumbprint Cookies, dough balls

Because I still fear the scale, I substituted fat free cream cheese in place of regular. This probably wasn’t the best decision because, well, fat tastes good! If you’re making food for others you want it to shine, and I broke one of my cardinal rules by substituting. To make up for this and sweeten the dough a bit without adding more sugar, I added a teaspoon of ground anise seed. Anise seed is expensive, but I’m always willing to blow my budget a bit when holiday food is involved. The anise seed was very aromatic and added a distinctive, but not overpowering, sweetness.

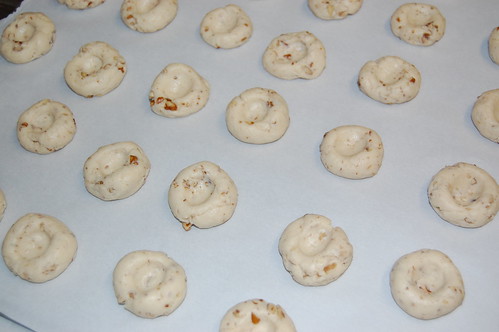
Thumbprint Cookies, indented

For future confections, I need to make a rule that I will never post about baked goods the same day I make them – I always enjoy them more the next day! I’m glad I reserved judgment on these cookies. My husband really loved them right out of the oven, but I think they got even better after they set. It’s rare when I find a cookie my husband really gets excited about; these are a keeper!

Thumbprint Cookies, ready to eat

Blackberry & Apricot Thumbprint Cookies
adapted from Kraft Foods Magazine

1 package cream cheese (8 0z, I used fat free)
1 1/2 sticks butter, softened (3/4 cup)
1 cup granulated sugar
2 tsp. vanilla
2 1/4 cups flour
1/2 tsp. baking soda
1 cup finely chopped pecans
1 tsp. anise seed, ground
blackberry and apricot jam (or jam of your choice, but the apricot is excellent)

Beat cream cheese, butter, sugar and vanilla in a large bowl until well blended. Add flour and baking soda gradually. Mix well. Stir in pecans and anise seed (you can grind the anise seed by putting it in a bag and hitting it with a tenderizer). Make sure it’s well-blended. Cover and refrigerate dough for 30 minutes (make sure you do this so that the butter doesn’t get to soft; you don’t want your cookies to fall flat in the oven).

Preheat oven to 350 F. Using a 1/2 tablespoon measure, scoop dough in 1 inch balls, rounding dough into balls. Place on parchment lined baking sheet about 1 1/2 inches apart. Indent the dough using your thumb. Bake for 10 minutes.

Remove from oven. The indentations may have risen in the oven, just push it down as needed and carefully fill eat cookie with jam. Continue baking for 8-10 minutes.

Makes about 5 dozen cookies.

Butternut Squash and Onion Soup (That Won't Ruin Your Diet)

A friend recently sent me a recipe for roasted butternut squash and shallot soup she found from Cooking Light. I love butternut squash soup, but I love it the way you should never have it – with heavy cream and sherry.

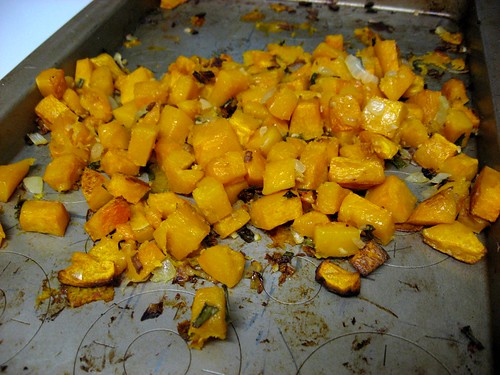
roasted butternut squash

Cooking Light outlines a healthier way to enjoy this soup, but unfortunately the recipe was a little expensive and called for ingredients that I don’t usually keep on hand, such as shallots, fresh ginger root and fresh chives. Ginger root is not expensive but I don’t love an overpowering ginger taste, shallots may be a little sweeter than regular onions but they’re also more expensive, and fresh chives are also expensive, especially if they’re only acting as a garnish.

I tried to minimize the cost of this recipe and make it a little more manageable for the average pantry. I found the onion taste to be a tad strong, but my husband had no complaints. Yet you do have to like onions to enjoy this recipe. There are other milder versions of this soup, as well as versions that incorporate nuts and apples. These sound absolutely delicious, and I’m excited to try them, but for this particular recipe I was trying to keep it simple.

I served this as the main course for dinner for my husband and I, so we had two full bowls with a little bit leftover. This would also be great as a side to have with a grilled cheese sandwich; I had a piece of bread with my soup and I enjoyed dipping the bread into the soup. If you have other vegetables in your kitchen that you would like to use, such as carrots, that would make an excellent addition as well.

butternut squash onion soup

Butternut Squash and Onion Soup
inspired by Cooking Light

4 cups (1-inch) cubed peeled butternut squash (about 1 1/2 pounds)
1 tablespoon olive oil
1/4 teaspoon salt
2 thinly sliced scallions
1/2 cup chopped onion
3 cloves minced garlic
1 tablespoon minced fresh ginger
2 1/2 cups fat-free, less-sodium chicken broth
2 tablespoons (1-inch) slices fresh chives
black pepper to taste

Preheat oven to 375°. Combine butternut squash cubes, oil, salt, minced ginger, minced garlic, chopped onion and minced ginger in a jelly-roll pan. Bake for 50 minutes or until tender, stirring occasionally. Cool 10 minutes.

Pour half the squash mixture and half the broth into a blender. Remove the center piece of the blender’s lid to allow heat to escape; lay a folded paper towel over the opening. Blend mixture until smooth, then pour into a large saucepan. Pour the remaining squash mixture and broth into the blender and repeat previous process. Cook over medium heat for five minutes or until thoroughly heated. Top with scallions and pepper as desired.