Day #7 of Rainbow Week – Rainbow Vodka

You’re looking at day seven of our Rainbow Week series. Click here to start on day one.

Today marks final day of Rainbow Week. Heather and I had a blast and we hope you enjoyed the ride as well. Today we’ll wrap things up with something to quench your thirst: rainbow vodka. I really wish I could take credit for this, but the clever people at Mix That Drink deserve the credit.

Rainbow Vodka from Mix That Drink

With their simple step-by-step instructions, it doesn’t get much easier than this. This is definitely on my to do list (perhaps with rum?).

Thanks again for reading. DinnerCakes will return to its regular programming Monday. See you tomorrow!

Day #6 of Rainbow Week – Pastel and Tie Dye Cupcakes

You’re looking at day six of our Rainbow Week series. Click here to start on day one.

Well, we’re nearing the end of Rainbow Week! We hope you’ve learned some new things and that you have plans this weekend to make lots of colorful rainbow treats like today’s post – Pastel Tie Dye Cupcakes.

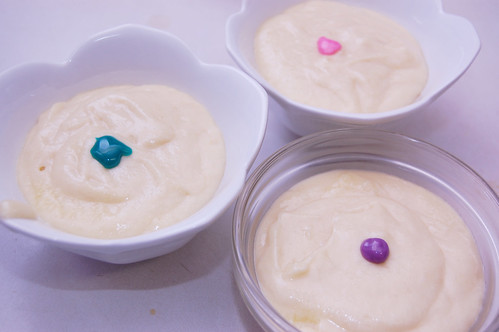
adding pastel

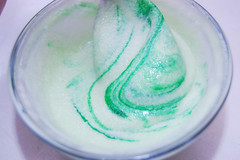
greenswirlpastelpurple

Back in the day I loved tie dye – and let’s be honest, I still do.

pastelcolorscupcakeswirl

Last weekend I was at a wedding for great couple; my husband and I met the groom back in high school. One of the groomsmen made a nice slide show of memories for the couple which was shown at the wedding. He joked with me that he had a bad old photo of me he considered including. Once he described the photo I remembered it exactly – I was wearing an old pair of jeans that I turned into bell bottoms using some tie dye fabric. Hey, who cares what he thought, right? I thought they were cool…

cupcakebatter

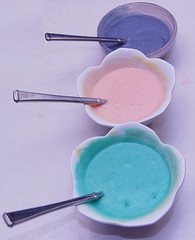
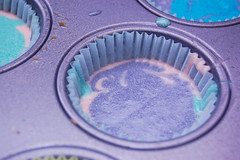
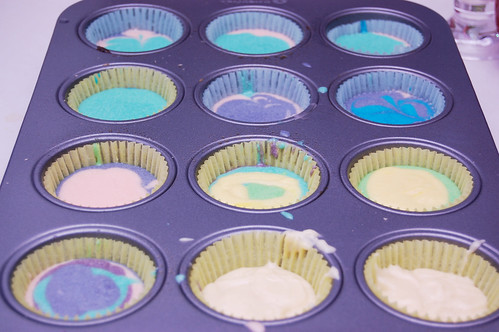
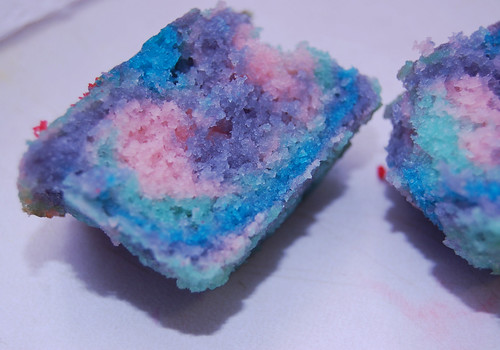
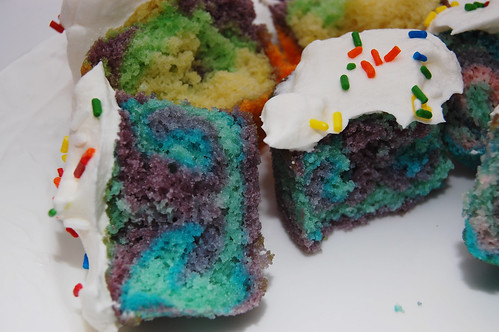
Making rainbow cupcakes like these can even be more fun than rainbow cake because each individual cupcake can have a unique pattern – colored layers, marbled/swirled batter, just color in the middle, etc. I used pastel purple, teal and pink, along with a few other colors, in yellow butter cake batter.

brokencupcake

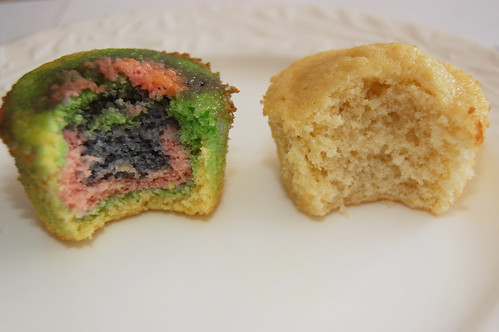
I was also able to do a little test, baking regular cupcakes alongside rainbow cupcakes to see how the color affects the batter. The answer is, as I believe Edwin mentioned and as I found out, that the color does affect the batter, particularly this time.

cupcakecomparison

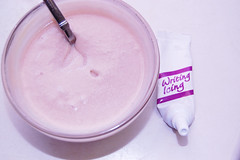
Pastel colors, because they’re lighter, require more gel. Whereas Edwin and I use only a small amount of primary color gel for the rainbow cake and rainbow cake cones, I had to use the whole tube of pastel color gel to color the batter – oy! All the stirring needed for pastels unfortunately makes the cupcakes more dense. So I might recommend sticking with primary color gels for the best tasting cake, although the teal color did turn out pretty cool!

inside cupcakes

Yellow Cake & Frosting

I used the same Williams-Sonoma yellow cake recipe here as I did for the cake cones. If you don’t have the Williams-Sonoma “Desserts” book, I would recommend this recipe available online by Martha Stewart for a basic yellow butter cake, adapted from “Martha Stewart’s Baking Handbook.” It is very similar to the one I used. A box yellow cake mix will also work.

To frost the cupcakes, I used a light and fluffy fat free Cool Whip. A Seven Minute Frosting would also work well. Anna at Cookie Madness has a good recipe for Seven Minute Frosting, and Joy the Baker has a Seven Minute Frosting that you can make pink or green (just in case you want even more color for your cupcakes!).

In case you missed Edwin’s detailed instructions on “How To Make Your Own Rainbow Cake” earlier in the week, please check it out for very useful tips and advice before you begin.

You’re looking at day five of our Rainbow Week series. Click here to start on day one.

Rainbow Week is running strong with day five and what a ride we’ve had. We’ve done baked goods, we’ve done fruits; how about a main course? That’s right folks, we’re giving you the full gamut! Of course, I’d be remiss if we did something easy. I mean, sure, I could just boil some colored pasta, throw in some cream sauce and call it a day; but that’s not why you come here, right? Didn’t think so.

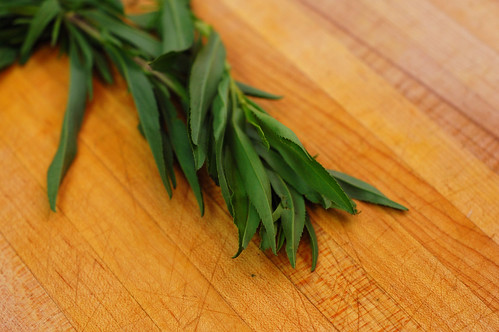
Tarragon

Now, my health-obsessed mind just wouldn’t be happy unless our rainbow dinner was healthy. So, we’re going with salad, but a different kind of salad. I’ve never been one for seafood, but my mother recently returned from a trip to Alaska with a cook book for me and, apparently, if there’s one thing you can get a lot of in Alaska it’s seafood (I guess it has something to do with all the water or the sub-freezing temperatures). No cookbook should just sit collecting dust so I decided to broaden my horizons.

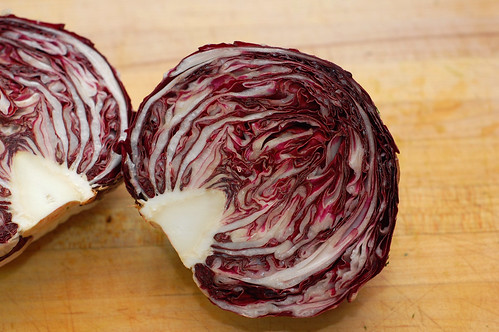
Radicchio

Lettuce provides the green, radicchio the purple, salmon the red and lemon the yellow. I like this dish because it has a low skill requirement, which is great for my seafood newbie-nees. I tried adding corn for the yellow at first but this really didn’t work out. Instead, go with lemon over lemon juice for a more visually appealing effect. Note, that this is a LOT of salmon I used in the picture below. This amount could easily be split between two for a lighter dinner.

Poached Salmon Salad with Honey Vinaigrette

Poached Salmon Salad with Honey Vinaigrette
Adapted from What’s Cooking, Alaska?
1 cup water
1/2 cup dry white wine
2-3 sprigs of tarragon; leaves removed
6 peppercorns
1 lemon cut into quarters
1 salmon fillet
1 quarter radicchio; sliced thin
Several handfuls of salad greens (I used romaine and spinach, but mesculn would work great as well).

Throw the water, white wine, tarragon stems, peppercorns and lemon into a large pan or pot and bring to a boil. Simmer covered for 10 minutes to reduce (if too much boils away, just add more water). Add your salmon fillet and simmer, covered, for an additional 10-12 minutes. Remove from heat, uncover and let the fillet cool. Once cool, wrap in plastic and chill for 1-2 hours or until ready to serve.

While chilling, prepare your salad greens along with our earlier honey vinaigrette recipe using the tarragon leaves from earlier (chopped). Once ready, top your salad with your salmon and spoon as much dressing atop as you’d like. Enjoy.

Day #4 of Rainbow Week – Tropical Fruit Salad

You’re looking at day four of our Rainbow Week series. Click here to start on day one.

Need a little break from baked goods? Rainbow cakes are a lot of fun and make for great eye candy, but there are other options for impressive and vibrant food as well.

pineappletoss

strawberriesoverflowing

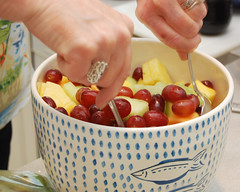
I hijacked this fruit salad recipe from my mom. In fact, I took the photos for this post the last time she made it (which I hope made for some cool action shots). I love the fruit salads that she makes because they always have very sweet and excellent glazes. This one packs a little more punch than some of my other favorites because it comes with tequila!

pouring

The tequila is noticeable, but not overbearing. You could leave it out if you really wanted to, but why? This recipe makes a very large bowl of fruit – perfect for entertaining at cookouts or dinner parties. If you’d like to adapt it to every day use, simply cut the recipe in half.

fruitsalad

You can probably tell this from the photos, but if you do decide to make a large batch, make sure you use the appropriate size bowl. We ran into some overflowing problems and had to transfer the fruit to a larger, wider bowl so that we could toss it with the glaze.

tropicalsalad

Tropical Fruit Salad
Adapted from Sandra Jackson-Work’s “Cooking with Friends” submission to Betty Crocker’s “CELEBRATE!” (April 2000, #161)

3/4 cup sugar
1/4 cup water
1/4 cup Key lime juice
2 to 3 tablespoons tequila
1 teaspoon fresh grated lime peel
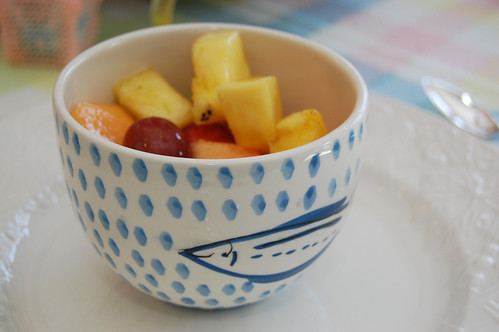
14 cups cut-up fresh fruit – strawberries, cantaloupe, pineapple, kiwi, honey dew melon, red grapes

Heat sugar and water to boiling in small saucepan. Reduce heat, and simmer uncovered for approximately 2 minutes, stirring constantly until sugar is dissolved. Remove from heat and stir in lime juice and tequila.

Let stand to cool. Cover and refrigerate for approximately 2 hours.

Stir in lime peel. Carefully toss fruit and lime mixture. Serve immediately.

Or, click here for a version without tequila (boo!).

Day #3 of Rainbow Week – Rainbow Cookies

You’re looking at day three of our Rainbow Week series. Click here to start on day one.

Back in Richmond, where both Heather and I grew up, there’s a local chain of grocery stores called Ukrops. My family didn’t go there often (there were closer grocery stores and Ukrops was never open on Sundays), but I always looked forward to the times we did for one reason and one reason only: rainbow cookies. As Heather likes to remind me, they weren’t particularly good cookies. In fact, they were quite dry. But when you’re a kid there’s something awesome about multi-colored cookies; just like there’s something awesome about cereal that looks like cookies (Cookie Crisp you were, and are, so amazing).

Rainbow Cookie Dough

I haven’t been to Ukrops in a long, long time, but what Rainbow Week would be complete without rainbow cookies? Today’s recipe follows the same principles from our first post, with a few exceptions. First, because cookie dough is much thicker than cake batter, food color drops are really your only option. It’s just too difficult to mix and distribute the gel. Since most cookies are pretty dense (when compared to a cake), you’re options are a lot larger. Just don’t pick something, well, cake-y like a black and white cookie and you should be fine. Try with 5-10 color drops in the divided good and you should be good.

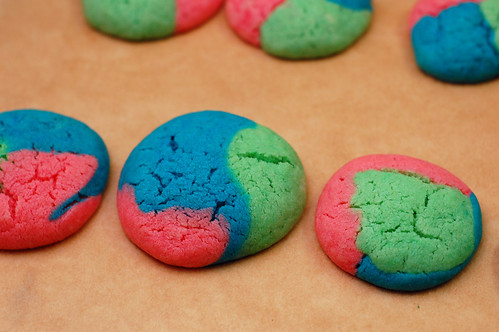
Blue Cookie DoughRed Cookie DoughTri-Color Dough

I decided to work with sugar cookies, a pretty simple and resilient cookie. You can work in one, two or three different colors (or more I suppose). With most sugar cookies I’d wager you’d have approximately three teaspoons of dough for each cookie, so divide the portions by the number of colors you want accordingly and put them together as shown. Then roll around in your hands until you get a smooth looking ball. Place them on a baking sheet and flatten them to the width specified with your recipe. That’s it!

Rainbow Sugar Cookies

Finding the Right Sugar Cookie Recipe

Most general cookbooks should have a sugar cookie recipe for you to use; and if it doesn’t you should write the author(s) a scathing letter. I personally used the one from Joy of Cooking (my cooking bible) for these.

If you’re looking for a good sugar cookie recipe, try Lydia’s recipe over at The Perfect Pantry. I’ve used it on many occasion with good results. Simply Recipes also has a recipe you could try. Enjoy!

Day #2 of Rainbow Week – Cake Cones

You’re looking at day two of our Rainbow Week series. Click here to start on day one.

Welcome back to work (for many of you); we hope you had a great holiday! Rainbow Week continues here on DinnerCakes, and today I’ll be sharing rainbow cake cones.

colors

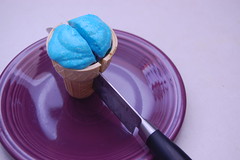
Cake cones are ice cream cones filled with cake. My mom used to make them for me when I was little. It’s a fun twist on a traditional cake, and if you scoop ice cream on top instead of frosting, it’s perfect for dessert lovers who enjoy cake and ice cream. Cake cones also lend themselves particularly well to rainbow cake.

DSC_0047DSC_0049

cakeconesoven

Yesterday Edwin recommended using standard food drops or fondant coloring gels. I divided yellow cake batter into small bowls and used about 1/4 teaspoon of Betty Crocker classic food coloring gels, stirring as little as possible.

cutconecakecones

cakecones2

I used a small spoon to pour one spoonful of each color batter into the cones. Because the cones are small, it’s easier to get an even layer of color, by moving the spoon from front to back, than it is with a large cake pan. Fill your cones about 2/3 full.

DSC_0051 (2)DSC_0070 (2)

To cook the cake cones, set the cones inside a muffin pan to keep them from falling over. For half of my cones, I made cream cheese frosting and added a few drops of food gel for color. I left the other half frosting-free so that I could scoop ice cream on top. I would recommend serving your cake cones with ice cream scoops. As you might imagine, I enjoy my cake with ice cream, but I also think it tastes better. The cake cones with frosting instead of ice cream is just a little too dry for me.

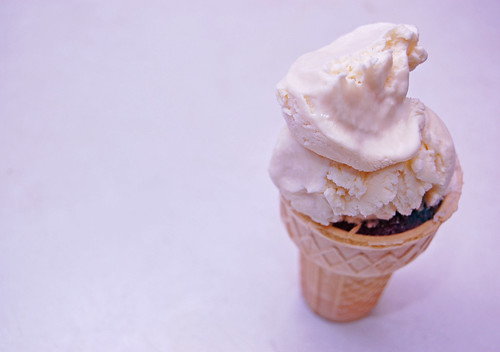
icecreamcone

The yellow cake recipe that I used is from my Williams-Sonoma Desserts book. I will admit that I enjoyed the taste of Edwin’s rainbow cake using a gold cake recipe more than my yellow cake (yum!), but either gold or yellow will work well. Enjoy!

icecreamconebitten

Finding the Perfect Yellow Cake & Frosting

If you don’t have the Williams-Sonoma “Desserts” book, I would recommend this recipe available online by Martha Stewart for a basic yellow butter cake, adapted from “Martha Stewart’s Baking Handbook.” It is very similar to the one I used.

You may also use a box yellow cake mix if you’re so inclined. Though I will add that Edwin has said, “Every time a DinnerCakes reader makes cake from a box a piece of me dies inside.” So, do with that what you will, readers!

I recommend using an ice cream of your choice instead of frosting the cake cones, but for half of my cones I used cream cheese frosting. It doesn’t take much food gel to color the frosting; I separated the frosting into small bowls and used about 3 to 5 drops of food coloring gel. I put the frosting in a small ziploc bag and cut off the tip to create a makeshift pastry bag. For a good recipe that won’t make an obscene amount of frosting, check out this one from Anna at Cookie Madness. For a frosting that’s a little flashier, Edwin recommends this Coconut Cream Cheese recipe from 101 Cookbooks.

In case you missed Edwin’s detailed instructions on “How To Make Your Own Rainbow Cake” earlier in the week, please check it out for very useful tips and advice.

Happy Rainbow Week at DinnerCakes! Heather and I have been busy talking about things we’d like to do and the direction we’d like to take with our modest niche in the foodie world and today is one of our new things we’re trying out (you may have also noticed Heather’s Saturday post: Foodie News). Every now and then we’ll introduce a theme week, in which we’ll write about the topic of choice. This week’s theme is rainbow week. We’ll give you tips and tricks on how to do your own rainbow-inspired food along with ideas on where to take it. We hope you enjoy it and, as always, e-mail us if you have any suggestions!
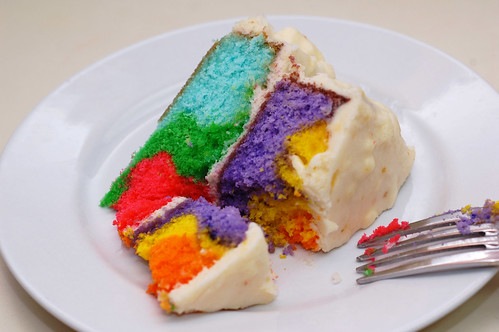
Rainbow Cake

Today’s post is about the basics of rainbow baking. We’ll discuss what you need to do, concerns and considerations, as well as give you a recipe to try your own (in case you just want to just follow some steps).

The Color – Drops and Gel
To color your batter, you’ll use food coloring. You’ve got two choices: you can go with the standard food drops or you can go with coloring gels (like the ones used to color fondant). Both work, but there’s a slight trade-off. The gels will give you a more vibrant color, but since they’re not liquid they’ll require more stirring. More stirring means more gluten, which means less rising during baking. This is generally not a good thing for cakes; it’ll be less light and airy. With the drops you have less stirring but the colors are fainter. The ones below are with gels.
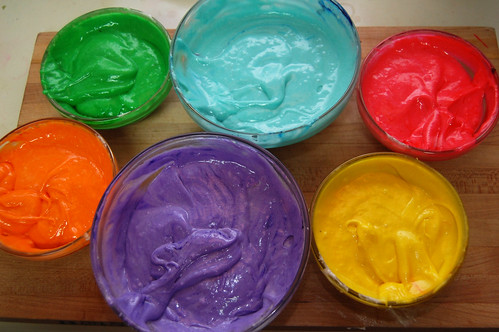
Rainbow of Colors

The Cake – Dense
Coloring your cake batter is going to require additional work after you’ve completed all your steps short of the actual baking. Even if you choose the drops, there will be more stirring which creates more gluten bonds. More gluten bonds means the cake will rise less. You really want to choose a denser cake. The effect will be less dramatic. If the cake has folded egg whites in it, forget it. Gold and yellow cakes are good candidates and, while I haven’t tried it yet, I bet a pound cake would work as well. I would not recommend this for angelfood cake.

Now, Heather says I should point out that you technically CAN use cake from a box. The rules are the same (though I’m not sure if cake mix has any real flour to form gluten with). But really, why would you want to? Every time a DinnerCakes reader makes cake from a box a piece of me dies inside, knowing we have failed you somehow.
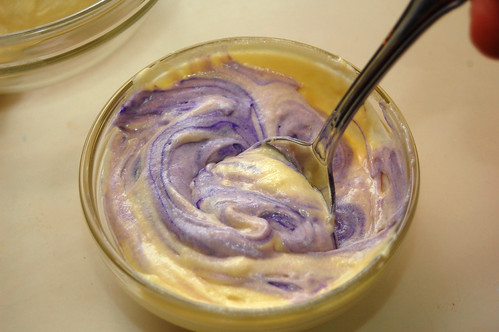
Mixing the Batter

The Process
The process is pretty straight forward. Decide on how many colors you want (I suggest six or less and remember, the batter is already one color you could use) and separate your batter into that many portions. Add your drops of your gel. If drops, 7-12 should be enough, though it does vary depending on how dark you would want it and which color you’re working with. With the gel, see the picture below. Either way, add it all at once and start first by folding the batter and eventually transitioning to stirring. The folding distributes the coloring quickly and the stirring smooths out the color. Be sure to scrape the bottoms and the sides so everything is colored (if you have glass bowls, use them). Remember, you want to stir as little as possible
.
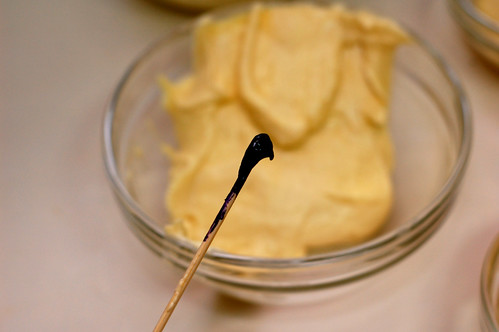
Gel

Once you’ve got your prepared batters, divide them among the cake pans. Pour one at a time directly in the center of the pan. You’re not going to get flat layers stacked on each other (I’ve tried). What you’ll get is each portion of batter pushing the other batter to the side as it fills in. It won’t result in perfect vertical bars, but it’ll definitely get the point across.

That’s all there is. Give it a shot and let us know how it turns out!

Pouring the BatterRainbow Batter

Rainbow Cake
Original recipe from Joy of Cooking.

2 1/2 cups cake flour
2 1/2 teaspoon baking powder
1/4 teaspoon salt
1 1/2 sticks unsalted butter
1 1/4 cups sugar
8 egg yoks
1 teaspoon vanilla
1 teaspoon lemon zest
3/4 cup milk

Whisk together the flour, baking powder and salt in a bowl. Cream the butter and sugar on high for 2-4 minutes until light and fluffy. Beat the yolks, vanilla and lemon zest for several minutes until thick and a pale yellow. Beat into the butter mixture. On low, beat the flour mixture and milk in alternates (flour-milk-flour-milk-flour). Continue until well combined.

Separate your batter into the portions and follow the guide above. Enjoy.