Kitchen Tips – Broken Buttercream & Whipped Frostings

If you ask me what the most important lesson or tip is for baking, I would answer “patience.” Many of the techniques involved in baking can be practiced and learned, but if you can’t muster patience in the kitchen – forget it, game over.

Most of my baking mistakes come from rushing things:
fallen cakes – continually opening the oven door and toothpick testing to see if it’s done yet,
flat cookies – nuking the butter instead of just waiting for it to reach room temperature, packing the dough balls in too closely on the baking sheet so that I don’t have to wait to do a second batch,
broken buttercreams… sadness!


photo by Sugarbloom Cupcakes

But in some cases, there’s a fix. And actually until this week, I never knew that I could save my broken buttercreams!

When making a frosting with butter or cream cheese, everything needs to be at room temperature. You must set it out for at least 45 minutes. There’s just no way around it! If you can’t wait, you might notice as you’re mixing that you have little tiny lumps instead of a nice smooth consistency. This is because either the butter or cream cheese is still too cold, and no amount of furious mixing will save it.

Before you throw it out.. or before you just sit down and eat it while crying.. try putting the bowl over a hot water bath and mixing (without getting any water in the bowl!). This should warm it up a bit and help the clumps smooth out without melting anything. You can also try adding a little warm melted chocolate (white chocolate for vanilla frosting) and mixing it throughout.

Buttercreams and whipped frostings are tricky; you are not alone! Frosting is half the battle.

Yogurt Frenzy: Greek vs. Regular Yogurt

Well, I’m home today with a sick dog. It was a great night of waking up at 11pm, 1am, 2am, and 4am to take the dog out so that he could do various gross things outside instead of in his crate. My only theory is that when I gave him a chew thing earlier in the day that should have taken him hours to work on, it was gone in 30 minutes – I’m thinking he swallowed it mostly whole. What type of food toys do you all use to keep your dog busy?

And on that note, it’s probably not a good day to share a recipe. But I would like to talk about my new obsession… yogurt!

My husband will tell you that I go through “food phases,” where I’m obsessed with something for about two weeks and then I never want to eat it again ever. He dreads that some day one of my food phases will include something he loves dearly, and then he’ll never get to have that food again. What can I say? It’s possible!

yogurt

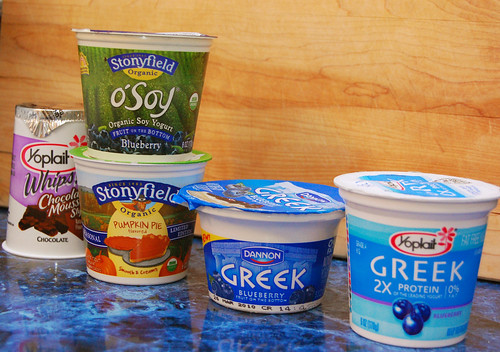
We’re about one week in to my obsession with yogurt. I saw a post from Cookie Madness that mentioned a cool new yogurt, and it really resonated with me. I ran right out to a huge grocery store I don’t usually go to, and it was a mecca for yogurt… so many flavors and kinds, all invitingly arranged. I stocked up on Yoplait Greek Blueberry Yogurt, Stonyfield Organic Pumpkin Pie Yogurt – Limited Edition, Chobani Greek Yogurt, Stonyfield Soy yogurt and others. I don’t know what to tell you.. it was a yogurt frenzy.

So far I’ve loved pretty much all of them. The only one I didn’t like (at all) was Yoplait’s Whips – Chocolate Mousse Silk. I guess I want my chocolate to taste like chocolate, and not sour yogurt!

I’d never had greek yogurt before, and if you haven’t had it you’re truly missing out. I think there are a lot of misconceptions about what greek yogurt actually is, however.

Greek yogurt is, simply, yogurt that has been strained. You know how sometimes you open a cup of regular yogurt and there’s that watery film on top? That’s an example of not strained. To strain the yogurt they use some kind of filter or cheese cloth which removes the whey (whey or milk plasma is the liquid remaining after milk has been curdled and strained). So greek yogurt has a similar taste to regular yogurt, but it’s thicker – like the consistency of sour cream. Also because it’s strained it’s allowed to make claims like “2x the protein,” because it’s more condensed.

But is it healthier? Pretty much. You’ll find less artificial ingredients, additives and sugar in greek yogurt. And since it’s more condensed, it actually fills you up a little better. Unless the thought of thick, creamy yogurt is really off-putting to you… I strongly advise you run to the grocery store and engage in a yogurt buying frenzy of your own!

Pop quiz: what ingredient do you use most often?  Onions?  Pasta?  Salt?  I have a feeling it’s probably oil; olive, peanut, take your pick.  There is rarely a recipe in one’s repertoire that doesn’t pair heat with oil (I suppose baking is the most notable excepting with butter taking the crown).  Oh, oil, how we love you.

Working with cooking oil isn’t a particularly complex area of the cooking process.  Sautéing, roasting; it’s all just lubrication with a subtle touch of taste.  I do feel a little constrained at times when I want to do something with finer control.  Ever see those purtty photographs of soup with the broken circle of oil on top?  Or maybe you just want to throw some veggies on a baking pan, coat them a little and roast.  I have a difficult time getting an even spread with the bottle it comes in (especially if it’s a large one), so I moved my olive oil to a squeeze bottle.  The smaller spout and squeeze-ness (technical term, for reals) allows me much more control.

I used a frosting bottle leftover from a Drop In & Decorate event I hosted, but any kind would work; one of those condiment bottles you’d find at most restaurants, for example.  Just be sure there’s a tight seal or you’ll find yourself with an oily mess.  Of course, there’s also dressing bottles, but I prefer to use that just for my really good olive oil.

Kitchen Tips – Melting chocolate

Creeping up on Valentine’s Day weekend, I’d like to give a little love to chocolate. Melting chocolate can be tricky, but it doesn’t have to be.

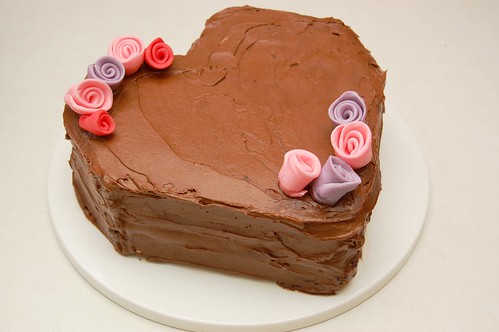
blackberry yellow cake with chocolate frosting and fondant flowers
photo from last year’s Valentine’s post – Heart-Shaped Blackberry Yellow Cake with Chocolate Buttercream Frosting, Blackberry Filling and Fondant Flowers

Basics

  • Don’t add water when trying to melt chocolate, it can cause it to turn stiff and grainy.
  • Chop chocolate in to smaller pieces to expedite the melting process.
  • The less time the chocolate spends over heat, the better. Take your chocolate off the heat early and stir continuously until it’s fully melted.
  • Stir your chocolate while it’s over heat as well; never leave the room while melting chocolate, or you may return to a clumpy, grainy, scorched mess.
  • Microwaving

  • If microwaving chocolate to melt, microwave in a microwave-safe bowl for as little as 5-10 seconds at a time. Remove the bowl carefully, stir and repeat process. Remember to stop microwaving when it’s almost fully melted, and just stir continuously until it’s ready rather than overheat.
  • Make-shift Double Boiler

  • Using direct heat on a stove? Why not instead try creating a double boiler effect. Place 2 inches of water in a small pot, bring it to boil and set a slightly larger pot on top of the pot with water. Add the chocolate to this top pot and stir constantly, removing it from the heat source when possible.
  • In an Emergency

  • Only as an emergency measure, if the chocolate starts to look a little lumpy and questionable, add a small amount of solid shortening (1 tablespoon solid vegetable shortening for each 6 ounces of chocolate you are melting).
  • Happy Chocolate Day!
    brought to you with help from Hershey’s.

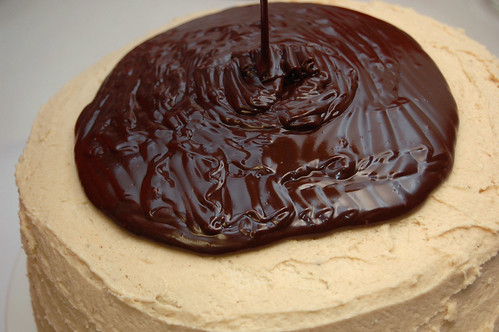
    Chocolate Glaze Pour
    photo from our post, A Labor of Love: Peanut Butter and Chocolate Triple Layer Cake, In Memory of Jeff

    Kitchen Tips – Just in Time! Oven Baked Wings Super Bowl Tip

    Apparently, Baking Powder Makes for Better Oven-Baked Wings! Let’s try this out!

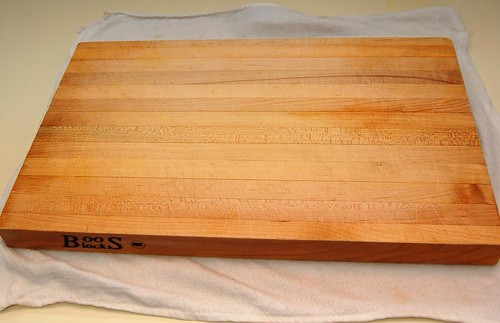
    One that really drives up the Edwin-Annoyance factor in the kitchen is when my cutting board won’t hold still. Not only is it annoying (return to me!), but it’s also unsafe. Fortunately, there’s an easy solution to this. If you find your cutting board slipping, simply put a damp towel under it. This can be a paper towel or a regular cloth dish towel you most likely have in the kitchen. This will ensure you a more satisfying and safe cutting experience.

    Prevent Your Cutting Board From Slipping

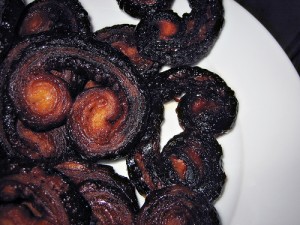
    Kitchen Tips – Save Those Burnt Cookies!

    It’s that time of year again: the holidays!  Christmas, Kwanzaa, Hanukkah, BAKE-A-THON….  The smell of baked goods is in the air!  Few things suck more than taking a fresh batch of cookies out of the oven only to discover, *gasp*, the cookies are burnt!  (funny story, my mom use to always burn the biscuits ever so slightly so we called it her Trademark.  she did not appreciate that as much as the rest of the family)

    The artistic side of burning sadness.

    The artistic side of burning sadness.

    Fear not, loyal readers, DinnerCakes is here for you with today’s Kitchen Tip.  All you need to remedy this terrible tragedy is a microplane grater and faith.  For cookies that are only slightly burnt or simply over browned you can gently grate away all that bad stuff.  This works best with your non-chunky cookies (like sugar), but is always worth a shot.

    Ok, these probably can't be saved

    Ok, these probably can't be saved

    There, you are now ready for the all that the holidays can throw at you (ha!).  Go forth and bake!

    Kitchen Tips – No More Peeling Potatoes!

    So this video is a little silly, but the tip within it is a fantastic time-saver. I was shown this video over the Thanksgiving holiday (yep, after I’d peeled all those potatoes). I haven’t had a chance to try it myself yet, but I am looking forward to it. Have any of you tried this before?

    Deglazing 101 – Little Pieces That Pack A Punch

    On Monday I briefly mentioned deglazing, but I didn’t really talk about what it was or why you’d do it.  Deglazing is a technique for removing dried, burnt bits of food from the bottom of a pot or pan.  The process is fairly simple.  You take a small amount of liquid (half a cup or more) to the pan while it’s still hot to boil those pieces off along with scraping with a metal or wooden utensil.  Eventually you’ll be left with a dark, somewhat thick “juice” and a slightly cleaner pan.

    This may seem a bit odd for someone who’s never heard of it.  Ordinarily, we associate burning with bad taste and something to be avoided.  Deglazing, however, has the effect of extracting strong flavor from this otherwise-useless cooking by-product.  They often serve as the foundation for gravies and pan sauces; a thinner kind of sauce (those bits are often called “fonds”, French for “base” or “foundation”).  They can add a stronger presence of flavor richness.

    Deglazing is often done after sauteing or searing beef or chicken in non-non-stick pan (is there a better way to say that?).  You can’t really get much deglazing with non-stick, unfortunately, or it wouldn’t really be doing its job.  Next time you’re watching a cooking show, check out the hardware.  Many chefs value this culinary ambrosia and therefore prefer non-stick.  Roasting pans are also excellent candidates for this, albeit a bit more difficult to work with.  Any liquid can be used, though the most common choices are water, stock and wine.  Of course, if the liquid has flavor it will effect the end result of your sauce base, so take a moment before making your decision.  Often, for example, you’ll see red wine being used with beef-based dishes.

    So, next time you’re looking down at a blacked pan in disgust, remember the power of deglazing!

    Kitchen Tips – Make Those Jack-o’-Lanterns Last!

    Pumpkins are primarily made up of water. Once you carve them and they start to lose their moisture, they unfortunately start to rot!

    boo

    Ehow.com has a great article on prolonging your pumpkin’s life. Here’s what you do:

    Step 1 – Clean pumpkin with washcloth and remove dirt. I also use a anti bacterial gel on mine. Carve it as usual.

    Step 2 – Apply a Vaseline jelly type product everywhere you cut. Line it along the inside and the face cut outs. This will help keep moisture in and bacteria and heat out.

    Step 3– When you are not using them (at night) wrap in Saran Wrap and place in a cold area. Your fridge will work fine. Take it out the following morning and remove wrap and place back on your porch.

    Repeat as often as you need. Never wipe off the jelly. It helps prolong the life of your pumpkin. I slather mine on well and re-apply after 2 days. Get a lot!

    And if you want more pumpkin fun, check out some Hershey’s Pumpkin Stencils, advanced stencils (including stencils to carve Twilight characters.. I’m not kidding) and brush up on your Jack-o’-Lantern traditions and history with a Wikipedia article.