Breaking Mom's Rules to Make "Dad-approved" Blueberry Lemon Loaf

My dad does not eat red meat.

He doesn’t eat real cheese, eggs, butter, or anything that was baked in a pan greased with Crisco, either. So when he called yesterday and asked if anything I was bringing home for Thanksgiving was “dad-approved,” I got a little quiet.

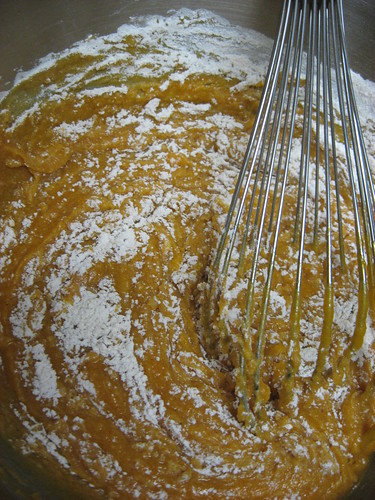
 "Dad-approved" Blueberry Lemon Loaf - Gradually Adding Flour Mixture

Then I remembered a recipe I saw on Smitten Kitchen a few months ago for Lemon-Blueberry Yogurt Loaf. I knew that my dad would love it… if it wasn’t for the whole-milk yogurt, three eggs and oil.

One of the first rules of holiday baking I learned from my mom was to always use fresh, high-quality ingredients. I’m not sure that Egg Beaters and fat free yogurt comply with this rule, but I had to try!

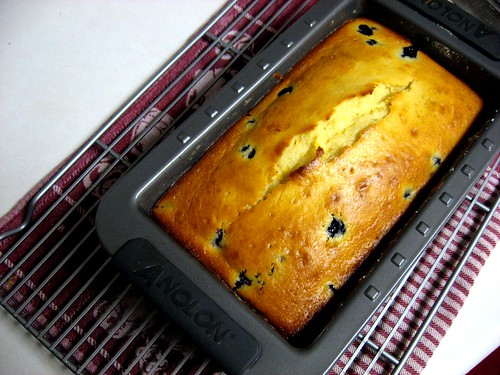
 "Dad-approved" Blueberry Lemon Loaf - Cool in the pan

Egg Beaters have no fat or cholesterol, and they’re made with real eggs. The egg whites are separated from the yolks and combined with vitamins and thickeners. In some recipes you may not even notice a difference, in others a lot could change. I replaced the whole-milk yogurt with a combination of Stonyfield Farm’s organic, fat free plain and lotsa lemon yogurt. I also used Smart Balance Omega Oil in place of canola or vegetable oil.

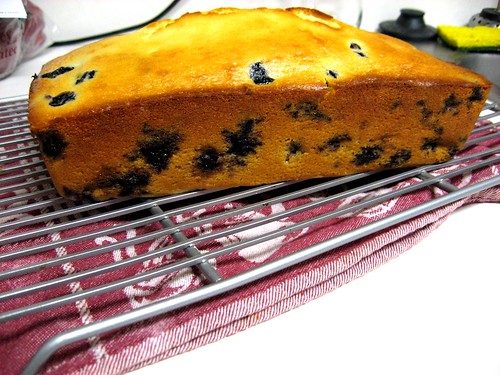
My blueberries sank a little bit, but I think if I had been more cautious while pouring the batter into the pan I could have avoided some of this. In any event, the result was an incredibly moist cake bursting with tart lemon flavor. Hopefully dad feels the same way!

 "Dad-approved" Blueberry Lemon Loaf - Cool Completely

“Dad-approved” Blueberry Lemon Loaf
Adapted from Smitten Kitchen

1 1/2 cups + 1 tablespoon all-purpose flour
2 teaspoons baking powder
1/2 teaspoon kosher salt
1/2 cup plain, organic, fat-free yogurt
1/2 cup lotsa lemon, organic, fat-free yogurt (I used Stonyfield Farm)
1 cup plus 1 tablespoon sugar
3/4 cup Egg Beaters (1/4 equals about 1 egg, but check your label)
2 teaspoons grated lemon zest (approximately 2 lemons)
1/2 teaspoon pure vanilla extract
1/2 cup Smart Balance oil
1 1/2 cups small blueberries, fresh or frozen, thawed and rinsed
1/3 cup lemon juice

Preheat the oven to 350 degrees F and spray your loaf pan with Smart Balance cooking spray. Line the bottom with parchment paper and spray again.

Sift 1 1/2 cups flour, baking powder, and salt into a medium bowl. In a large bowl whisk yogurt, 1 cup sugar, Egg Beaters, lemon zest, vanilla and Smart Balance oil. Whisk the dry ingredients gradually into the wet ingredients. Rinse blueberries in a small bowl and mix with 1 tablespoon of flour. Gently fold the blueberries into your batter so that they do not burst.

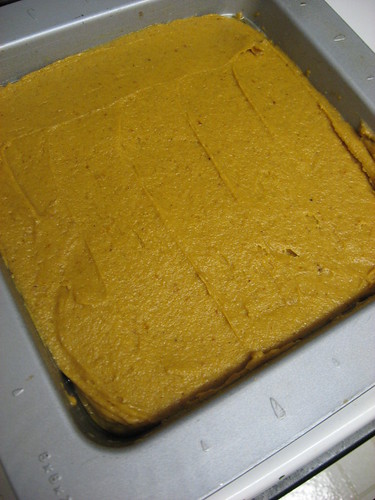
Pour batter into loaf pan and bake for about approximately 55 minutes, or until a toothpick inserted in the center comes out clean. Note that using Egg Beaters may increase your cook time a little.

While the loaf is baking, combine 1/3 cup lemon juice and 1 tablespoon sugar in a small pan on your stove until the sugar dissolves. Set pan aside.

Cool your loaf for 10 minutes before flipping out onto a wire rack. Lay a pan underneath the wire rack and poke a few small holes in the loaf using a toothpick – pour the lemon and sugar mixtures over the loaf while it’s still warm.

Cool completely and wrap tightly.

From the moment Edwin and I saw this cake, we knew it was always our destiny to bake it.

And its creation had special meaning for me. I first learned of this cake a few months ago from mine and my husband’s friend Jeff. Jeff found the cake on Smitten Kitchen and demanded that we spend a day baking and gorging ourselves on it. He found out a few weeks after this that the cancer he’d had for two years was terminal, but he had such an incredible attitude that he just continued making plans for things he wanted to do, see and eat. Making this cake together remained on the top of his list.
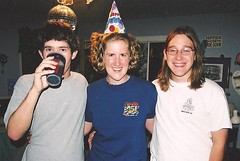
young jeff, heather, morganold morgan, heather, jeff

Unfortunately things went down hill incredibly fast, and my husband, Morgan, and I were with Jeff when he died in mid-September. The three of us had been friends for a long time; he was the best man in our July wedding, one month before he found out he was terminal and two months before he died. I think there may always be a hole in our lives and in our hearts where he was.
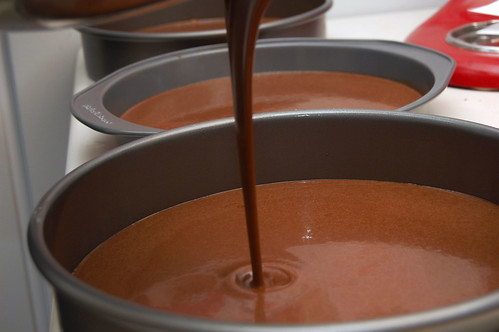
Pouring the Batter

A few weeks ago Edwin sent me a link for this cake. I thought about the plans I had to make it with Jeff and I hesitated. Then I remembered how after Jeff’s death, at his request, we had thrown a celebration of his life where each of his friends either brought over a dish they had shared with him or some food that he loved. I realized that making this cake with Edwin was probably an excellent way to honor my friend and celebrate the things he loved most – food and friends.
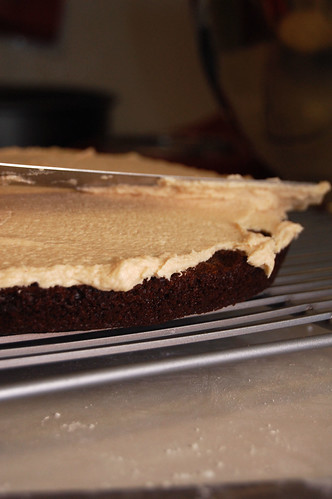
Spreading Closeup

For the First Time on DINNERCAKES, Edwin and Heather Unite:

Thus, Edwin and I set a date and embarked on what we both knew would be a challenging journey. The elusive sour-cream chocolate cake with peanut butter frosting and chocolate-peanut butter glaze had been taunting us to bake it for quite a while.

The result – “This might be the best cake I’ve ever had,” crowed Edwin.

Even Morgan agreed, who can usually take or leave cakes. Nothing was overpowering about the cake, and although it may appear dense in photos, it’s actually very light and incredibly moist.
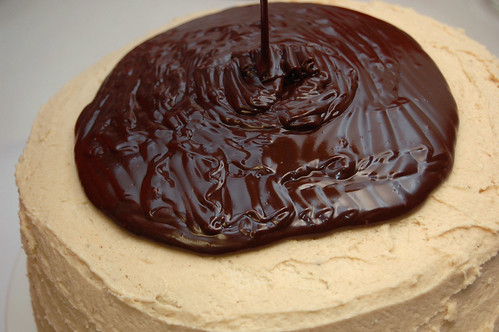
Chocolate Glaze Pour

However, it is extremely rich. A cold glass of milk is vital for the prevention of a sugar-induced coma. This beauty of a cake packs away 2 ½ cups of sugar in the cake batter and 5 cups of confectioners’ sugar in the frosting. If you have diabetes or a heart condition, this cake is not for you!

But now that all is said and done, our dream cake has been enjoyed and divvied up between us, and we’ve exceeded our sugar quota for the entire week, we can’t think of a better way to kick off Thanksgiving week and the holiday season than to share this amazing recipe.
Chocolate Peanut Butter Cake - So GoodThe First Cut - Chocolate Peanut Butter Cake

Edwin and I are thankful for good friends, good food and good times past and present. And I am thankful that, although I did not get to make this cake with Jeff, I was able to share so many other wonderful memories with him.

Hope this beautiful cake kick-starts your Monday! Happy Thanksgiving week from Dinnercakes!
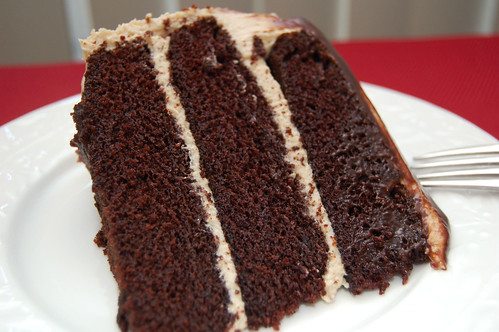
Perfect Slice - Chocolate Peanut Butter Cake

Peanut Butter and Chocolate Triple Layer Cake
Sky High: Irresistible Triple-Layer Cakes
2 cups all-purpose flour
2 1/2 cups sugar
3/4 cup unsweetened cocoa powder, preferably Dutch process
2 teaspoons baking soda
1 teaspoon salt
1 cup neutral vegetable oil, such as canola, soybean or vegetable blend
1 cup sour cream
1 1/2 cups water
2 tablespoons distilled white vinegar
1 teaspoon vanilla extract
2 eggs

Preheat the oven to 350 degrees F. Butter the bottoms and sides of three 8-inch round cake pans (we used three 9-inch rounds so our cakes came out a little thinner). Cut three rounds of parchment paper to line the bottom of each pan; butter the parchment paper.

Sift flour, sugar, cocoa powder, baking soda, and salt into a large bowl. Whisk to combine. Add in oil and sour cream; whisk to blend. Beat in water gradually (we used a stand mixer, but you can also use a whisk). Add vinegar and vanilla. Beat in eggs until well blended. Scrape down the sides of the bowl to ensure batter is well-mixed. Divide evenly between 3 prepared pans.

Bake for 30 to 35 minutes, or until it passes the toothpick test. Cool in the pans for 10-20 minutes. Turnout onto wire racks, carefully peel off the paper liners, and firm them up in the freezer for 30 minutes.

To frost, place one layer flat side up on a cake stand or serving plate. Spread Peanut Butter Frosting evenly on top, repeat with the next layer. Place the last layer on top and frost the entire cake with a thin layer of frosting – you are going to make a crumb coat; this part is crucial (a crumb coat keeps crumbs from showing up on your final layer of frosting).

Put the cake (with a thin layer of the peanut butter frosting all over) back in the freezer for 20 minutes. The frosting will now be somewhat firm on the cake, now you can use the remaining frosting to cover the entire cake, without a crummy mess! When fully frosted, you may want to chill again for 10 minutes.

To decorate with the glaze, set the cake plate on a sheet of parchment paper to catch drips. Pour the glaze directly over the center of the cake, and using a spatula, spread it lightly over the top and to the edges so that it falls down the sides in large drips. To set the cake, you may want to refrigerate it again when you’re done. Edwin and I didn’t make it that far and instead we chowed down immediately.

Peanut Butter Frosting
1
0 ounces cream cheese, room temperature
1 stick (4 ounces) unsalted butter, room temperature
5 cups confectioners’ sugar, sifted
2/3 cup smooth peanut butter, preferably a commercial brand (because oil doesn’t separate out)

Beat the cream cheese, butter and peanut butter until light and fluffy in a large bowl with a mixer. Add the confectioners’ sugar gradually, mixing thoroughly and scraping down the sides of the bowl often. Continue to beat until blended, about 3 to 4 minutes.

Chocolate-Peanut Butter Glaze
8 ounces semi-sweet chocolate, coarsely chopped
3 tablespoons smooth peanut butter
2 tablespoons light corn syrup
1/2 cup half-and-half

I didn’t have a double boiler, so we used to the microwave method, heating for 15 seconds at a time and stirring after each 15 second interval. If you do have a double boiler or a metal bowl that you can set over simmering water, combine the chocolate, peanut butter, and corn syrup. Cook while whisking often until the chocolate is melted and the mixture is smooth. Last, remove from the heat, whisk in the half-and-half and beat until smooth. Pour over the cake while still warm.

The Cake That's Not A Cake – Pumpkin Cake with Honey Frosting

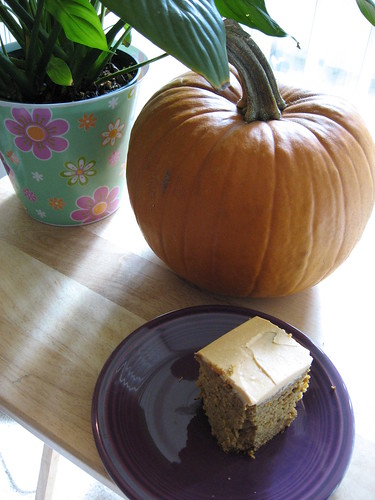
Well, this cake lied to me! It claimed to be a pumpkin cake with honey frosting, but soon after I began working on it I grew skeptical.

The batter was thick, even leveling it out in the pan was a little tricky. But as I tried my first bite it just seemed so familiar. I raced over to my recipe binder and began thumbing through the pumpkin recipes. It turns out this recipe is only one or two ingredients different from my favorite pumpkin BREAD recipe.

Pumpkin Loaf with Honey Frosting, Whisking

This really is a quick bread with frosting. It’s very heavy and dense, so make sure you serve it in small squares! This would actually be an amazing treat to have with your coffee in the morning and would serve that purpose much better than having it after dinner when you’re already full. In fact, I found some incredibly cute photos from someone who used the original Martha Stewart recipe to bake mini cupcakes. Bite size is the way to go here.

Ghost Baker Suggests Proceeding With Caution:

Beware the cook time. I used a square 8 inch pan because I don’t have a 9 inch, and I had a bit of a scare when I peeked into the oven at 55 minutes and the cake looked completely done. It had pulled away from the edges of the pan and was dark brown in the center and edges. I left it in for 5 more minutes but then became worried I was overcooking it. I did the knife test since I didn’t have any toothpicks, and it came out clean. But this time the knife lied to me. I poked at the center and it seemed a little squishy – it turns out the cake was like a pool that has a thick cover over it for the winter and I threw it back in the oven! To avoid this problem I would just try treating it like a bread and using a loaf pan (or, approximately 15 minutes for mini cupcakes and 25 for regular cupcakes).

Pumpkin Loaf with Honey Frosting, Leveling

I also used pumpkin cream cheese for the frosting instead of regular cream cheese. This gives the cake and the frosting some nice continuity, and it worked well with the honey.

And, woo hoo, you can make this recipe without any fancy gadgets – no stand mixers, food processors, pastry knives, etc. Dust off your whisk and wooden spoon!

Pumpkin Loaf with Honey Frosting, Chowing

Pumpkin Loaf with Honey Frosting
adapted from Martha Stewart
Prep: 25 minutes, Cook: Approx 1 hour and 20 minutes (when using a loaf pan)

CAKE INGREDIENTS
1/2 cup (1 stick) unsalted butter, melted, plus more for pan
2 1/2 cups all-purpose flour (spooned and leveled)
2 teaspoons baking soda
1/2 teaspoon salt
1 tablespoon pumpkin-pie spice (or 1 1/2 teaspoons cinnamon, 3/4 teaspoon ginger, 1/2 teaspoon nutmeg, and 1/8 teaspoon each allspice and cloves)
2 large eggs
1 1/2 cups sugar
1 can (15 ounces) solid-pack pumpkin puree

HONEY FROSTING
1/2 cup (1 stick) unsalted butter, very soft
1 bar (8 ounces) reduced fat pumpkin cream cheese, very soft (or you can use regular)
1/4 cup honey

Preheat oven to 350 degrees. Butter your loaf pan.

In a medium bowl, whisk together flour, baking soda, salt and pumpkin-pie spice. In a large bowl, whisk together eggs, sugar, butter (melted), and pumpkin puree until combined. Add the dry ingredients to pumpkin mixture and mix gently until smooth.

Turn batter into prepared pan and level the top using a thin spatula. Bake until a toothpick inserted in center comes out clean, approximately 1 hour and 20 minutes.

Cool for 10 minutes while in the pan, then turn out and cool completely (right side up) on a wire rack.

To make the honey frosting – In a medium bowl, whisk softened butter, softened pumpkin cream cheese and honey until smooth and pale orange. Spread over cooled pumpkin loaf. Cut loaf into sliced to serve.

*If you prefer to use a square 9 inch pan, decrease baking time to approximately 50 minutes.

Zucchini Bread, A Fall Treat

Gold of a ripe oat straw, gold of a southwest moon,
Canada thistle blue and flimmering larkspur blue,
Tomatoes shining in the October sun with red hearts,
— Carl Sandburg, “Cornhuskers,” Falltime (1918)

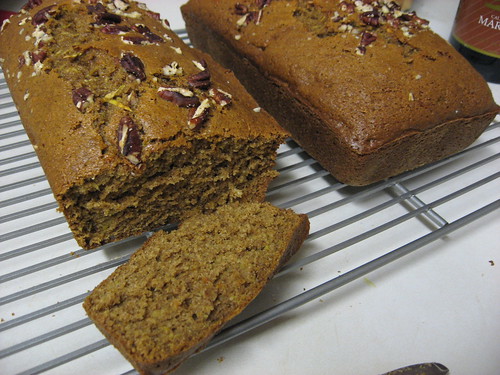
I never had zucchini bread until last fall, but it was love at first sight. Zucchini and pumpkin are brothers.

Zucchini Bread

Though I’ve noticed many people seem to make bread to get rid of extra zucchini, I really just love the taste of zucchini bread! Despite being a summer squash it’s a perfect complement to fall recipes including butternut squash, stew, or turkey. And I appreciate any opportunity I have to combine cinnamon and cloves!

Everyone has their own taste as to how they like their quick bread – moist, nutty, rich, etc., but you want something that won’t dry out immediately. I have two recipes that I like to work with, the first one is a Betty Crocker zucchini bread (which can also easily serve as pumpkin bread by substituting 1 can of solid packed pumpkin for the zucchini), and the second one is a more adventurous recipe from 101 Cookbooks.

Zucchini Bread

Moist and Aromatic Zucchini Bread – Because For Ghost Baker, Fall is just Beginning:

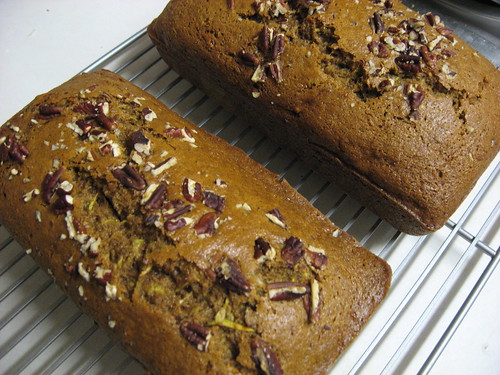
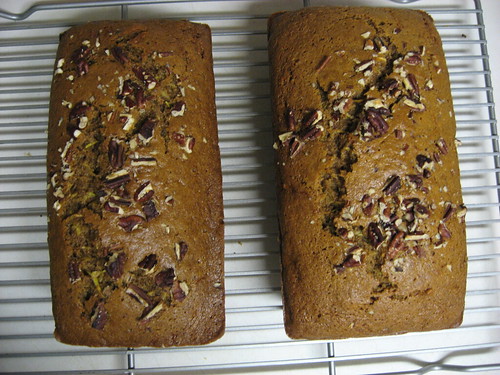
You can find thousands of versions online and in cookbooks of certain dishes, so when I find two that I like I try to see how I can combine them and what I can learn from each. The Betty Crocker recipe is great because of its similarity to pumpkin bread, using cinnamon and cloves, and it’s versatility. However the cook time is a little off. I baked my loaves for 60 minutes as suggested and they came out just a little too done. 101 Cookbooks suggests slightly undercooking the loaves because they will continue to cook while cooling after being taken out of the oven. As with anything you bake, it’s always a good idea to keep an eye on things towards the end of the cook time (If you click on our Flickr photo stream, the first photo in the zucchini bread series is from the time I used just the 101 Cookbooks recipe; you’ll see it comes out dense and the cook time was perfect).

I also like to grate my zucchini, including the skins, a little more finely. Make sure you drain them so that your loaves don’t get to watery. You want your batter to be relatively thick.

And if you think I enjoy Zucchini Bread, just wait for my Aunt Sue’s Pumpkin Bread recipe!

Zucchini Bread

Zucchini Loaves
adapted from Betty Crocker and 101 Cookbooks

3 cups grated zucchini, including skins
1 2/3 cups sugar
2/3 cup vegetable oil
2 teaspoons vanilla
4 large eggs
3 cups whole wheat flour
2 teaspoons baking soda
1 teaspoon salt
1 teaspoon ground cinnamon
1/2 teaspoon ground cloves
1/2 teaspoon ginger
1/2 teaspoon baking powder
1 1/2 cups coarsely chopped walnuts

Move oven rack to the low position so that tops of pans will be in the center of the oven. Preheat your oven to 350 F. Grease two 8×4 inch loaf pans and sprinkle lightly with flour.

In a large bowl, combine zucchini, sugar, oil, vanilla and eggs and mix. Stir in remaining ingredients leaving out nuts. Once incorporated, add the nuts leaving out a handful to be sprinkled on at the end – do not overmix your batter.

Divide the batter evenly between the two pans. Use a rubber spatula to level the batter. Sprinkle remaining nuts on top of the batter.

Bake for approximately 40-45 minutes. Cool 10 minutes in the pans on a wire rack. A toothpick inserted in the center should come out clean.

Loosen sides of the loaves from the pans and remove from pans, placing the loaves top side up on a wire rack. Cool completely, about 2 hours, before wrapping tightly (if you wrap your loaves before they cool completely, you’ll get mold!). After wrapping, store at room temperature up to 4 days, or refrigerate up to 10 days.

Prep: 15-20 minutes, Bake: 45 minutes, Cool: 2 hours
Makes 2 loaves, or about 24 slices each.

Chocolate Pumpkin Cheesecake Brownies

Next week my husband is beginning a new career that he’s very excited about, and he asked me to bake something to take in to his office as he says his good byes. I sent him a few recipes to choose from, including 101 Cookbooks’ Amazing Black Bean Brownie Recipe that I’ve been dying to try, but Morgan wasn’t having any of it. He said he wouldn’t want them to think, “Who’s this crazy guy bringing in brownies made of beans? We’re glad he’s leaving!

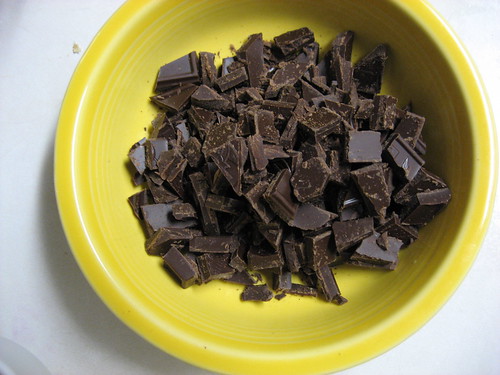
Chocolate Pumpkin Cheesecake Brownies, Chopped Chocolate

Back to the drawing board!

I can’t really argue with him – office culture is not the most welcoming environment for exotic new recipes. In fact, people in general can be incredibly wary of trying new things (I should be looking in the mirror as I say this; I’m sure Morgan will be incredulous that I’m even suggesting that I’m outside this category).

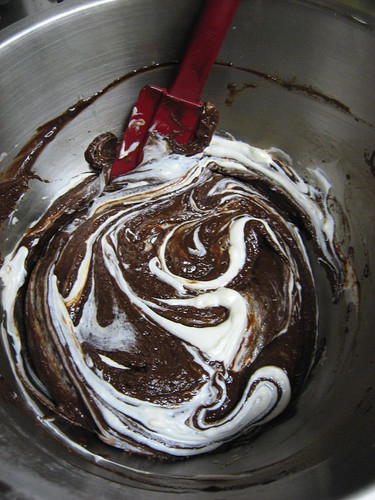
Chocolate Pumpkin Cheesecake Brownies, Adding Cream Cheese to the Chocolate Batter

I remember a number of birthday parties growing up where my mom would amass enough food to feed an army, an assortment of all my favorite things including an amazing sherbert punch. But the sherbert punch contained a lot of different ingredients along with scoops of rainbow-flavored sherbert that would float to the top – this was clearly not Kool-Aid. And so the punch would go untouched. Hmpf, kids!

But I just couldn’t bring myself to make a chocolate chip cookie or basic brownie recipe this week. This week is different! Historic and amazing things have happened in my home state of Virginia and across the country. Electricity is in the air. If anything is possible, then maybe Morgan’s office will accept something ever so slightly off the beaten path?

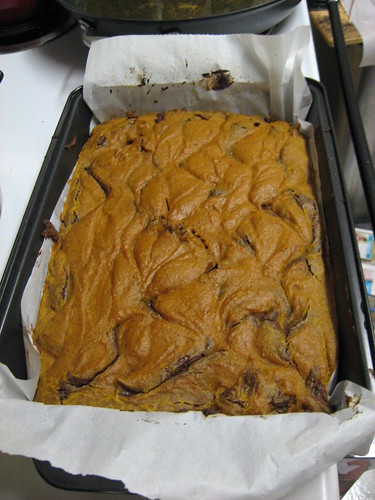
Chocolate Pumpkin Cheesecake Brownies, Fresh out of the Oven

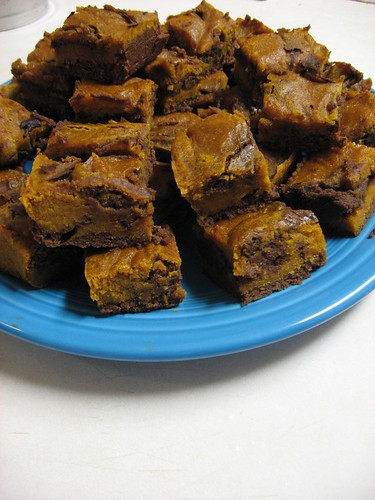
I kept coming back to two recipes: Chocolate-Pumpkin Brownies from RecipeGirl.com and Pumpkin Swirl Brownies from Smitten Kitchen (though I have to be honest, even I am almost pumpkined out for the season). The RecipeGirl brownies looked more chocolatey and had less pumpkin and pumpkin spices, and the Smitten Kitchen recipe looked great but Deb seemed a little unsatisfied. I decided to compromise and try to incorporate the best of both pumpkin brownie worlds.

Chocolate Pumpkin Cheesecake Brownies

Ghost Baker’s verdict and suggestions for an irresistible medley of chocolate and pumpkin:

Deb at Smitten Kitchen said she kept wishing her brownies were either all chocolate or all pumpkin and the RecipeGirl brownies looked more chocolate than pumpkin. I tried to change the recipes so that one taste might slightly overpower the other. Being that I love pumpkin, I added a whole can of pumpkin along with cloves and more nutmeg. Sometimes I think brownies run the risk of being a little bland, but adding the extra spices really kicked them up a bit. I liked them even better after they set overnight.


Deb also described her chocolate batter as being too thick. To smooth it out and make it more pourable I included 1/2 cup of cream cheese. It was certainly not as thin as the pumpkin batter, but it did help.

I also used a 13×9 pan to keep the brownies from being too enormous and thick.

Update – Success! Morgan said these brownies were scarfed down at his office in no time.

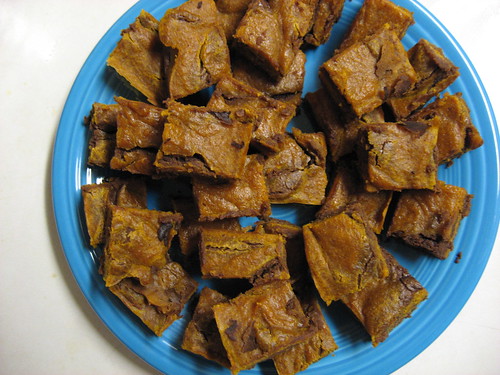
Chocolate Pumpkin Cheesecake Brownies, Chow Down

Chocolate Pumpkin Cheesecake Brownies

adapted from Smitten Kitchen and Recipe Girl

1 stick unsalted butter, room temperature

6 oz bittersweet chocolate, chopped

2 cups all-purpose flour

1 teaspoon baking powder

1/8 teaspoon cayenne

1/2 teaspoon salt

1 1/2 cups granulated sugar

4 large eggs

1 tablespoon pure vanilla extract

1 can solid-pack pumpkin

1/4 cup vegetable oil

1 teaspoon ground cinnamon

1/2 teaspoon ground nutmeg

1/2 teaspoon cloves

1/2 cup cream cheese, softened

Preheat your oven to 350 degrees. Grease a 13×9 baking pan and line the bottom and two sides with parchment paper. Grease the paper as well.

Melt chocolate and butter in a microwave safe bowl for 50 seconds; stir to incorporate fully.

Whisk together flour, baking powder, cayenne, and salt in a large bowl. Set aside. Combine sugar, eggs, and vanilla in the bowl of a stand mixer (or use a hand held mixer if you don’t have one). Beat until fluffy and pale yellow, approximately 3 minutes. Beat in flour mixture in two parts.

Pour half of your batter(about two cups) into a separate bowl and stir in the chocolate mixture. Add the softened cream cheese and stir unti combined.

In the other bowl, stir together pumpkin, oil, cinnamon, nutmeg and cloves.

Transfer half of your chocolate batter to the prepared pan and smooth and level with a rubber spatula. It will be relatively thin. Top with half of the pumpkin batter. Repeat with another layer of the chocolate batter followed by the last layer of pumpkin. You have to work relatively quickly to keep the batter from setting.

With a butter knife, marble your two batters – make sure you take the knife all the way down to the bottom of the pan.

Bake approximately 27-30 minutes. Let cool on wire rack, then remove brownies by lifting parchment paper and cool completely on your wire rack.

Makes about 36 brownies.

Red, White and Cupcakes

Happy Election Day! When I thought about what to cook on election day I kept thinking about hot wings and nachos. Unfortunately I seem to associate super bowl food with election food. Maybe it’s apt; I think it will be a battle! In any event I decided to settle for cupcakes.

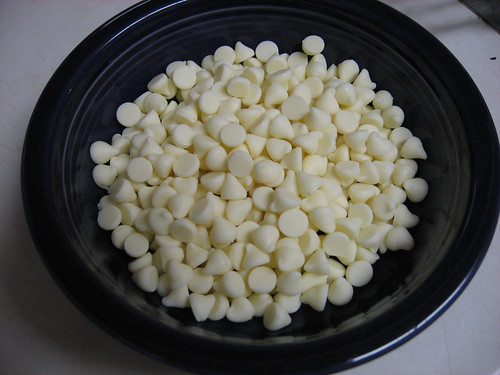
White Cupcakes, White Chocolate Chips

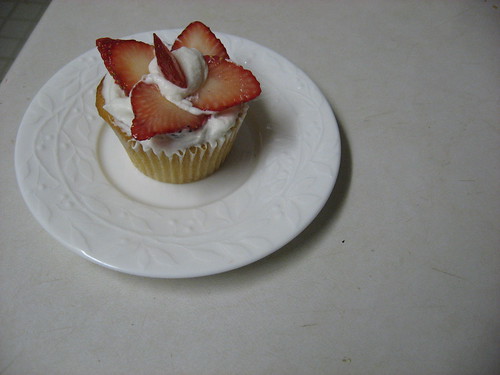
There were probably several points in this recipe where I should have turned back and abandoned ship, but I had a dream of red, white and blue patriotic cupcakes in honor of election day. I wanted white cake, white icing, and a splash of colorful strawberries and blueberries.

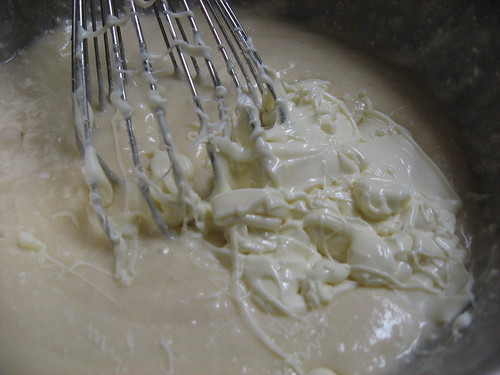
White Cupcakes, Adding White Chocolate to the Batter

While searching for a white cake recipe in my cookbooks, I was surprised to find that I actually owned a book completely about cupcakes called Cupcakes: From the Cake Mix Doctor by Anne Byrn. I knew that using this book would go against one of Edwin’s core values (thou shalt not use box cake mix), but because I was in a pinch for time and I enjoy thwarting Edwin, I went for it.

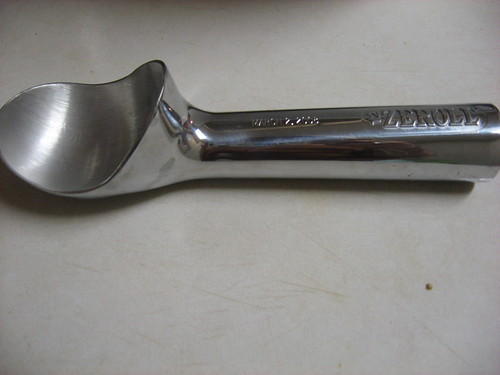
White Cupcakes, Ice Cream Scoop - Gift from my Friends for my Bridal Shower

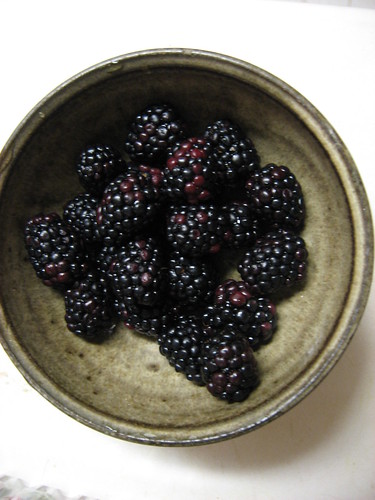
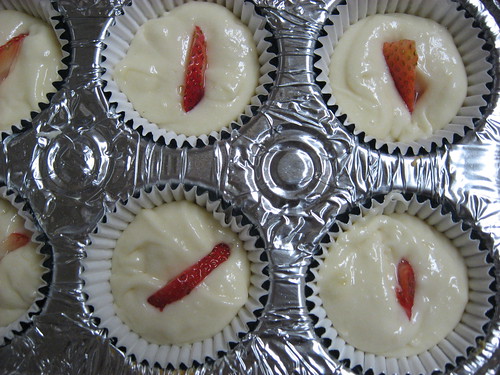
Flipping through the first few chapters I found some neat suggestions including 5 ways to fill a cupcake. One of the suggestions is to place a large berry on top of the batter before baking – fitting nicely with my theme of berries and white cake. I also wanted to trim at least a little fat from this recipe, so I decided to top off the cakes with a dollop of fat free cool whip instead of buttercream frosting – something like mini strawberry and blueberry shortcakes. Unfortunately for me the grocery store had other ideas, and they weren’t carrying very impressive blueberries. But blackberries are just as good, if not better, right?

White Cupcakes, Blackberries

In addition to box cake mix (sorry, Edwin), the batter called for other ingredients such as milk, oil, eggs, vanilla, and white chocolate chips. The white chocolate chips sounded amazing to me as an addition to the batter, but they gave me trouble. I had to work quickly and make sure not to let the melted white chocolate sit, because after only a minute the smooth mixture hardened into large chunks.

White Cupcakes, Use Smaller Slices

Adding a berry to the top of the batter before baking was also problematic. I tried it a few different ways, sometimes hiding a thin slice of strawberry or a blackberry inside the batter and sometimes leaving it on top. The cupcakes with strawberry slices had to cook for an even longer time than the blackberry cakes – approximately 22 minutes. The cook time for all of the cupcakes was a little tricky, and on my very first batch a few of the cakes just completely sunk in the middle.

White Cupcakes, Complete

Ghost Baker’s Tips to Avoid Trouble at the Polls:

Work quickly to avoid having your white chocolate harden and ruin your batter. Make sure it’s fully incorporated into the batter. If you’d like to add a berry filling, stick to either small blueberries or blackberries or just a half berry. Set it gently on top of the leveled batter right before it goes in the oven. Adjust your cook time as needed, but make sure the area around the berry slightly springs back when you touch it lightly after taking it out of the oven. Make sure there are no pockets of uncooked batter.

Red, White and Cupcakes with Berry Filling
adapted from White on White Cupcakes in
Cupcakes: From the Cake Mix Doctor

24 Paper Liners for cupcake pans
1 cup white chocolate chips
1 package white cake mix, extra moist
1 cup milk
1/3 cup vegetable oil
1 large egg
3 large egg whites
1 teaspoon vanilla extract
1 cup blueberries or blackberries (approximately)
1 container of cool whip for frosting

Preheat the oven to 350 and line°F and line your cupcake pans. Set aside.

Place the white chocolate chips in a microwave safe bowl. Microwave on high for 50 seconds. Remove the bowl from the microwave and stir with a rubber spatula until the chips are smooth. Set aside.

Mix cake mix, milk, oil, egg, egg whites, vanilla, and melted white chocolate in a large mixing bowl. Blend with a stand mixer or electric mixer on low for 1 minute, then medium for 2 more minutes.

Using an ice cream scoop or 1/4 measuring cup, scoop batter into your lined cups, filling it approximately two thirds of the way. Level your mix with a spoon. Lay a small berry or half a berry in the center of each cake; do not push down.

Bake approximately 22 minutes, checking after 20 minutes to make sure your cakes don’t burn. They should be light golden brown and slightly firm to the touch. The batter surrounding the berry should not be runny.

Cool for 15 minutes, then top with a dollop of cool whip and decorate with berries as desired.

The Cuter Side Of Halloween (Meringue Ghosts)

I’m normally not one to decorate for decoration’s sake. Part of this is because I suck at the aesthetics. I was not blessed with an overabundance of artistic skill. When it comes to drawing, I peaked at stick men (side note: I did write my own stick man comics in elementary school. it rocked). I’m also more about the food than the presentation. As my dad says, it’s going to look worse on the way out (thanks, dad).

Every now and then I like to flex my puny artistic muscle. Normally this serves a reminder as to why I don’t do this very often. Every now and then, however, things work out. Thursday was one of those days.

Meringue

Like I said before, holidays have great themed culinary conentations. The eyeball cupcakes were a hit at work and I have to say I was quite pleased with these meringue ghosties. I got the idea from a post at 101 Cookbooks.

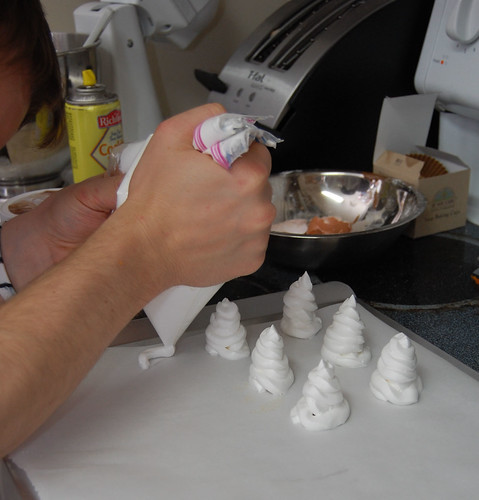
Pipin'

Meringue is a mythical beast for some; myself included. Sometimes it feels like you can do everything “right” and still crash and burn. Because of this I strongly recommend having a can of meringue powder ready in case disaster strikes. With this, you have two options. You can use it as back up or you can just screw from-scratch and follow the recipe on the can. I did the former. My from-scratch attempt was faltering so I added a bit of meringue powder and water. Success!
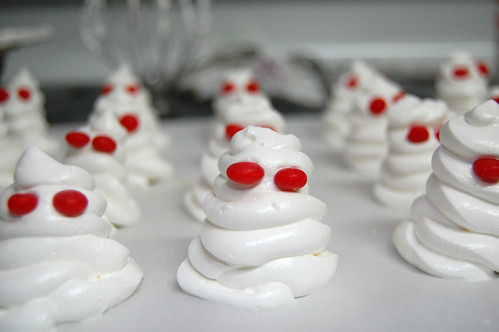
Meringue Ghosties!

Ghost Meringues
adapted from 101 Cookbooks
Two large egg whites, room temperature
Three-finger pinch of salt
1/4 tsp cream of tartar
1/2 cup of confectioners sugar
Meringue powder and water (as backup!)

Cinnamon decorating decors for the eyes

Prepare a baking ban with a sheet of parchment paper and preheat the oven to 250 °F.

Combine the egg whites, salt and cream of tartar into a bowl and, using a hand or stand mixer, mix until frothy. Medium/medium-fast works fine here. At this point set your mixing speed to low and slowly add the confectioners sugar. Add it quickly and you’ll get a nice cloud of sugar dust.

Mix. Keep mixing. Mix some more. You’re going to be mixing for at least 20 minutes; probably more. The volume should increase significantly (double/triple in size) and the consistency should be thick and light. The meringue should form stiff peaks. (somewhere during this stage I concluded I was down the road of failure and started adding meringue powder and water. No measurements on this!)

Once at this point add to a pastry bag or a large plastic bag with a tip cut off and begin piping. I piped these similarly to the way you fill a cone with softserve ice cream. Start with a circle the size you want and keeping narrowing the spiral as you reach the top; eventually reaching a tip. Put two cinnamon decors on each as the eyes.

Put in the oven for 45 minutes. After 45 minutes, poke a “test” ghostie with your finger (should not be too hot, but be careful). It should be fairly solid. If not, leave in the oven for longer. When solid, turn off the heat, open the door a few inches and let sit for 15 minutes. At this point the ghosties should be farily stable and ready.

The Eyes Have It (Eyeball Cupcakes)

Halloween has to be the best “holiday” of the year. Don’t get me wrong; Christmas is cool, Thanksgiving is fun, but Halloween is a free pass to go nuts. Whether you’re one of thousands of girls who take advantage of the one day it’s socially acceptable to tramp it up, an individual who plays out his/her secret fantasy without fear of judgment (furries are people too, or so I’m told), or just someone who likes a little make-believe; this day has something for you. Halloween is the best night of the year to go out. No other day will complete strangers be so open to meet you; so willing to start random conversations.

00065

And then of course, there’s the baking. The great thing about every holiday is the themed baking. There are plenty of ideas out there on Halloween-themed culinary delights and I took full advantage. Last year’s vampire cupcakes were a hit, but here at DinnerCakes we are ever venturing forward; forging new paths. This will be a two-parter, folks. And by two parter, I mean two posts that are Halloween themed. (ok, so I guess that’s not really a two-parter at all. whatev.)

Making the eyes

My friend Lindsey and I were talking, discussing potential works of art to bring to her party and she mentioned recently coming across “eyeball” cupcakes. Doing a quick search on foodblogsearch gave me plenty of examples. Having dabbled in fondant before (sometimes successfully), I decided to give it a shot.

Almost

This is more of a how-to on the decorative process than it is a recipe. For the cupcakes, I used a recipe from Joy Of Cooking (also known as my bible). You could use anything. Like yellow cake? Do that. All about red velvet? Go for it. The world is your oyster (pantry).

They're Looking At Me!

Eyeball Cupcakes (of DOOM!)
Two dozen cupcakes (give or take)
Two pounds of white fondant (this is more than enough, you WILL have leftovers, but this is unavoidable)
Two cups royal icing in a pastry bag or plastic bag with the tip cut off (butter cream also works well)
Red and black icing for veins and pupil, respectively (royal works well, but any icing in a tube at the store will work)
Lifesavers

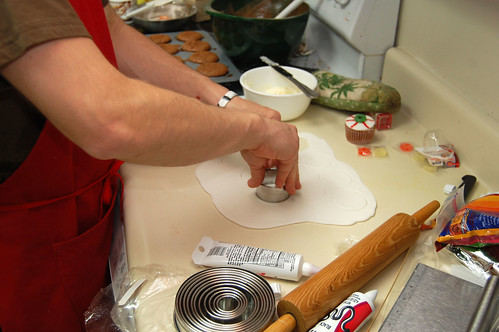
After the cupcakes have cooled, begin working on the fondant. Start with half and work it in your hands; warming it up. When it’s comfortably pliable, set it on a clean working surface to roll it out. Note, some fondant can stick to some (most?) surfaces. Not as big a deal with the small shapes we’re making here (pastry cutter for the win), but you could always dust the surface with corn starch. Roll out your fondant like you would a pie crust; from the center out. Feel the surface of the fondant to see how smooth and even it is. You’re going for 1/4 to 1/8 of an inch thick. This process is really forgiving since you’re going to be making really small shapes. Use a pie cutter of the proper size (or a glass or anything round) to cut the whites of the eyes for each cupcake.

Spread a layer of icing on the top of each of the cupcakes. This is your glue. Glue your eyeball whites onto the cupcakes. Depending on your icing, it might dry somewhat quickly, becoming less awesome in the glue category. You may want to consider only icing half first, gluing on the whites, then continuing with the other half.

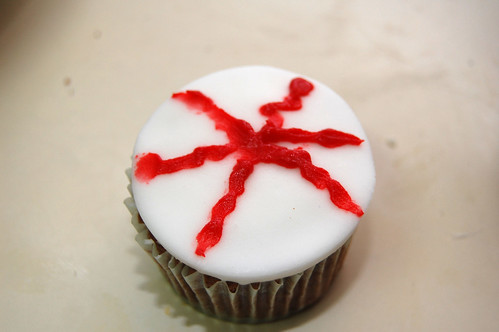
Next, the veins with the red icing. Start from the center, drawing squiggly lines out; as many as you want. Don’t worry too much about how pretty the center is. After you’re done with this, you’ll place lifesavers at the center and dot its hole with black icing.

And then, BAM.

Everything [but the Kitchen Sink] Cookies

My husband and I are journeying to Chicago for Halloween this year (farther west than I’ve ever been, I’ll embarrassingly admit). Last year we hosted a very successful party at our apartment, but because our lives have been a little chaotic for the last few months, we thought a change of scenery might do us some good this year.

Everything Cookies, Fun Ingredients

A bunch of us are converging on a friend’s apartment, and of course I can’t show up empty-handed. Kudos to the other half of DinnerCakes, Edwin, for suggesting this outstanding recipe from Sunday Nite Dinner!

Everything Cookies, Oats and Raisins

Hopefully these cookies survive airport security and are well-received by my friend. And, Kari, if you’re reading this post right now, “Surprise, cookies!”

Everything Cookies, Chips and More Chips

Sweet, hearty, crunchy yet chewy, a buttery cookie smell that takes you back to elementary school, a hint of fruit – these cookies are a breath of fresh air. They call for a flurry of ingredients, but even just measuring them all and getting them together was absolutely heavenly!

Everything Cookies, Tossed

Ghost Baker’s verdict and salty suggestions:

You must make these cookies; how’s that for a suggestion? I really didn’t change anything about the recipe except, following a note at the top, I increased the salt quantity from 1/2 teaspoon to 3/4.

Everything Cookies, Hand Mixing

Because these cookies already include, well, everything, I wouldn’t add any more ingredients. If you like an even more peanut buttery taste (the peanut butter as it stands is subtle, I like it) then swap the measurements of the chocolate chips and peanut butter chips. You could also exchange the walnuts for pecans or, if you really just have to go wild, swap in craisins instead of raisins.

Everything Cookies, Ready to Eat

Everything Cookies
from Sunday Nite Dinner

Ingredients

1 1/2 cups low fat granola
1 cup golden raisins
1 cup old fashioned rolled oats
1 1/2 cups chocolate chips (dark or semi-sweet work well)
1 cup peanut butter chips
1 cup chopped walnuts
1 2/3 cups all-purpose flour
1 teaspoon baking soda
1 teaspoon baking powder
3/4 teaspoon salt
1/2 cup packed dark brown sugar
1/2 cup granulated sugar
1 cup (2 sticks) unsalted butter, cut into small pieces (room temperature)
2 large eggs
1 teaspoon vanilla extract

Preheat your oven to 350°F.

In a large bowl, toss granola, raisins, rolled oats, chocolate chips, peanut butter chips and walnuts; set aside.

In a medium bowl, sift flour, baking soda, baking powder and salt. Then whisk the ingredients together until combined.

In your stand mixer bowl (or another large bowl if you don’t have a stand mixer), combine the granulated and dark brown sugar. Add a few pieces of butter at a time and beat until it’s thick and smooth. Add vanilla and beat in the eggs, one at time. Fold in your flour mixture and beat until fully incorporated. Add the granola, raisins and chips and mix well together by hand (you would probably break your wooden spoon even if you tried).

Using a tablespoon, scoop a hefty 2 tablespoons of dough at a time and roll into 2-inch balls. Place the balls onto baking sheets lined with parchment paper. Space your dough balls approximately 2 inches apart.

Bake until the cookie edges turn golden brown, about 15 minutes. Cool your cookies on the baking sheets for 3 minutes, then transfer onto a wire rack (your mouth works, too). Cool for about 30 minutes, then store in an air-tight container.

This recipe makes about 3 dozen cookies.

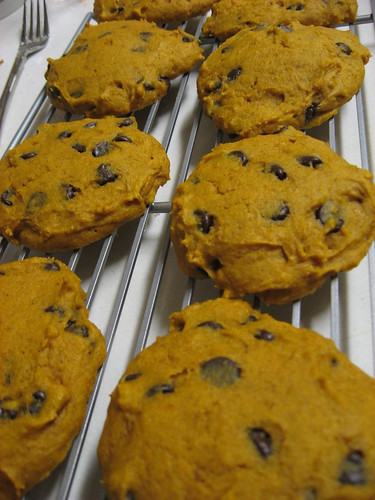
Now THAT'S a Perfect Pumpkin Cookie

Eureka! Joy the Baker has blessed us with the most marvelous Pumpkin Cookie recipe that I’ve tried. This recipe dances circles around the one I tried last week.

Part of the key is flattening and smoothing the dough with a thin metal spatula before baking. At first I thought this step seemed a little odd to me, but having a flatter cookie (still very soft and cake-like) came out so much tastier than the poofy, muffin-like variety.

Also this recipe called for more of your typical pumpkin pie spices such as nutmeg and cloves. It tastes exactly the way delicious pumpkin desserts were meant to!

Pumpkin Cookies, fresh out of the oven

Ghost Baker’s verdict and pumpkin-packed suggestions:

If you like a caramel taste to your pumpkin cookies, then butterscotch chips would be great. I knew from my previous pumpkin cookie attempt that I wanted more chocolate (who doesn’t?). Instead of just 1 cup of chocolate chips, I added an extra 1/2 cup and used bittersweet chocolate chips. I also used a whole can of pumpkin instead of a half can.

Pumpkin Cookies, in an air tight container

Pumpkin Chocolate Chip Cookies
adapted from Joy the Baker

2 cups all-purpose flour
1 1/2 teaspoons baking powder
1 teaspoon baking soda
1/2 teaspoon salt
1 teaspoon ground cinnamon
1/2 teaspoon nutmeg
1/2 teaspoon ground cloves
2 eggs
1 cup sugar
1/2 cup canola or corn oil
1 can pumpkin
1 teaspoon vanilla extract
1 1/2 cups chocolate chips (can also substitute or mix with butterscotch chips, white chocolate chips, etc.)

Preheat your oven to 325 degrees. Prepare two baking sheets with buttered parchment paper.

Combine flour, baking powder, baking soda, salt, cinnamon, nutmeg and cloves in a medium bowl. Set aside.

In a large bowl (or stand mixer), lightly beat eggs and sugar until smooth (about 1 minute). On low, add the oil, pumpkin, and vanilla until blended. Remove bowl from stand mixer and fold in the flour mixture until fully incorporated. Stir in chips.

Using an ice cream scoop or 1/4 measuring cup, scoop dough onto baking sheets, spacing 2 inches apart.

Don’t forget to use a thin metal spatula to smooth and flatten the dough!

Bake cookies one sheet at a time for about 16 minutes – the top should feel a little firm and a toothpick or fork inserted in the center will come out dry. Let the cookies sit for about 5 minutes before removing to a wire rack.

Cool the cookies completely before storing in an air tight container. Try not to eat them all in one sitting! Makes about 2 dozen cookies.