Have you cooked with whole wheat pasta? I must admit, I’ve done very little with it. It got a pretty bad wrap when it first came out. I believe I heard the comparison to cardboard being thrown around more than once, which isn’t a great selling point. But whole wheat pasta has come a long way (or so I’ve heard) and sometimes there’s nothing simpler than boiling some noodles in a pot (what? I’ve been sick. leave me alone).

Whole Wheat Rigatoni

I remember having this really delicious whole wheat pasta salad a few years back at a park cleanup project I attended. Sadly, I don’t know how it was made but it is what I attribute the inspiration for today’s recipe to. This dish also introduces something I cook very rarely with: sun-dried tomatoes. It’s something nice to have in the pantry when you’re looking to add a little more tomato flair to your meal. I used sun-dried tomatoes without oil, but feel free to use the kind with. Just keep in mind the amount of additional oil you add.

Whole Wheat Pasta Salad with Tomatoes and Broccoli

Whole Wheat Pasta Salad with Tomato and Broccoli

1/4 extra virgin olive oil
3 teaspoons red wine vinegar
1 handful fresh basil; roughly torn
2 garlic cloves; minced
1/4 cup sun-dried tomatoes; chopped
4 oz mozzarella cheese; shredded
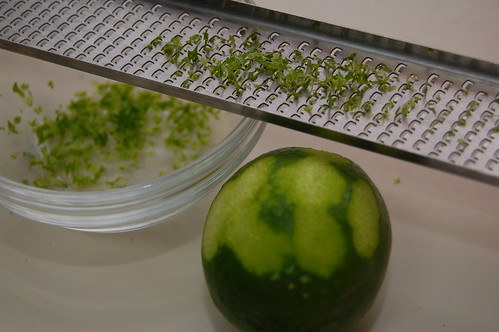
Juice of half a lemon
2 tomatoes; cored and scored with an X on top
3/4 lb whole wheat pasta (I used rigatoni but I suggest fusilli)
1/2 lb broccoli; large florets chopped in half
Grated parmesan (optional)

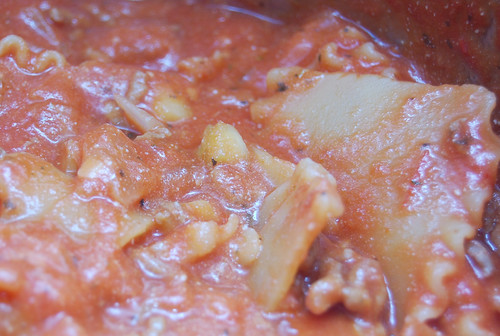
In a large pot of boiling water, blanch your tomatoes for 30-40 seconds and remove with a slotted spoon or tongs. Once cool enough to handle, peel and cut along the equator. Remove the seeds, roughly chop and set in a small serving bowl. Mix in the oil, red wine vinegar, basil, garlic, sun-dried tomatoes and lemon juice.

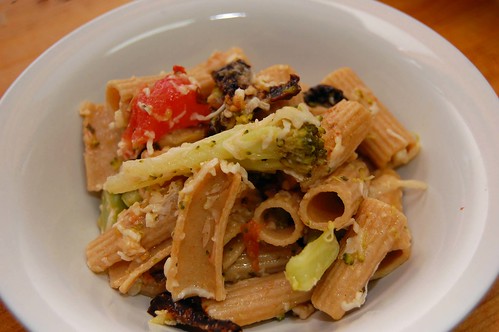
Bring the pot back to a boil and cook your pasta per the package’s instructions. When you have about 5 minutes left, add the broccoli. Strain when ready and place in a large bowl. Add the “dressing,” mozzarella and toss to coat. Add parmesan if you so desire, serve and enjoy.

Lasagna Skillet, aka Lasagna "Giant Pot"

Like the English Muffin Pizzas I posted at the end of last month, this recipe is also from that stage where Morgan and I were trying to clean out our kitchen before moving.

noodles

And while we’re on the subject of moving – yes, we are all moved in to our new place in Charlottesville and it’s gorgeous here. Unfortunately we’re not all unpacked yet, but we’re getting there (slowly). The kitchen is finally done, and I’m looking forward to jumping back into the DinnerCakes saddle!

stackednoodles

Back to today’s post, we had some beef that had been in the freezer for awhile, lasagna noodles in the far reaches of the cabinet and a stray zucchini to use. Morgan loves, loves, loves lasagna, but we never make it because of the fat content plus time commitment. But like I said, we were moving within the week so everything had to go!

cooking

A long time ago I remembered making something called “lasagna skillet,” a less elegant version of lasagna where the noodles are broken up into fourths and everything is cooked together in a skillet. I decided to make something similar, but because of the massive amounts of ingredients (yep, if you’re cooking for two like me you will have leftovers – but they’re delicious leftovers!) I couldn’t fit everything in a large skillet so I used a large spaghetti pot. It would be even more inelegant to call this dish lasagna “giant pot,” so let’s just stick with lasagna skillet.

This dinner really surpassed my expectations and we both enjoyed it very much. It came in handy for both lunches and dinners the next few days, and the leftovers are great either cold or warmed up. Enjoy!

lasagnaskillet

Lasagna “Skillet”
inspired by Betty Crocker

a double batch of mom’s marinara sauce (double the recipe from the link, or use one jar of store bought sauce)

1 lb ground beef
1 onion, diced
1 zucchini, skinned and diced
3 cloves garlic, minced
16 oz package lasagna noodles
4 cups water
1/2 cup part skim ricotta
mozzarella cheese, to sprinkle

Stir together beef, onion, zucchini and garlic in skillet over medium-high heat, about 5-6 minutes, until beef is brown; drain.

Add ingredients to large pot and stir in water, sauce and lasagna noodles, quartered. Bring to a boil, folding the mixture over the stiff pasta, then reduce heat to a simmer and cook uncovered for approximately 20 minutes, until noodles are cooked (Note: It will seem like a lot of water, but it gets absorbed as it cooks). Add ricotta when noodles are almost completely cooked. Sprinkle with mozzarella before serving.

Kitchen Tips – Understanding Zesting

Gather ’round children, and we shall explore the wonderful world of zesting. Last week I shared a recipe that called for lemon zest, so today we’ll learn what it is, how to get it, and pitfalls to consider.

Hello, Lime

Zest is the (very) thing skin on citrus fruit like oranges, lemons and limes. Containing oils, zest has a strong citrus flavor, and is most commonly used in desserts such as cookies or pies, but can be used in other things such as drinks and salads. Growing up, my mother would bake “orange peel” cookies, which often perplexed me. “Isn’t the peel garbage?” Not so!

Lime Zest

The best tool for zesting is a microplane grater, but a standard grater can work as well (using the side with the smallest holes). Just delicately grate the color off your fruit. You can even peel it of with a paring knife and a steady hand. The only thing to be careful of is the white stuff under the color, called pith. Pith is bad. Pith is the weird uncle, that one that is a little…. off. Pith is bitter and can really ruin your dish, so be sure to only take the zest and not the pith!

Feeling adventurous? Want to practice your newly acquired skill? Here are a few recipes that use the mighty zest.

Enjoy!

In Case of Zombies

Hope you enjoyed yesterday’s post from Edwin of his “Pillow Fight” cake submission to the Threadcakes competition. The competition challenged bakers to make cakes inspired by a Threadless t-shirt.

I also submitted a cake modeled after one of my favorite Threadless shirts.

In Case of Zombies

Winners will be announced next week, and there was some seriously intense competition (this is my personal favorite – how did they do it?!!). This competition was definitely a learning experience for both Edwin and myself!

Food Photography – Pillow Fight Fondant

Fun with fondant!

Pillow Fight in Fondant

Light Chicken Salad – What's Your Go-To Recipe?

So recently I wanted to create a really great light chicken salad. I know Edwin and I mention the grocery store in our hometown all the time, Ukrop’s, but they really do have great light chicken salad. Sadly the store bought chicken salad I tried at Harris Teeter in Northern Virginia was, well, gross!

DSC_0016

This is not the spectacular replica I was hoping for, but it’s a start. I read some forums where others have tried to recreate it, and it seems that the only ingredients used are chicken, celery and mayonnaise. Since it’s labeled “light” chicken salad in the store, I assume that means a low fat mayo is used. I used fat free Miracle Whip in place of mayo, and it didn’t knock my socks off.

DSC_0019DSC_0021

I’d really love some help on this recipe if any of you have suggestions or recommendations! I know it’s easy to go wild with chicken salad recipes (adding nuts, cranberries, etc.), but I’d really just like something very basic. What do you think?

chicken salad

Light Chicken Salad

1 lb. boneless, skinless chicken breast
2 stalks celery, diced
1/2 to 1 cup of fat free Miracle Whip
1 baguette
paprika, salt, black pepper and cayenne to taste

Preheat oven to 400F and bake chicken (seasoned with spices above) for 20 minutes. Cut celery while chicken is cooling.

When chicken is cool, use a fork to shred. Combine shredded chicken, diced celery and Miracle with in a large bowl. Add additional spices as desired. Mix well, cover tightly, and chill until serving. Slice baguette while waiting.

It’s been a…. trying few days for me. Somewhere between the grocery store and my bed I lost my wallet Friday night. In case you’ve ever wondered what it’s like to lose your wallet, let me enlighten you. It sucks. A lot. Not the end of the world, of course, but the task of replacing all my cards has me dreading this week…

Cabbage and Rice Noodle Salad

Another inconvenience about losing your wallet is no money. As I write this, I have exactly five dollars with me (and an almost empty tank of gas). So dinners this weekend were whatever I had in my kitchen. An interesting challenge. I do occasionally run into the finding-an-ingredient-after-it’s-spoiled situation, so this was a good way to be proactive on my current supply. So what to do with a bunch of random ingredients? Throw em in a wok and see what happens!

Cabbage and Rice Noodle Salad

Cabbage and Rice Noodle Salad
I only used half a small cabbage (1 lb) but would recommend trying a whole cabbage if you want more greens.

3 tablespoons peanut oil
1/2 small cabbage (approximately 1 lb); sliced thin
3 shallots; diced
2 red chiles; diced
3 cloves of garlic; minced
4 oz thin rice noodles
2 tablespoons tamari
1 tablespoon oyster sauce

Cook your rice noodles as directed and set aside; usually boiling for only a few minutes. Par-boil your cabbage for 2-3 minutes and immediately chill in water and drain. Pat in some paper towels to dry. Stir fry your shallots and chiles with two tablespoons oil for a few minutes until the shallots begin to brown. Add the garlic and additional oil and continue cooking briefly until fragrant; 30 seconds to a minute. Be careful not to burn the garlic!

Add your remaining ingredients, tossing to coat and combine. Cook for a few minutes, adding salt to taste. Once everything is hot, combined and delicious, serve and enjoy.

Kitchen Tips – Preserving The Top Of Your Wedding Cake

I got a lot of great feedback from my post on Wednesday showcasing mine and Morgan’s wedding cake (both on our wedding day and then one year later) – thanks so much for the kind words!

In keeping with the wedding and memories mood I have going on this week, I thought I’d take the opportunity to post about how to store the top of your wedding cake so that you can enjoy it the next year. I’m sure there are a few different ways you can do it, but I’m going to share what worked for us.

Our cake was not covered in fondant (I just can’t get in to chewy taste of it), but I’d imagine that fondant would only serve as another protective layer.

When you’ve got the top of your cake back home, transfer it to either a piece of flat plastic used for tiered cakes, or a cardboard cake round that has been wrapped in plastic before putting the cake on top (so the cardboard doesn’t absorb anything or give off cardboard taste!).

Place the cake top, uncovered, in the freezer for about 20 minutes to firm it up. Remove it from the freezer, and wrap it, cardboard or plastic round and all, tightly with lots of plastic wrap – no skimping! When done, place it safely in the freezer and leave it alone for a year!

To enjoy, move the cake from the freezer to the fridge 1-2 days before your anniversary. A few hours before serving, remove the plastic wrap and set it back in the fridge. Then right before serving, allow cake to reach room temperature before digging in by setting it out on the counter.

Good luck!

I’m a little torn when it comes to the summer months. One one hand, I love the weather, the warmth (HATE the cold) and all you can do in the great outdoors. On the other hand there’s the, lets call it cooking restrictions. Maybe restrictions isn’t the right word, but basically the discouragement of cooking with a lot of heat. A couple boiling pots and some roasting in the oven can kick summer heat into overdrive.

summer citrus salad1

So we turn to salads and this is one is quite tasty. It’s a bit different from your usual, being not so heavy on the greens and having no vinegar whatsoever. But its simplicity and uniqueness really make it stand out. Any apple will do and if you don’t have agave nectar, start at one tablespoon of sugar and work your way up to a taste that hits the spot for you.

Summer Citrus Salad with Spinach

Summer Citrus Salad with Spinach

1 apple; peeled (optional) and chopped into small 1/4 inch pieces
2 celery stalks; chopped
2 handfuls of baby spinach (about 2oz); chopped
1/4 cup chopped walnuts
4 tablespoons lemon juice
4 tablespoons extra virgin olive oil
2 tablespoons agave nectar
1 tablespoon fresh parsley; chopped

Combine all your solids (apple, celery, spinach, walnuts) into a bowl and mix. Combine your remaining ingredients separately and pour over your salad. Toss to coat and enjoy.

Food Photography – Our Wedding Cake, One Year Later

I think my husband knows by now that I have a bit of an obsession with the photos of our wedding cake. I have no good response for this.

wedding cake

Sunday marked our very first wedding anniversary. We celebrated with a lot of packing, the movie Watchmen, a bottle of red wine given to us on our wedding day from two friends who had been in France (we were instructed not to open it until our first anniversary) and the top of our wedding cake that had been on the top shelf of my parents’ freezer all year.

cake

The packing went as you might expect, the movie was still just as good as we remembered in the theater, the red was quite nice and the cake was still remarkably tasty!

f1719

The buttercream frosting had hardened a bit and tasted a little freezer burned, but the cake itself was great! I couldn’t believe it, so I had to eat most of it to be absolutely sure.

f1929

For the short time the cake existed last year before being devoured, it was four tiers. The layers alternated between yellow cake with blackberry filling and chocolate cake with chocolate filling – all frosted with french vanilla kiss buttercream and decorated with white chocolate curls and purple hydrangea. The cake sat on a 14″ silver cake plateau purchased online by my mom; we hope to keep it in the family for awhile.

wedding cake slices

The cake was designed by Teri Edwards at Cakes Unlimited, who we can’t recommend enough if you’re planning a wedding in Charlottesville.

topcake... one year later

The same is true for Meredith Montague Photography – Meredith took all of the amazing wedding cake photos that I’m over-enthusiastically sharing with you today (minus, of course, this last photo of our cake top one year later, looking, well, a little sad!).