Breaking Mom's Rules to Make "Dad-approved" Blueberry Lemon Loaf

My dad does not eat red meat.

He doesn’t eat real cheese, eggs, butter, or anything that was baked in a pan greased with Crisco, either. So when he called yesterday and asked if anything I was bringing home for Thanksgiving was “dad-approved,” I got a little quiet.

 "Dad-approved" Blueberry Lemon Loaf - Gradually Adding Flour Mixture

Then I remembered a recipe I saw on Smitten Kitchen a few months ago for Lemon-Blueberry Yogurt Loaf. I knew that my dad would love it… if it wasn’t for the whole-milk yogurt, three eggs and oil.

One of the first rules of holiday baking I learned from my mom was to always use fresh, high-quality ingredients. I’m not sure that Egg Beaters and fat free yogurt comply with this rule, but I had to try!

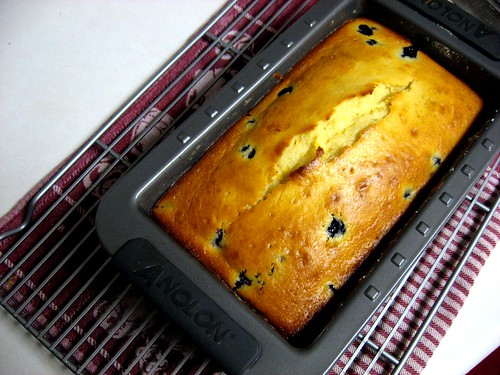
 "Dad-approved" Blueberry Lemon Loaf - Cool in the pan

Egg Beaters have no fat or cholesterol, and they’re made with real eggs. The egg whites are separated from the yolks and combined with vitamins and thickeners. In some recipes you may not even notice a difference, in others a lot could change. I replaced the whole-milk yogurt with a combination of Stonyfield Farm’s organic, fat free plain and lotsa lemon yogurt. I also used Smart Balance Omega Oil in place of canola or vegetable oil.

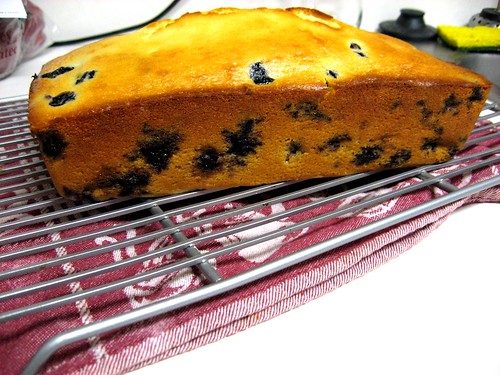
My blueberries sank a little bit, but I think if I had been more cautious while pouring the batter into the pan I could have avoided some of this. In any event, the result was an incredibly moist cake bursting with tart lemon flavor. Hopefully dad feels the same way!

 "Dad-approved" Blueberry Lemon Loaf - Cool Completely

“Dad-approved” Blueberry Lemon Loaf
Adapted from Smitten Kitchen

1 1/2 cups + 1 tablespoon all-purpose flour
2 teaspoons baking powder
1/2 teaspoon kosher salt
1/2 cup plain, organic, fat-free yogurt
1/2 cup lotsa lemon, organic, fat-free yogurt (I used Stonyfield Farm)
1 cup plus 1 tablespoon sugar
3/4 cup Egg Beaters (1/4 equals about 1 egg, but check your label)
2 teaspoons grated lemon zest (approximately 2 lemons)
1/2 teaspoon pure vanilla extract
1/2 cup Smart Balance oil
1 1/2 cups small blueberries, fresh or frozen, thawed and rinsed
1/3 cup lemon juice

Preheat the oven to 350 degrees F and spray your loaf pan with Smart Balance cooking spray. Line the bottom with parchment paper and spray again.

Sift 1 1/2 cups flour, baking powder, and salt into a medium bowl. In a large bowl whisk yogurt, 1 cup sugar, Egg Beaters, lemon zest, vanilla and Smart Balance oil. Whisk the dry ingredients gradually into the wet ingredients. Rinse blueberries in a small bowl and mix with 1 tablespoon of flour. Gently fold the blueberries into your batter so that they do not burst.

Pour batter into loaf pan and bake for about approximately 55 minutes, or until a toothpick inserted in the center comes out clean. Note that using Egg Beaters may increase your cook time a little.

While the loaf is baking, combine 1/3 cup lemon juice and 1 tablespoon sugar in a small pan on your stove until the sugar dissolves. Set pan aside.

Cool your loaf for 10 minutes before flipping out onto a wire rack. Lay a pan underneath the wire rack and poke a few small holes in the loaf using a toothpick – pour the lemon and sugar mixtures over the loaf while it’s still warm.

Cool completely and wrap tightly.

Sometimes I forget that most people don’t have the fondness for vegetables that I do. I think this is largely in part to their childhood memories at dinner. Many a vegetable has been overcooked in the mad dash ritual of the family dinner. What at one point was vibrant and full of flavor can easily become dull and tasteless. Of course this is not an attack on our loving Moms and Dads (mine rock), but life can get hectic when you’re balancing a career, home life and the numerous extracurricular functions of your children.

Quality food doesn’t have to be difficult or overly time consuming. You can still have delicious tasting veggies with minimal effort that won’t leave you shaking yourself (or your child) in rage.

Chopped Broccoli

This is a simple roasted vegetable recipe. With the sesame and soy sauce, it’s easy to peg this as an Asian-only side dish; but I disagree. Serve these vegetables alongside grilled fish or a lightly breaded chicken breast with lemon – add some brown rice and you’ve got yourself a flavorful and healthy meal.

Oh, and did I mention roasting preserves more of the vegetables’ nutrients than boiling? Man, this dish rocks all kinds of worlds!

Roasted Sesame Broccoli

Roasted Sesame Broccoli
This dish works with both the broccoli florets and the stalks. I like a little of both for variety, making the florets that much more enjoyable in contrast. Go with whatever you like. Consider adding sesame seeds before serving, though I find this purely decorative.

One broccoli bunch or approximately 4 cups, with or without stalk; sliced (see below)
1 tablespoon olive oil
1 1/2 tablespoons sesame oil
2 teaspoons soy sauce

Preheat the oven to 475°F.

To slice the broccoli, cut up into the florets, not all the way through. Then split by pulling the broccoli apart. For the stalks, cut into 1/4 inch slices. Combine the broccoli, olive oil, sesame oil and soy sauce in a mixing bowl. Place in a baking sheet as a single layer (this will help you get a good browning). Roast in the oven for 20-25 minutes, tossing halfway through. Remove when the tops are crispy. Serve immediately.

Follow-up to a Labor of Love

Dear DINNERCAKES Readers,

Making the Glaze - Chocolate Peanut Butter Cake

Thanks to Tastespotting, yesterday we experienced many new visitors to our site. Edwin and I would like to thank you very much for your interest in yesterday’s post. At DINNERCAKES we like to post about what’s for dinner, with an extra helping of dessert. However we were very proud yesterday to create and share not only a lovely cake, but to do so in memory of someone who was very special and is very missed.

Thanks for reading,
Edwin & Heather

From the moment Edwin and I saw this cake, we knew it was always our destiny to bake it.

And its creation had special meaning for me. I first learned of this cake a few months ago from mine and my husband’s friend Jeff. Jeff found the cake on Smitten Kitchen and demanded that we spend a day baking and gorging ourselves on it. He found out a few weeks after this that the cancer he’d had for two years was terminal, but he had such an incredible attitude that he just continued making plans for things he wanted to do, see and eat. Making this cake together remained on the top of his list.
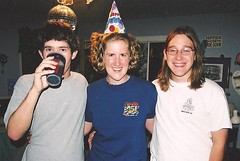
young jeff, heather, morganold morgan, heather, jeff

Unfortunately things went down hill incredibly fast, and my husband, Morgan, and I were with Jeff when he died in mid-September. The three of us had been friends for a long time; he was the best man in our July wedding, one month before he found out he was terminal and two months before he died. I think there may always be a hole in our lives and in our hearts where he was.
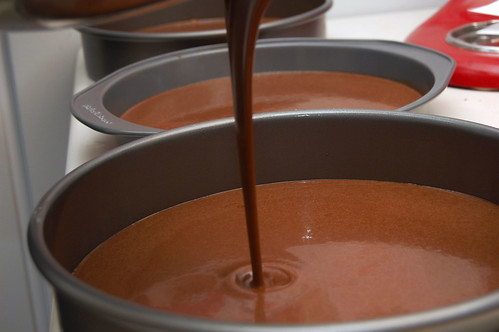
Pouring the Batter

A few weeks ago Edwin sent me a link for this cake. I thought about the plans I had to make it with Jeff and I hesitated. Then I remembered how after Jeff’s death, at his request, we had thrown a celebration of his life where each of his friends either brought over a dish they had shared with him or some food that he loved. I realized that making this cake with Edwin was probably an excellent way to honor my friend and celebrate the things he loved most – food and friends.
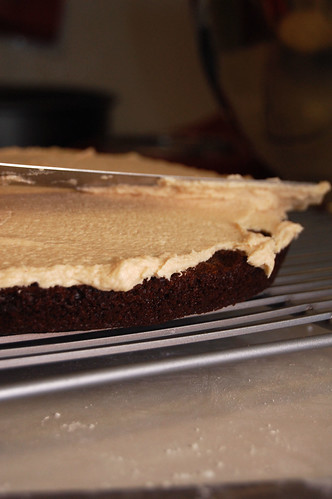
Spreading Closeup

For the First Time on DINNERCAKES, Edwin and Heather Unite:

Thus, Edwin and I set a date and embarked on what we both knew would be a challenging journey. The elusive sour-cream chocolate cake with peanut butter frosting and chocolate-peanut butter glaze had been taunting us to bake it for quite a while.

The result – “This might be the best cake I’ve ever had,” crowed Edwin.

Even Morgan agreed, who can usually take or leave cakes. Nothing was overpowering about the cake, and although it may appear dense in photos, it’s actually very light and incredibly moist.
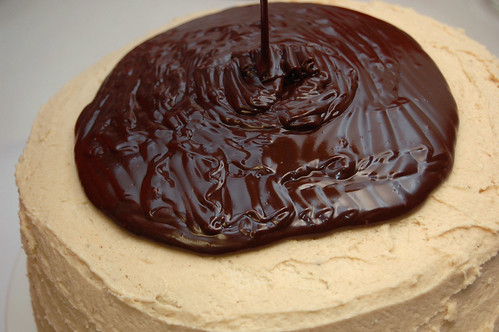
Chocolate Glaze Pour

However, it is extremely rich. A cold glass of milk is vital for the prevention of a sugar-induced coma. This beauty of a cake packs away 2 ½ cups of sugar in the cake batter and 5 cups of confectioners’ sugar in the frosting. If you have diabetes or a heart condition, this cake is not for you!

But now that all is said and done, our dream cake has been enjoyed and divvied up between us, and we’ve exceeded our sugar quota for the entire week, we can’t think of a better way to kick off Thanksgiving week and the holiday season than to share this amazing recipe.
Chocolate Peanut Butter Cake - So GoodThe First Cut - Chocolate Peanut Butter Cake

Edwin and I are thankful for good friends, good food and good times past and present. And I am thankful that, although I did not get to make this cake with Jeff, I was able to share so many other wonderful memories with him.

Hope this beautiful cake kick-starts your Monday! Happy Thanksgiving week from Dinnercakes!
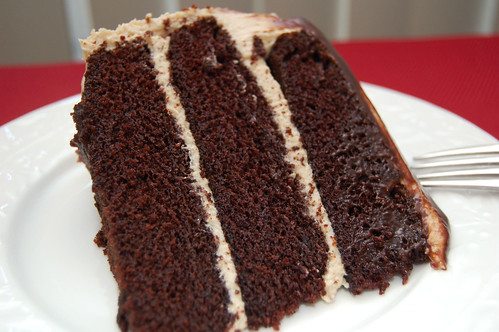
Perfect Slice - Chocolate Peanut Butter Cake

Peanut Butter and Chocolate Triple Layer Cake
Sky High: Irresistible Triple-Layer Cakes
2 cups all-purpose flour
2 1/2 cups sugar
3/4 cup unsweetened cocoa powder, preferably Dutch process
2 teaspoons baking soda
1 teaspoon salt
1 cup neutral vegetable oil, such as canola, soybean or vegetable blend
1 cup sour cream
1 1/2 cups water
2 tablespoons distilled white vinegar
1 teaspoon vanilla extract
2 eggs

Preheat the oven to 350 degrees F. Butter the bottoms and sides of three 8-inch round cake pans (we used three 9-inch rounds so our cakes came out a little thinner). Cut three rounds of parchment paper to line the bottom of each pan; butter the parchment paper.

Sift flour, sugar, cocoa powder, baking soda, and salt into a large bowl. Whisk to combine. Add in oil and sour cream; whisk to blend. Beat in water gradually (we used a stand mixer, but you can also use a whisk). Add vinegar and vanilla. Beat in eggs until well blended. Scrape down the sides of the bowl to ensure batter is well-mixed. Divide evenly between 3 prepared pans.

Bake for 30 to 35 minutes, or until it passes the toothpick test. Cool in the pans for 10-20 minutes. Turnout onto wire racks, carefully peel off the paper liners, and firm them up in the freezer for 30 minutes.

To frost, place one layer flat side up on a cake stand or serving plate. Spread Peanut Butter Frosting evenly on top, repeat with the next layer. Place the last layer on top and frost the entire cake with a thin layer of frosting – you are going to make a crumb coat; this part is crucial (a crumb coat keeps crumbs from showing up on your final layer of frosting).

Put the cake (with a thin layer of the peanut butter frosting all over) back in the freezer for 20 minutes. The frosting will now be somewhat firm on the cake, now you can use the remaining frosting to cover the entire cake, without a crummy mess! When fully frosted, you may want to chill again for 10 minutes.

To decorate with the glaze, set the cake plate on a sheet of parchment paper to catch drips. Pour the glaze directly over the center of the cake, and using a spatula, spread it lightly over the top and to the edges so that it falls down the sides in large drips. To set the cake, you may want to refrigerate it again when you’re done. Edwin and I didn’t make it that far and instead we chowed down immediately.

Peanut Butter Frosting
1
0 ounces cream cheese, room temperature
1 stick (4 ounces) unsalted butter, room temperature
5 cups confectioners’ sugar, sifted
2/3 cup smooth peanut butter, preferably a commercial brand (because oil doesn’t separate out)

Beat the cream cheese, butter and peanut butter until light and fluffy in a large bowl with a mixer. Add the confectioners’ sugar gradually, mixing thoroughly and scraping down the sides of the bowl often. Continue to beat until blended, about 3 to 4 minutes.

Chocolate-Peanut Butter Glaze
8 ounces semi-sweet chocolate, coarsely chopped
3 tablespoons smooth peanut butter
2 tablespoons light corn syrup
1/2 cup half-and-half

I didn’t have a double boiler, so we used to the microwave method, heating for 15 seconds at a time and stirring after each 15 second interval. If you do have a double boiler or a metal bowl that you can set over simmering water, combine the chocolate, peanut butter, and corn syrup. Cook while whisking often until the chocolate is melted and the mixture is smooth. Last, remove from the heat, whisk in the half-and-half and beat until smooth. Pour over the cake while still warm.

Thanksgiving is coming and you know what that means: absurd amounts of food. More food than you, me or a small third-world country could eat. It doesn’t matter how many people there are; you will make more food than you need.

Last year I had a pretty small Thanksgiving celebration with just the Mom and I (the sister was far, far away in Alaska). Despite this fact our meal included turkey, ham, mashed potatoes, sweet potatoes, roasted white asparagus, green bean casserole, croissants…. oh, and five pies. Madness (to be fair, my mother does spread the love by giving food to friends and family).

Why we as a society go through this ritual every year, I may never fully understand. However, I do know that I friggin’ love it (perhaps that is enough reason in itself?). Thanksgiving is a great time to reflect on all the good things in life, especially family. But that strong association with food has just been burned into our brain, and a Thanksgiving without large quantities of food would just be lacking.

Mesculn Salad Closeup

With the Christmas/Hanukkah/Kwanzaa/Whatever so nearby, this is the time of year people start packing on the pounds. Maybe it’s more than just the holidays, maybe it’s the fact that for most of us it’s so darn cold outside that we subconsciously pack on a little extra padding to keep us warm (I support the bear philosophy of sleeping until Spring. Alas…). However, many of us tend to feel guilty by said additional padding and go into a tizzy trying to work it off.

Here’s my suggestion: eat more salad.

Have a good hearty salad prior to feasting on turkey, ham, yams and god knows what else. Fill some space in that stomach of yours with something other than the traditional heavy weights of Thanksgiving – better that it’s lettuce and other vegetables than… everything else.

Mesculn Salad with Tomatoes

Hell, start eating salad now. Prep yourself; maybe start shaving off a bit of weight in preparation for the inevitable gorging. Of course a salad is only as good as its dressing. A salad without dressing is just… rabbit food. I picked up this recipe from a chef I assisted for. It’s an excellent vinaigrette with many of its ingredients readily available in most pantries. Try experimenting with different herbs – let us know what you think!

Mesclun Green Salad with Honey Vinaigrette
This recipe makes approximately 3/4 cup of dressing, depending on how much oil you use; plenty for half a pound of greens. The amount of oil is flexible to how you like your vinaigrette and how light you’d like it to be. If you don’t have shallot then a sweet onion will work in a pinch.

1/4-1/3 cup extra virgin olive oil; approximate
1 tablespoon honey
2 tablespoons white wine vinegar
1 teaspoon Dijon mustard
1 clove garlic; minced
1 small shallot; minced
1 tablespoon fresh herbs (basil, chives, rosemary…. you can’t really go wrong here)
Salt and pepper to taste

Combine everything but the oil in a serving bowl. Beat/whisk together briefly to ensure everything mixes together well; further crushing the garlic, onion and herbs. While whisking, slowly add your olive oil until satisfied. Spoon out a bit, maybe a third, to pour atop. Remember you can always add more but you can’t take any off. Add your greens to the bowl and lightly toss or rotate.

Brigadeiro, A Sinfully Sweet Brazilian Candy

I had a friend in high school who moved to the United States from São Paulo, Brazil. One day after school, she took me back to her house and taught me how to make a deliciously sweet and simple Brazilian treat known as brigadeiro.

A brigadeiro is made using cocoa and condensed milk, a thick and sticky blend of milk and sugar that yields some of the most decadent and rich desserts I’ve ever had. It combines all the things that make my ideal candy – smooth, sweet, and full of unadulterated chocolate.

Brigadeiro, thickened - notice the bottom of the pan Brigadeiro, hardened mixture

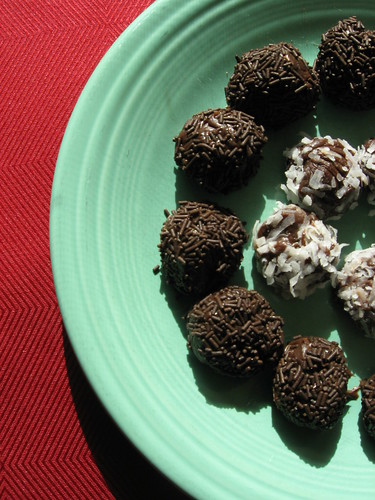
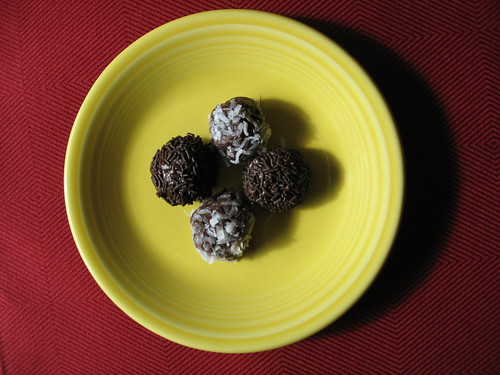
My friend rolled her brigadeiro in chocolate sprinkles (the most common way) and placed each candy in a tiny paper wrapper. But you can get as creative as you like, incorporating any number of sumptuous outer coatings including coconut, pistachios, almond shavings, powdered sugar, more cocoa, etc.

I tried to make brigadeiro around this time last year and I failed. I lost the recipe my friend gave me (in my defense, it was almost 10 years ago), and I decided to follow a recipe I found online. I had also forgotten most of the instructions, which are actually pivotal in this recipe, and the recipe online gave little guidance.

After deciphering some “how-to” videos in Portuguese, I’m proud to say that I’m back in the brigadeiro-making ring. And just in time, too, because these are absolutely excellent to bring to any kind of holiday party.

Brigadeiro

Ghost Baker Suggests Holding the Butter:

The Portuguese videos I watched did not use 1 tablespoon of butter, something that many recipes I found online called for. Since my butter-free recipe worked very well and the experiments with butter did not, I did not include butter in the recipe below. If you think butter is a must, I’d love to hear it!

Enjoy, and good luck not eating them all in one day!

Brigadeiro, serving

Brigadeiro

1 can sweetened, condensed milk (15 oz)
3 tablespoons cocoa, sifted (I used Nestle, because they introduced cocoa powder)
Chocolate sprinkles (and/or coconut, nuts, etc.)

Heat 1 can of sweetened, condensed milk in a small pot on medium-low heat, stirring frequently. Sift in one tablespoon of cocoa at a time (I didn’t use a sifter this time because my sifter was MIA, and you can clearly see little deposits of cocoa in my photos. It still tastes great if you don’t sift it, but you may want to do it to achieve aesthetic perfection).

Use a wooden spoon to combine the cocoa into the condensed milk. Stir, stir and stir some more! Don’t stop stirring or else your chocolate could burn.

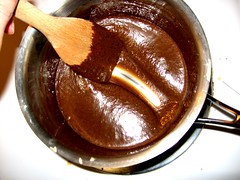
After about 5 minutes, you’ll notice the mixture getting thicker. You can tell that it’s done when, while stirring, you are able to see a good bit of the bottom of the pot (see my photos for an example).

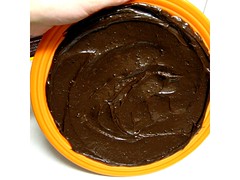
Remove from the heat and pour onto a plate. Smooth the mixture out so that there’s a thin layer covering the entire surface. Set this aside, or if you can’t wait – set it in the fridge, for about 15 minutes. The mixture is ready when it’s completely cooled and hardened. Notice in my photo that I’m holding the plate at a 90 degree angle and the mixture hasn’t budged; you should be able to turn the mixture completely upside down without consequence (yep, just like they do Dairy Queen when you order a Blizzard).

In the meantime, ready your chosen toppings. I used chocolate sprinkles and coconut flakes and added these to two separate, small plates.

Using a spoon, scoop up about 1 tablespoon of your hardened mixture. It’s going to be very sticky! Using an additional spoon or very buttered and greased hands, drop it onto your topping and roll it until it’s completely covered and shaped like a ball. Continue scooping, dropping and rolling until you’ve used all your mixture. You may want to store these in mini paper cup wrappers; I just used a plate and covered it with saran wrap. You can try to share with others, but it’s hard!

Many Brazilians actually eat their brigadeiro just straight out of a bowl with a spoon. You can even use the mixture as a topping on ice cream or brownies. So really, you can’t go wrong!

Tofu, No It Doesn't Suck (Tofu Spinach Manicotti)

So it occurred to me recently that I really don’t know that many vegetarian main course dishes. To be fair, I know a lot of soups, salads and roasted vegetable varieties (or, at least I eat a lot of roasted vegetables). But when you take all those away I realize that I have a rather slim repertoire.

Time for change. Time for something new, something inventive. And by new and inventive, I mean new and inventive for me. Tofu and I don’t really get along that well. To be honest, I’ve never had much luck with the stuff. It always struck me as something created to mollify wistful former carnivores who haven’t quite been able to let go. Psh. When prepared properly, fruits and vegetables (with the occasional accompaniment of grains or legumes) offer a myriad of flavorful meals to enjoy. But hey, gotta keep an open mind. Try new things. Expand horizons.

Tofu Spinach Filling

This is a pretty classic tofu dish. I scoured the web for a handful of vegetarian recipes and let them flow into me as inspiration (deep, huh?). It is from this very zen moment that I was able to craft today’s recipe: Tofu Spinach Manicotti. No applause, please.

The dish was good. Not knock-my-socks-off great, but definitely something I’ll do again. Next time I’ll sweat or saute the bell pepper and perhaps add some onion into the mix as well. I’m a saucy guy, so if you’re not as big on tomato sauce, cut back on the amount.

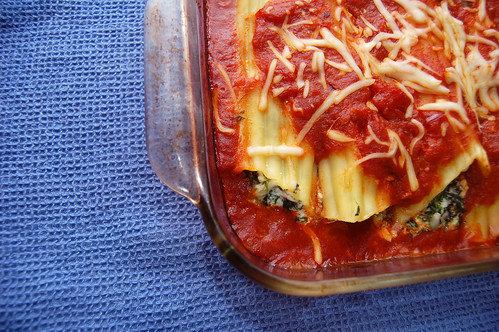
Tofu Spinach Manicotti

Got a tofu dish you’re proud of? E-mail me and I’ll be sure to try it out.

Tofu Spinach Manicotti
5 ounces firm tofu
3 ounces chopped spinach; thawed
3/4 cup ricotta cheese (I used fat free)
1/3 cup mozzarella and a sprinkling on the side (part skim for me)
1 clove garlic; minced
1/2 green bell pepper
1/2 teaspoon dried basil
1/4 teaspoon salt
3 cups tomato sauce; approximately
7 manicotti shells

Prep:
If making tomato sauce from scratch, make it first. Set aside and let it cool. Boil the manicotti as directed on the packaging. Drain and set aside. Toss with a bit of oil to prevent sticking.

Filling and Baking:
Crumble or chop the tofu into small pieces (think cottage cheese). Combine with the spinach, ricotta, mozzarella, garlic bell pepper and salt. Poor about a cup and a half of the tomato sauce into a 9″x13″ baking pan. Stuff the manicotti noodles with the filling and line in the pan. Cover the noodles with the remaining sauce and sprinkle with some additional mozzarella. Place in the oven for 30 minutes. Remove and serve immediately.

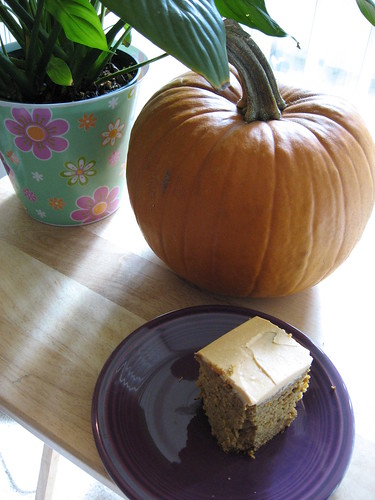
The Cake That's Not A Cake – Pumpkin Cake with Honey Frosting

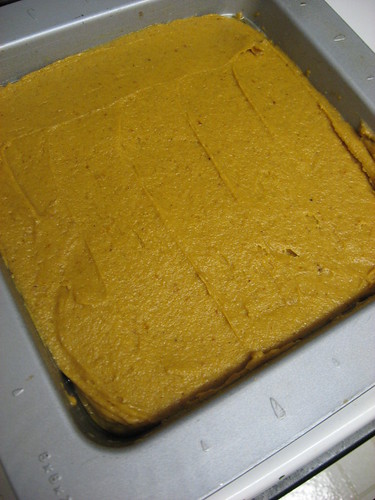
Well, this cake lied to me! It claimed to be a pumpkin cake with honey frosting, but soon after I began working on it I grew skeptical.

The batter was thick, even leveling it out in the pan was a little tricky. But as I tried my first bite it just seemed so familiar. I raced over to my recipe binder and began thumbing through the pumpkin recipes. It turns out this recipe is only one or two ingredients different from my favorite pumpkin BREAD recipe.

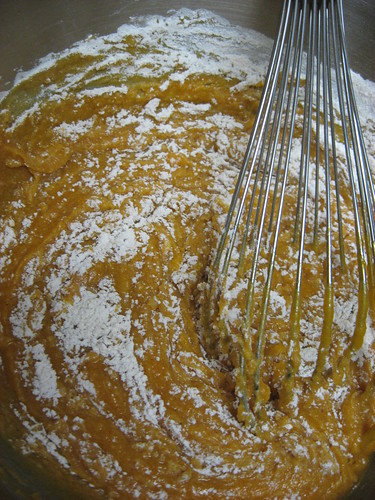
Pumpkin Loaf with Honey Frosting, Whisking

This really is a quick bread with frosting. It’s very heavy and dense, so make sure you serve it in small squares! This would actually be an amazing treat to have with your coffee in the morning and would serve that purpose much better than having it after dinner when you’re already full. In fact, I found some incredibly cute photos from someone who used the original Martha Stewart recipe to bake mini cupcakes. Bite size is the way to go here.

Ghost Baker Suggests Proceeding With Caution:

Beware the cook time. I used a square 8 inch pan because I don’t have a 9 inch, and I had a bit of a scare when I peeked into the oven at 55 minutes and the cake looked completely done. It had pulled away from the edges of the pan and was dark brown in the center and edges. I left it in for 5 more minutes but then became worried I was overcooking it. I did the knife test since I didn’t have any toothpicks, and it came out clean. But this time the knife lied to me. I poked at the center and it seemed a little squishy – it turns out the cake was like a pool that has a thick cover over it for the winter and I threw it back in the oven! To avoid this problem I would just try treating it like a bread and using a loaf pan (or, approximately 15 minutes for mini cupcakes and 25 for regular cupcakes).

Pumpkin Loaf with Honey Frosting, Leveling

I also used pumpkin cream cheese for the frosting instead of regular cream cheese. This gives the cake and the frosting some nice continuity, and it worked well with the honey.

And, woo hoo, you can make this recipe without any fancy gadgets – no stand mixers, food processors, pastry knives, etc. Dust off your whisk and wooden spoon!

Pumpkin Loaf with Honey Frosting, Chowing

Pumpkin Loaf with Honey Frosting
adapted from Martha Stewart
Prep: 25 minutes, Cook: Approx 1 hour and 20 minutes (when using a loaf pan)

CAKE INGREDIENTS
1/2 cup (1 stick) unsalted butter, melted, plus more for pan
2 1/2 cups all-purpose flour (spooned and leveled)
2 teaspoons baking soda
1/2 teaspoon salt
1 tablespoon pumpkin-pie spice (or 1 1/2 teaspoons cinnamon, 3/4 teaspoon ginger, 1/2 teaspoon nutmeg, and 1/8 teaspoon each allspice and cloves)
2 large eggs
1 1/2 cups sugar
1 can (15 ounces) solid-pack pumpkin puree

HONEY FROSTING
1/2 cup (1 stick) unsalted butter, very soft
1 bar (8 ounces) reduced fat pumpkin cream cheese, very soft (or you can use regular)
1/4 cup honey

Preheat oven to 350 degrees. Butter your loaf pan.

In a medium bowl, whisk together flour, baking soda, salt and pumpkin-pie spice. In a large bowl, whisk together eggs, sugar, butter (melted), and pumpkin puree until combined. Add the dry ingredients to pumpkin mixture and mix gently until smooth.

Turn batter into prepared pan and level the top using a thin spatula. Bake until a toothpick inserted in center comes out clean, approximately 1 hour and 20 minutes.

Cool for 10 minutes while in the pan, then turn out and cool completely (right side up) on a wire rack.

To make the honey frosting – In a medium bowl, whisk softened butter, softened pumpkin cream cheese and honey until smooth and pale orange. Spread over cooled pumpkin loaf. Cut loaf into sliced to serve.

*If you prefer to use a square 9 inch pan, decrease baking time to approximately 50 minutes.

I’ve been experimenting a lot more with my cooking and baking since we started this the awesomeness that is DinnerCakes. Most of these forays in the culinary jungle have been met with limited success. My climbing cake was a dismal failure and my roasted stuffed turnips probably won’t knock any one’s socks off. I recently attempted to craft a red velvet cake for my six inch pans and once again the harsh gods of baking slighted me. Sorry Carly, guess you’ll have to settle on store bought cupcakes for your birthday. But hey, that’s life, right? You learn more through failure than victory. Let’s move on to a success story.

Oh, the possibilities...

There are some really great non-profits in the DC Metro area and I’ve had the opportunity so meet some really great people through them. One of the groups I’ve been working with for a few years is the Capital Hill Community Foundation. They’ve been working to renovate elementary school libraries in the Capital South area of DC. I gotta say, they’ve been doing some amazing work. I’ve been coordinating a few volunteer efforts with them recently and this last Sunday we had a really productive day at Ludlow-Taylor Elementary.

Ready For The Oven

It’s sometimes hard to get people to sign up for something like a Sunday morning project. I totally understand this. I love sleep. Sleep and I are tight, and on Sunday we try to catch up on all the time we’ve lost over the week. But alas, duty calls sometimes. I try to make sure the projects I organize are enjoyable for everyone and one of the ways I do this is food. People love free food. It’s insane. I mean, anyone can buy muffins at the local grocery store; but if you bring them for people, you’re guaranteed to hook a few.

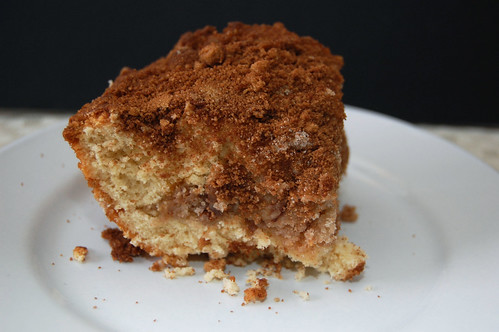
Cinnamon Streusel Coffee Cake

I got up (way too) early Sunday morning to once again attempt another culinary adventure. There was a lot riding on this one. People need their food. Perusing my ever-growing list of to-do’s I came across a tasty looking dish from the folk’s at Baker’s Banter. This blog will make you want to be a baker, people. One of their more recent posts was for a Cinnamon Streusel Coffeecake (side note: why must something so delicious be tainted with the label “coffee?”). It. Looked. Awesome. I felt the need to make my own modifications, of course (hey, that’s how we roll here at DinnerCakes). It was a big hit. Next time you need some quick and easy (and cheap) to impress, give this baby a shot to save the day.

Interested in service in the DC Metro area? Contact us for more information on how to plug in to the community.

Update: My friend Laurian tried this recipe with powdered buttermilk with no ill effect. In addition, she recommends adding some water to the topping for a more crunchy effect. Thanks, Laurian!

Cinnamon Streusel Coffee Cake
adapted from Baker’s Banter

Filling
1 cup brown sugar; light or dark (I used light)
1 1/2 tablespoons ground cinnamon
1 teaspoon unsweetened cocoa powder

Topping
1 1/2 cups sugar
1/2 teaspoon salt
1 1/2 cups flour
1 1/2 tablespoon cinnamon
1/4 cup butter; melted
2 tablespoons water

Cake
1 cup butter
1 1/4 teaspoons salt
1 1/2 cups sugar
1/2 cup brown sugar; light or dark (I used light)
2 1/2 teaspoons baking powder
2 teaspoons vanilla extract
3 large eggs
1/2 cup buttermilk
1 1/4 cups milk; any kind (I used skim)
3 3/4 cups flour

Prep:
Preheat the oven to 350°F. Grease a 9″x13″ baking pan.

Mix the filling together in a bowl and set aside. Mix together the topping in another bowl until crumbs form. Set aside.

Cake:
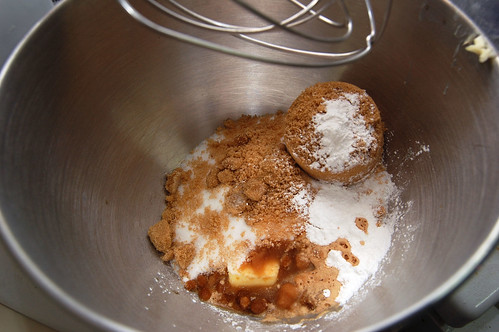
In a large bowl with a stand or hand mixer, beat together butter, salt sugars, baking powder and vanilla until combined and smooth. Add the eggs one at a time, beating in between until well combined. Be sure to scrape the sides. Combine the milks together in a separate container such as a liquid measuring cup.

Alternate adding the flour and milk to the butter mixture; three times adding the flour, two times adding the milk (flour, milk, flour, milk, flour). Be sure to scrape down the sides to ensure it’s well combined.

Pour half the mixture into your baking pan (since i don’t bother weighing, i tend to put a little more in this half. better on the bottom than the top). Sprinkle the filling evenly on top. Give it a light shake to make sure it’s even and reaching all the corners. Spread the remaining batter on top; evenly. If you have a pastry scraper, I recommend using this to help evenly spread the batter, but a spatula will work as well. Sprinkle the topping evenly over the pan. A bit more light shaking will help.

Bake until golden brown at the edges and passes the toothpick test; approximately 50-60 minutes. Remove from the oven and let sit for 20 minutes. Service straight from the pan and enjoy.

More Cabbage (Roasted Stuffed Turnips)

It’s a cold wet day here in DinnerCakes land. Perfect for staying indoors to cook; and I use the term ‘perfect’ loosely. I hate the cold. Hate it. People who love winter are nuts to me. It’s only November and I’m counting down the days till May. Yeah the whole snowy landscape looks charming an wondrous; but that’s just until you get outside and you realize you’re freezing and you can’t feel your face. But I digress…

The Lone Turnip

I volunteer at a cooking store in Bethesda every now and then called L’Academie de Cuisine. I’m not “living the dream” of quitting my job and becoming a full time chef (let’s face it people, dreams don’t usually translate well to real life), but working there as an assistant gets me some great exposure to different kinds of cooking along with meeting a wide variety of chefs. Recently I volunteered for a class under Christine Ilich in which we made some really great soups (which I will have to write about some time). She was great to work under and really emphasized variation and adaptation with cooking. We actually didn’t completely follow any recipe passed out to the attendants that day and the soups were still amazingly tasty. A true sign of culinary prowess.

Prepping The Filling

Christine had brought some vegetables from her personal garden for the class and some of them just weren’t used. I, never one to turn down free food, gladly took these off her hands (score). One of the things I took back with me were a couple of turnips. Turnips, it turns out, are part of the cabbage family. So if cabbage is the black sheep of my made-up lettuce family, then turnip is like the uncle that you never call. You never talk about turnip. You know he’s there, but you consider it a good year when you’ve minimized your time with him as much of possible. However, I am not one to waste food. Ever. Unless it is spoiling, by god, I will find a use for it!

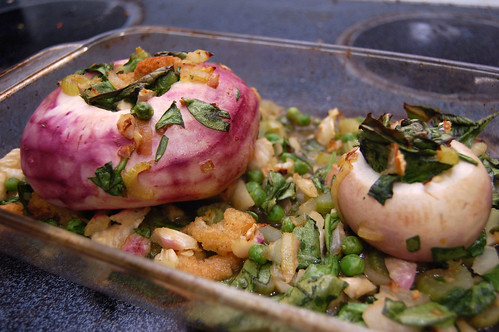
Roasted Stuffed Turnips

Smitten Kitchen has this excellent post for roasted stuffed onions. These things are amazing. I have often just eaten them as the main (and only) dish for dinner. Screw chicken, man, just give me another friggin’ onion. Inspired by Christine Ilich’s excellent soup variations and by Smitten Kitchen’s mouth watering onions, I decided to try my own adaptation.

Looking back, I would have added some more seasoning. These things are good, but nowhere up to the level that is the roasted stuffed onions.

Roasted Stuffed Onions
adapted (loosely) from Smitten Kitchen
3-4 turnips
1 celery stalk; chopped
2 garlic cloves; minced
2 cups roasted bread roughly the size of crutons (or croutons)
1 onion; chopped
1/2 tsp salt
1/2 tsp pepper
8oz baby spinach; coarsely chopped
1 cup peas; frozen or fresh
1 cup vegetable stock
2 tablespoons butter; melted

Preheat the oven to 400°F.

Prepping the turnips
Scrub the turnips. If old (rough, brown skin), peel them. Cut off the tops and bottoms, about a 1/4 to 1/2 an inch. Core the turnips using a melon baller (it’s really easy). Leave a 1/4 to 1/2 an inch thick wall. Try not to go through the bottom, but don’t lose any sleep over it if you do. Take the “innards” and roughly chop them, then combine with a 2 tablespoons of oil and 1/2 teaspoon of salt. Place on a baking sheet with the hollowed turnips and let roast for 20 minutes.

The filling
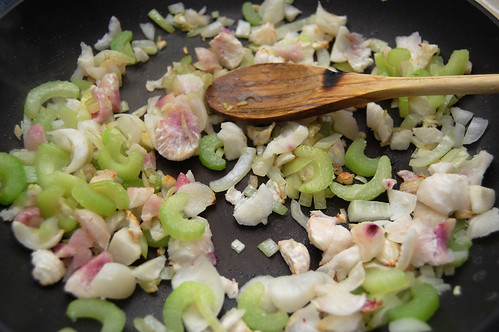
Prepare a heat-proof bowl with the spinach, bread, stock and melted butter. Once the turnips are out of the oven, reset the oven to 350°F. Saute the onion, celery, garlic and turnip “innards” until soft; approximately 5 minutes. Add to the prepared bowl and mix together.

Stuff the turnips with the filling. If you have extra, no worries. Throw it in the pan as bedding. It’ll still be quite tasty. Roast the turnips for 20-25 minutes, until the turnips are softened, slightly browned.