New Faves, Old Faves – Chicken Casserole

I’m on a dinner roll this week (get it? dinner… roll…? i should not be allowed to tell jokes)! Shrimp & Grits on Tuesday was a new fave, today’s recipe is an old, old fave.

prebaking

This recipe is from a cookbook put out by the teachers and administrators at my elementary school. Yep, my elementary school… in the 80’s.

But my mom tried it one night, probably almost 20 years ago, and it has been a family staple ever since. I used to request it for my birthday every year, and I never understood why when friends came over for a birthday dinner they never got as excited about Chicken Casserole as they did about Pepperoni Pizza.
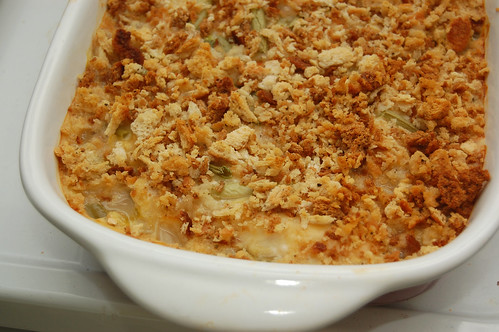
baked

That’s right, I’m talking about casserole. I know that in today’s world the word “casserole” strikes a bit of fear into our hearts. We think of a leftover tuna casserole in our grandmother’s fridge… right next to the green ambrosia. You know what I’m talking about. Americans used to thrive on casserole, now we’re terrified.

I’d rename it something with less baggage, but maybe I can reclaim the world and turn it back into something positive… take it back to when it meant making a quick and easy dinner and only having to dirty one pan. One pan!

This dish makes enough for leftovers on a busy night. What I love most is the hint of white wine that comes through. Don’t overbake it, or you’ll be left with sad, dry chicken.
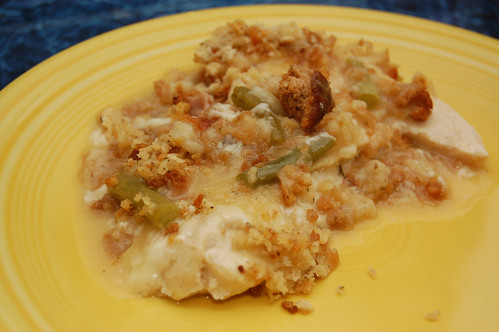
chickencass

Bringing Sexy Chicken Casserole Back
adapted from Joan George

6 boneless chicken breasts, halved longways
salt and pepper to taste
8 slices Swiss cheese (low-fat works)
3/4 cup white wine
1/4 cup melted butter (unsalted)
1 1/2 cans cream of chicken soup
2 cups Pepperidge Farm stuffing mix

Preheat oven to 300F. Place halved chicken breasts in a 9×13 baking dish and top with Swiss slices. In a medium bowl, thin the soup with the white wine and mix until smooth. Pour mixture over chicken and Swiss. Rinse bowl, and combine stuffing mix and melted butter. Stir, moistening stuffing, and sprinkle over top of the dish. Season with salt and pepper.

Bake at 300F for 1-1/2 hours. Can be made ahead.

Note – I added a handful of green beans to my latest batch, just to introduce some veggies in there. I didn’t feel it added anything tremendous flavor-wise, so I might suggest making your veggies as a side rather than adding them to the dish.

Thanksgiving with Martha

My cooking/baking/decorating idol Martha Stewart has released her Thanksgiving favorites.

I’m so excited for Thanksgiving cooking and baking that I can barely contain myself. Do you know what you’re making yet this year?

52 of Martha’s Favorite Side Dishes
15 Stuffing and Dressing Recipes
10 Cranberry Sauce Recipes

Hello everyone!  The weather in DC is totally screwing with me lately; fluctuating from cold to chilly to pleasant in a matter of days.  My culinary barometer doesn’t know whether or not it should be pointing in the root and squash vegetables of winter or forge on with the lighter meals of summer.  I’ve decided to let time being the deciding factor.

All the essentials

Work has been craaaazy lately, with over time becoming the norm rather than the exception.  A bit frustrating at times but with a recent automobile “incident” and Christmas just around the corner, the extra cash is appreciated.  (And yes, we have begun planning Bake-A-Thon 2009!)

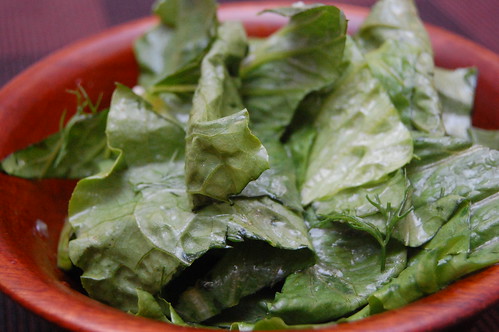
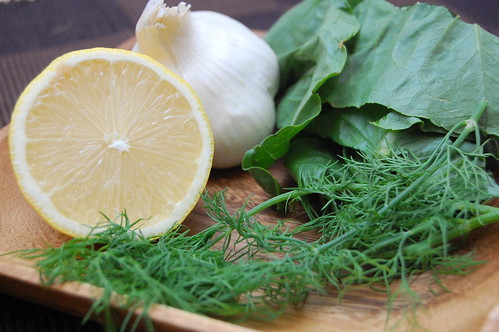
Being the cheapskate I am, I rarely work with fresh herbs.  With a gift of some potted plants I’ve been trying to turn that around.  Ever worked with dill?  I don’t think I have.  The most exposure I’ve had to the stuff is snickering at the local  grocery store while reading the dried herb container labeled “Dill Weed”.  (hah!  still cracks me up)  It’s a hard flavor to describe, reminding me a bit like a mild cilantro but also maybe parsley like.  I also had a brief flash of cucumber!  The lemon and garlic, however, kick its influence up.

Romaine with Lemon Dill Dressing

Lemon Dill Dressing
Add this to a simple salad of lettuce; perhaps with carrots or scallions.

1 tablespoon fresh dill fronds; chopped
1 garlic clove; minced
Juice of one lemon (approximately 2 tablespoons)
1/4 cup of extra virgin olive oil

Combine and enjoy!

Shrimp & Grits – Love at First Bite

I can’t wait any longer to share this recipe. I’m too darn excited.

shrimpandgrits_serving

The first time I had grits, I ordered them with my scrambled eggs at a local restaurant in the south. I’d never given grits much thought before, and I probably didn’t even know what grits were until my mid-teens or possibly later. People just don’t eat grits in the north (and in case you’re new to grits – it’s ground corn.. it’s the consistency of cream of wheat, but cream of wheat is ground wheat instead of corn).

greenpepper and garlic

I had no idea that grits would be the perfect compliment to a breakfast of scrambled eggs and warm biscuits. My friend Jeff always raved about having shrimp and grits for dinner, but considering that he liked things such as Turducken, you could only put so much stock in his food recommendations.

cookinggritsthickgrits

But wow, this time he was right! Shrimp and grits makes a quick, healthy, spicy and delicious dinner (if you’re a big breakfast person, this would probably make an awesome breakfast too – I just like a lighter meal in the morning). I was stunned that something so tasty could be whipped up in probably 15 minutes – and that time includes my miscellaneous puttering and slowness.

cooking shrimp

I adapted a recipe from What’s Cooking America to take out some unnecessary items and make it more my style, and I’m happy to report that it worked out perfectly. You won’t find any bacon, onions or heavy cream in my version. Many recipes also add a lot of cheese to their shrimp and grits, but I just didn’t think this needed it. I also used instant grits instead of slow cooking (this makes a big difference in your cook time, so read your labels!), which made the process much faster. Give grits a chance 🙂

shrimpgrits_serving

Creamy Shrimp & Grits
adapted from What’s Cooking America
Serves 2-3 people

About 20 regular sized frozen shrimp, thawed and peeled
1/2 cup skim milk
2 cups water
1 cup chicken broth
3 tablespoons butter
1 cup instant grits
2 tablespoons fresh lemon juice
1 clove garlic, minced
1/2 finely chopped green bell pepper
Salt and black pepper to taste
dash of red pepper flakes, cayenne, and onion powder

In a large saucepan over medium-high heat, combine skim milk, water, and broth and bring to a boil. Add butter, salt and pepper. Slowly add grits, stirring constantly so that they do not burn. Reduce heat to medium-low. Cook for approximately 5 minutes, stirring frequently. Grits should absorb all of the liquid and become soft and moist, not dry, like oatmeal. Remove from heat.

Sprinkle thawed and peeled shrimp with lemon juice, black pepper, a little salt and onion powder and set aside. Add garlic and green bell pepper to a medium pan; sauté until the onion is clear and transparent. Add shrimp mixture and sauté 5 to 7 minutes or until shrimp are curled and opaque. Remove from heat.

Spoon hot grits onto individual plates and top with shrimp mixture. Enjoy!

A couple years ago I came across this really excellent site called Drop In & Decorate, by the blogger Lydia Walshin of Perfect Pantry.  The site is a resource for a very simple idea: get a group of family/friends together to decorate cookies, then donate them to a locale charity.  A fun concept for people of any age with a the bonus of doing something nice for your local community (also good to ensure you don’t pig out on the end product, though I will say from experience there is a good chance you will eat your fair share during the decorating process).

Photos by Stefani Bachetti

Since its inception the idea has really taken off, collectively donating to 55 non profits in 18 US states (and Canada).  It’s become so popular that Lydia was able to incorporate Drop In & Decorate as tax-exempt non-profit last year.  I organized my own Drop In & Decorate event a couple years back and can humbly say it’s inspired a few to do the same.

My sister is definitely the artist of the family.  Photography, painting, charcoal, you name it.  Even her cake decorating puts puts me to shame.  Stefani recently started her first semester at the Institute of Design at Illinois Institute of Technology in Chicago and was inspired (if I do say so myself) to organize her own Drop In & Decorate event.  Of course being surrounded by a group of like-minded artists you’re sure to get some amazing art.  In the end these artists decorated approximately 180 cookies for the Inner Voice homeless shelter.  Pretty awesome.

Drop In & Decorate Cookies by Stefani

Drop In & Decorate is a fun event that anyone can do, culinary prodigy or not, that does a little something for the local community.  Interested in hosting your own?  Check out the site or contact Lydia via e-mail.  Right now she has some free supplies and coupons to offer future organizers.

Drop In & Decorate Logo

Office Snack Gourmet

Not a fan of the vending machine options at work?  Emilie Baltz wasn’t and decided to do something about it with Office Snack Gourmet.  This stuff is wild.  Praline Purses?  Cheddar Dusted Popcorn?  I don’t think I’ll ever look at snack food the same way again.

3 Cheese Chilequiles by Emilie Baltz Mocha Nougat Fondant by Emilie Baltz

Foodie & Health News!

Oy, what a week! Let’s kick back our heels a bit with some foodie and health-related news, mmkay?

  • Cat Catches Swine Flu (I’m not kidding!)
  • Kellogg’s finally agreed to take the very misleading “Helps your child’s IMMUNITY” banner off of Cocoa Krispies boxes. Listen, Cocoa Krispies helps no one’s immunity.
  • Flour Girl at Washington Post asks, “What’s in Your Cake Flour?
  • Washington Post features top reader recipe picks for October – including fancy eggs, Italian vegetable stew, Moroccan chickpeas with apples and more!
  • Don’t miss out on some neat foodie events in the DC area this week – I’m looking at you, Chef Edwin!
  • Proper storage of leftover cheese makes it last a long time.
  • I could have used this auto-sealing coffee mug yesterday when I spilled coffee all over myself while driving.. fun!
  • And… loldog?

    SHARKATTACK

    Deglazing 101 – Little Pieces That Pack A Punch

    On Monday I briefly mentioned deglazing, but I didn’t really talk about what it was or why you’d do it.  Deglazing is a technique for removing dried, burnt bits of food from the bottom of a pot or pan.  The process is fairly simple.  You take a small amount of liquid (half a cup or more) to the pan while it’s still hot to boil those pieces off along with scraping with a metal or wooden utensil.  Eventually you’ll be left with a dark, somewhat thick “juice” and a slightly cleaner pan.

    This may seem a bit odd for someone who’s never heard of it.  Ordinarily, we associate burning with bad taste and something to be avoided.  Deglazing, however, has the effect of extracting strong flavor from this otherwise-useless cooking by-product.  They often serve as the foundation for gravies and pan sauces; a thinner kind of sauce (those bits are often called “fonds”, French for “base” or “foundation”).  They can add a stronger presence of flavor richness.

    Deglazing is often done after sauteing or searing beef or chicken in non-non-stick pan (is there a better way to say that?).  You can’t really get much deglazing with non-stick, unfortunately, or it wouldn’t really be doing its job.  Next time you’re watching a cooking show, check out the hardware.  Many chefs value this culinary ambrosia and therefore prefer non-stick.  Roasting pans are also excellent candidates for this, albeit a bit more difficult to work with.  Any liquid can be used, though the most common choices are water, stock and wine.  Of course, if the liquid has flavor it will effect the end result of your sauce base, so take a moment before making your decision.  Often, for example, you’ll see red wine being used with beef-based dishes.

    So, next time you’re looking down at a blacked pan in disgust, remember the power of deglazing!

    Food Photography – Pumpkin Cheesecake from Chandler’s Bakery

    Chomp, chomp! It’s time for some food photography.

    This is a Pumpkin Cheesecake from Chandler’s Bakery in Charlottesville, VA. I get my pizza dough from Chandler’s and also satisfy my cravings for hard rolls. I’m a big fan of their breads [insert tired argument about how I’m originally from the north and you can’t find a decent roll in the south here].

    pumpkin cheesecake

    The desserts I’ve had are good, but so far I haven’t been blown out of my shoes. I look forward to trying more things from Chandler’s and more bakeries in Charlottesville!

    I tried a cake from Albemarle Baking Company when looking for wedding cakes a few years ago, and even though everyone tells me how great they are I swear the frosting on that cake was really Crisco. It was a gigantic disappointment, especially since they made me purchase a whole cake in order to try it – at least at that time they didn’t do samples for weddings. Somehow their bread also happens to be very good, but I’m too traumatized by my grease cake experience to return.

    Have a bakery recommendation in Charlottesville? I’ll romp on over with an open mind and a hungry stomach.

    Man, I love Halloween.  Georgetown was a blast as always and there were some really original cool costumes.  My inspector gadget was quite successful, with random strangers yelling “Inspector Gadget” as I walked by.  The extra hour was well spent, livin’ it up until it was time to pass out (not booze related).  Good times!  I’m already plotting next year’s costume (Mad Hatter, maybe?).

    Fingerling Potatoes and Rosemary

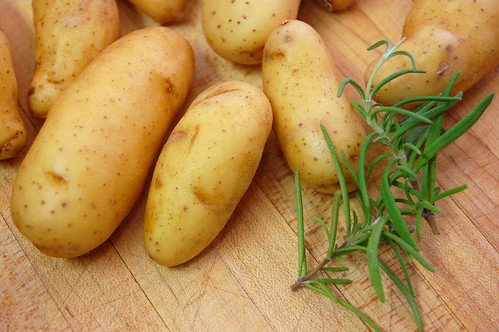
    I was walking the produce aisles of my local Trader Joe’s, which is conveniently located near the local library I go to on the weekends to actually get some work done, when I came across some fingerling potatoes.  The first thought that popped into my head was “fun size potatoes”.; followed quickly by my second thought “Man, these would make great fingers for a Halloween recipe”.  Next year.

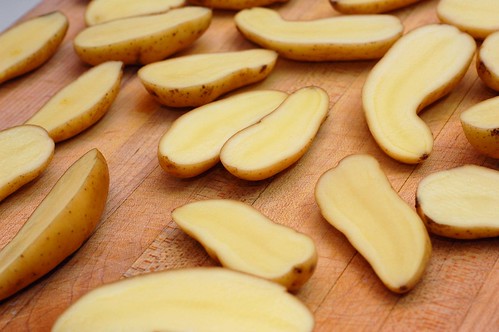
    Sliced Fingerling Pototoes

    Potatoes can take a while to cook even when chopped, so the size of these is rather convenient for during-the-work-week cooking.  Pay heed to the instructions about the pot or pan used.   Stock takes a while to reduce (as does wine and just about anything else you’re going to reduce), so you really want something with a lot of surface area.  This will up the rate of reduction while still allowing all your potatoes to be immersed.

    Overall, I liked this. I may experiment with some fresh thyme next time…

    Rosemary and Garlic Fingerling Potatoes

    Rosemary and Garlic Fingerling Potatoes

    4-5 teaspoons olive oil
    1 onion; chopped (I went with larger pieces than I normally go)
    4 garlic cloves; minced
    1 tablespoon butter
    Leaves from one sprig of rosemary; coarsely chopped
    1 teaspoon salt or more to taste
    2.5-3 cups stock (vegetable or chicken)
    1-1.5 lb fingerling potatoes; sliced lengthwise

    Saute your onion in oil under medium-high until browned; approximately 5 minutes. Add all your remaining ingredients but the potatoes and cover to bring to a boil. Once boiling, add your potatoes, cover again and bring to a “strong simmer” or “weak boil” (I have no idea if these are valid culinary terms). Let it stay like this to reduce your stock; approximately 20-30 minutes.

    When close to all the liquid being gone, raise your heat to medium/medium-high. What you’re going for is some light browning on one side of your potatoes. Be sure to watch it at this phase because it’s very easy to burn it if it sits too long! Once the one side has begun to brown, toss and cook it like you were sauteing it. When well browned all around (rhyme!), remove from heat and serve.

    If you used a non-stick pot/pan and you have some burnt stuff on the bottom, never fear. Simply deglaze and add to your potatoes for an even richer taste. Enjoy.