Light, White Meat Fish Fillets

The other week I went fishing with my dad. He’d been hounding me to go with him for, well, a few years, and I’d been dragging my feet. It’s an all day commitment and I seem to never have a lot of spare days, but also the last few times I went we never caught anything. Fishing can be a lot of fun, or it can be extremely uneventful.
DSC_0115DSC_0116

Thankfully this trip was a lot of fun! We did have some good activity, but most of it we had to throw back – 3 rays, 1 small flounder, 1 blue fish that I let get away as I brought it up to the boat, 2 cobia who eyed the bait but just wouldn’t bite, and, luckily, one small/medium size blue fish that I did successfully get into to boat and we kept!
DSC_0121

My dad was determined to catch me enough fish for my husband and I to have dinner, so the next day he went back out by himself and caught a few speckled trout and croaker.
DSC_0128

The result was an excellent dinner. Earlier in the week before the fishing trip I bought a flounder fillet at the grocery store for dinner. The difference between fresh fish and store bought fish is amazing.

Good fish doesn’t take long to prep or cook. This recipe will work well for any small to medium size white meat fish.

DSC_0130

Light, White Meat Fish Fillets

1/4 cup plain bread crumbs
1 teaspoon Chesapeake Bay Seafood Seasoning
1 clove garlic, minced
1/2 teaspoon parsley flakes
1/2 teaspoon Italian seasoning
5 turns of salt
12 turns of black pepper
1 egg
5-6 small fillets

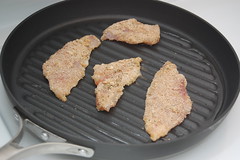
Heat a grill pan on medium high heat. Combine all ingredients except fish and egg and make a thin layer of the spice/bread crumb mixture on a plate. Crack open an egg and whisk it in a small bowl.

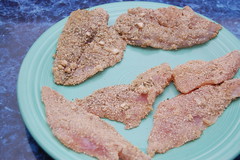
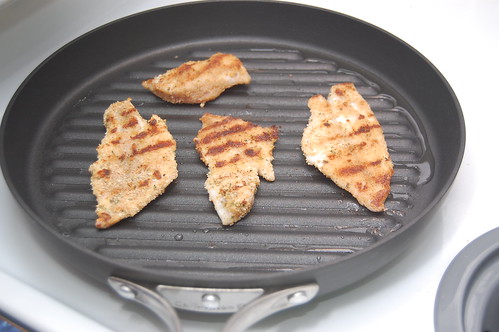
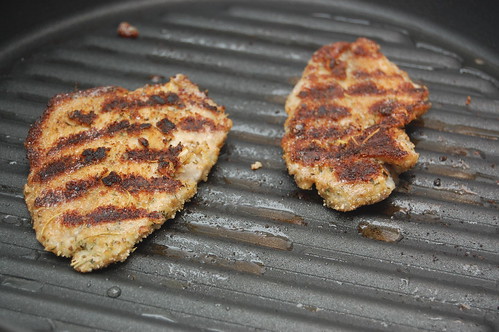
Coat fish fillets one at a time in the egg and then dredge in spice/bread crumb mixture. Add coated fillets to grill pan and cook small fillets for approximately 3 minutes on each side, watching carefully to be sure you don’t overcook. Fish should be opaque when done; use a small fork to test that fish just starts to flake when touched.

Serve with whole wheat couscous and asparagus.

Kitchen Tips – Deconstructing [Americanized] Mexican Food

The week that my husband and I moved, I carved out a little time for a “ladies night” with some friends. We planned a low key evening of dinner and drinks at Uncle Julio’s followed by a romantic comedy, “Ghost Town,” which was rated by Paste Magazine as one of the 17 Best Romantic Comedies of the Decade (it wasn’t).

During the dinner portion of the evening, I found myself asking a lot of questions about what things were. My friends were pretty surprised by this, and they demanded that I dedicate a post to understanding Mexican food. Gladly!

I hope this list helps all of you as much as it helped me! Please note that these definitions are generalizations that apply to Americanized Mexican food, and of course there are variations.

  • Quesadilla – A tortilla that is filled with cheese (queso), folded (not wrapped) and cooked until the cheese melts.
  • Chorizo – A fatty pork sausage.
  • Tamales – Can have a variety of fillings including meat, cheeses, vegetables or chilis, but it is generally steam-cooked corn dough wrapped in a softened corn husk before cooking. It is tied together and steamed until the dough is cooked, and the corn husk is peeled back before eating.
  • Fajita – Marinated grilled meat cut into strips on a corn or flour tortilla, often with peppers. The tortilla is usually then wrapped.
  • Burrito – A flour tortilla folded and rolled to completely enclose the filling (generally beans, rice, cheese and/or meat).
  • Taco – Usually a hard, folded corn tortilla stuffed with various fillings like meat, cheese, lettuce, etc.
  • Enchilada – A softened corn tortilla folded around a filling (the ends are left open, unlike a burrito). Often topped with a tomato-based sauce and cheese.
  • Chile relleno – A roasted poblano pepper stuffed with cheese and sometimes meat. The pepper is dipped in a batter and fried.
  • Taquito (or flauta) – A small, thin, rolled up tortilla (usually with a meat filling) and fried until crispy.
  • Chimichanga – A fried or deep-fried burrito (ends tucked in). Also filled with similar ingredients to a burrito.

Food Photography – The Inn at Little Washington

Last night I had the pleasure of having dinner at The Inn at Little Washington, a foodie haven about 70 miles from Washington, DC. If you’re not familiar with The Inn, check Wikipedia for a listing of the many, many awards it has received.

It’s a pretty spectacular place; I guarantee it’s the most decadent meal you’ll ever have. It was actually my second time there – the first time was to celebrate the anniversary of my in-laws, and last night was a celebration for me and my sister-in-law. Of course I brought my camera and tried to snap away at everything we ordered. We had dinner at one of the two tables in “the kitchen,”

bread in kitchen

“The Inn’s new kitchen, often referred to as “the most beautiful kitchen in the world” was added in 1998. Inspired by the dairy room at Windsor Castle, the kitchen features an enormous Vulcan range. Built to order in France, it is topped with a copper and brass hood that looks like King Arthur’s tent. Two kitchen tables — we call them the inner sanctum — allow guests to watch the action ringside.”

canape2

For starters they brought us a sampling of canapés.

cheese canape

I believe this one was cheese.

risotto canape

I grabbed this one, filled with risotto.

shrimp canape

Shrimp canape

truffle popcorn

Herbed popcorn topped with shaved truffles. Morgan informed me that this is how he would like his popcorn from now on.

sorrel

They brought this between the canape and our first course. They referred to it as “sorrel,” and it did, in fact, taste a lot like grass!

oyster slurpees2

A Quartet of Island Creek Oyster Slurpees.
This was by far my favorite thing all night. I’d never had anything like it, and it was amazing. The oysters were each filled with a dollop of either cold grapefruit, passionfruit, cucumber puree or wasabi slurpee. Amazing.

beet fantasia

Beet Fantasia: Three Varieties of Roasted Beets, Beet Mousse and Citrus Salsa.

foie gras

A Marriage of Hot and Cold Foie Gras with Ice Wine Jelly and House Made Quince Preserves.

ravioli

ravioli cut

Spinach and Cheese Filled Molten-Gold Ravioli with Shaved Summer Truffle.
I wanted to love this, but there was a lot of runny egg inside that overpowered it a little more me.

lobster with gnocchi

Fricassee of Maine Lobster with Potato Gnocchi, Green Grapes and Curried Walnuts.

scallop

Pan Seared New England Diver’s Scallop with Black Olive Tapenade and Gazpacho Salsa.

rabbit

Medallions of Rabbit Loin Wrapped in House Cured Pancetta Surrounding a Lilliputian Rabbit Rib Roast Resting on a Pillow of Pea Puree.
I peered through the giant water chalices to take this photo. The rabbit was amazing.

maine lobster

Pan Roasted Maine Lobster with Braised Baby Bok Choy, Grapefruit and Citrus Butter Sauce.
This was my main course selection – very excellent but at this point I was very stuffed!

tuna

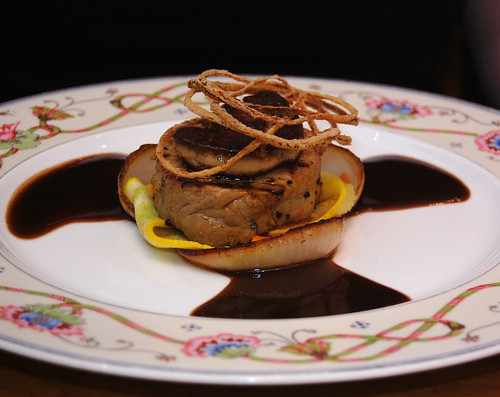
Pepper Crusted Tuna Pretending to be a Filet Mignon, Capped with Seared Duck Foie Gras on Charred Onions with a Burgundy Butter Sauce.

lamb2

Elysian Fields Baby Lamb Loin with Parsley Risotto, Chanterelle Mushrooms, Garlic Custard and Minted Bearnaise Sauce.

Sweetbreads

Crispy Sweetbreads with Grilled Local Peaches, Chanterelle Mushrooms and Virginia Country Ham.

After dinner and before dessert – some kind of delicious blackberry drink with tapioca.

sorbetsorbet4

sorbet3

A Painter’s Palette of Seasonal Sorbets.
I didn’t get to try as much of this as I would have liked. My husband ordered it, and he said he would almost eat the glass it was sitting in to get every last drop.

sevendeadlysins

sevensins

mint

Seven Deadly Sins, A Sampling of Seven of Our Most Decadent Desserts.
What I picked – of course!

mini cobblers

A Trio of Summer Cobblers: Local Blueberry, Peach and Cherry with Buttermilk Ice Cream.

cheeses

For a Selection of Today’s Cheeses, Just Ask for Faira the Cow.
We did.. and they brought it!

cookies'

A favor box of assorted cookies and chocolates to end the night, in the shape of The Inn.

As you can see, I will not be eating for the rest of the week!

Lasagna Skillet, aka Lasagna "Giant Pot"

Like the English Muffin Pizzas I posted at the end of last month, this recipe is also from that stage where Morgan and I were trying to clean out our kitchen before moving.

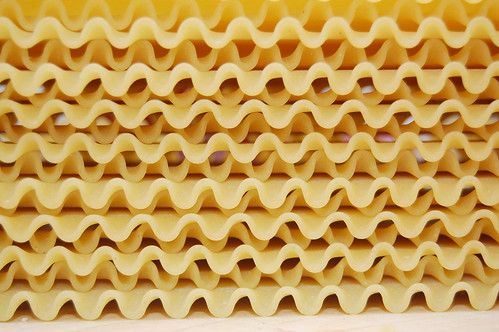
noodles

And while we’re on the subject of moving – yes, we are all moved in to our new place in Charlottesville and it’s gorgeous here. Unfortunately we’re not all unpacked yet, but we’re getting there (slowly). The kitchen is finally done, and I’m looking forward to jumping back into the DinnerCakes saddle!

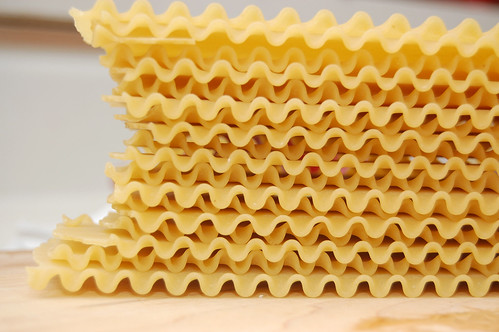
stackednoodles

Back to today’s post, we had some beef that had been in the freezer for awhile, lasagna noodles in the far reaches of the cabinet and a stray zucchini to use. Morgan loves, loves, loves lasagna, but we never make it because of the fat content plus time commitment. But like I said, we were moving within the week so everything had to go!

cooking

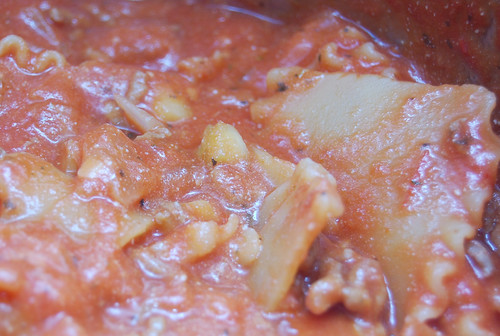
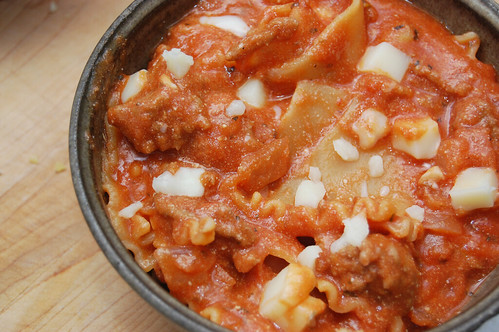
A long time ago I remembered making something called “lasagna skillet,” a less elegant version of lasagna where the noodles are broken up into fourths and everything is cooked together in a skillet. I decided to make something similar, but because of the massive amounts of ingredients (yep, if you’re cooking for two like me you will have leftovers – but they’re delicious leftovers!) I couldn’t fit everything in a large skillet so I used a large spaghetti pot. It would be even more inelegant to call this dish lasagna “giant pot,” so let’s just stick with lasagna skillet.

This dinner really surpassed my expectations and we both enjoyed it very much. It came in handy for both lunches and dinners the next few days, and the leftovers are great either cold or warmed up. Enjoy!

lasagnaskillet

Lasagna “Skillet”
inspired by Betty Crocker

a double batch of mom’s marinara sauce (double the recipe from the link, or use one jar of store bought sauce)

1 lb ground beef
1 onion, diced
1 zucchini, skinned and diced
3 cloves garlic, minced
16 oz package lasagna noodles
4 cups water
1/2 cup part skim ricotta
mozzarella cheese, to sprinkle

Stir together beef, onion, zucchini and garlic in skillet over medium-high heat, about 5-6 minutes, until beef is brown; drain.

Add ingredients to large pot and stir in water, sauce and lasagna noodles, quartered. Bring to a boil, folding the mixture over the stiff pasta, then reduce heat to a simmer and cook uncovered for approximately 20 minutes, until noodles are cooked (Note: It will seem like a lot of water, but it gets absorbed as it cooks). Add ricotta when noodles are almost completely cooked. Sprinkle with mozzarella before serving.

In Case of Zombies

Hope you enjoyed yesterday’s post from Edwin of his “Pillow Fight” cake submission to the Threadcakes competition. The competition challenged bakers to make cakes inspired by a Threadless t-shirt.

I also submitted a cake modeled after one of my favorite Threadless shirts.

In Case of Zombies

Winners will be announced next week, and there was some seriously intense competition (this is my personal favorite – how did they do it?!!). This competition was definitely a learning experience for both Edwin and myself!

Light Chicken Salad – What's Your Go-To Recipe?

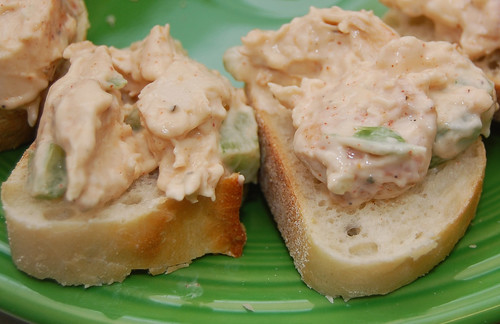
So recently I wanted to create a really great light chicken salad. I know Edwin and I mention the grocery store in our hometown all the time, Ukrop’s, but they really do have great light chicken salad. Sadly the store bought chicken salad I tried at Harris Teeter in Northern Virginia was, well, gross!

DSC_0016

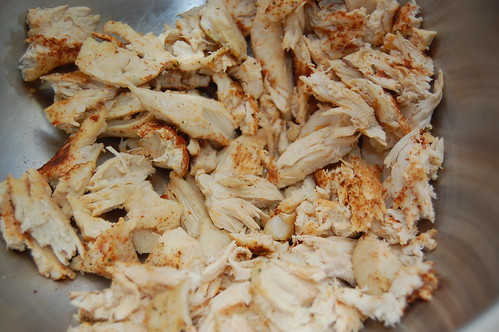
This is not the spectacular replica I was hoping for, but it’s a start. I read some forums where others have tried to recreate it, and it seems that the only ingredients used are chicken, celery and mayonnaise. Since it’s labeled “light” chicken salad in the store, I assume that means a low fat mayo is used. I used fat free Miracle Whip in place of mayo, and it didn’t knock my socks off.

DSC_0019DSC_0021

I’d really love some help on this recipe if any of you have suggestions or recommendations! I know it’s easy to go wild with chicken salad recipes (adding nuts, cranberries, etc.), but I’d really just like something very basic. What do you think?

chicken salad

Light Chicken Salad

1 lb. boneless, skinless chicken breast
2 stalks celery, diced
1/2 to 1 cup of fat free Miracle Whip
1 baguette
paprika, salt, black pepper and cayenne to taste

Preheat oven to 400F and bake chicken (seasoned with spices above) for 20 minutes. Cut celery while chicken is cooling.

When chicken is cool, use a fork to shred. Combine shredded chicken, diced celery and Miracle with in a large bowl. Add additional spices as desired. Mix well, cover tightly, and chill until serving. Slice baguette while waiting.

Kitchen Tips – Preserving The Top Of Your Wedding Cake

I got a lot of great feedback from my post on Wednesday showcasing mine and Morgan’s wedding cake (both on our wedding day and then one year later) – thanks so much for the kind words!

In keeping with the wedding and memories mood I have going on this week, I thought I’d take the opportunity to post about how to store the top of your wedding cake so that you can enjoy it the next year. I’m sure there are a few different ways you can do it, but I’m going to share what worked for us.
Our cake was not covered in fondant (I just can’t get in to chewy taste of it), but I’d imagine that fondant would only serve as another protective layer.

When you’ve got the top of your cake back home, transfer it to either a piece of flat plastic used for tiered cakes, or a cardboard cake round that has been wrapped in plastic before putting the cake on top (so the cardboard doesn’t absorb anything or give off cardboard taste!).

Place the cake top, uncovered, in the freezer for about 20 minutes to firm it up. Remove it from the freezer, and wrap it, cardboard or plastic round and all, tightly with lots of plastic wrap – no skimping! When done, place it safely in the freezer and leave it alone for a year!

To enjoy, move the cake from the freezer to the fridge 1-2 days before your anniversary. A few hours before serving, remove the plastic wrap and set it back in the fridge. Then right before serving, allow cake to reach room temperature before digging in by setting it out on the counter.

Good luck!

Food Photography – Our Wedding Cake, One Year Later

I think my husband knows by now that I have a bit of an obsession with the photos of our wedding cake. I have no good response for this.
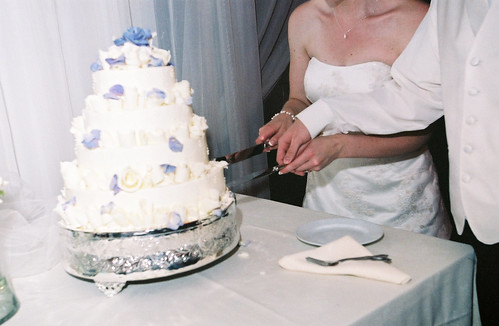
wedding cake

Sunday marked our very first wedding anniversary. We celebrated with a lot of packing, the movie Watchmen, a bottle of red wine given to us on our wedding day from two friends who had been in France (we were instructed not to open it until our first anniversary) and the top of our wedding cake that had been on the top shelf of my parents’ freezer all year.
cake

The packing went as you might expect, the movie was still just as good as we remembered in the theater, the red was quite nice and the cake was still remarkably tasty!

f1719

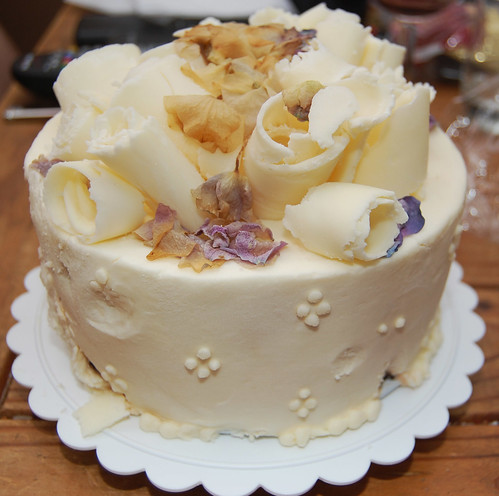
The buttercream frosting had hardened a bit and tasted a little freezer burned, but the cake itself was great! I couldn’t believe it, so I had to eat most of it to be absolutely sure.

f1929

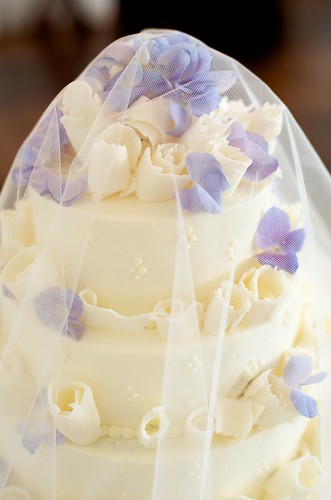
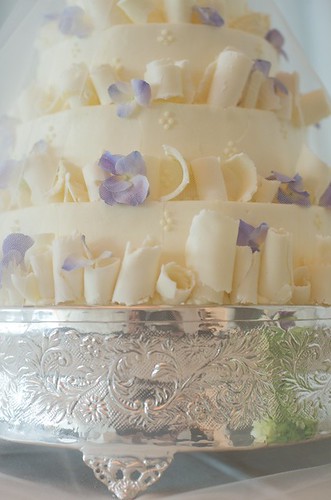
For the short time the cake existed last year before being devoured, it was four tiers. The layers alternated between yellow cake with blackberry filling and chocolate cake with chocolate filling – all frosted with french vanilla kiss buttercream and decorated with white chocolate curls and purple hydrangea. The cake sat on a 14″ silver cake plateau purchased online by my mom; we hope to keep it in the family for awhile.

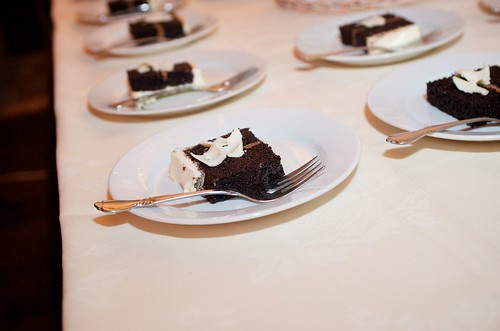
wedding cake slices

The cake was designed by Teri Edwards at Cakes Unlimited, who we can’t recommend enough if you’re planning a wedding in Charlottesville.

topcake... one year later

The same is true for Meredith Montague Photography – Meredith took all of the amazing wedding cake photos that I’m over-enthusiastically sharing with you today (minus, of course, this last photo of our cake top one year later, looking, well, a little sad!).

English Muffin Pizzas

Today we’ll be having a different kind of culinary adventure – how about an adventure for people who are moving in under a week, have packed up pretty much all of their belongings, whose lower back and legs are killing them from packing and cleaning things up and who are left with a lot items that might not naturally go together?

moz

Yeah, that’s probably a little too specific, huh? I won’t start whining about how exhausted I am, but I will admit that I may have just fallen asleep in the closet…

So today I bring you english muffin pizzas! They’re not the fanciest or most sophisticated dinner or lunch, but you shouldn’t knock them until you try them. It’s summer, and they’re light, easy and really tasty.

beforecooking

You know how there’s always that person in the group who can’t have cheese? Or someone doesn’t like meat? Another person doesn’t like a lot of sauce on their pizza? Remarkably, everyone can get exactly what they want with english muffin pizzas. Set up an assembly line of ingredients for kids and/or adults and have everyone decorate their own – there’s no messy, sticky pizza dough to roll out, and there’s no grease like with take out. Make as many or as few as you like.

english muffin pizzas

English Muffin Pizzas

whole wheat english muffins
fresh shredded mozzarella
Ghost Baker’s mom’s marinara
fresh basil, torn into small pieces

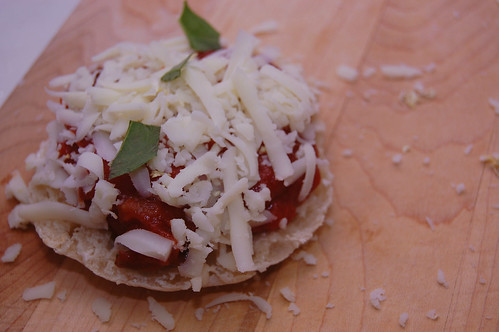
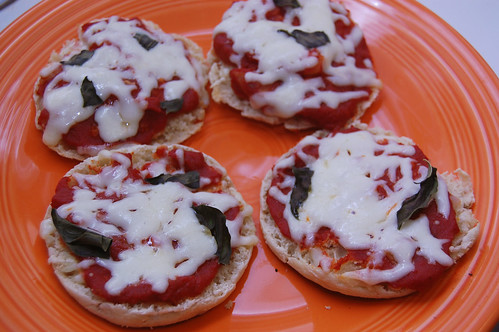
Preheat oven to 350F. Toast english muffins first by themselves for a crispier crust. Add ingredients above as desired and add to a baking sheet. Cook until mozzarella melts.

Quick & Easy Zucchini and White Bean Soup

The other day I was browsing Food Gawker for inspiration, and I came across a photo for zucchini soup. This is normally the type of thing that I would quickly skip over, but I remembered that I had a stray zucchini around the house that needed to be used, and not much time left to use it!

zucchinicelerygarlic

I talked over a few ideas with Edwin, who was of course thrilled at my newfound fascination with soup. I came up with a few changes to make the zucchini soup I found a little more my style. The biggest change was probably adding white beans. I really enjoy white beans; they always make a really malleable addition to meals. I also some celery, removed the onion and added less zucchini and chicken broth.

closeupsoup

One thing to keep in mind is to be a little careful handling the zucchini. After chopping it my hands felt completely dried out, itchy, tight and raw. I was initially a little startled, but then I remembered an excellent comment left by a reader on Edwin’s Celery Root Bisque recipe from last year – handling squash can cause a condition called Contact Dermatitis, and zucchini is a squash. It shouldn’t cause any real damage, but if you’re susceptible like me then your hands might be a little uncomfortable right after working with it. Try touching it as little as possible or, if you’re really concerned, wear latex gloves when handling squash.

Dry hands aside, I have to admit that I really loved this soup. Zucchini doesn’t really have a very strong flavor, so there’s nothing overpowering about the soup – the white beans and pepper make it flavorful. It’s light, very tasty and quick and easy to make – definitely a DinnerCakes win and a great summer dinner!

zucchini soup

Zucchini & White Bean Soup
adapted from Cooking with Michele

2 cans chicken broth (14 oz. each)
1 can cannellini beans (19 oz.), drained
2 stalks celery, chopped
1 zucchini, chopped
1/2 tablespoon extra virgin olive oil
1 1/2 cloves garlic, chopped
1/2 tablespoon fresh thyme, minced
1/2 cup half and half, optional
salt and pepper, to taste

Heat large pot over medium heat and add oil when hot. Add garlic, zucchini and celery and cook for about 5 minutes, stirring occasionally. Add stock, drained white beans and thyme to the pot, then cover and bring to a boil. Reduce heat to simmer and cook until zucchini and celery are softened, about 15 minutes.

Remove pot from heat and pour in batches of two or three into food processor (be careful not to overflow!) and pulse. When desired consistency is reached, pour final batch back into the pot and add half and half, followed by salt and generous amounts of pepper to taste (don’t skimp on the fresh ground pepper!).

Makes about 3 or 4 servings of soup.