

(Pictured: Dark, Milk and Chai Ginger Chocolate Truffles made for a co-worker’s birthday last week. Truffles are covered in coconut, pistachio, cashew, powdered chocolate or pecan).
(Pictured: Dark, Milk and Chai Ginger Chocolate Truffles made for a co-worker’s birthday last week. Truffles are covered in coconut, pistachio, cashew, powdered chocolate or pecan).
Happy Design Tuesday, everyone! Notice anything different?
We started DinnerCakes a little over six months ago and we’re both very proud with how things are going. This site has really driven us both to become better cooks, and sharing our adventures with you has helped us foster a community of great people. It’s been a great six months and we’re looking forward the next six (and the six after that, and the six after that, and the… you get the idea).
Today we are very excited to unveil our new site design. We wanted to give DinnerCakes a unique look along with simplifying it down to just the good stuff and none of the clutter. We’d love to hear what you think of the new design, both good and bad. Leave us a comment or e-mail us directly.
Thanks for reading.
I remember three years ago sitting among a group of women who were telling me they couldn’t believe I’d never tried, heard of, made, or otherwise been exposed to bakeless cookies – three years later here I finally am! Yesterday for the first time ever I made “bakeless cookies.”
This recipe is straight out of my bridal shower recipe box. A few months before getting married, my bridesmaids threw me a dessert themed bridal shower (they know me well, huh?). They requested that each of the guests bring a dessert recipe, and they collected them all in a cool wooden box painted blue and orange, the colors of my alma mater. I’m looking forward to slowly trying each of the recipes in this box!
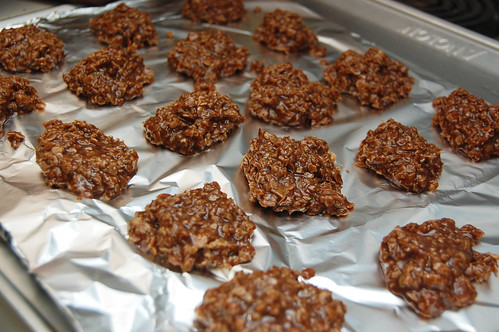
So back to bakeless cookies – I’m not sure I “get” them. I guess I assumed they would firm up, but they’re still very soft. I can pick them up now without too much sticking to the foil, but the consistency is akin to warm, soft fudge or chewy caramel candies (without quite that level of stickiness). I wanted to just describe them as “little goo balls,” but Edwin advised me against using that imagery… woops? They did firm up quite a bit after I put them in the fridge, but they’ll always be soft.
While sadly I probably can’t pack these cookies up to take to work (because they’re so soft I’d worry they’d just meld together, and I think the consistency might confuse people expecting a typical flour-based cookie), I will say that they’re pretty addicting. I started out with just one, then I snuck back for seconds, and then the cycle continued on. I’m interested to hear what you all think about bakeless cookies, whether you try your hand at these or if you have your own recipe. There’s definitely no confusing them for baked cookies and nothing compares to cookie dough, but maybe they do have a place in the cooking/baking world after all? It’s hard to say no to chocolate + peanut butter, and it’s no secret that I’m a little obsessed with oats. These cookies are very chewy and oaty.
And in DinnerCakes housekeeping news – something big is coming to DinnerCakes tomorrow! If you’re a regular reader, then you may have a pretty good idea of what I’m talking about. Edwin and I are very excited about it – please check back tomorrow to find out what we’ve been working on behind the scenes!
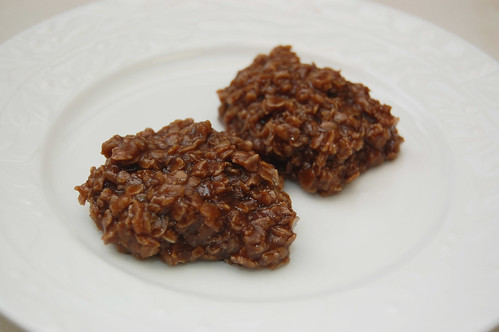
Bakeless Cookies
from my husband’s Aunt Claudia, who received this from her grandmother Louise
2 cups granulated sugar
dash of salt
1/2 cup milk
1/2 cup oleo (same thing as margarine)
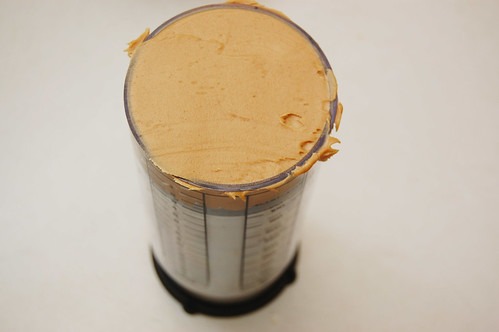
1/2 cup peanut butter (chunky or smooth)
3 cups quick cooking oats
3 tablespoons cocoa
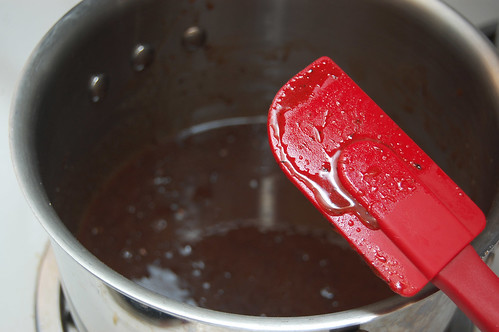
Melt margarine in a medium size pan. Add sugar, milk and cocoa; stir constantly. Once the mixture starts to boil, cook for 5 more minutes and then add peanut butter, blending until smooth. Remove from heat and add in oatmeal fast.
Drop by tablespoons onto foil. As they cool they will firm up just enough so that you can pick them up and pop them into your mouth!
Happy Saturday, DinnerCakes readers!
Today’s Kitchen Tip I learned just a few weeks ago at a cook-out. I got into a discussion about baking with the wife of one of my husband’s friends. She told me a great story about carrot cake!
She and her husband had another couple over for dinner, and she unwrapped her freshly baked carrot cake to get it ready for serving. She cut into it and noticed that there were green flecks throughout the cake! She knew it couldn’t be mold because she had just made it. One of the dinner guests thought she had put some zucchini in the cake.
Yikes! How many of you would have died from embarrassment like she felt?
It turns out that the only thing she did differently this time as opposed to in previous cakes was that she left on the outer layer of the carrot. She washed it of course, but she included the whole carrot rather than removing that top layer.
I did some googling and it looks like she’s not alone. Quite a few people have suffered the green speckled carrot cake phenomena. I can’t pinpoint exactly why, though. Some sites get extremely technical talking about the oxidation of the carrots. Other possible explanations I found were that sometimes if carrots are pushed above the soil when growing, the sun may turn them greenish, and that overbaking could also make them yellowish.
The bottom line is that you should peel off the outer carrot skin to be safe, and watch your cake to make sure that you don’t overbake it. If anyone comes across a more definitive explanation (in layman’s terms!) please let us know!
Heather and I tend to talk about food pretty often; so often in fact that we have rules. One of the more recent ones is no talking about food before noon. Why? Cravings. When you’ve got a craving for baked goods or something loaded with cheese at 10am in the morning, you’re in trouble. Wednesday’s craving (albeit not at 10 in the morning, thank god) was fries. Some cravings cannot be denied.

Maybe it’s the whole swine flu thing, but I felt like taking this cravings in the Mexican direction (bet you didn’t see THAT coming!). I’ve never actually heard of Mexican fries though so I decided to make up my own. Overall, I felt the seasoning was mild until I added a spritz of lime. Don’t ask me why, but that addition definitely made it a winning combination.

Mexican Potato Wedges
This recipe is is only for one potato, so be sure to scale it up when considering how many people you’re serving.
1/4 teaspoon onion powder
1/4 teaspoon chili powder
1/4 teaspoon oregano
1/2 teaspoon paprika
1/2 teaspoon cumin
1 garlic clove; minced
a pinch red pepper flakes
a pinch cayenne (optional, for a bit more kick)
1 tablespoon oil
1 russet potato
1 lime
Preheat the oven to 375. Mix all your spices and garlic together in a small bowl and set aside. Wash and dry your potato then cut it into eights wedge then cut each wedge in half. Throw your wedges, oil and spices together and mix until well combined.
Place your wedges on a baking sheet covered in foil and roast for 35 minutes; tossing halfway through. Your wedges should be browned. Remove from the oven and let cool for a few minutes and serve with a spritz of lime juice. Enjoy.


