Bay Scallop Gratin

I love scallops, but until recently I had never made scallops. I repeat – never!

Why? Scallops are expensive, they have to be cooked just right and it’s so easy to cook them just wrong.

But we’ve got to learn sometime.. so, thank you sale at Harris Teeter, you finally gave me that little push to buy and cook scallops.

scallopgratin

First, here’s a helpful little article about scallop selection and storage. Some things to note in particular:

  • they shouldn’t be pure white
  • don’t store them in water
  • they should look moist but not soggy
  • refrigerate immediately after purchase, and preferably cook them within 1 day
  • The best cooking methods are brief, to avoid overcooking. these include: sauteing, grilling, broiling or poaching. overcooked scallops are tough and rubbery. Prior to cooking, you’ll want to pat the scallops dry. Large sea scallops (what I purchased) will take 3 to 5 minutes, while the smaller bay scallops will take only 1 to 2 minutes. But this is not a hard and fast rule – always remember it’s easy to overcook them!

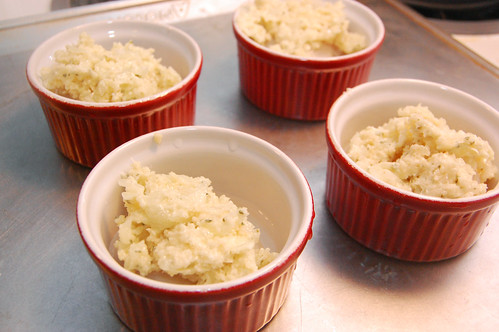
    prebaking

    I adapted a recipe for Bay Scallop Gratin from the Barefoot Contessa. I took out some of the frills (like shallots, Pernod, and prosciutto) and tried to make it a little more accessible to busy folks like you and me!

    These scallops are cooked in butter – not Paula Deen style butter but yep, it’s still butter. I used two tablespoons of regular unsalted butter and one tablespoon of Smart Balance butter in an attempt to moderate just a little bit of the fat. The butter, white wine and lemon juice add a nice, delicate flavor that doesn’t overpower the scallops – but my favorite part is the panko sprinkled on top to give it just a little bit of crunch.

    My husband and I each got two large bay scallops with some couscous on the side, and we were satisfied and very happy at the end of dinner. Though I know it seems scary at first, seafood can be so easy (and FAST) to cook! It could really be your new best friend; why not start with scallops (the least “fishy”)?

    servingscallops

    Bay Scallop Gratin
    adapted from Ina Garten

    3 tablespoons unsalted butter, at room temperature (I used 2 Tbs. of regular unsalted and 1 Tbs. of Smart Balance butter)
    3 medium-large garlic cloves, minced
    1/2 small onion, thinly sliced and minced
    2 tablespoons parsley, plus extra for garnish
    1 tablespoon freshly squeezed lemon juice
    1 teaspoon coarse Kosher salt
    1/2 teaspoon freshly ground black pepper
    3 tablespoons olive oil (I used Smart Balance oil)
    1/4 cup panko (do use this instead of regular bread crumbs; panko is great for seafood)
    3 tablespoons dry white wine
    1/2 to 3/4 pound large fresh bay scallops (equivalent of about 4)

    Preheat the oven to 425F. Place four ramekins on a cookie sheet.

    To make the topping – place room temperature butter in the bowl of a stand mixer with a paddle attachment or use a hand mixer. Beat in garlic, onion, parsley, lemon juice, salt and pepper on low until combined. Add in oil slowly; the mixture should resemble mayonnaise. Fold in panko with a rubber spatula and set aside.

    Evenly divide the white wine on the bottom of each ramekin. Cut the small muscle/membrane from the side of each scallop if present (here’s a handy how-to video – but my scallops didn’t have it). Pat the scallops dry with paper towels and distribute evenly in the ramekins. Spoons the garlic/butter mixture over the scallops and bake for 8-10 minutes, until the topping is golden and sizzling. The scallops should be barely done at this point, as they will continue to cook for a few moments outside the oven.

    Sprinkle with extra lemon juice and parsley for garnish. Serve in ramekins immediately.

    My New Favorite Way to Cook Shrimp!

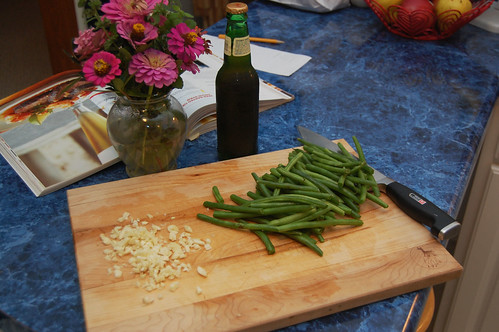
    I’m still obsessed with my Anheuser-Busch Great Food Great Beer cook book. I know, it doesn’t look like much… but it really has great easy recipes that you can throw together on a weeknight (and isn’t that what you’re here for?).

    prepping

    This cook book led me to my new favorite way to cook shrimp – drenched in beer. It’s not the first time I’ve cooked or baked with beer and had success… Check out my previous posts:

    Guinness Beer Brownies And [photos of] Babes

    Taco Salad with Drunken Black Beans

    You don’t need to use a fancy beer, a bottle of Budweiser will do just fine. I adapted the recipe from the cook book a bit, adding a few extra spices to give it more depth of flavor.

    greenbeanscooking shrimp in beer and garlic

    I also cooked the shrimp in a grill pan instead of a heavy skillet, but because you’re drowning the shrimp in beer it probably doesn’t make a difference. Morgan and I enjoyed this dinner over couscous and spicy Szechuan style green beans (spice-phobes beware!).

    drunken shrimp and szechuan green beans

    Drunken Shrimp with Szechuan Style Green Beans
    (makes dinner for 2)

    Drunken Shrimp
    16 frozen shrimp, thawed and peeled according to package instructions
    1 bottle (12 ounces) beer of your choice
    5 cloves garlic, minced
    1/4 teaspoon cayenne pepper
    1/4 teaspoon cumin
    1 teaspoon chili powder
    2 turns of salt, 12 turns of pepper

    Measure and combine cayenne, cumin, chili powder, salt and pepper in a small ingredient bowl. Heat large skillet on medium high heat. Add a little bit of oil when hot. Add garlic and stir quickly so that garlic doesn’t burn. Add shrimp, followed by spice mixture, and stir.

    Immediately pour 1/2 bottle of beer into pan and cook for about 3 minutes. Turn the shrimp and add remaining 1/2 bottle of beer. Cook until shrimp are firm, pink and curled. Serve immediately.

    Szechuan Style Green Beans

    approx. 1 pound green beans, washed and ends broken off
    2 cloves garlic, minced
    1/4 teaspoon ginger
    1/2 teaspoon curry powder
    1/2 teaspoon cayenne powder
    1 tablespoon soy sauce

    Heat medium size skillet on medium heat. Add about 1 tablespoon of oil, followed by green beans. Stir, adding spice mixture and soy sauce. Cook until desired tenderness is reached (about 7-10 minutes).

    You’re looking at day five of our Rainbow Week series. Click here to start on day one.

    Rainbow Week is running strong with day five and what a ride we’ve had. We’ve done baked goods, we’ve done fruits; how about a main course? That’s right folks, we’re giving you the full gamut! Of course, I’d be remiss if we did something easy. I mean, sure, I could just boil some colored pasta, throw in some cream sauce and call it a day; but that’s not why you come here, right? Didn’t think so.

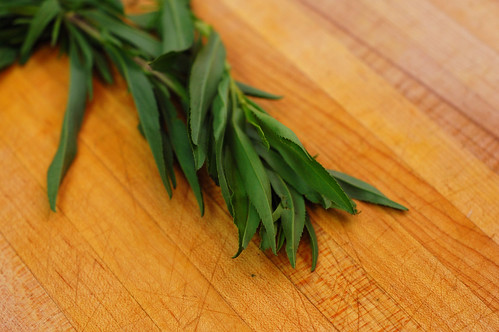
    Tarragon

    Now, my health-obsessed mind just wouldn’t be happy unless our rainbow dinner was healthy. So, we’re going with salad, but a different kind of salad. I’ve never been one for seafood, but my mother recently returned from a trip to Alaska with a cook book for me and, apparently, if there’s one thing you can get a lot of in Alaska it’s seafood (I guess it has something to do with all the water or the sub-freezing temperatures). No cookbook should just sit collecting dust so I decided to broaden my horizons.

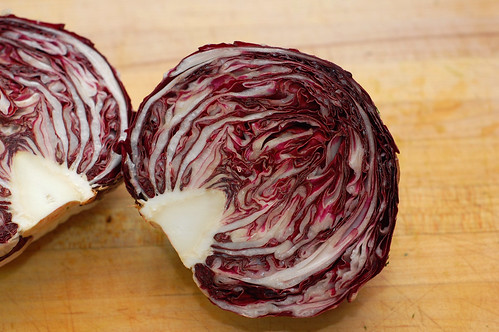
    Radicchio

    Lettuce provides the green, radicchio the purple, salmon the red and lemon the yellow. I like this dish because it has a low skill requirement, which is great for my seafood newbie-nees. I tried adding corn for the yellow at first but this really didn’t work out. Instead, go with lemon over lemon juice for a more visually appealing effect. Note, that this is a LOT of salmon I used in the picture below. This amount could easily be split between two for a lighter dinner.

    Poached Salmon Salad with Honey Vinaigrette

    Poached Salmon Salad with Honey Vinaigrette
    Adapted from What’s Cooking, Alaska?
    1 cup water
    1/2 cup dry white wine
    2-3 sprigs of tarragon; leaves removed
    6 peppercorns
    1 lemon cut into quarters
    1 salmon fillet
    1 quarter radicchio; sliced thin
    Several handfuls of salad greens (I used romaine and spinach, but mesculn would work great as well).

    Throw the water, white wine, tarragon stems, peppercorns and lemon into a large pan or pot and bring to a boil. Simmer covered for 10 minutes to reduce (if too much boils away, just add more water). Add your salmon fillet and simmer, covered, for an additional 10-12 minutes. Remove from heat, uncover and let the fillet cool. Once cool, wrap in plastic and chill for 1-2 hours or until ready to serve.

    While chilling, prepare your salad greens along with our earlier honey vinaigrette recipe using the tarragon leaves from earlier (chopped). Once ready, top your salad with your salmon and spoon as much dressing atop as you’d like. Enjoy.