I had a friend in high school who moved to the United States from São Paulo, Brazil. One day after school, she took me back to her house and taught me how to make a deliciously sweet and simple Brazilian treat known as brigadeiro.
A brigadeiro is made using cocoa and condensed milk, a thick and sticky blend of milk and sugar that yields some of the most decadent and rich desserts I’ve ever had. It combines all the things that make my ideal candy – smooth, sweet, and full of unadulterated chocolate.
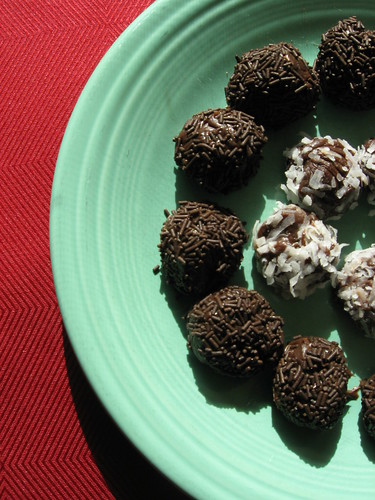
My friend rolled her brigadeiro in chocolate sprinkles (the most common way) and placed each candy in a tiny paper wrapper. But you can get as creative as you like, incorporating any number of sumptuous outer coatings including coconut, pistachios, almond shavings, powdered sugar, more cocoa, etc.
I tried to make brigadeiro around this time last year and I failed. I lost the recipe my friend gave me (in my defense, it was almost 10 years ago), and I decided to follow a recipe I found online. I had also forgotten most of the instructions, which are actually pivotal in this recipe, and the recipe online gave little guidance.
After deciphering some “how-to” videos in Portuguese, I’m proud to say that I’m back in the brigadeiro-making ring. And just in time, too, because these are absolutely excellent to bring to any kind of holiday party.
Ghost Baker Suggests Holding the Butter:
The Portuguese videos I watched did not use 1 tablespoon of butter, something that many recipes I found online called for. Since my butter-free recipe worked very well and the experiments with butter did not, I did not include butter in the recipe below. If you think butter is a must, I’d love to hear it!
Enjoy, and good luck not eating them all in one day!
Brigadeiro
1 can sweetened, condensed milk (15 oz)
3 tablespoons cocoa, sifted (I used Nestle, because they introduced cocoa powder)
Chocolate sprinkles (and/or coconut, nuts, etc.)
Heat 1 can of sweetened, condensed milk in a small pot on medium-low heat, stirring frequently. Sift in one tablespoon of cocoa at a time (I didn’t use a sifter this time because my sifter was MIA, and you can clearly see little deposits of cocoa in my photos. It still tastes great if you don’t sift it, but you may want to do it to achieve aesthetic perfection).
Use a wooden spoon to combine the cocoa into the condensed milk. Stir, stir and stir some more! Don’t stop stirring or else your chocolate could burn.
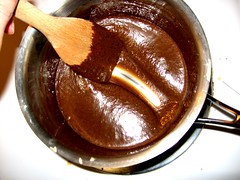
After about 5 minutes, you’ll notice the mixture getting thicker. You can tell that it’s done when, while stirring, you are able to see a good bit of the bottom of the pot (see my photos for an example).
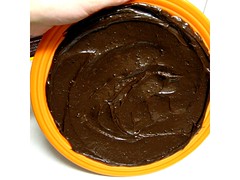
Remove from the heat and pour onto a plate. Smooth the mixture out so that there’s a thin layer covering the entire surface. Set this aside, or if you can’t wait – set it in the fridge, for about 15 minutes. The mixture is ready when it’s completely cooled and hardened. Notice in my photo that I’m holding the plate at a 90 degree angle and the mixture hasn’t budged; you should be able to turn the mixture completely upside down without consequence (yep, just like they do Dairy Queen when you order a Blizzard).
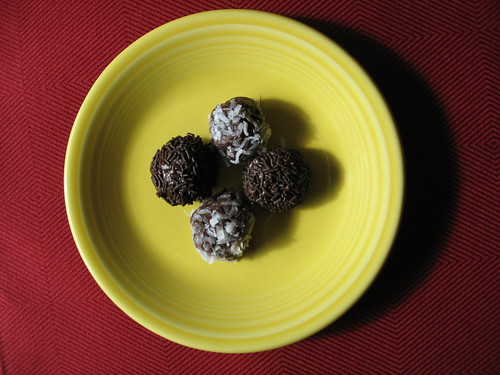
In the meantime, ready your chosen toppings. I used chocolate sprinkles and coconut flakes and added these to two separate, small plates.
Using a spoon, scoop up about 1 tablespoon of your hardened mixture. It’s going to be very sticky! Using an additional spoon or very buttered and greased hands, drop it onto your topping and roll it until it’s completely covered and shaped like a ball. Continue scooping, dropping and rolling until you’ve used all your mixture. You may want to store these in mini paper cup wrappers; I just used a plate and covered it with saran wrap. You can try to share with others, but it’s hard!
Many Brazilians actually eat their brigadeiro just straight out of a bowl with a spoon. You can even use the mixture as a topping on ice cream or brownies. So really, you can’t go wrong!


I am so impressed that you were able to make these! Sarah also attempted to teach me how to make them at one point… attempted being the key word there. I am definitely not a chef, but it sounds like you are! 🙂 I love this blog you have, too – please keep it up!!!
Leigh – well, it did take a few attempts before I got it down, so don’t lose hope! Thanks for the comment 🙂
I made these yesterday – pretty yummy. I still don’t think that they were hard enough as my little balls fell flat unless refrigerated. I cooked the mixture for about 15 minutes on 4/10 heat in a Teflon coated pot, and it was definitely thick. Next time I plan on cooking it for longer to try and thicken it even more. I also recommend shredding any store bought coconut in the food processor as well. Wonderful recipe!!
Hmm.. I had that happen the first time I tried making it, but they were too soft because I didn’t pour it out in a thin layer on a plate and then set it in the fridge for 15 minutes. Did you pour it out on a plate?
They’ll never get truly hard, but they should hold their shape. I like to keep any uneaten ones in the fridge and just let them sit out for 5 minutes before serving.
HEY GUYS!!! Brigaeiros have been my favorite since forever and I have a few tips…
The BUTTER:
DO put a medium tablespoon in – it makes the chocolate smooth and tasty. It was a coincidence that Heathers butter version didn’t work – I guarantee it!
MEDIUM LOW heat:
Believe me – you want the heat medium really LOW so you can really stir slow and heavy – which somehow pulls the sugar and really gives it that amazing caramel-like texture. Lower heat also gives the cocoa and sugar more time to bind properly
STIRRING:
The stirring is primarily to keep the blob of ingredients moving – not letting any parts sit on the bottom and burn. Ideally use a wooden spoon that can really scrape the bottom of the pot – the method is to do big round scrapes, flipping and folding the blog over itself constantly – remember to scrape all parts of the bottom of the pot constantly so nothing sits too long and burns – you can scrape fairly slow – taking around a second for each scrape around. Its nice to stir in a big circle that gets smaller and smaller and then start over big.
WHEN IS IT DONE?
It takes a bit of practice to know what it looks like when its ready to be taken of the heat – but the good thing is that even if its not firm enough, or a bit too firm, it will probably still be great to eat with a spoon or on icecream (or if too soft, you can fill a cake with it!). Anyway, dont be surprised if you keep trying and it doesn’t work.
Usually, a good time to take it off is when you see the ingredients form a nice pillowy blob in the middle when you tip the pan – it’ll slide around the pan like a flabby ball.
As you try it again and again, youll understand at how it has to look to be ready. It sucks that you have to practice, but the ingredients are cheap and its soooo worth it!!!
GOOD LUCK!
Yeah, I tried making these last night, too. I definitely didn’t put them out on a plate…I just put the pot into the fridge when it was done cooking!! Lol, well maybe I’ll try again today. 🙂
It’s still delicious even when it doesn’t turn out right, thankfully 🙂 But if you’re going to try to roll the mixture into little balls like truffles then spreading it on the plate is pivotal!
Exceptional! I lived, taught, and cooked in Brazil for nearly 5 years … I can not remember going to a birthday party without having a “Brigadeiro!